
I’ve always been a big supporter of using your free time to shoot personal work to keep your portfolio and your skills fresh. In fact, it’s my personal work that fills most of my portfolios.
Back to West Virginia
Recently I took my Phase One 645DF+ with the IQ140 back to the West Virginia
farming countryside to take portraits of a lovely model, Cari Funkhouser. The camera
performed fantastically to capture the model and the sky detail in one shot thanks to the
dynamic range on the IQ backs.
Capture One Pro 7 is my raw processing software of choice. I use it to easily color
balance, bring out detail from the highlights and shadows, correct lens flaws, and
sharpen my images with great ease and efficiency.
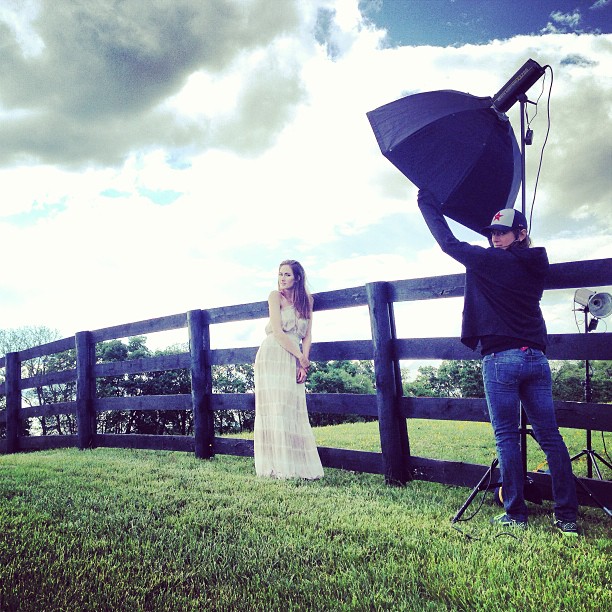
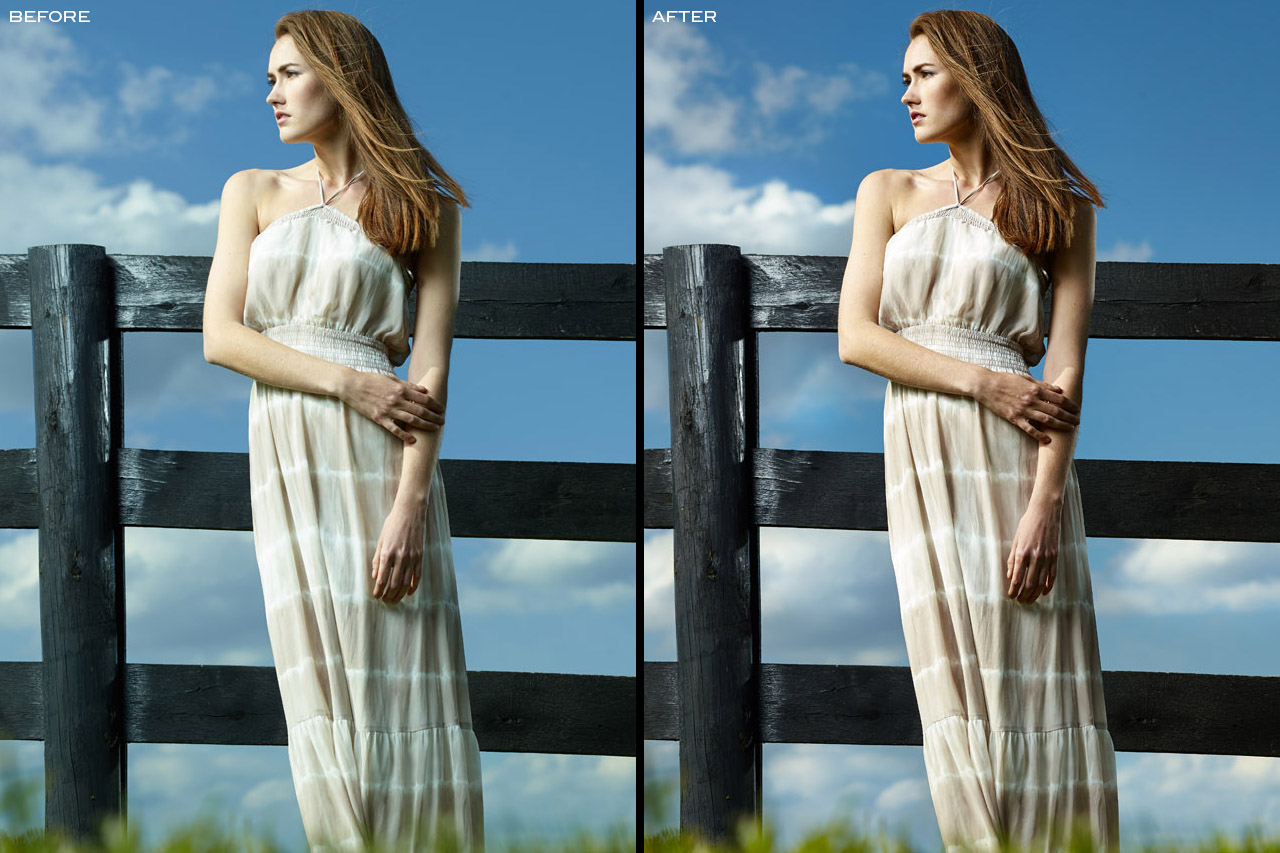
Most of the shoot was accomplished with only 1 light. There was a great moody sky and the Phase One’s 12.5 stops dynamic range captured all of that beautiful detail. Below is the image before and after post production in Capture One Pro 7.
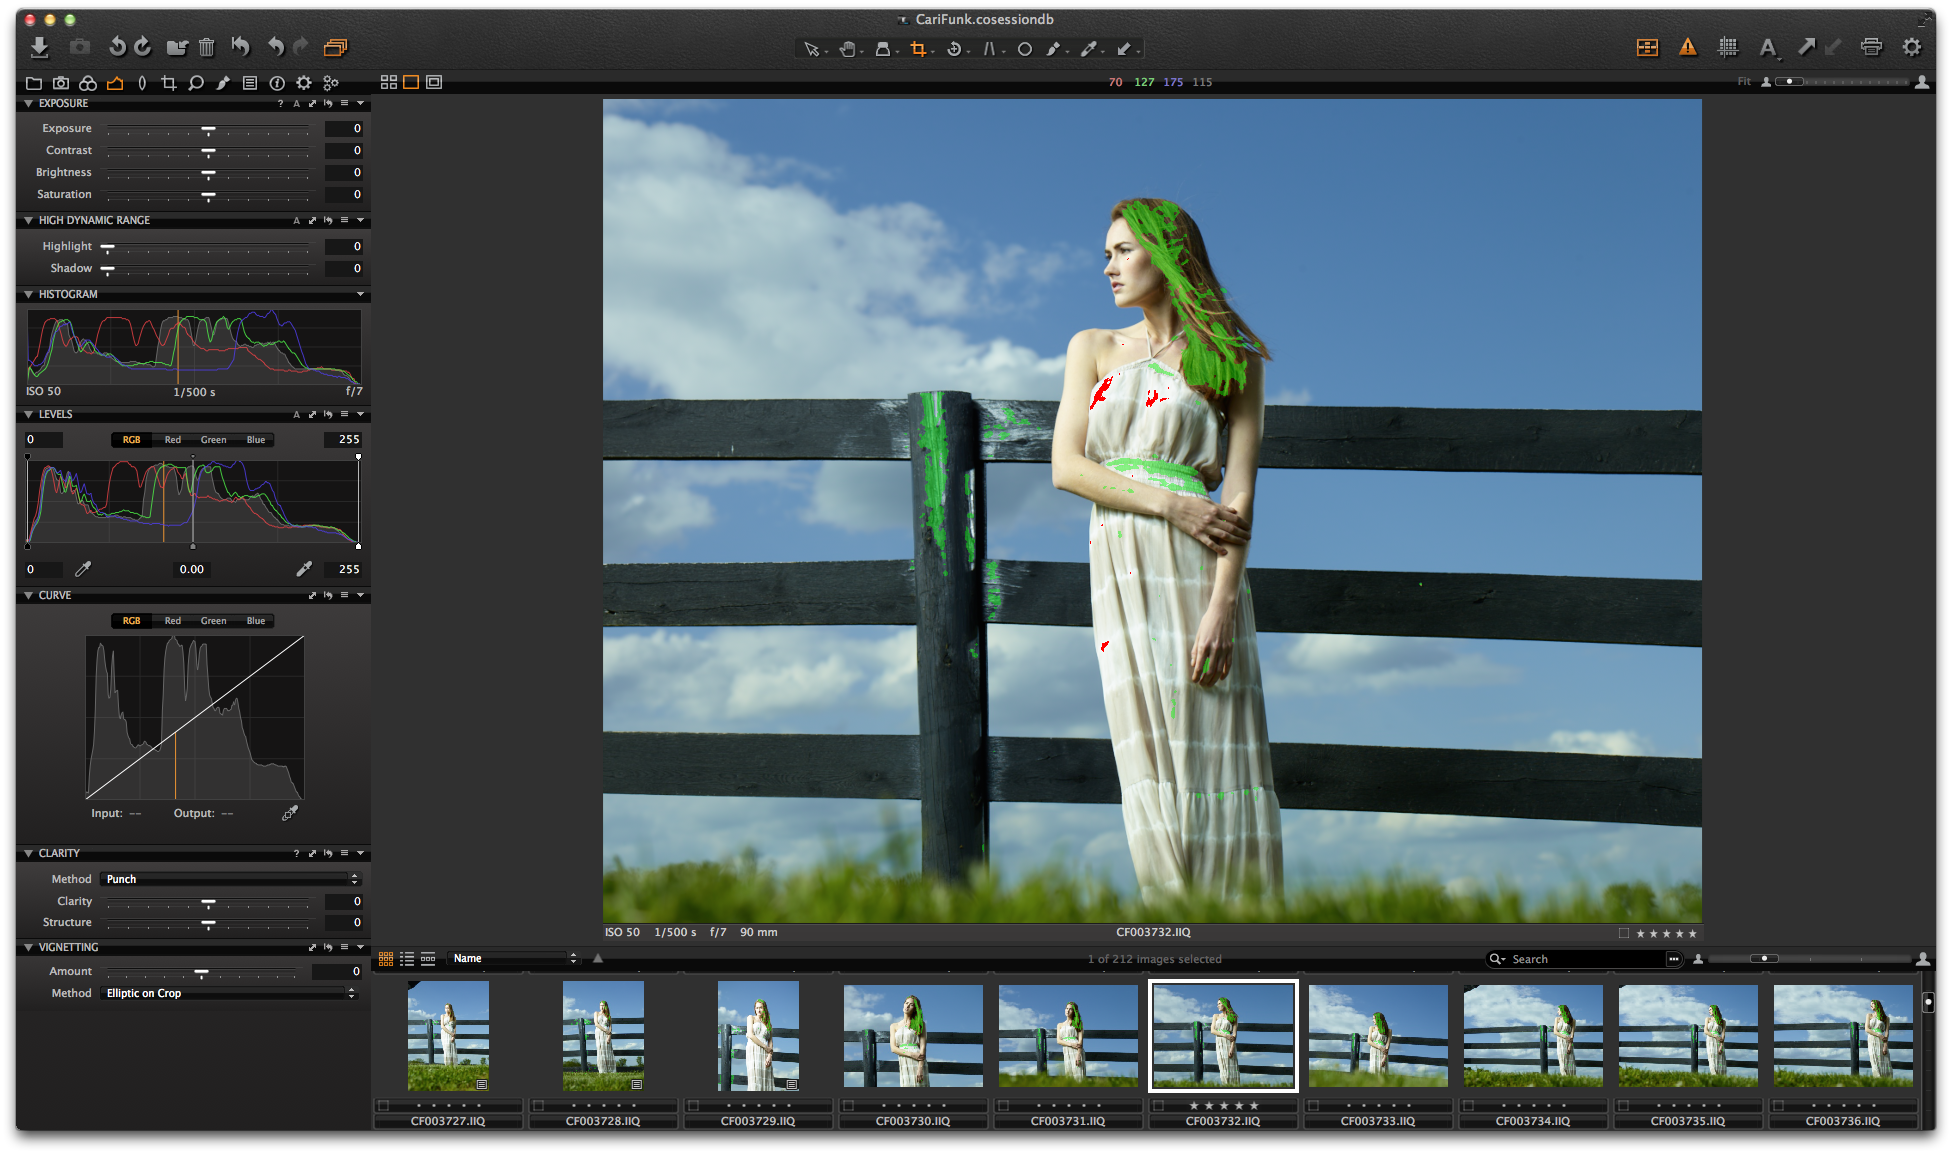
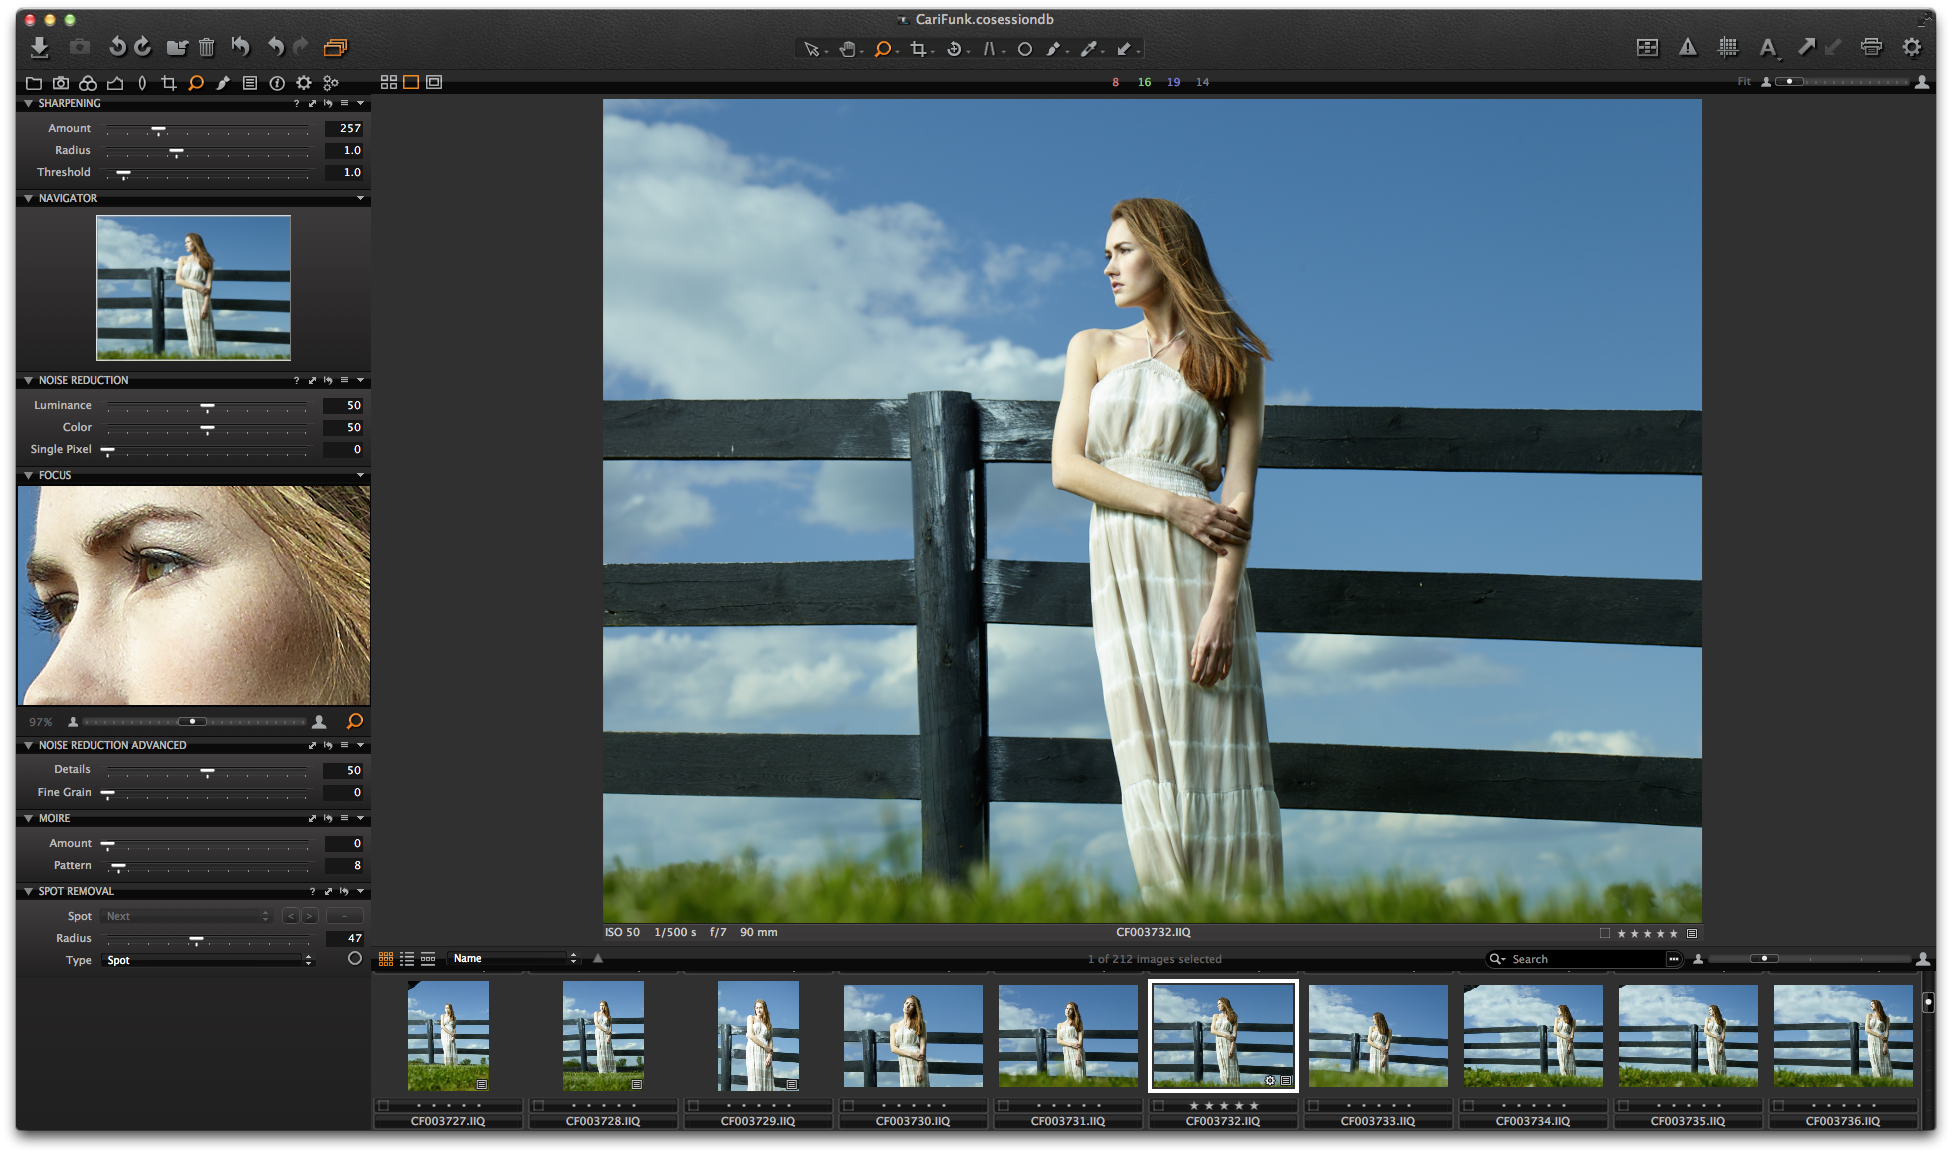
Much like you’d see on the camera’s screen, Capture One Pro 7 has focus masking (in green) and highlight over-exposure warning (in red). I use these features to quickly identify which images will be sharp up close and not too over-exposed and worth editing.
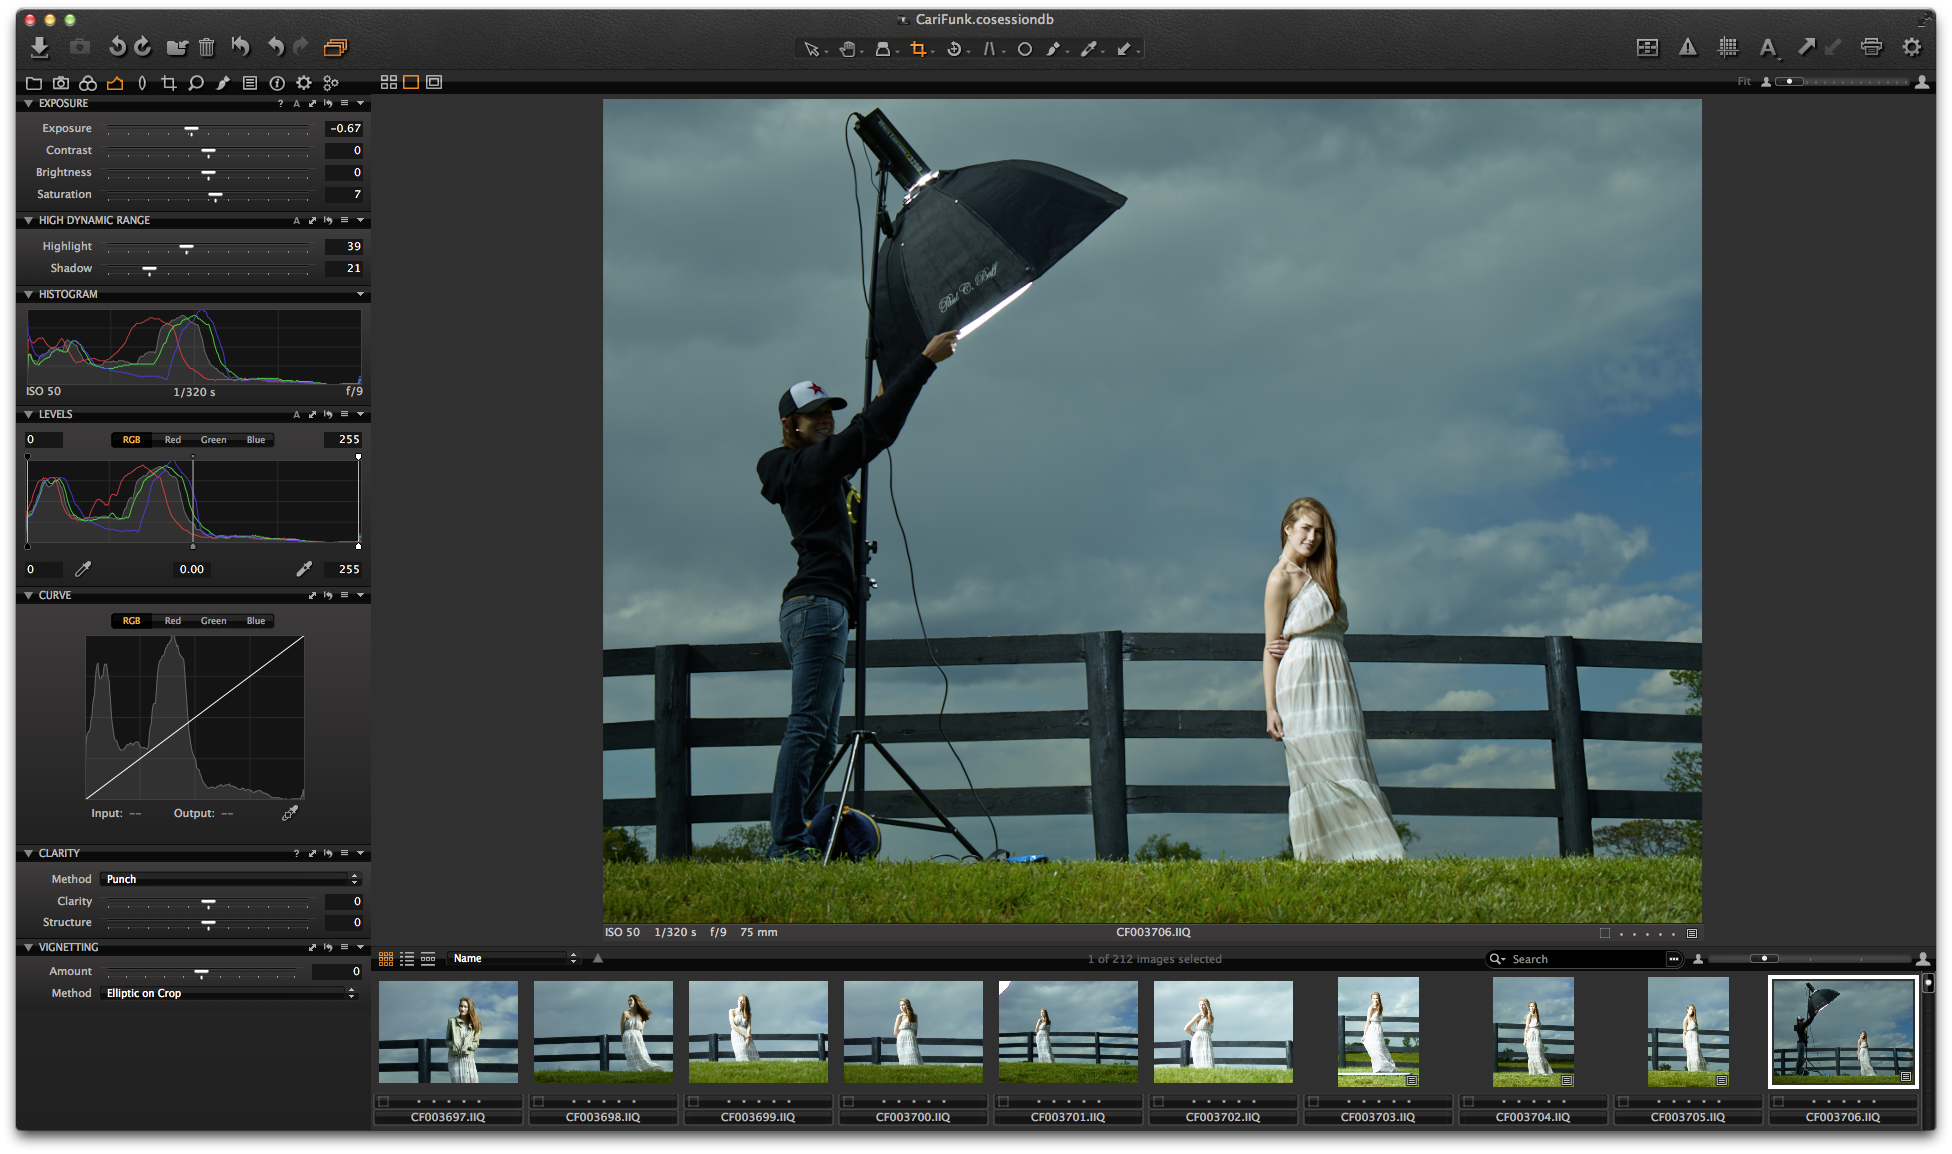
On a normal setup, I may take 25-75 images. From those, I can easily choose the 5-10 images within acceptable focus and exposure range using the focus and exposure masks in the thumbnails as you can see in the screen shot above. From those 5-10 images, I would process the raw files and edit with greater detail. Doing this saves a lot of time opening up each huge raw file just to check to make sure it’s in focus.
I quickly double-checked my focus and added a little sharpness. I normally add about 30 sharpness to the “Amount” to most of my images. I find that this helps add a slight fine edge that I like to see in my photography. Of course, if I really like an image, but the focus is a little soft, I can add more sharpness. As you can see on the left in the screen shot of our image below, it looks super detailed!
Next I start making global exposure and color adjustments.
The colors in the image straight out of camera were really great due to the custom-made ICC profiles in the software.
But I wanted to just make the colors of the sky and grass stand out a little bit more, so I increased the saturation and the contrast to 4 just to mark the difference between the foreground and background (see screen shot below).
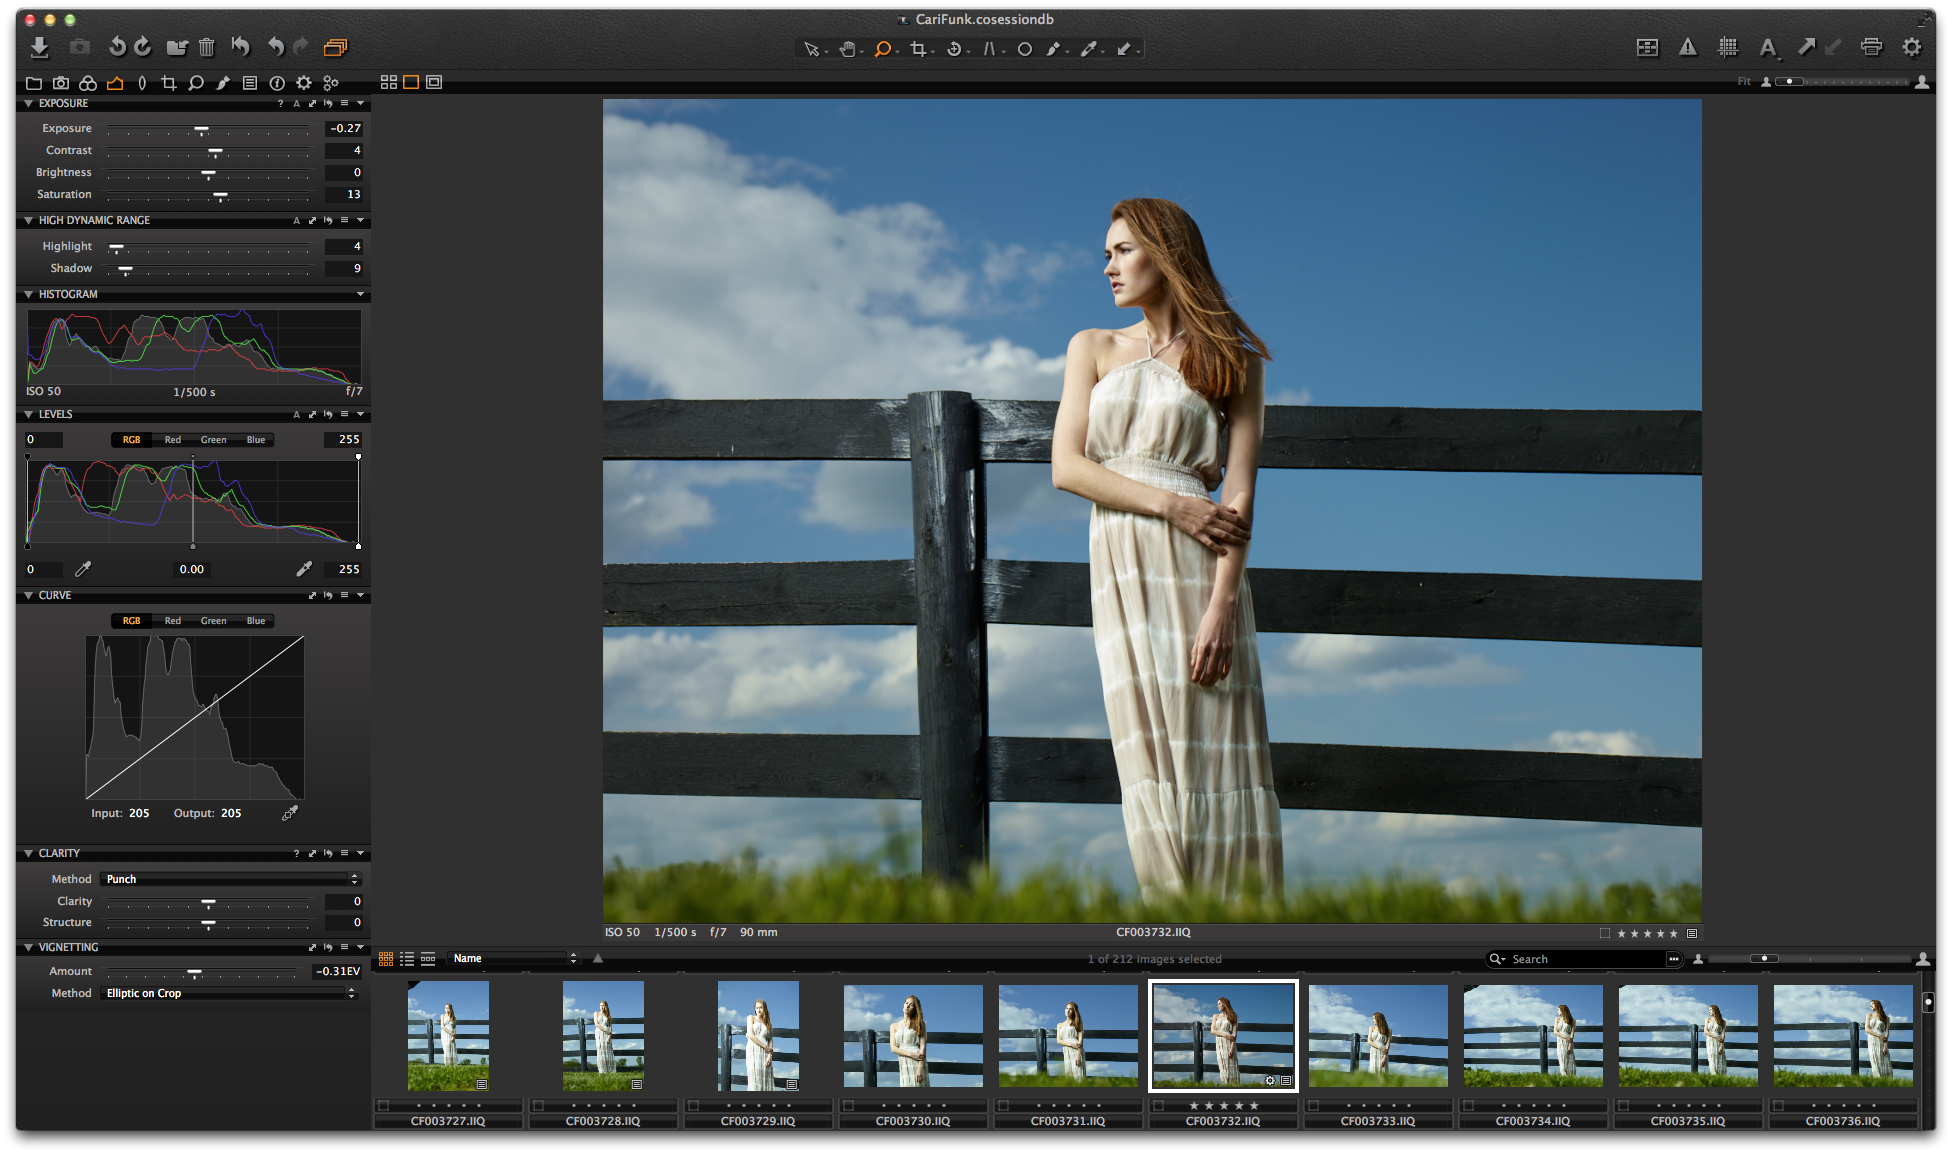
As far as I can see, the image processing engine makes recovering details from the highlights and the shadows very easy without losing information. I’ve never seen another program perform so effectively in doing so. I’ve had shots that were captured accidentally 1 stop over or under and you wouldn’t know by seeing the final images.
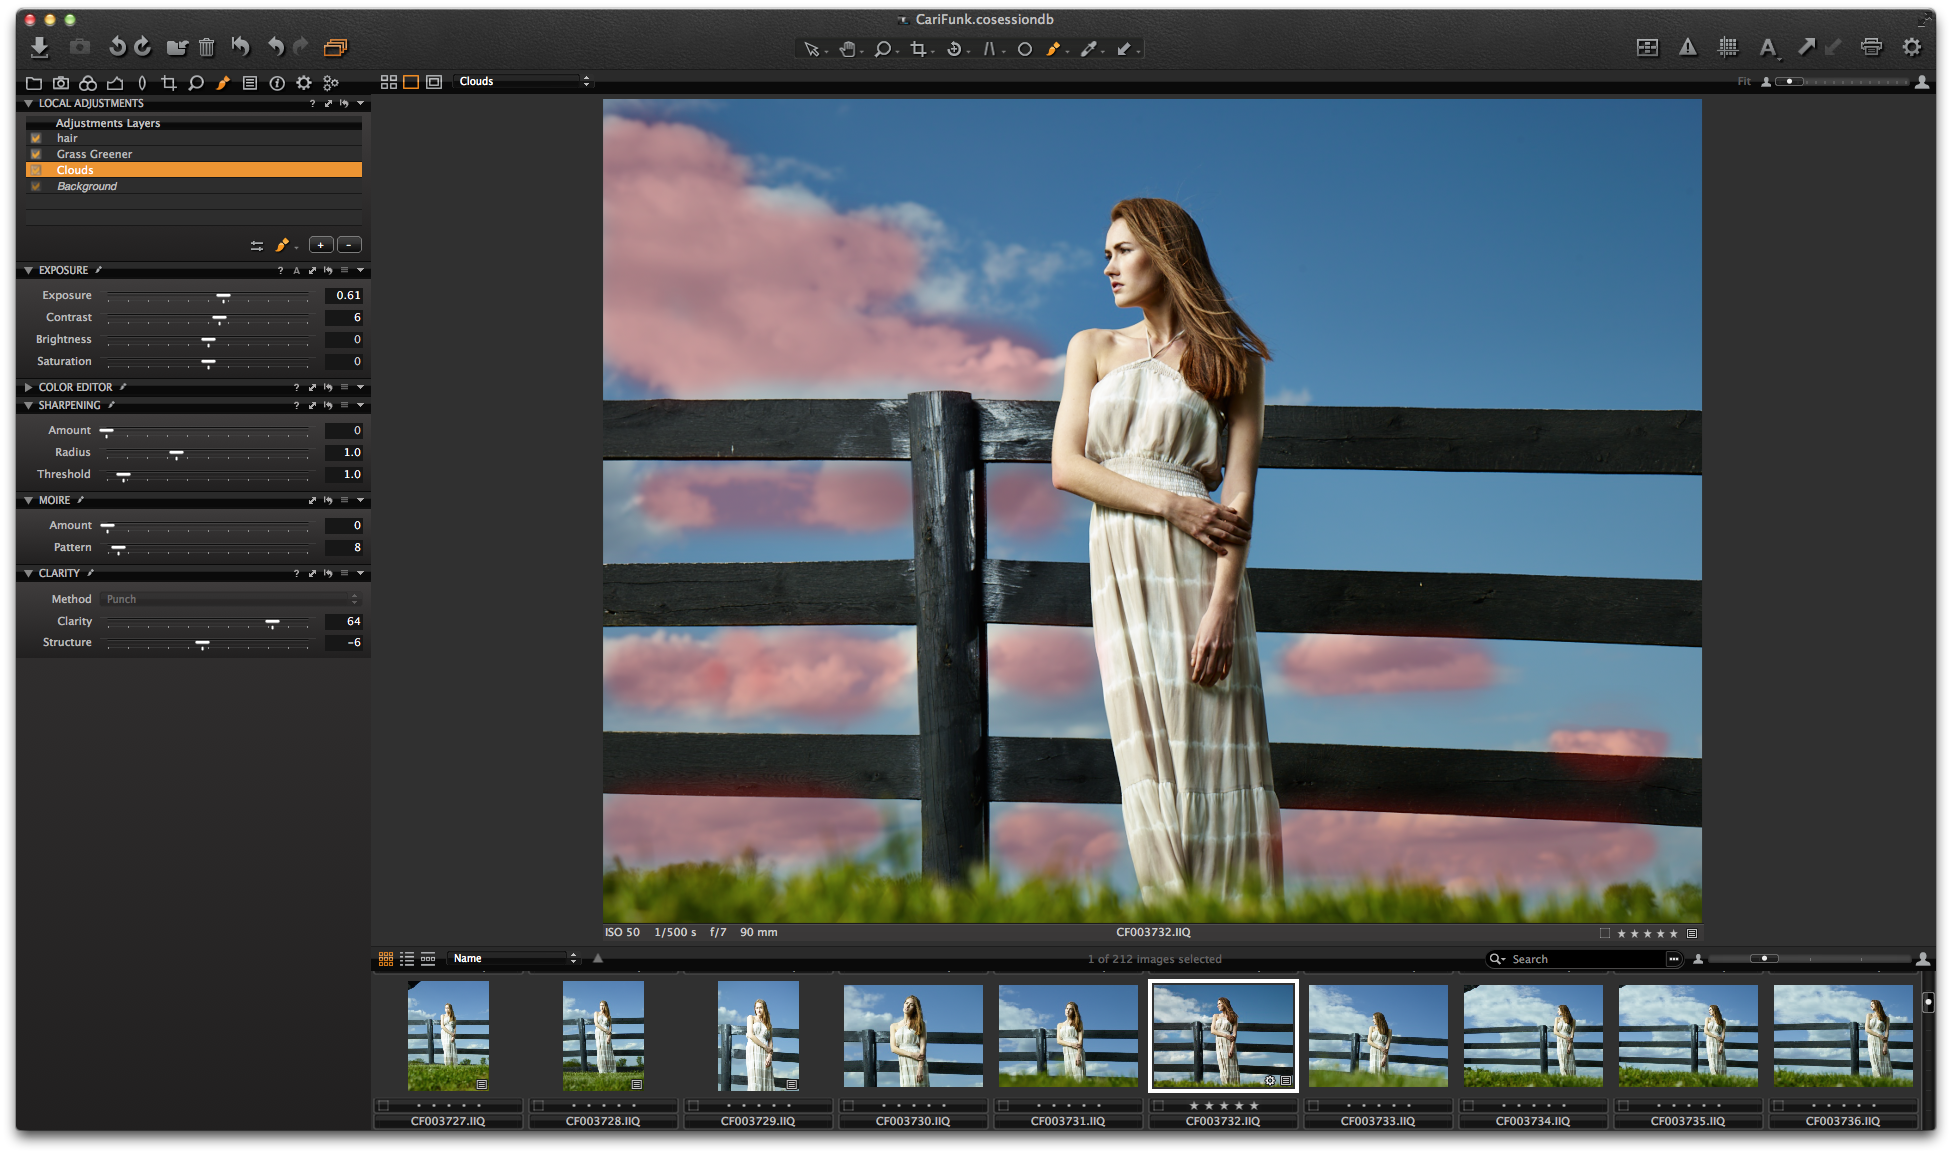
Making adjustment layers and masks is very easy. As you can see below, I created different
layers to bring out detail and color out of the clouds and grass independently.
In the shown layer (see screen shot below) I used a mask to increase Clarity and Exposure in order to highlight the clouds in the image.
It took me a couple of weeks to find the right workflow that suits me best, but after getting comfortable with how Capture One Pro 7 works with all of its customizable functions, I’m able to bring more out of my RAW files.
Worth the learning curve
It also took me a bit to really learn and trust what the software could do in regards to recovery of highlights and shadows and sharpness, but it really is fantastic and worth the learning curve. Everything you saw me do above in the blog post can be accomplished in about 5 minutes, depending how in-depth I go in the edit, from open to exporting of the final file.
Best regards,
Douglas
Douglas Sonders
Douglas Sonders is a advertising and editorial photographer. Douglas keeps a busy schedule working for reputable clients such as: Apple, Billboard magazine, the Consumer Electronics Association, Four Seasons Hotels and Resorts, Rolling Stone magazine and Universal Music Group.


Spiegazioni semplici ed efficaci. Veramente un bel lavoro con Capture One 7
Hi Gerardo,
Thank you so much! I am glad you enjoy the post.
Br,
Douglas
I have been using Lightroom 5 and Photoshop CS6 for some time now to File, Edit and Print my images. I also use a few of the top Plug-ins too. I can see where it would be beneficial to do all the work within one program but, I find that I need to frequently remove objects from an image using Content Aware Fill. If capture One Pro 7 can not do this can I easily take the image into PS and then back into Capture One?
Another concern is the 30 day trial period. I am not sure 30 days is enough time to explore and get comfortable with On One Pro’s capabilities. Is it possible to take it for a longer test drive?
I did the same thing as you did it works great the only thing I am having a hard time with is how to you covert the raw to something that I can burn on a disk to print?