
Our way to approach industrial environments is at the end pretty simple. In order to create a clean, modern and new approach to such topics we force a crystal clear picture language. Capture One Pro 8 helps us with that even more.
Earlier this year we were hired by Fortune Magazine USA to cover the production and testing facilities of a well known Swiss watch company.
My favorite picture of the day
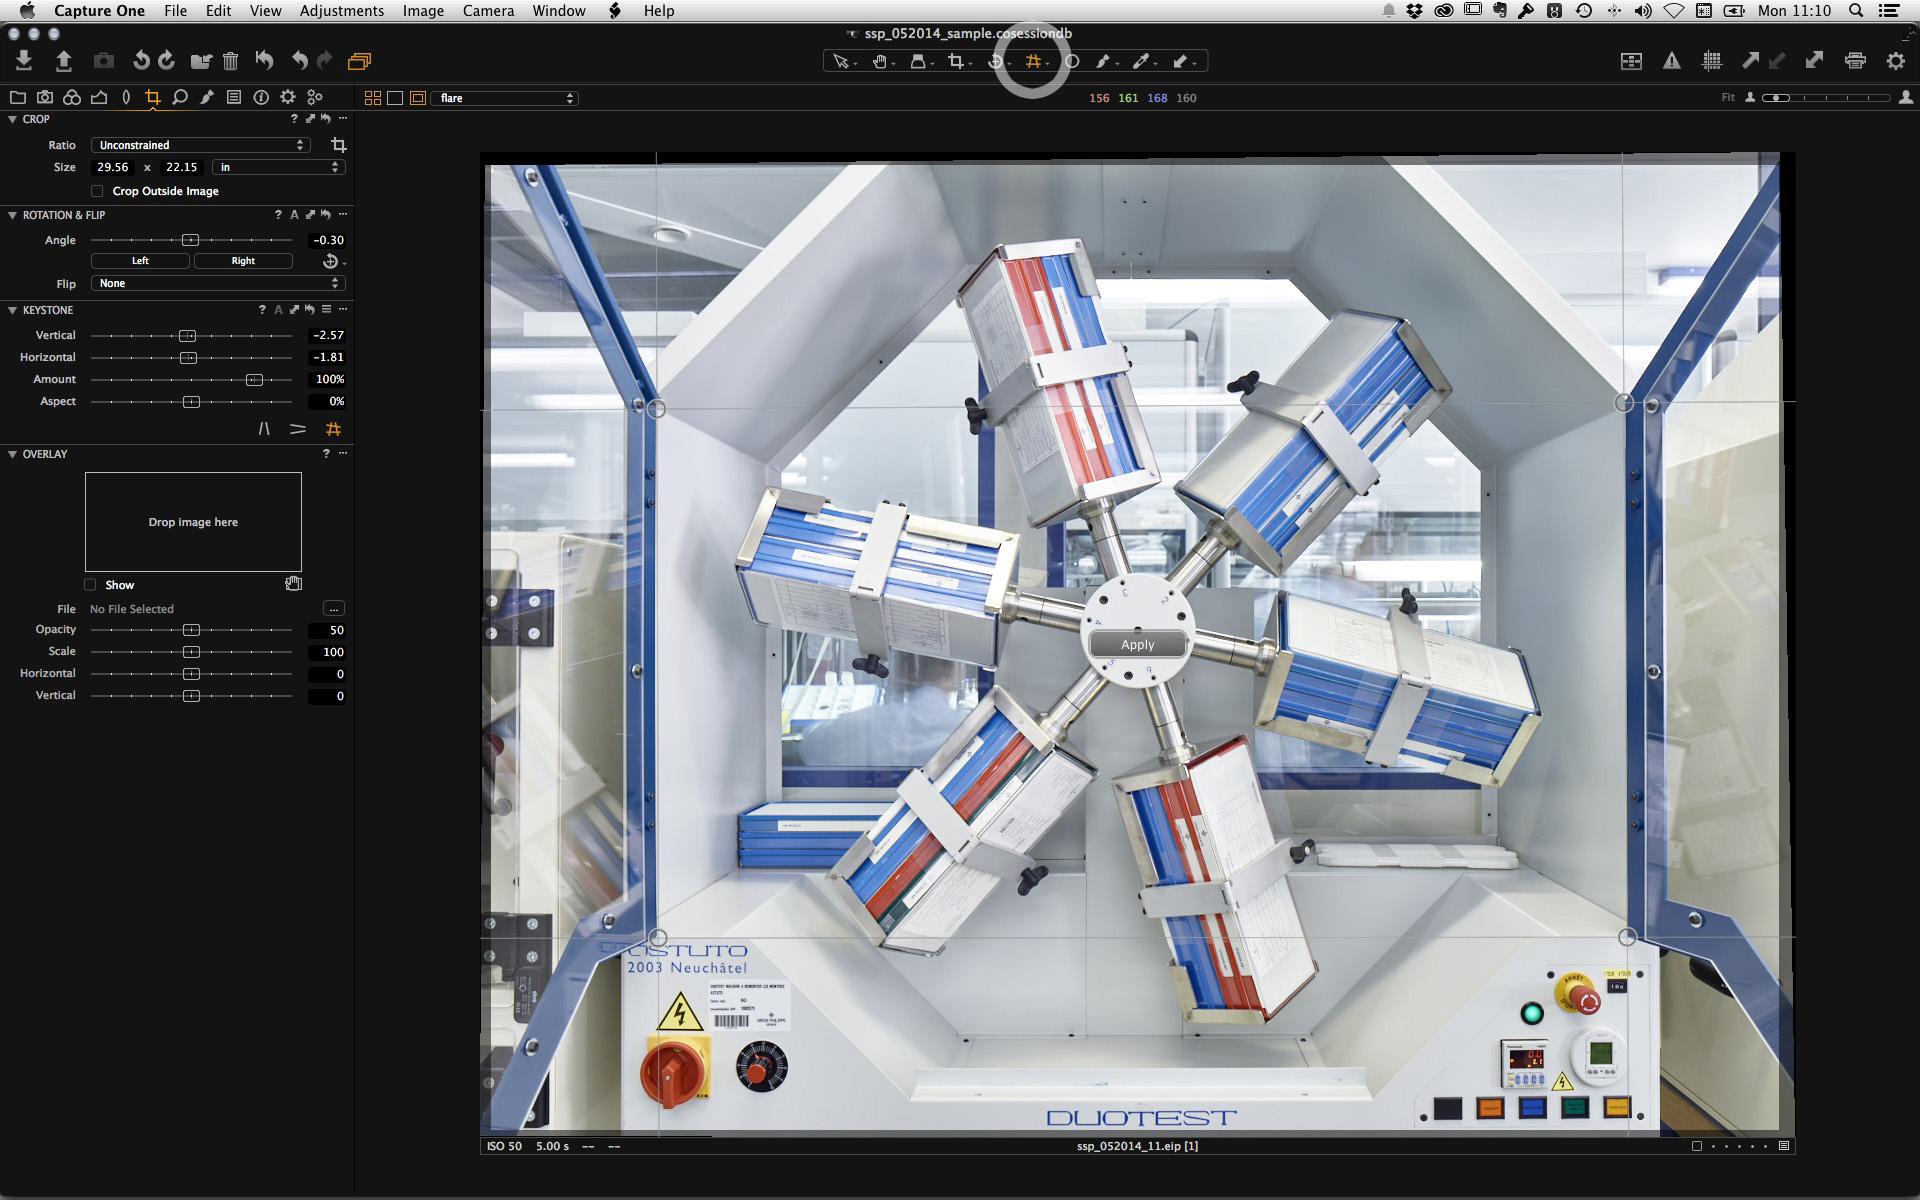
The example I want to talk about was a little side shot, done in a rush while visiting a few departments of the factory. The geometrical order and the “clarity” of this testing cabinet was catching my attention and it actually turned out to be my favorite picture of the day. Of course there was some work to be done on the raw file, which was shot with our Alpa 12 TC and the Phase One IQ260 digital back.
First stop: LCC process
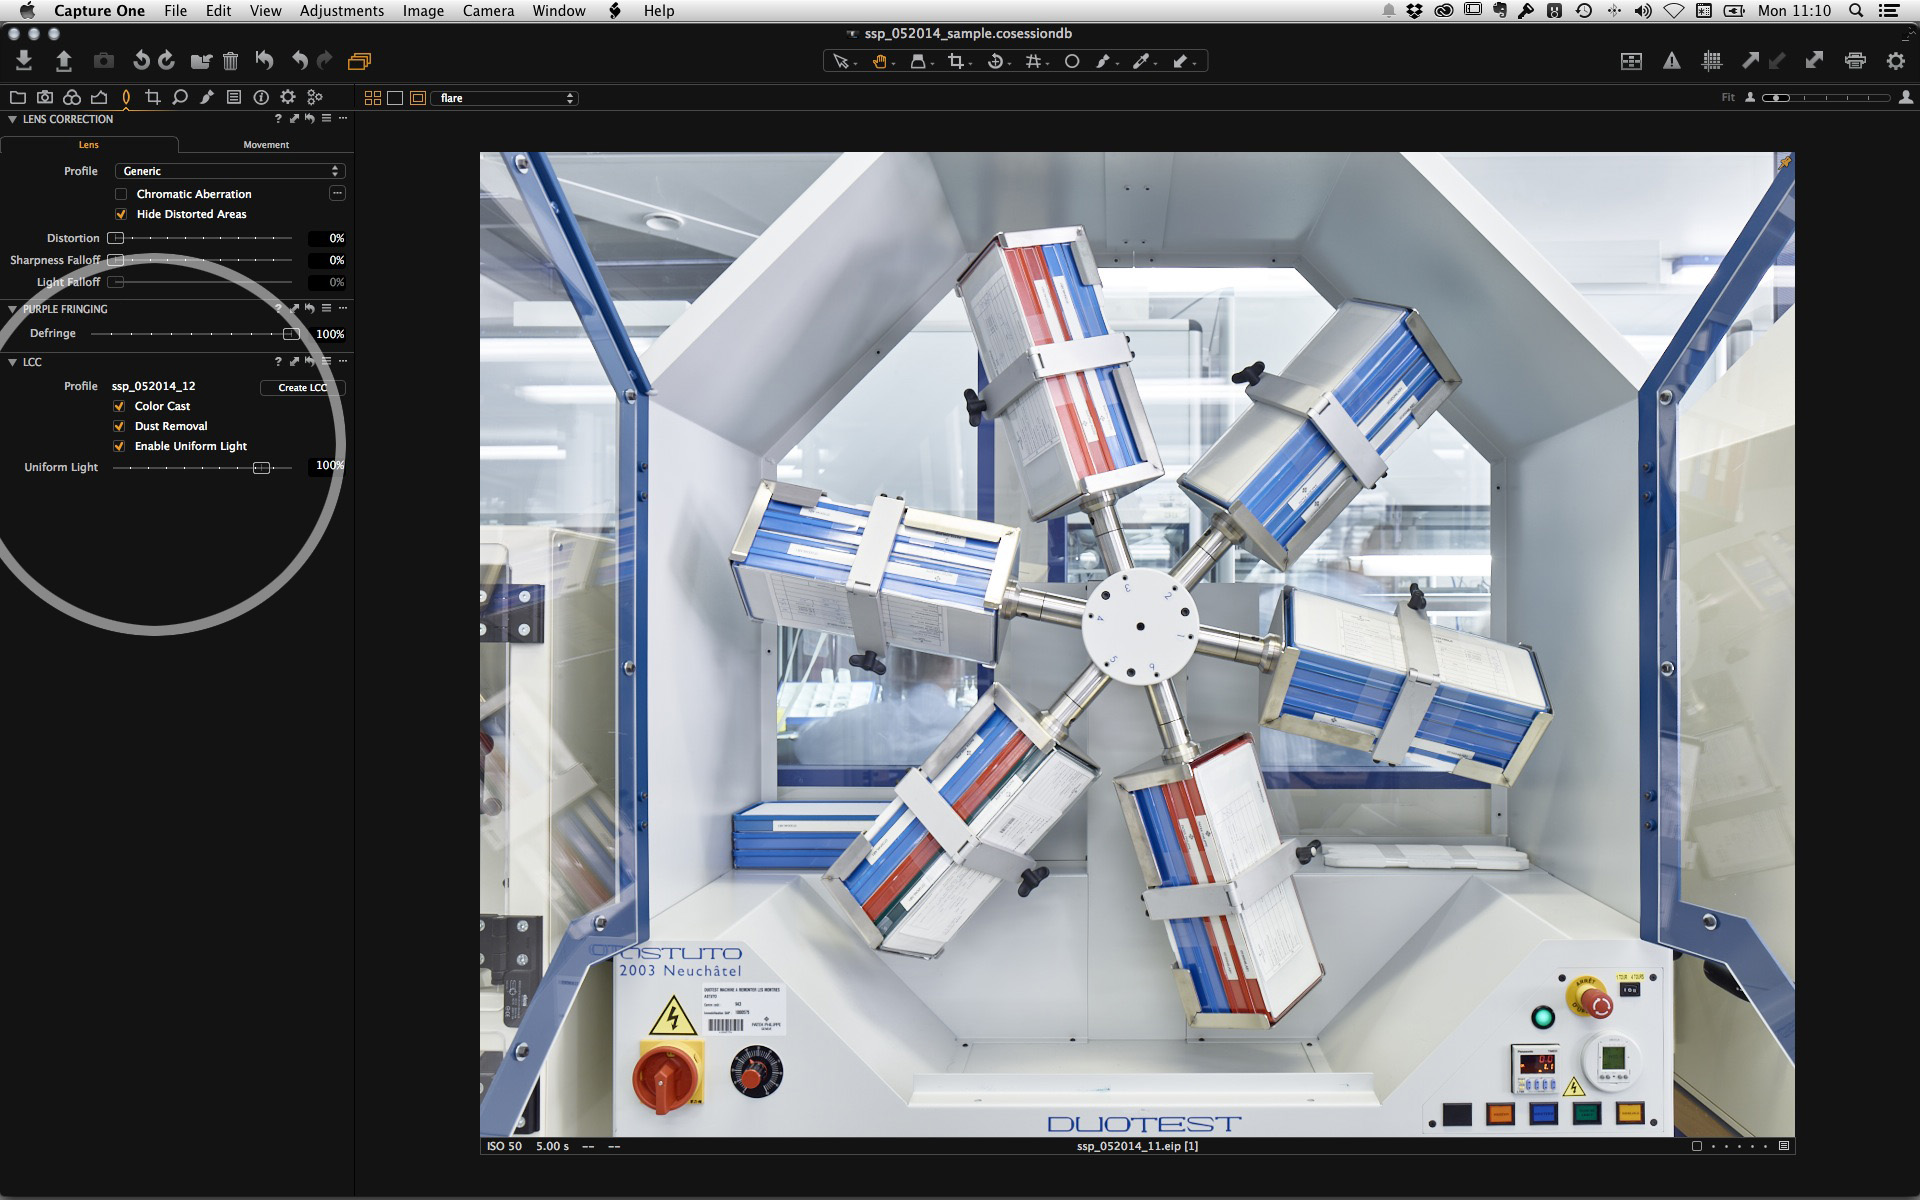
First of all I had to go through the LCC process in order to get rid of any lens cast, dust, and light falloff. Pretty simple in Capture One Pro 8! Find the corresponding calibration shot, tell Capture One Pro 8 to create an LCC by right-clicking your image. I do normally include the “dust removal” option and after that apply it to the original picture. See screen shot below.
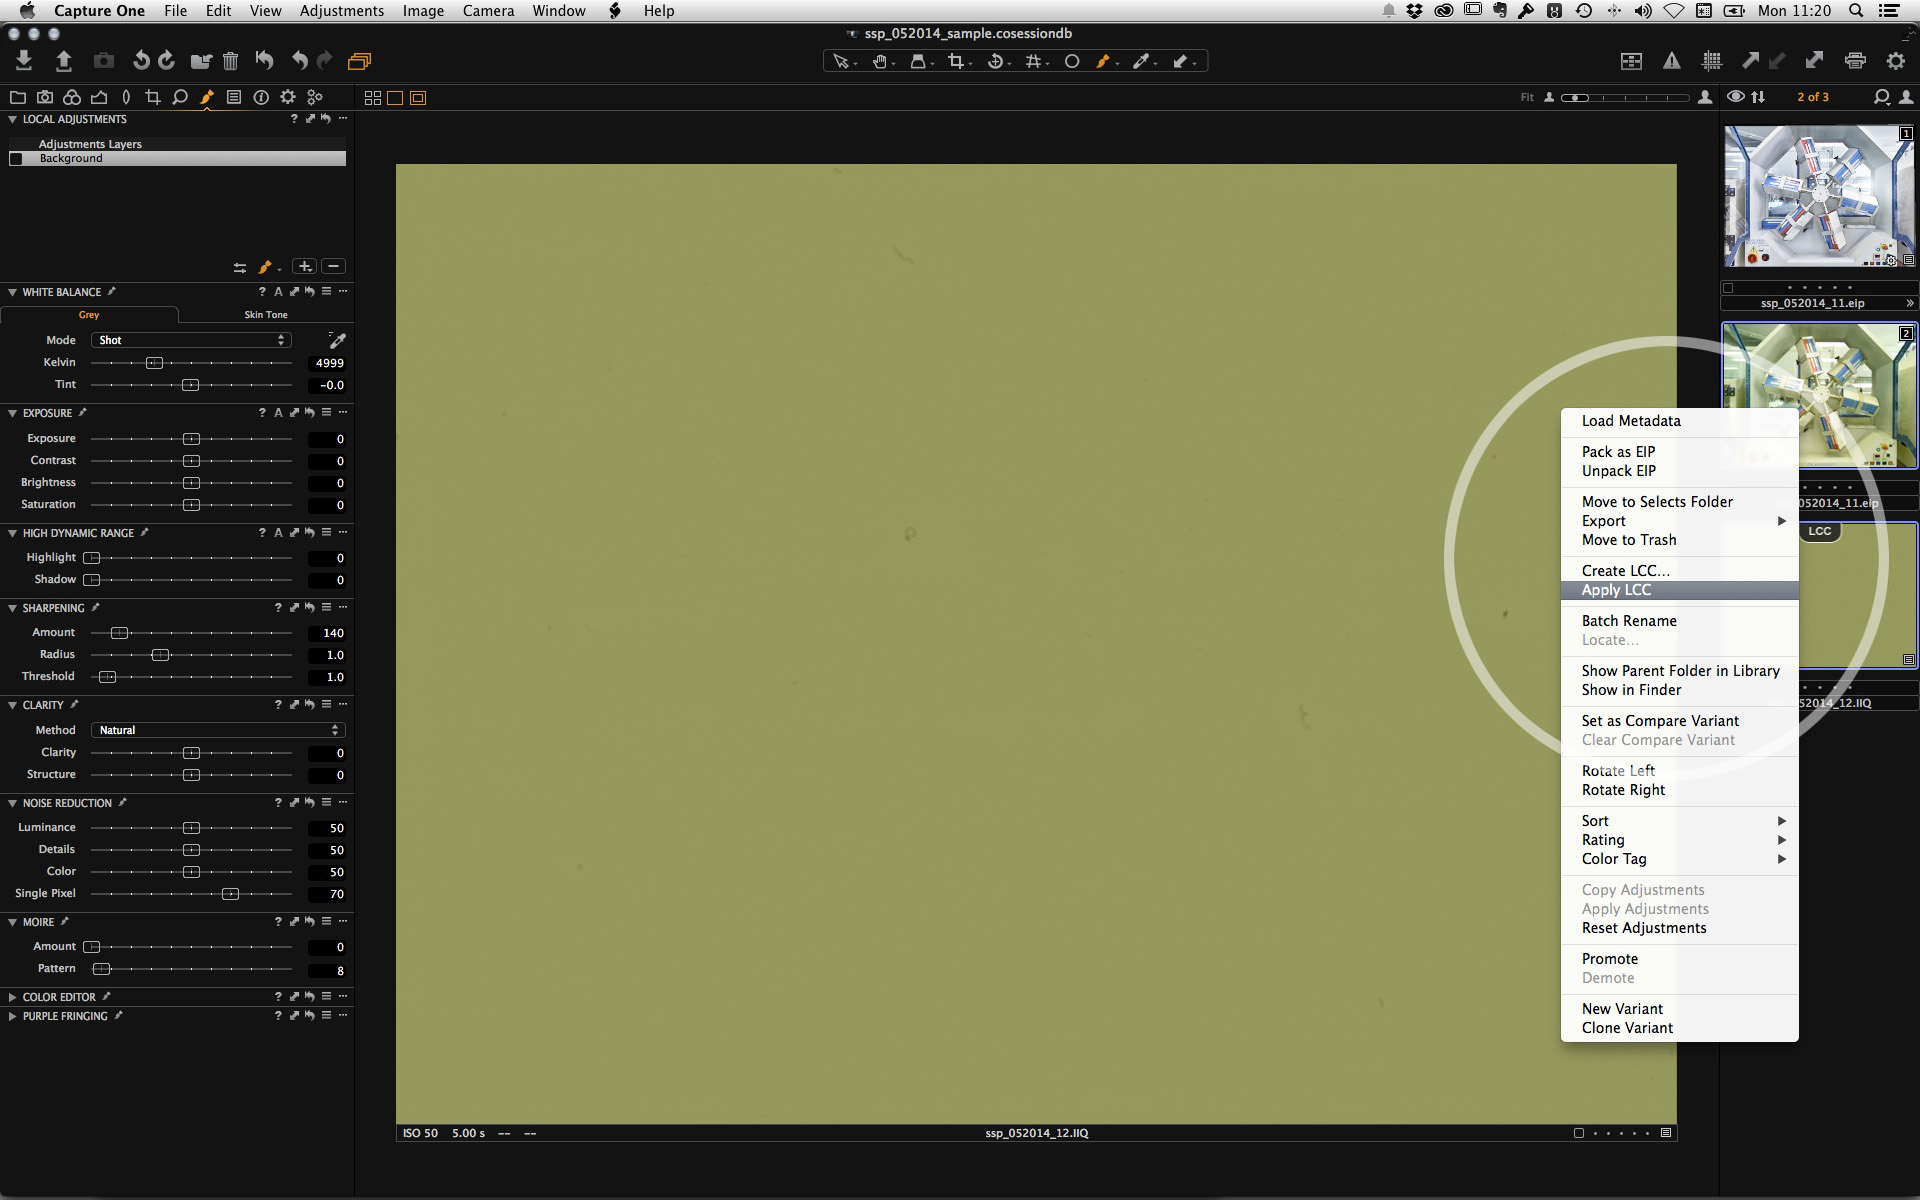 Click on images to enlarge
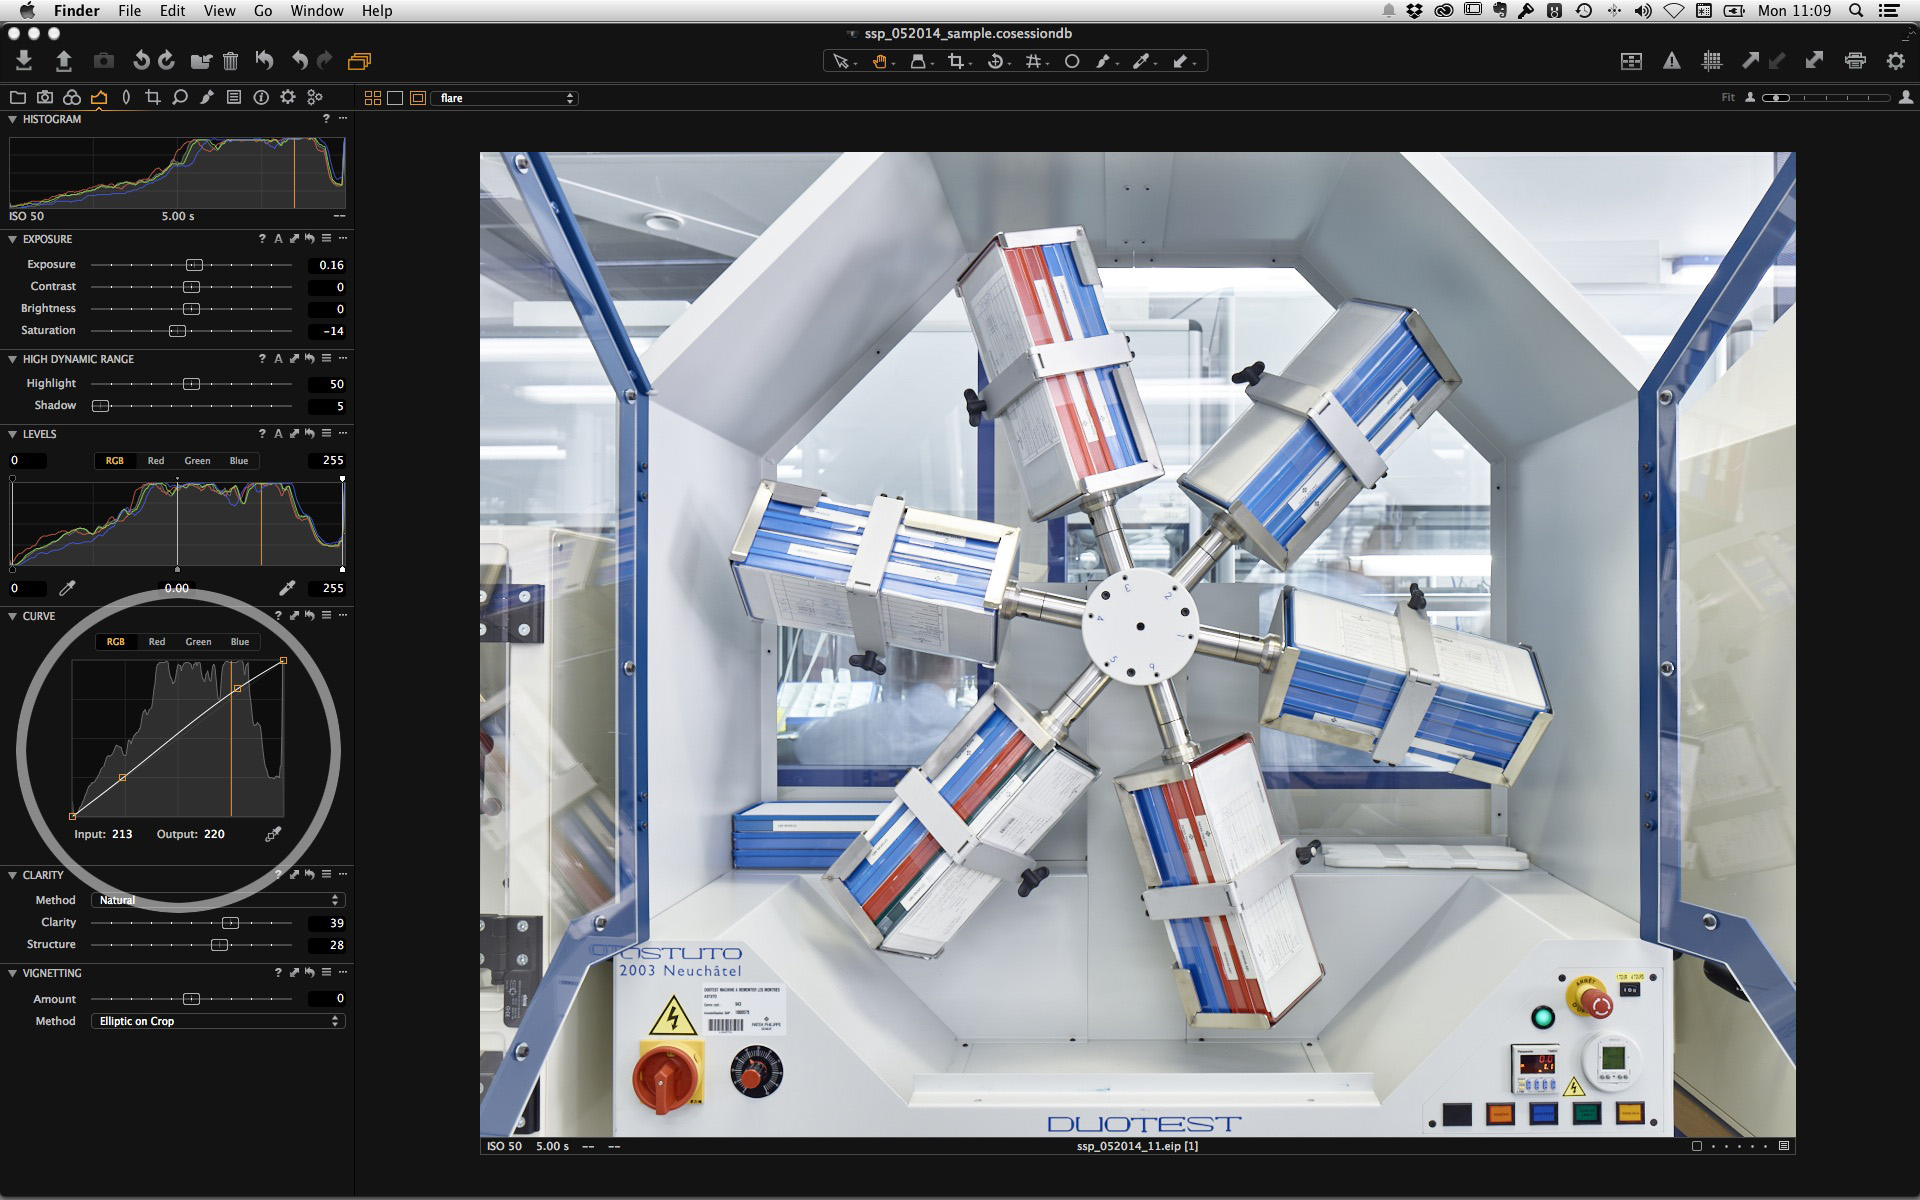
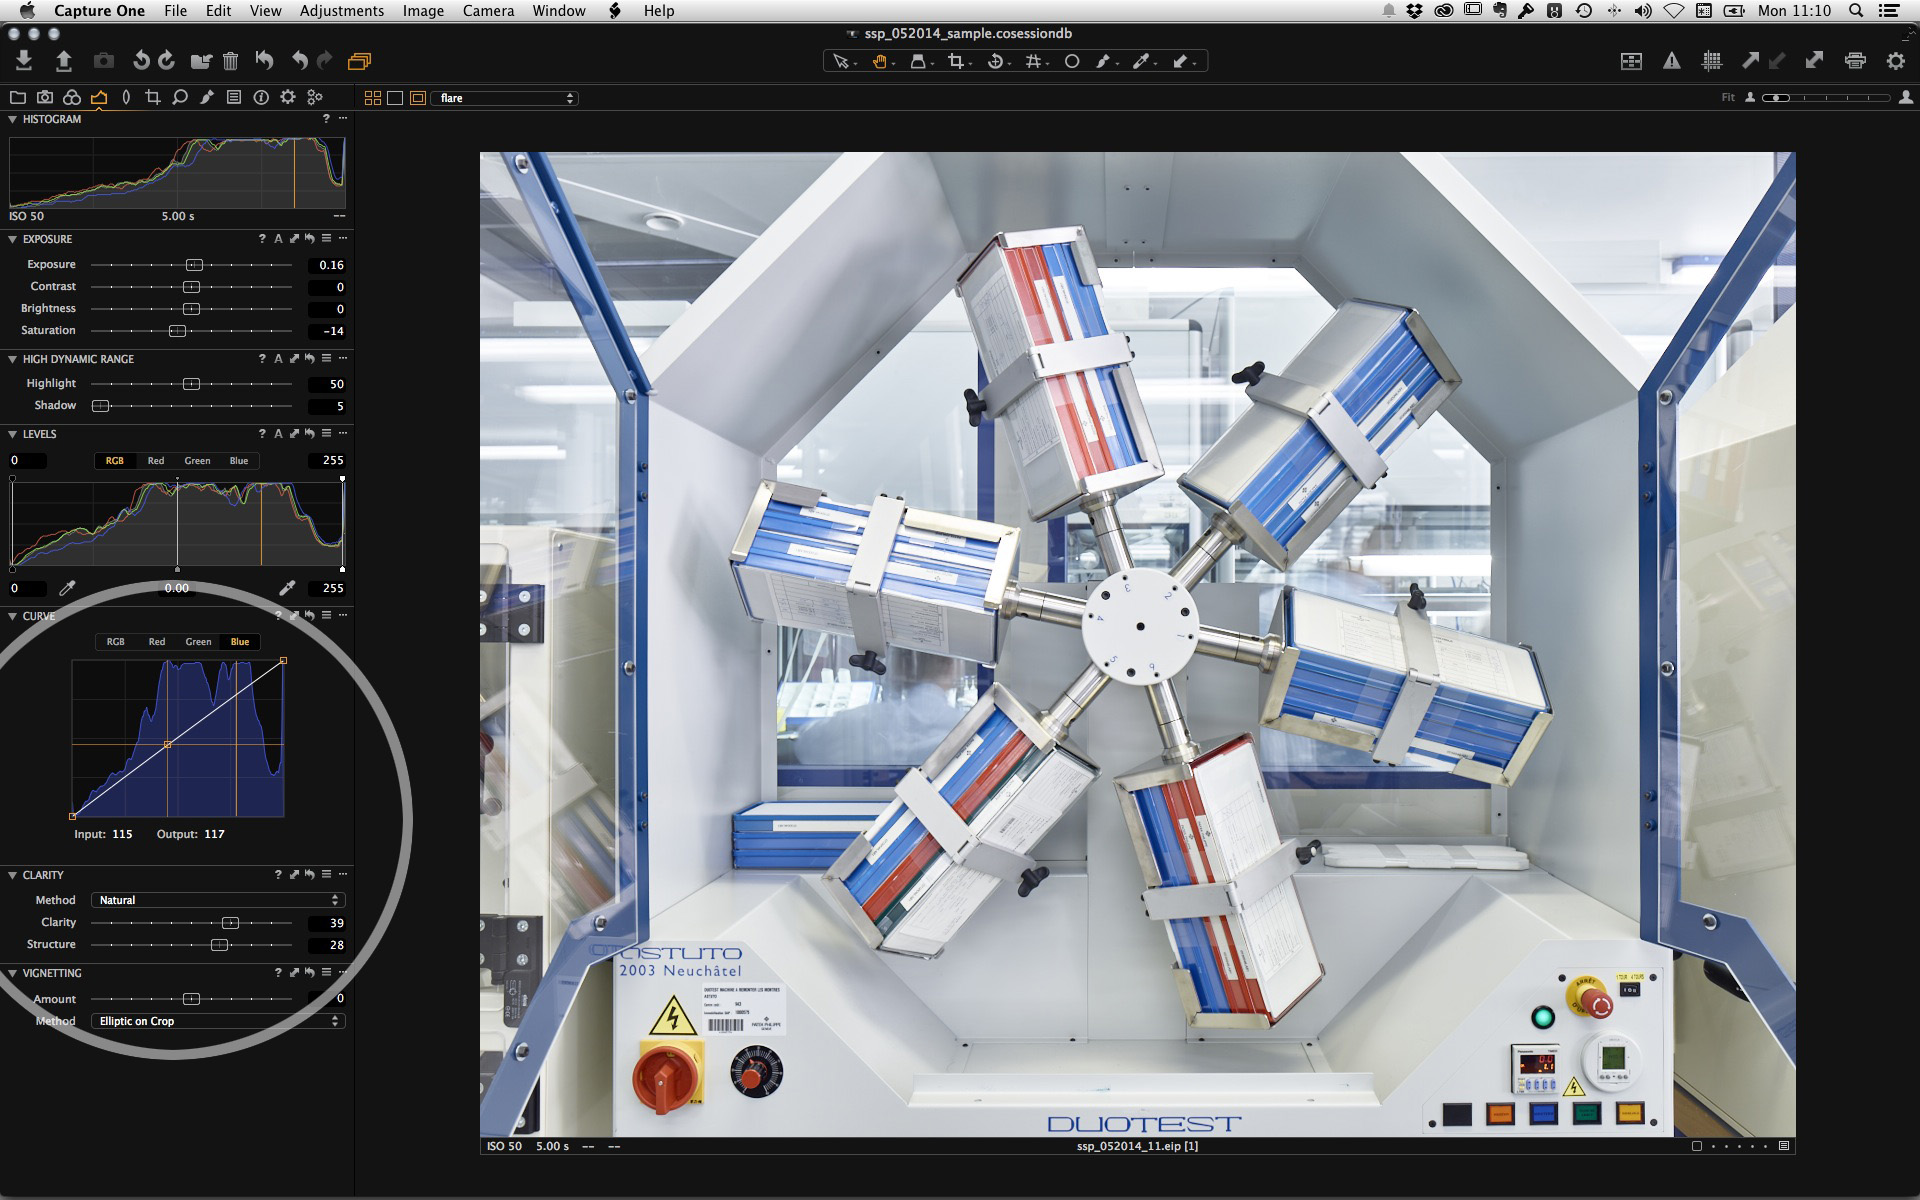
New Clarity method
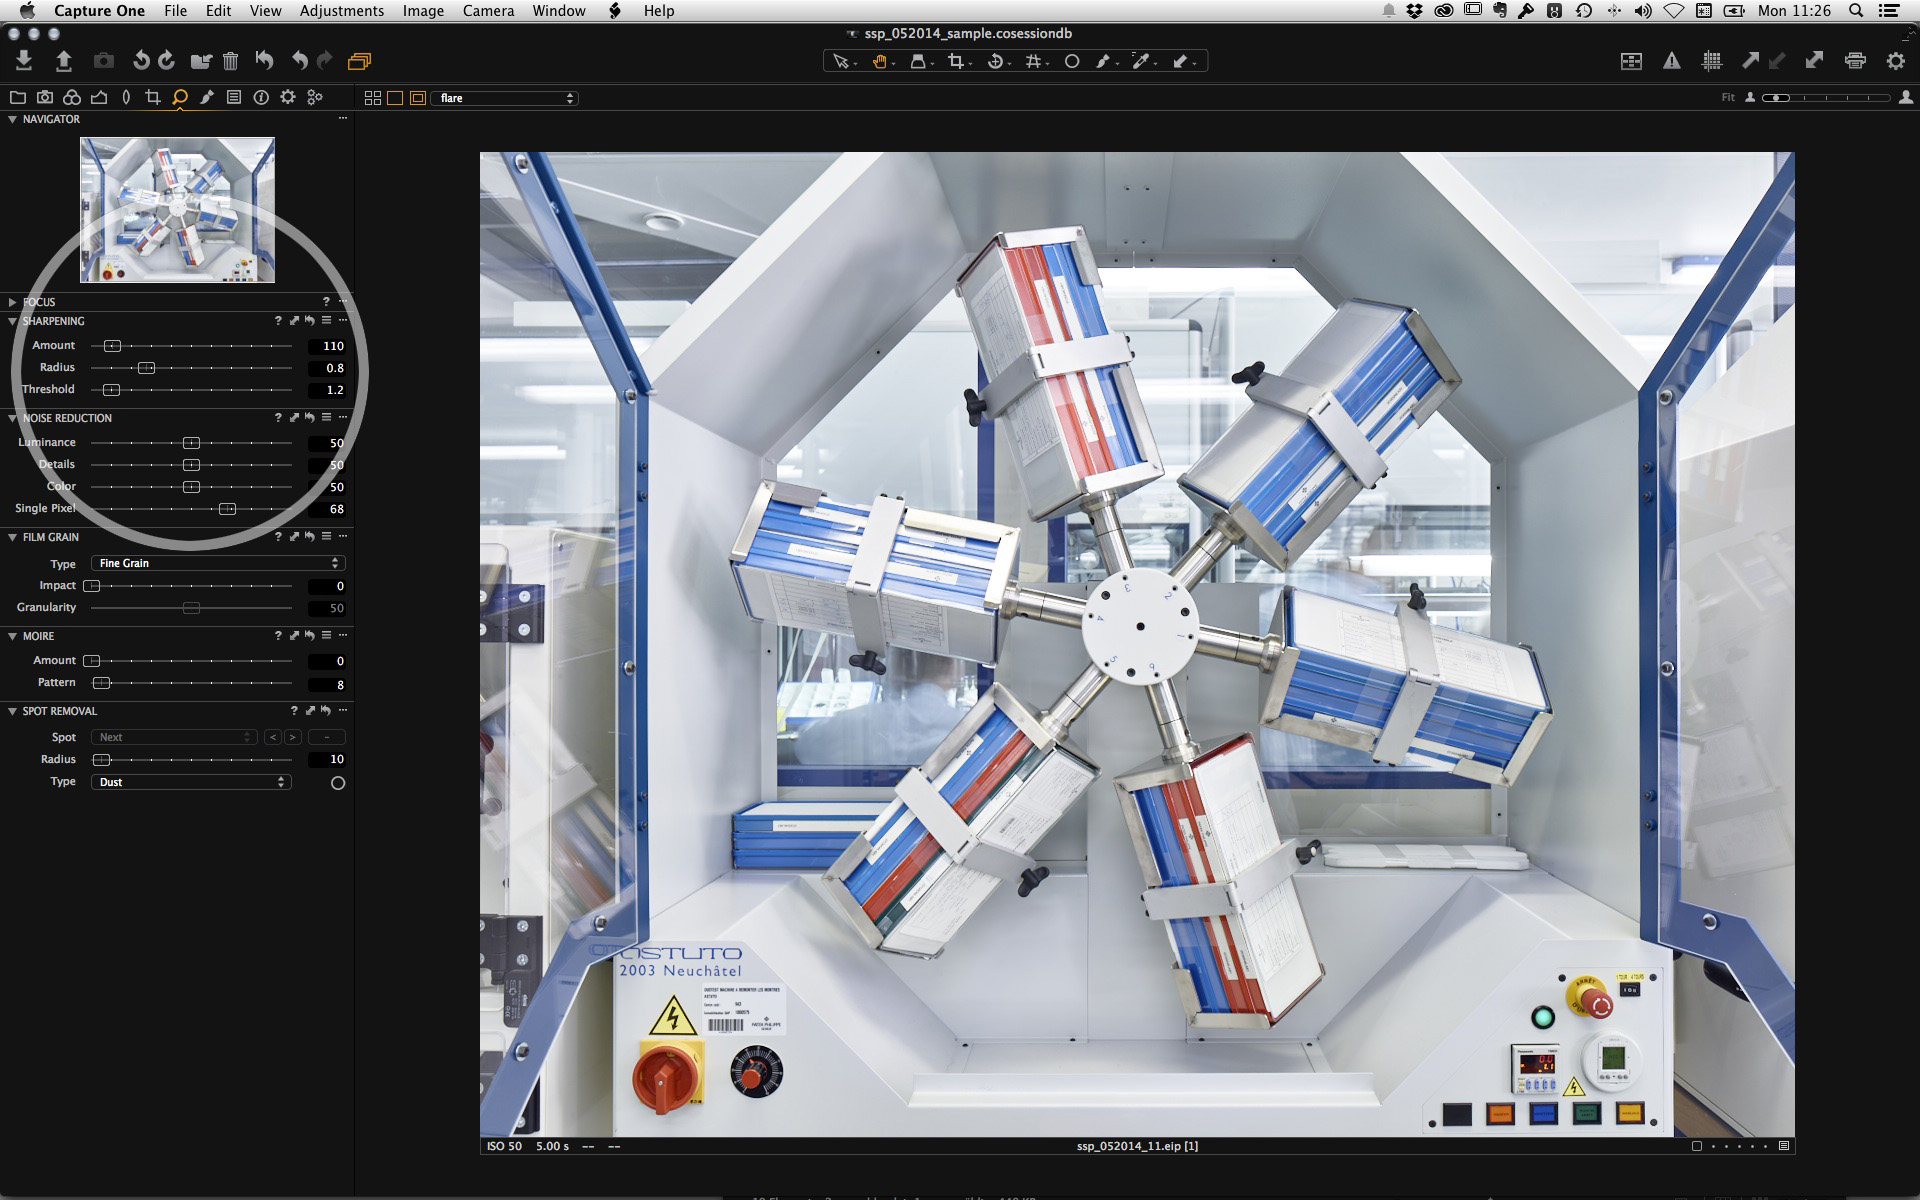
Then I do some general adjustments like White Balance, exposure, HDR and some basic color correction. The Curve is used to add a little contrast and I also pushed the blue channel a bit. See screenshots below. I was also using the new Clarity method called Natural. I like it a lot! It is less aggressive than Punch.
I also play a lot with Structure. A great tool especially for pictures in this context, as Structure helps to improve the fine details in an image like this.
In the next tab be sure to check the “dust removal” button in the LCC section! It often goes forgotten and dust removal from LCC’s does a really great job! It’s worth double checking! See screen shot below.
Correcting the geometry
I also used the Keystone tool to correct the geometry of the picture. As I said, it was done in a rush so it needed some fine treatment.
I don’t tend to do fancy things in the sharpening tab. What I usually do with pictures like this is to reduce the radius bellow 1 – normally between 0.7 – 0.9 and limit the amount between 90 – 110. In my experience my Alpa / IQ260 combination rarely needs more sharpening than that.
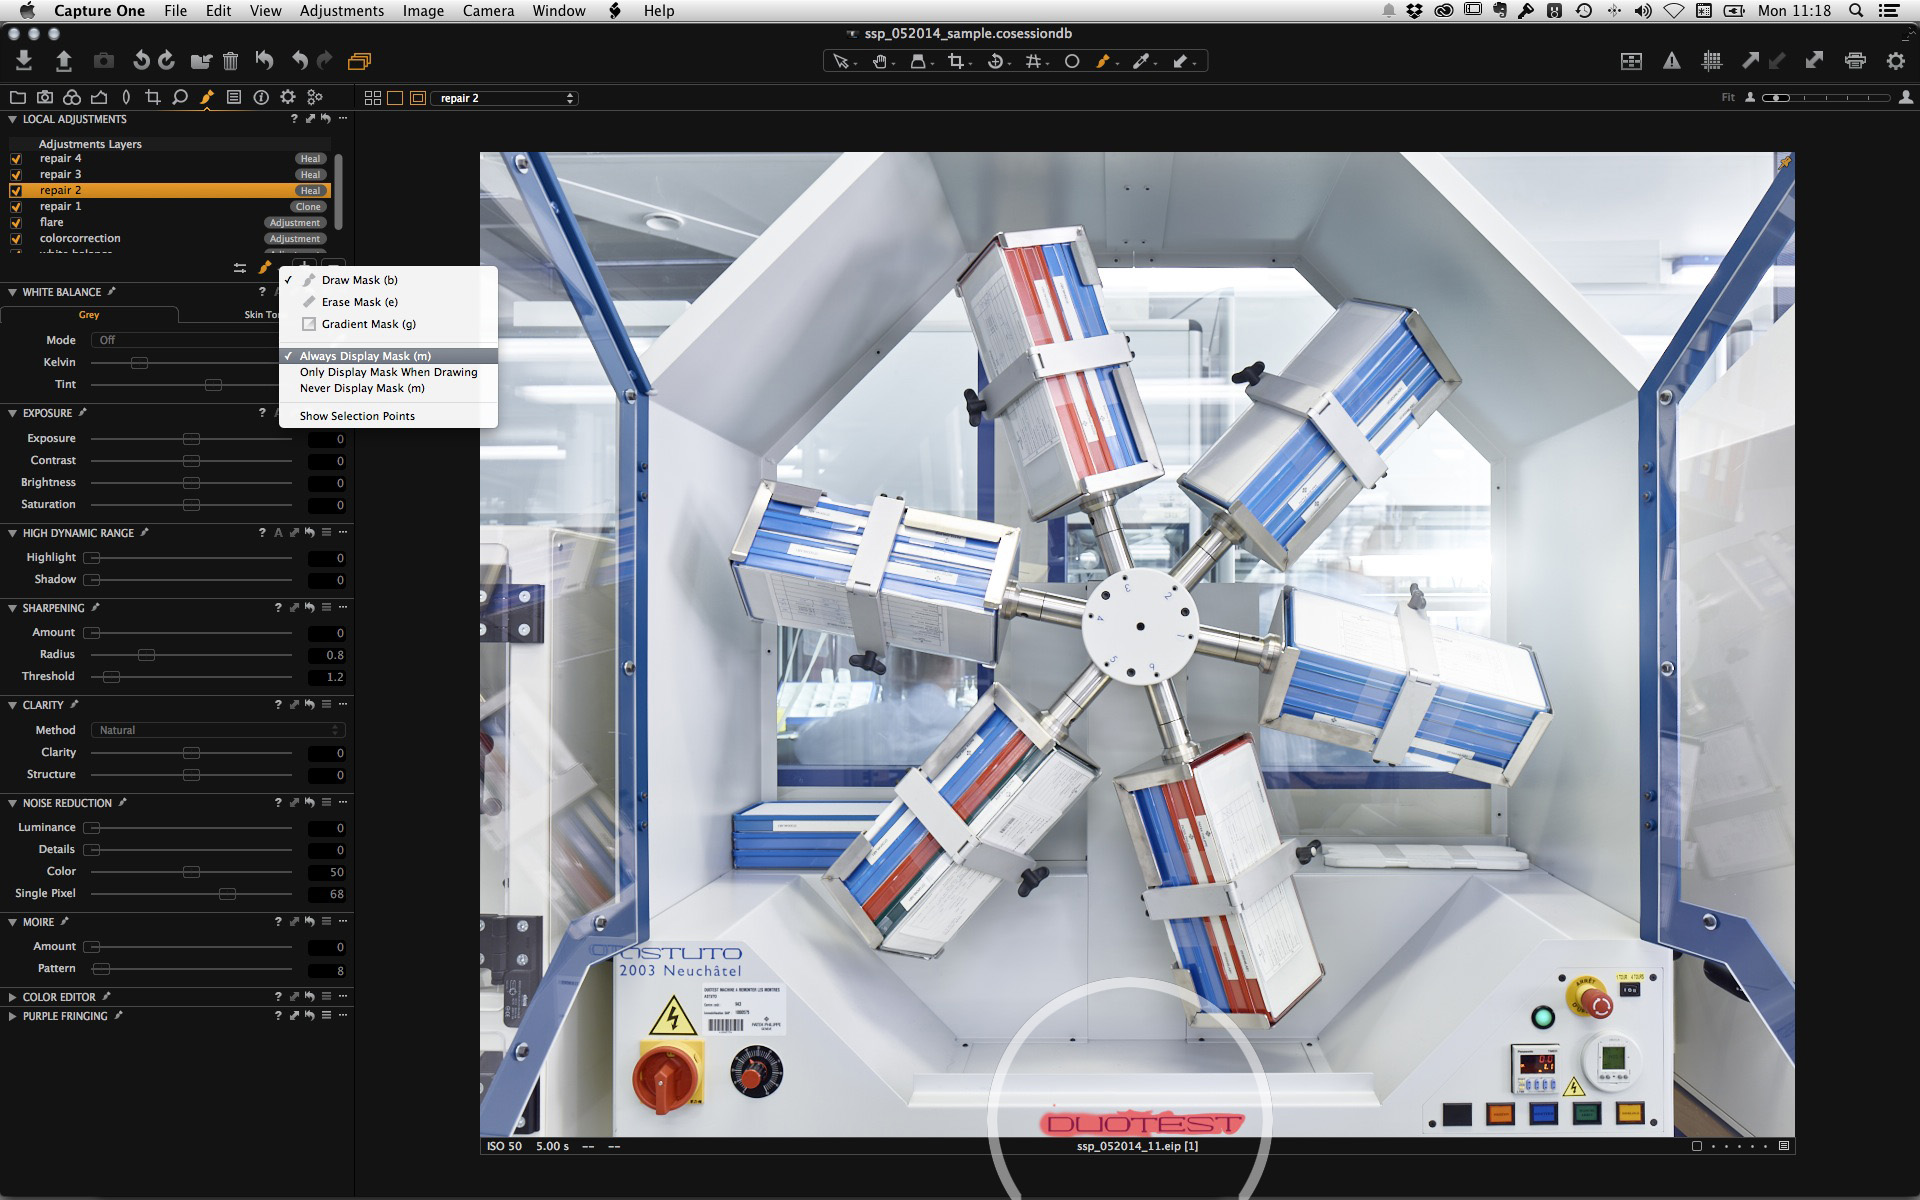
Fun with the Local Adjustments
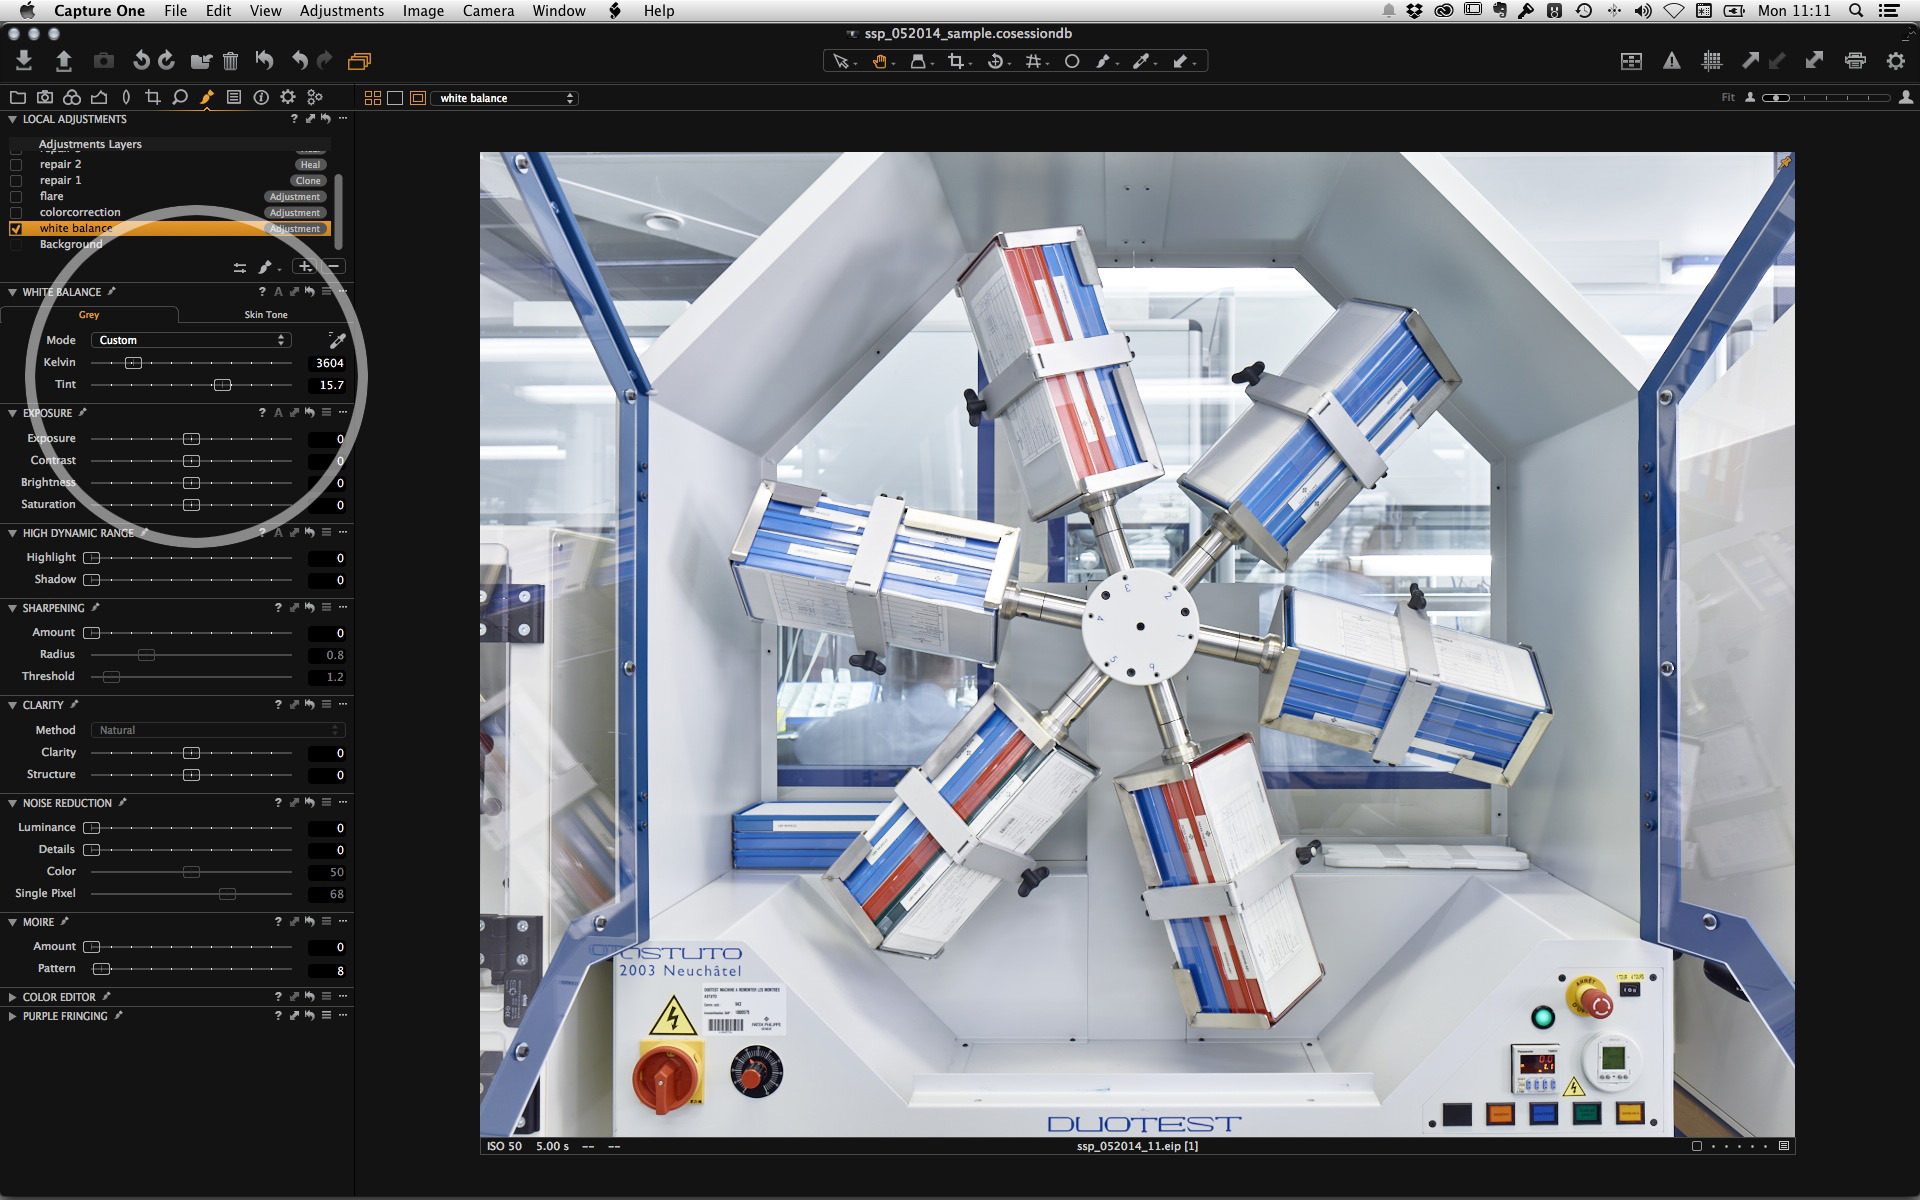
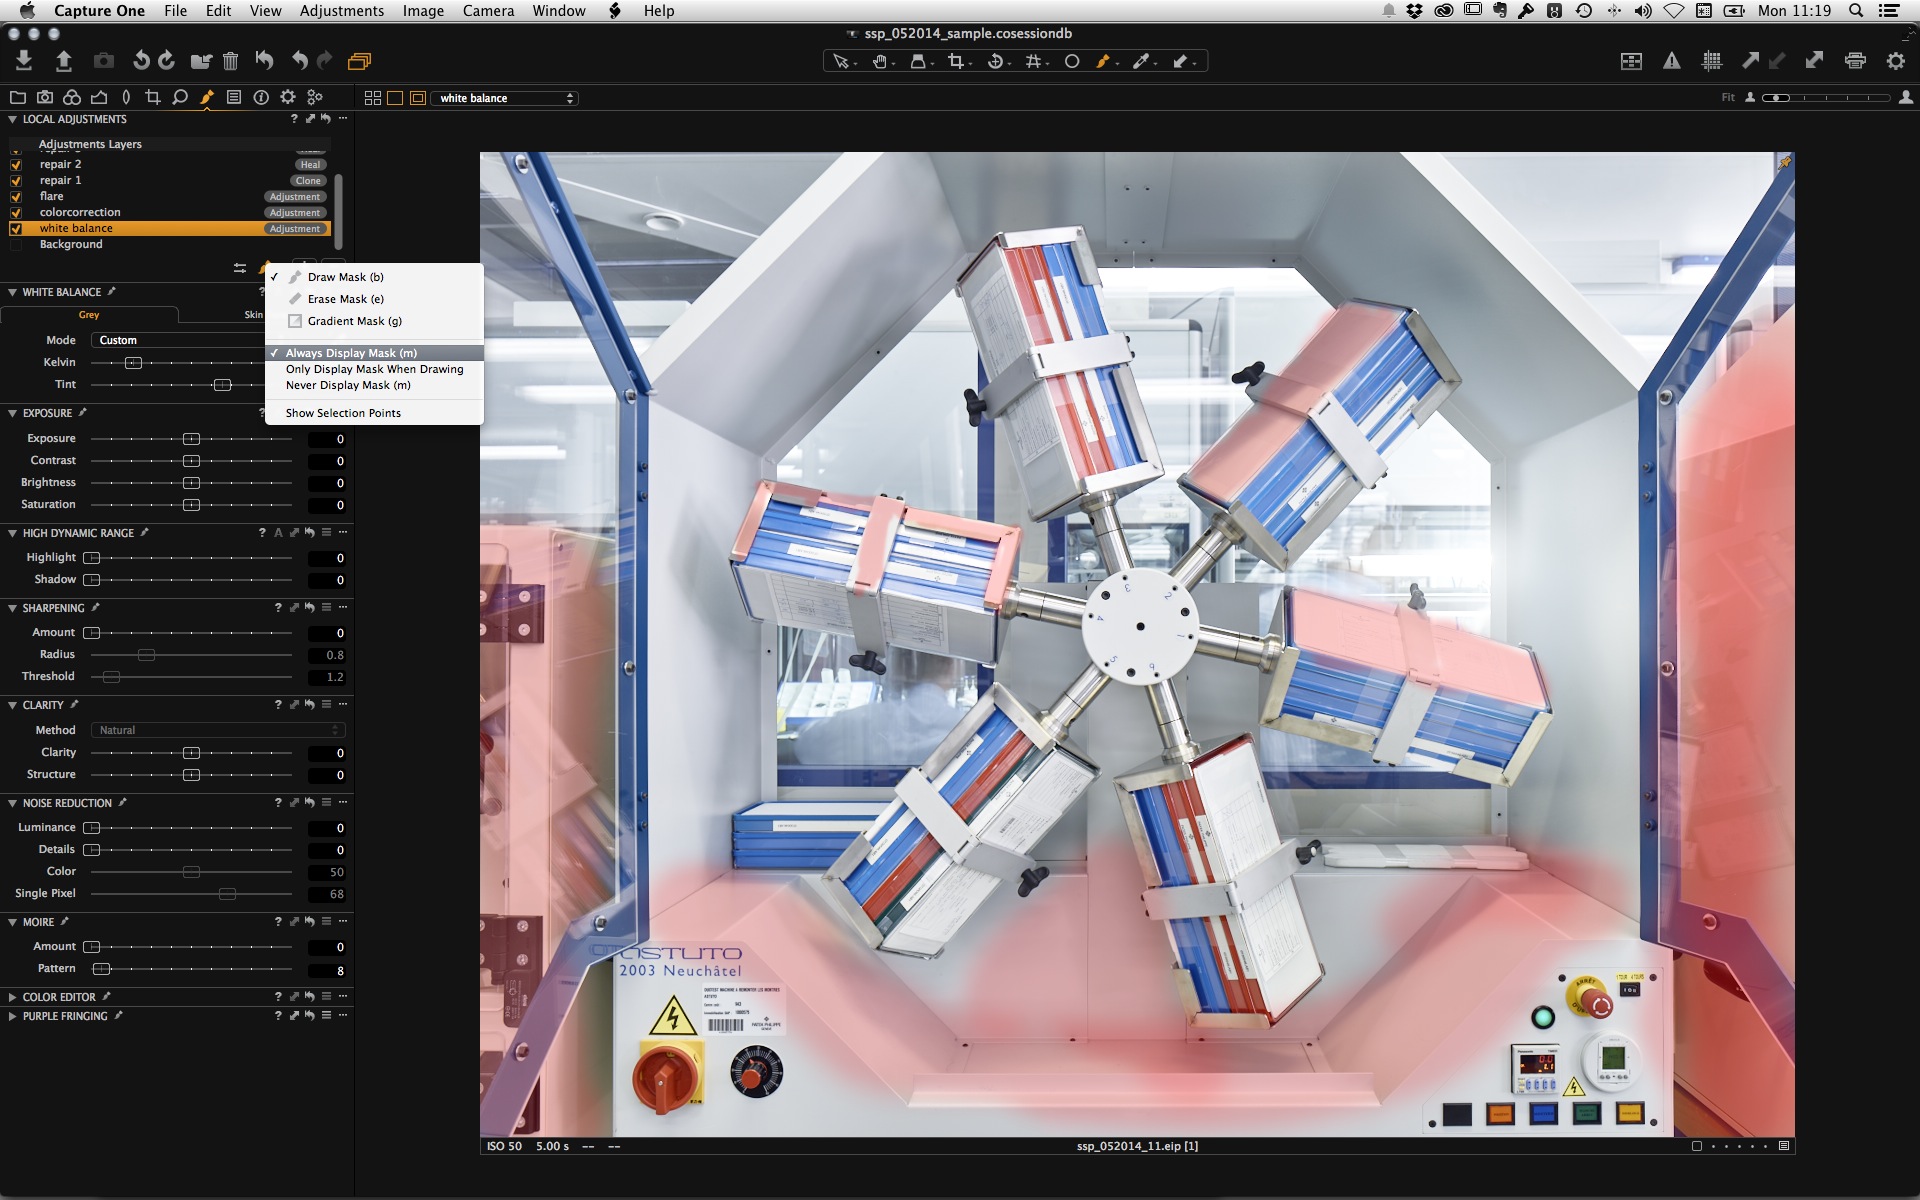
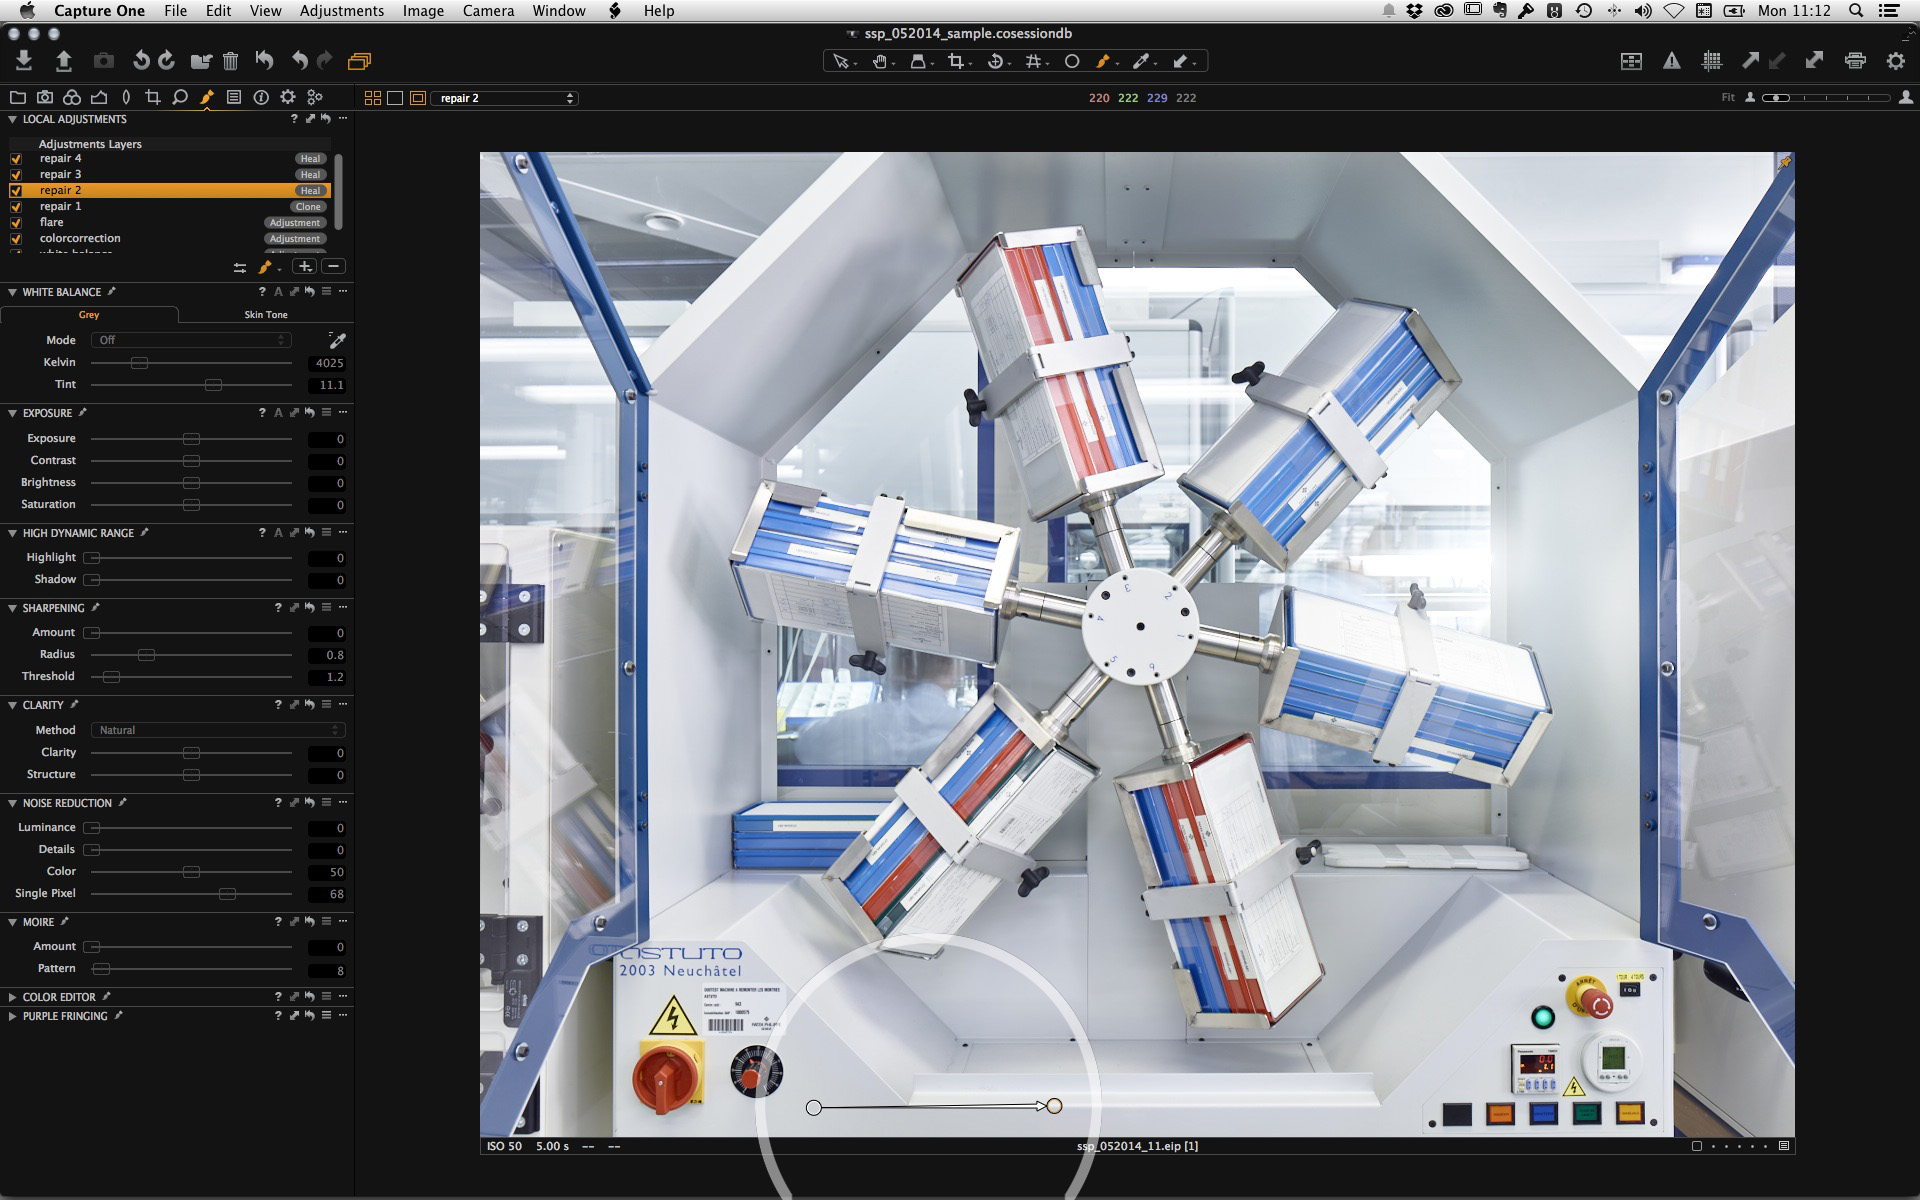
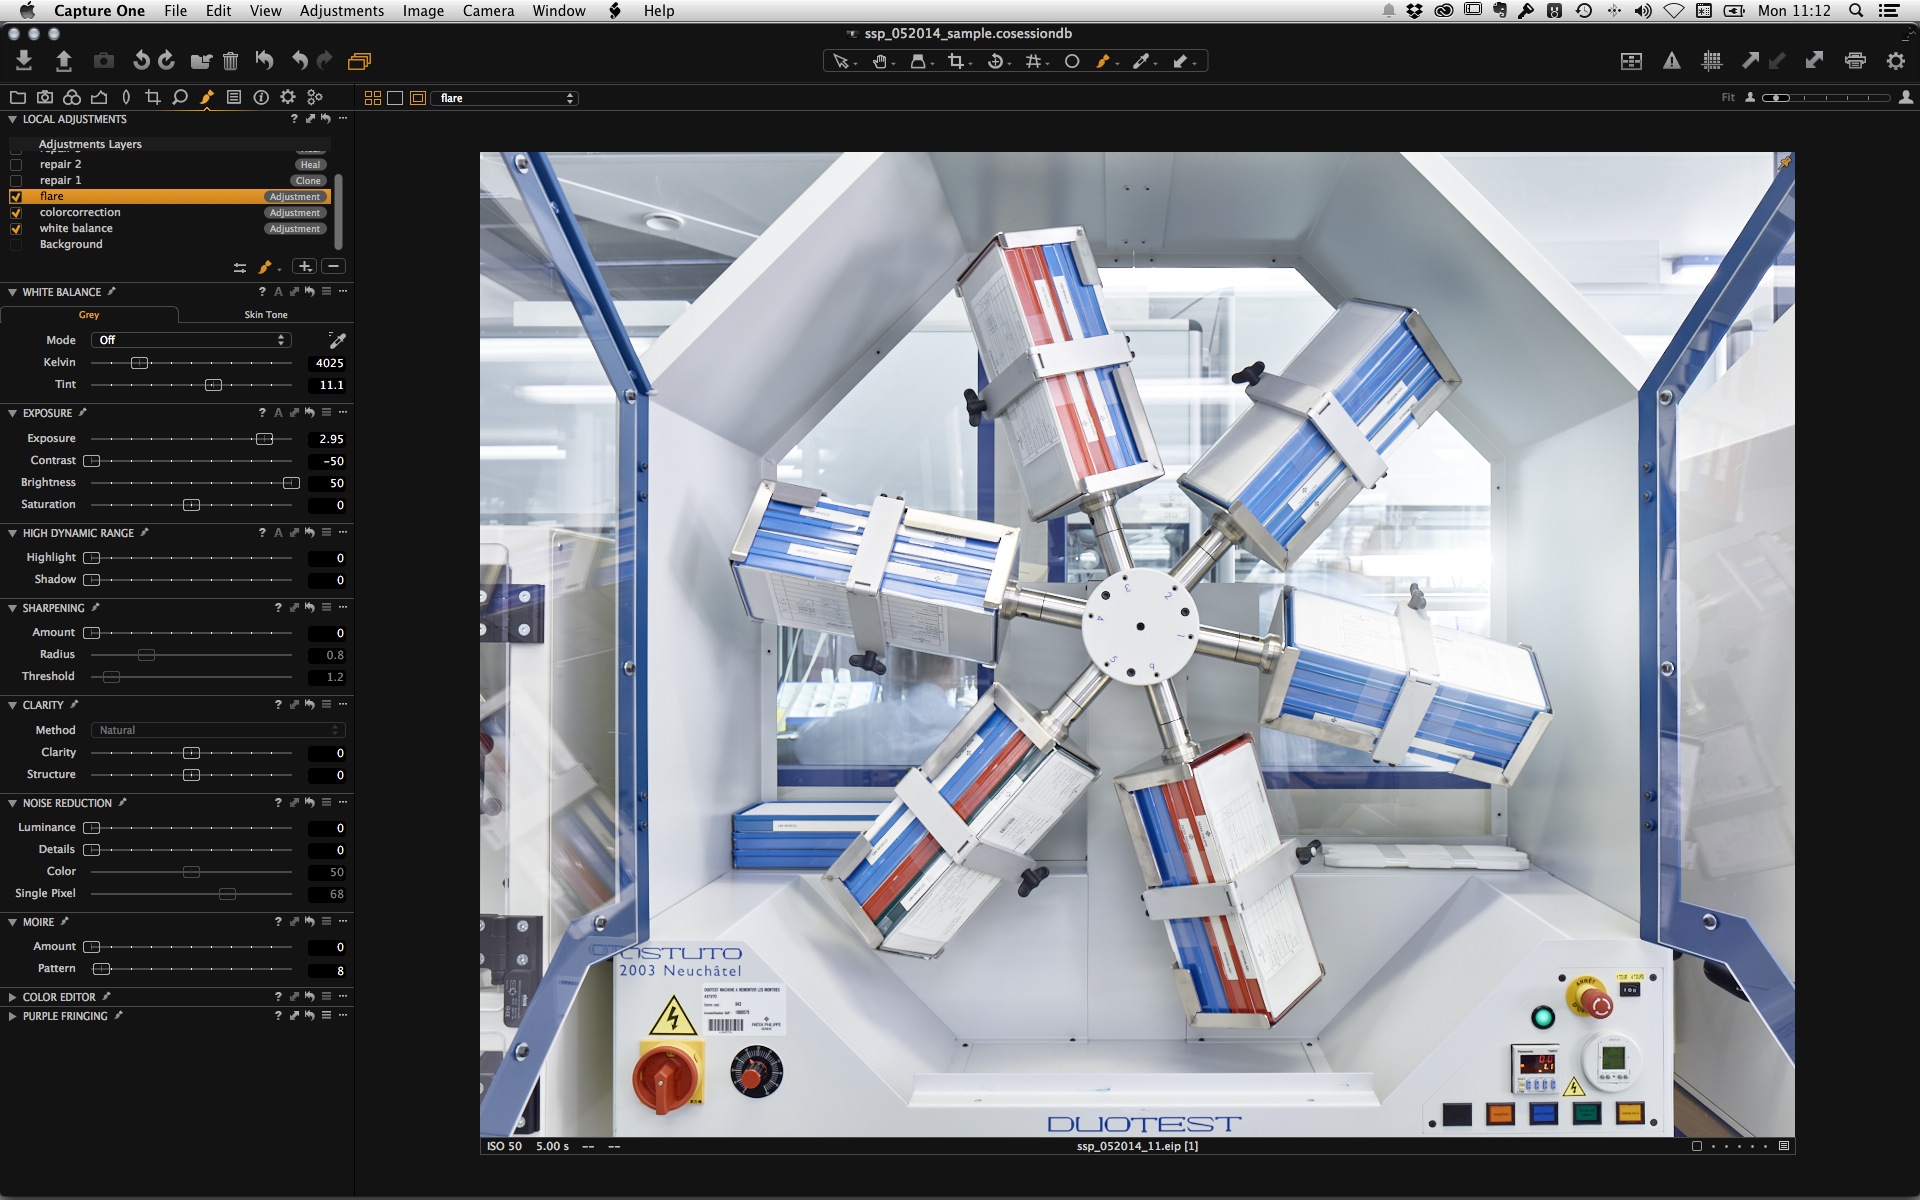
But then I went into the Local Adjustments: with the massive increase in performance, they are real fun now to use in Capture One Pro 8! First I corrected some issues with the mixed light situation the picture was taken in. Some daylight, some tungsten light with various colours.
Before the release of Capture One Pro 8, the usual way to correct that would have been to do extensive color correction or create different Variants to combine in Photoshop. Now you can have adjustment layers with different White Balance settings and brush them into your picture. That is an amazing benefit, which I use often! See screen shots below.
Perfection with the Repair Layers
Besides some minor color correction I also used the new Repair Layers to get rid of some dirt and the logo on the button – which I think was distracting the viewer’s attention.
The great thing about doing correction or retouches already in Capture One Pro 8 already at that point, is that if you have to do global changes later in the process, it will not affect your already done retouch! Especially in a process of “finding a look” for your picture – that can be really helpful!
Create a lens flare
I also figured out something cool: You can already use an Adjustment layer to create a lens flare in Capture One Pro 8! Here is how I do that: create an Adjustment layer, invert the mask so that you can actually see what your correction looks like.
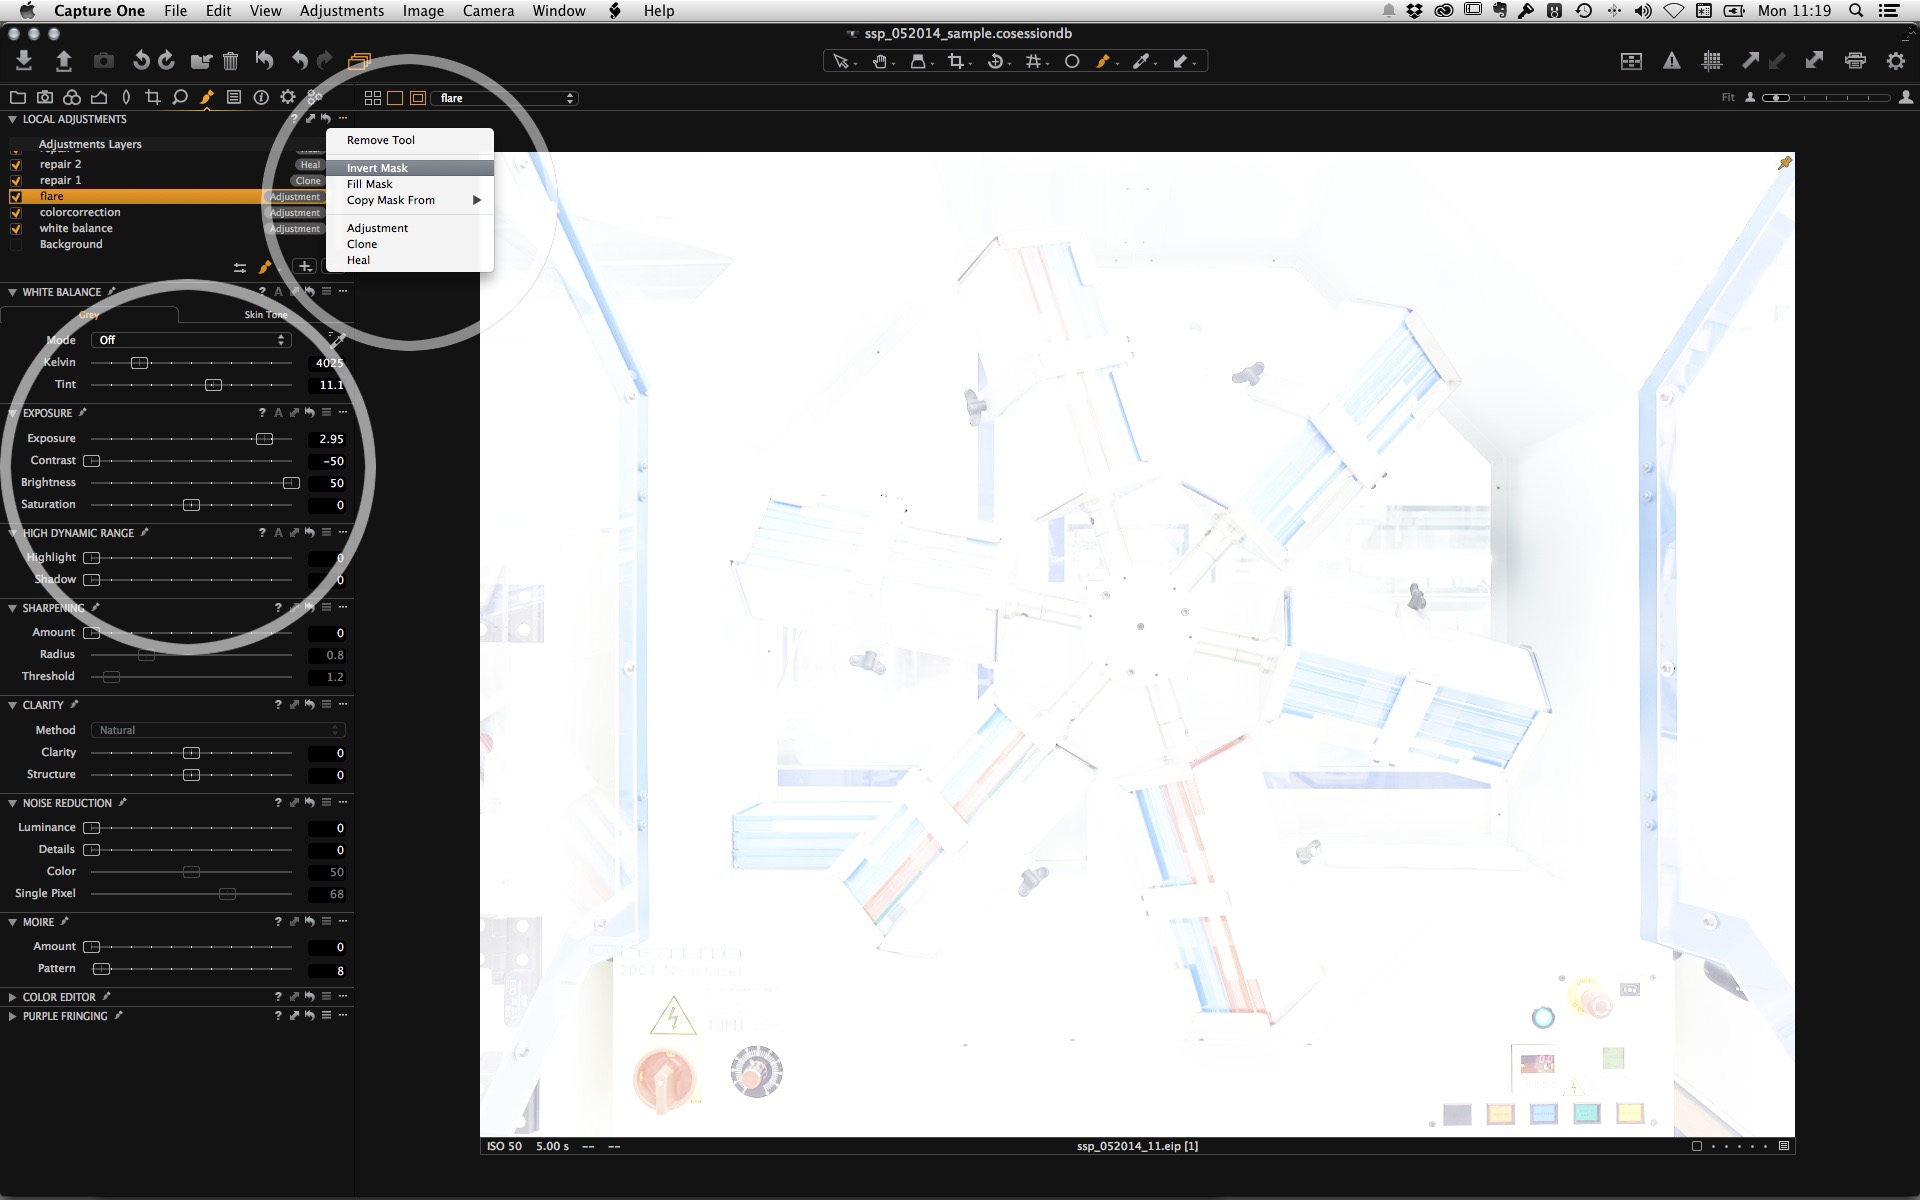
Then push the exposure and the brightness to maximum and reduce the contrast to minimum. That’s pretty much what a lens flare in your camera would do. Invert the mask again to hide it – and than take a big soft brush and make one dot to the point where you want to show your flare with a opacity of 15 – 40. Do the same thing again with a smaller brush.
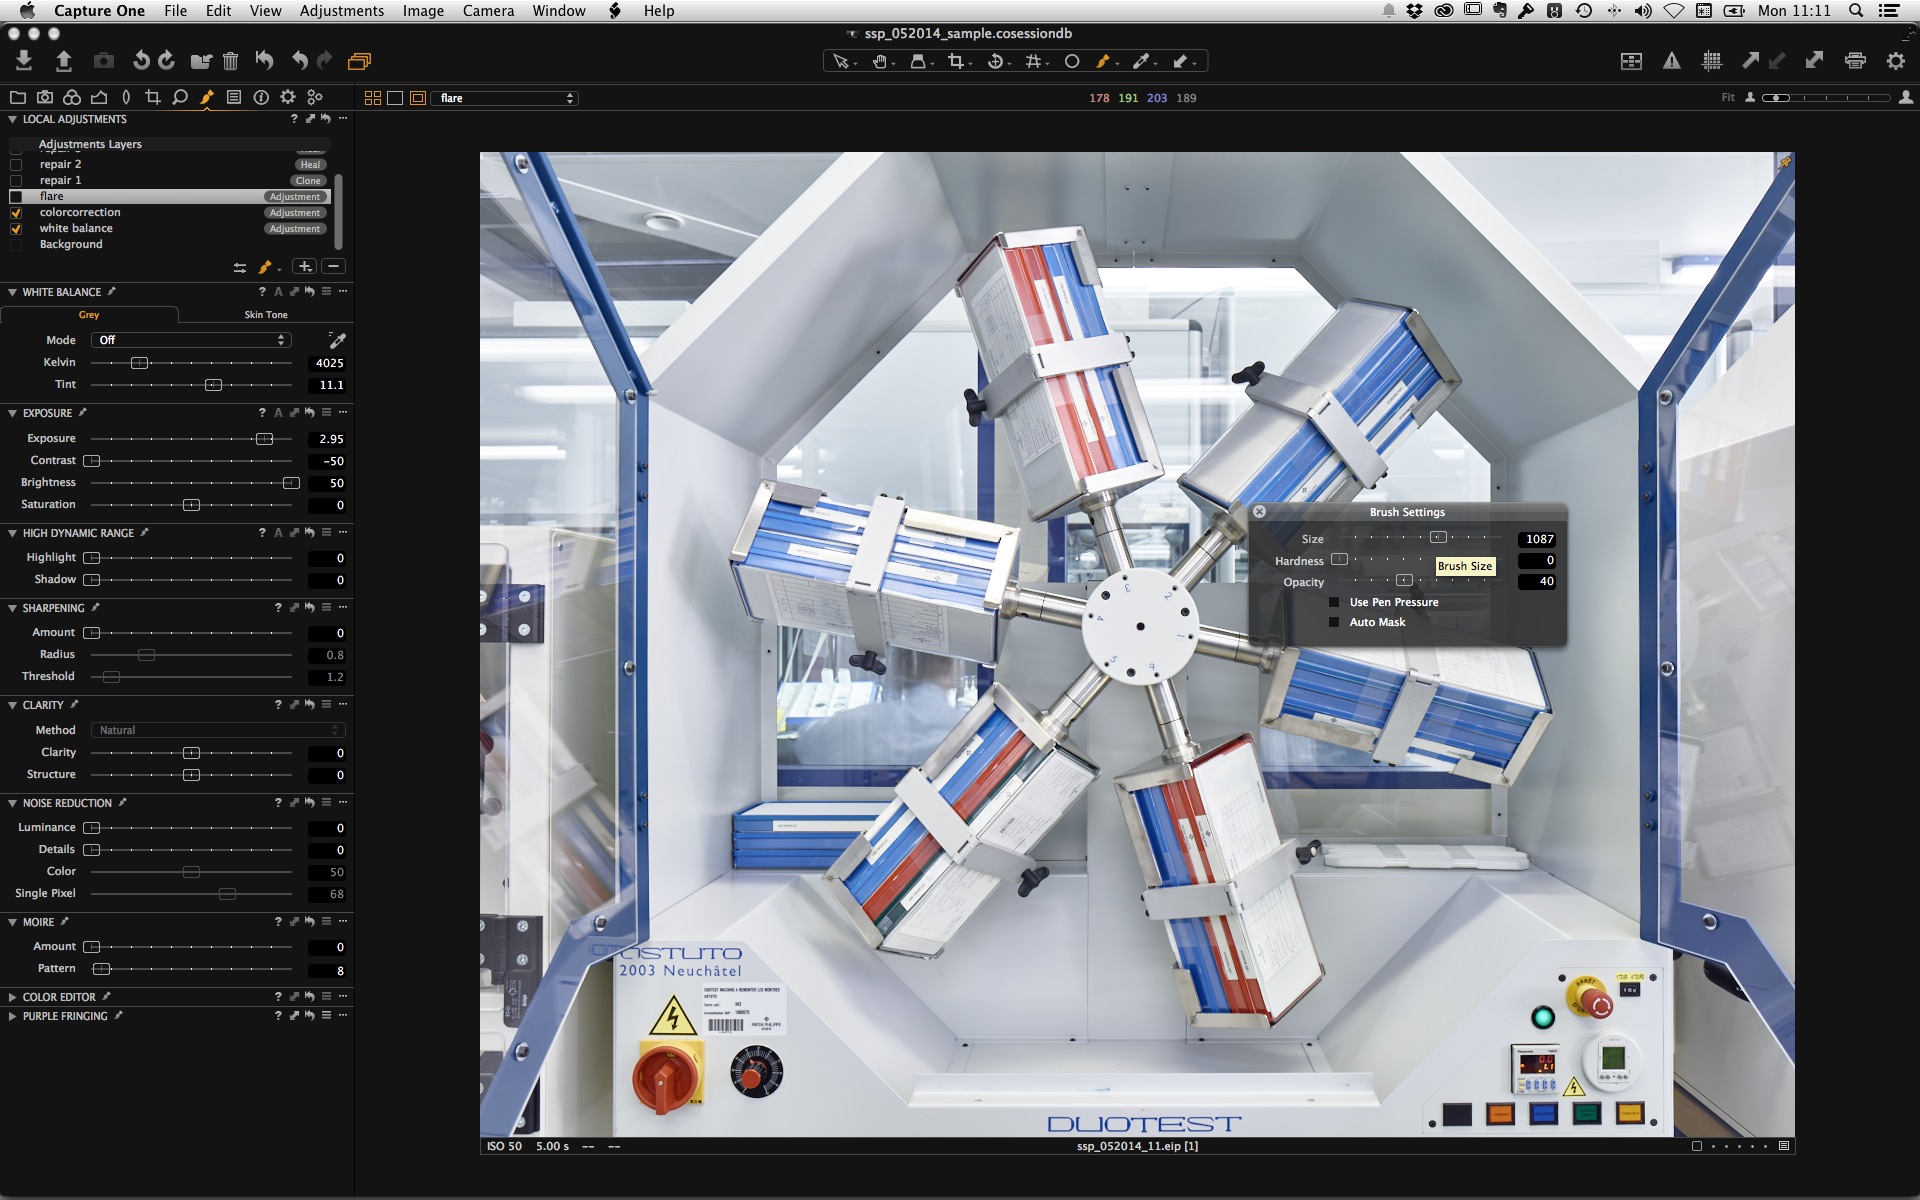
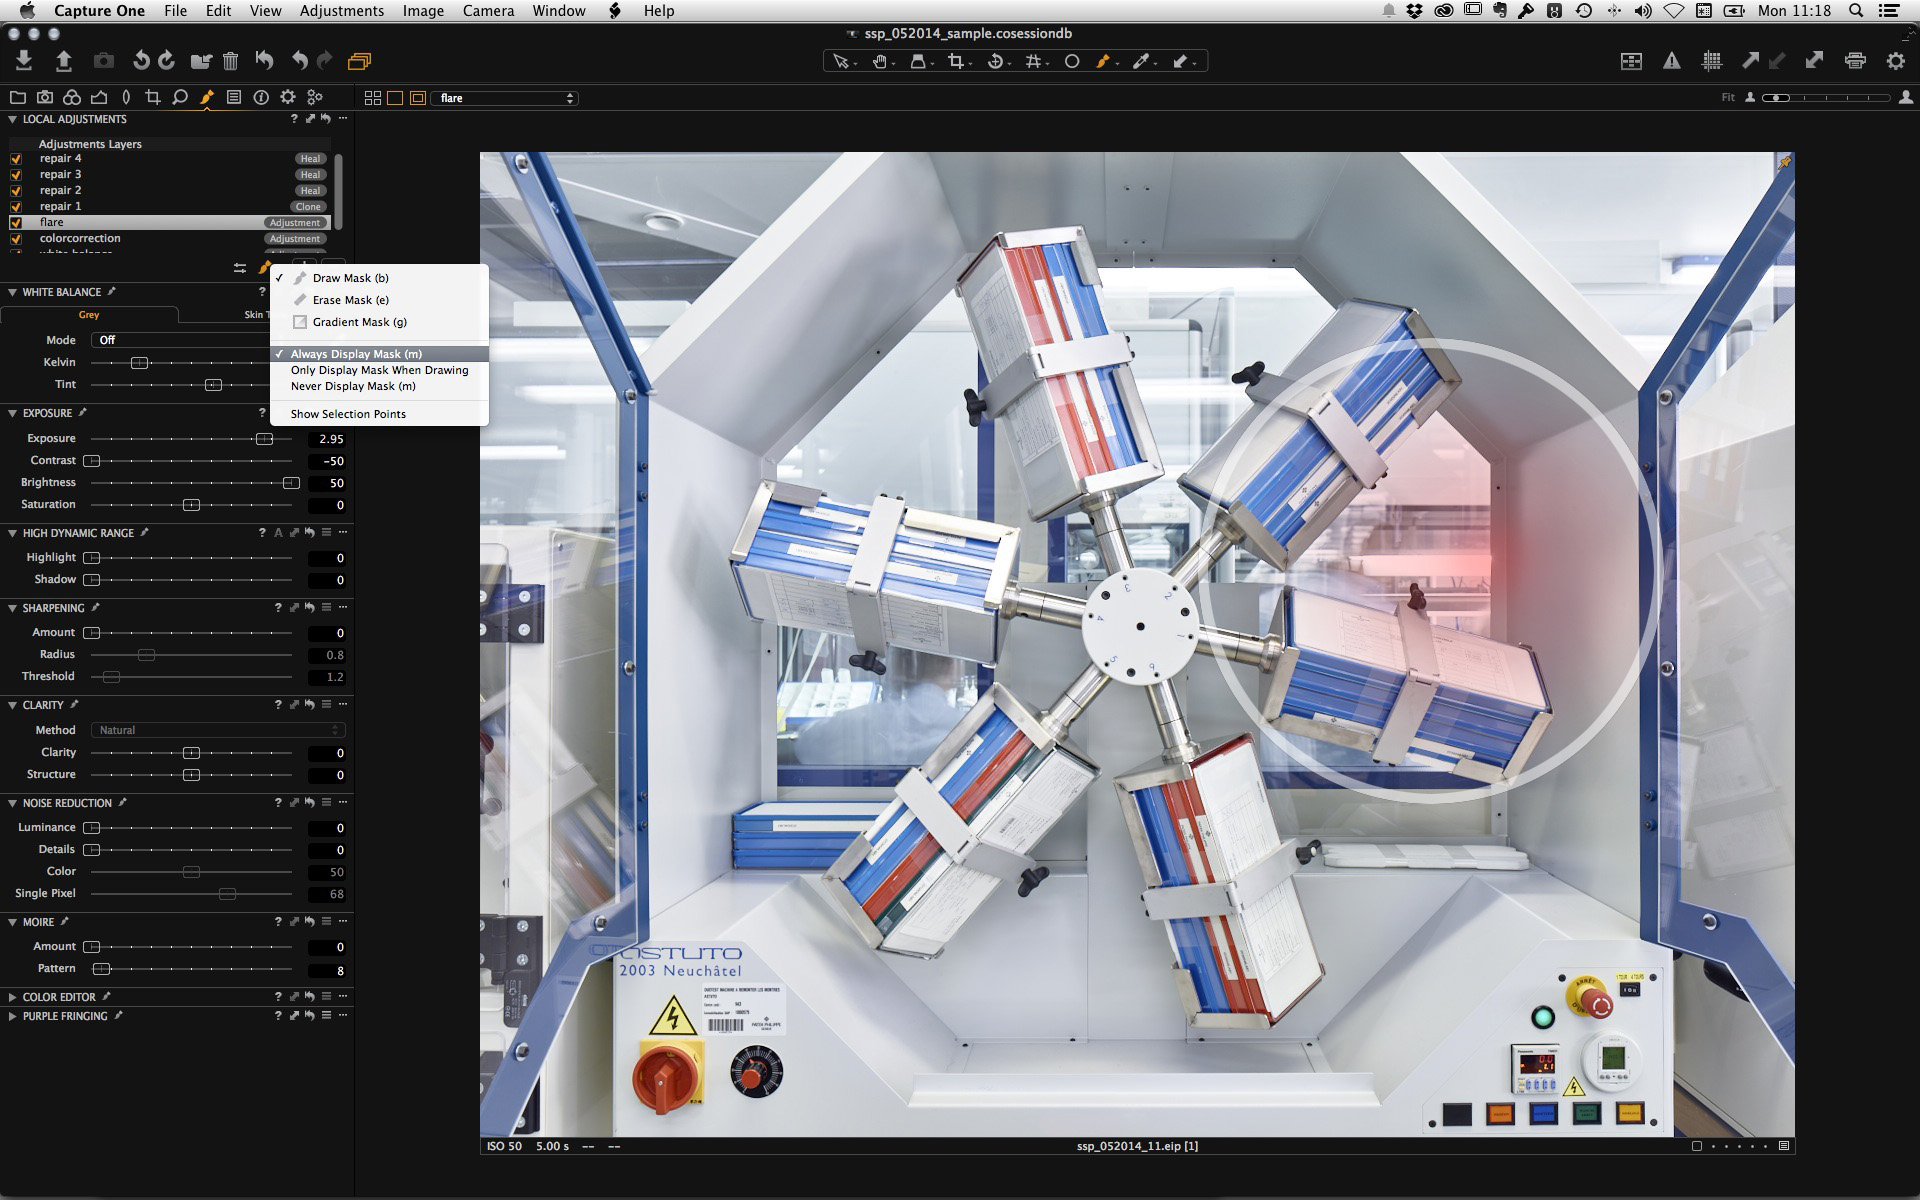
That should be enough. Now you can adjust your flare with the exposure value to taste! Pretty simple effect but it ads some dimension to the picture. You don’t see it in the first place, but you will miss it if you turn it off. Only try to “support” what’s already there, not to create something completely new – ok?
That’s it pretty much it – I hope you have enjoyed that little factory tour and we are looking forward to your thoughts and comments. – If you like to see more of our work please visit our website: www.scanderbegsauer.com
All the best,
Andreana and Alex
Scanderbeg Sauer
Extremely industrial, extremely loud, extremely dirty, extremely distant locations to most of the people - you can bet that there's where they will be. Their photographic work is primarily focused on the meeting of the corporate, industrial and personal, all characterized by a unique visual expression and consistent vision.


The color correction layers is a a brilliant idea! Mixed light situations are so common on location. Thanks.
Tom
PhaseOne es realmente extraordinario. pero tiene un gravisimo problema.
la mayoria de las ayudas, tanto de youtube como los foros, estan en ingles y yo no se ni una palabra de ingles.
me gustaria que me solucionaran este problema
gracias y espero su respuesta
un saludo
Hi José,
Glad you like the blog.
For now, the blog is only in English, but we are looking into the possibilities for making the blog available in other languages as well.
All the best,
Niels
Excellent post. The flare trick is so clever, never thought that!