While their styles and subjects may be different, fashion and travel photographer Brian Siambi and fashion and beauty photographer Zoë Noble have one thing in common: their beautiful skin tones. We spoke to them about how lighting and the right photo editing software make their subjects shine and make editing skin tones easier than ever.
How do you use lighting in your shoots to achieve beautiful skin tones?
Brian Siambi: All my shoots involve natural light. I just love how natural light falls on dark skin and the different moods it gives at different times of the day. For example, if I want a dramatic mood I’ll shoot at midday, which allows me to create amazing shine and shadows when editing. If I want soft light, I’ll wait until clouds are overcast.
Zoë Noble: I use both studio and natural lighting. I love the simplicity and rawness of natural light and how it can really disarm your subject. With no big lights or waiting around for the perfect lighting set up, your subject can really relax and connect. On the other hand, I love the endless possibilities for creating a story with light and color that you get with studio lighting.
Should I use hard light or soft light? Should I add gels for some color? Maybe add a flag to create some dynamic shadows? You have so many tools at your disposal and I love that.
Generally, the concept of the shoot will dictate the lighting so it’s great for me to understand how to use both natural and studio light and choose the one that best fits the story or subject.
You both do amazing work with skin tones and color grading. How do you get those colors?
BS: For me, color grading starts when I plan the shoot and my vision for the final image. I switched to Capture One because I felt I wasn’t quite getting the correct tones for darker skin in Lightroom that I needed to take my work to the next level.
For skin tones, I mostly use the Color Balance tool and Color Editor tools. I separate a specific color I want to edit. For dark skin, I mostly play with brown, reds and oranges and combine them with the Temperature tool to balance the blue and orange in order to get the correct toning for dark skin.
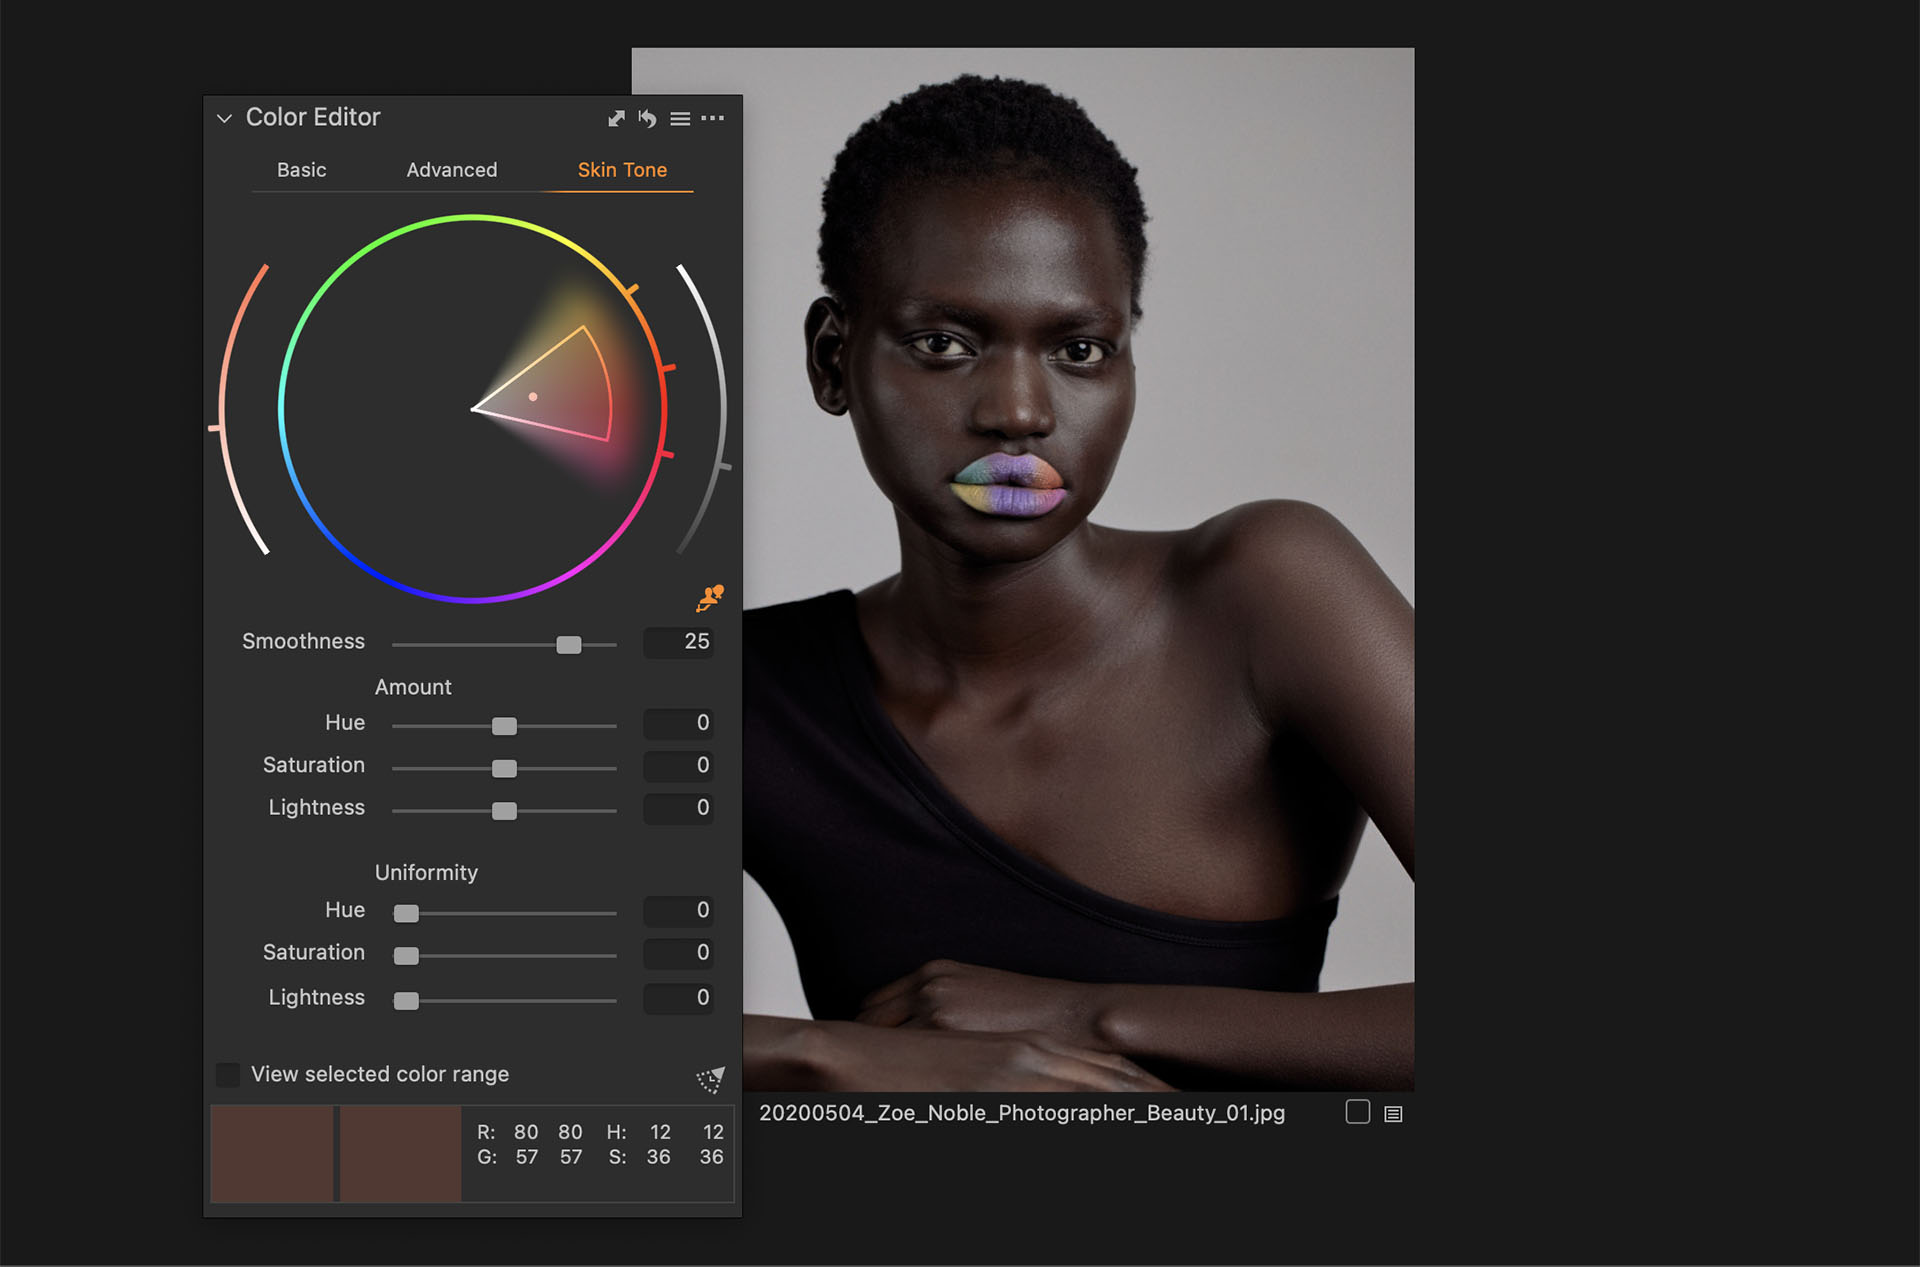
ZN: A very important part of my color grading is to ensure I have a great base to start with. I’ll always use the Skin Tone tool to unify colors and correct any discoloration on the skin. When I take my beauty photos into Photoshop for more intensive retouching, I can work on further correcting colors, using Curves adjustments or using a blank layer set to Color.
I take a “less is more approach” to color grading, so I’ll use adjustments like Curves and the Color Balance tool to add a wash of color. I often like complementary colors so if I cool down the shadows I will then warm up the highlights.
I generally like cooler images, but I will always match the color grading to the concept of the shoot. If I shot in bright sunlight, my color grading will complement this, so I’ll add warmer tones. This way my color grading feels cohesive with what’s already happening in the photo.
What is your Capture One editing process?
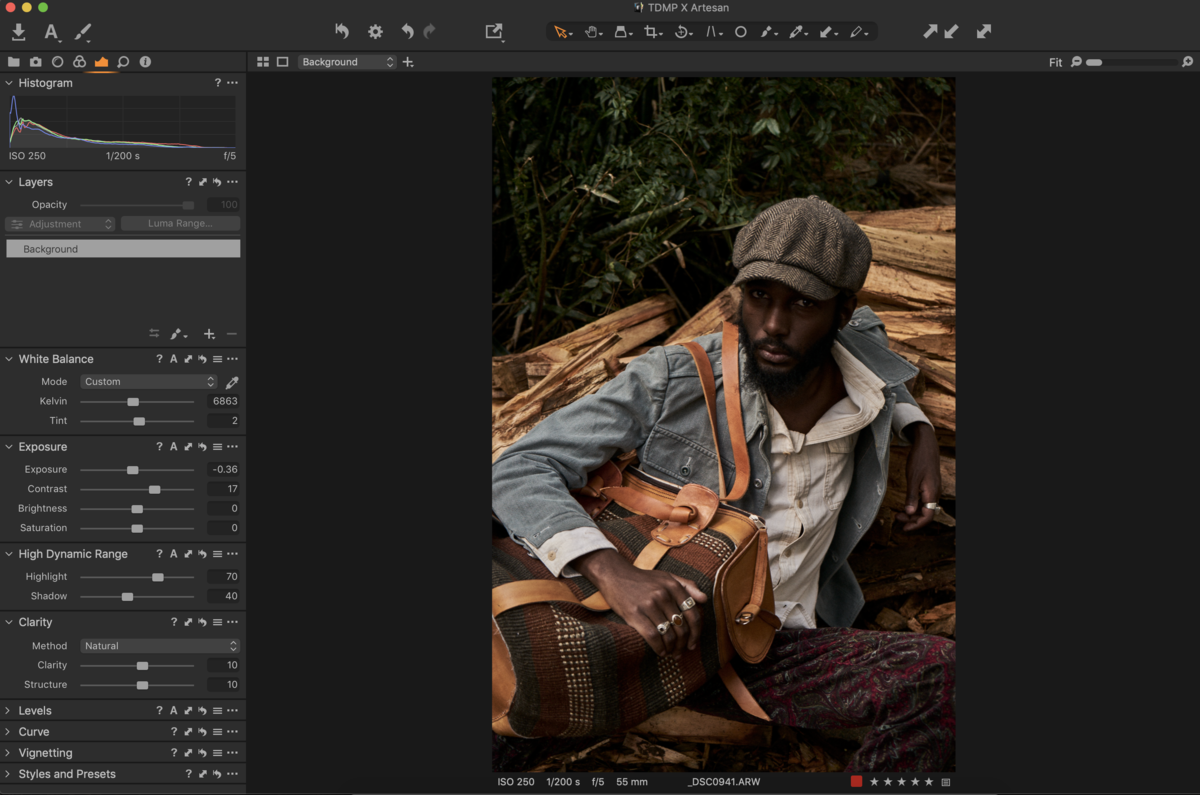
BS: I use Capture One for most of my editing process. Once I’ve shortlisted the images I want to work with, I start with correcting the exposure, color temperature, high dynamic range and clarity. Then I move to the Color Editor where I separate the colours and get the rich dark skin that I want.
The Skin Tone tool is great because I sample the skin of the subject then I play with the HSL. Then I will play with contrast to just get the punch of the whole image.
I have customized my Capture One workspace by organizing the tools I use into different tabs and I get to edit images in different stages – this feature is FREAKIN AWESOME. I have also created my own custom Styles for dark skin tones which has made my work easier. I can set the tone with a Style and develop the image further from there.
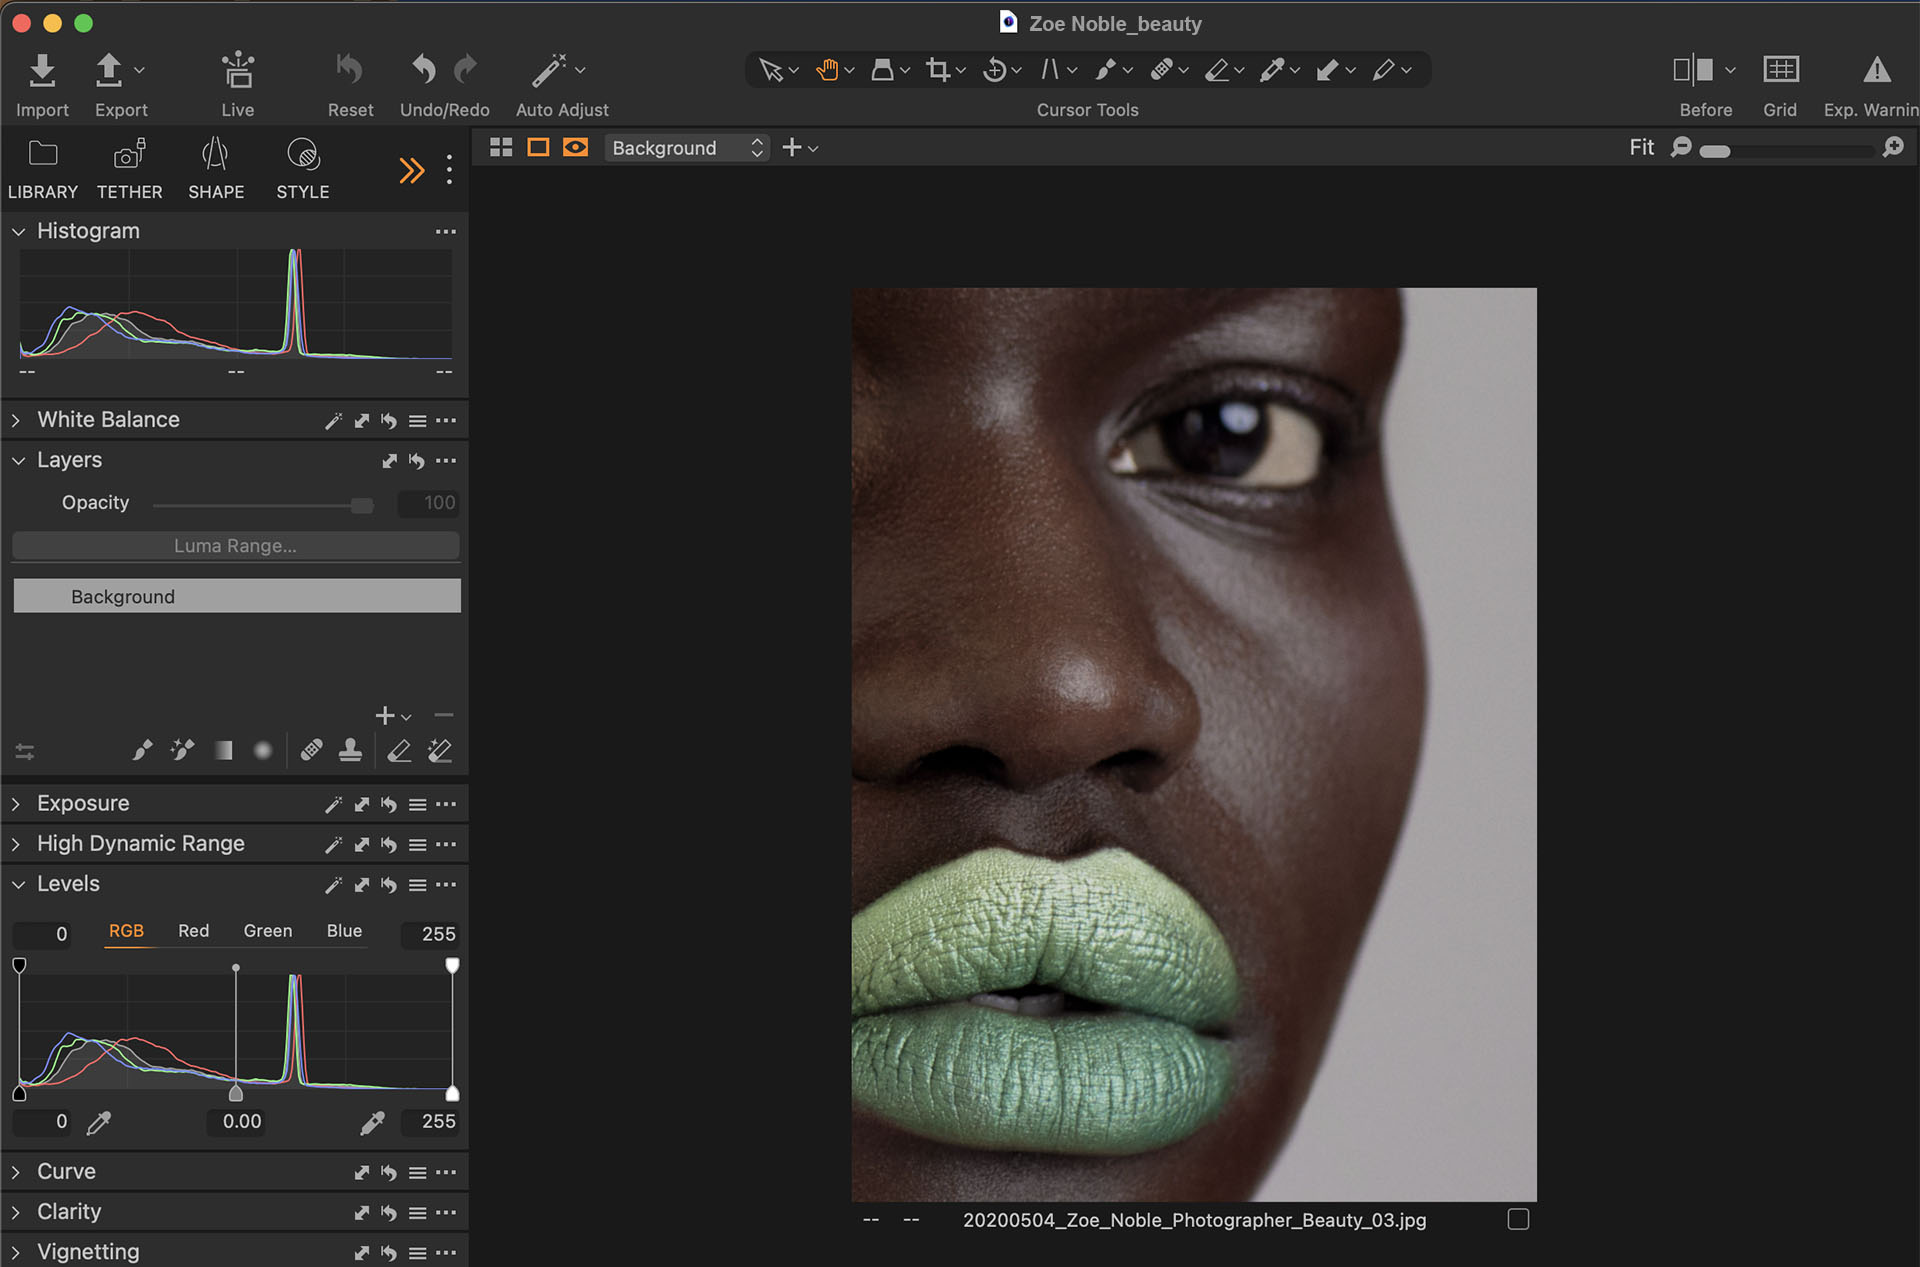
ZN: It will always depend on the type of shoot I’m working on. If it’s a client shoot and I will be doing more intensive skin or hair retouching later in Photoshop, I will ensure my files have good dynamic range and are relatively “clean.” I will color correct the files using the White Balance and the Skin Tone Tool, correct exposure and lift my shadows to add more detail into those darker areas. I’ll also ensure no highlights are blown out.
Then I can do my intensive retouching in Photoshop and add contrast and color grading at the end, so if a client would like changes, these can be easily made.
If I’m working on my own images I usually “bake in” things like color grading or contrast into the RAW file. I try to do as much as I can in Capture One to save time. So I’ll use tools like the Color Balance tool for color grading as this is really quick and simple to use.
What are your favorite Capture One tools for portraits?
BS: I have a few. The Color Editor and Color Balance tools – they make it so much easier to split color and edit my images separately and get the exact grade I want. The Luma Range tool gives an extra punch to my images, especially with dark skin and bright surroundings.
I also love the High Dynamic Range tool to give my images a finer look.
ZN: I LOVE the Skin Tone Tool because it saves me so much time on color correcting and is super easy to use! I also love the Color Balance Tool because it’s very intuitive and you can quickly add a color grade to your images or create multiple “looks” to offer options to your clients.
How do you incorporate Photoshop into your Capture One workflow?
ZN: After I’ve made my adjustments in Capture One, I will use the “Edit with” option and create a 16-bit PSD file using the Adobe RGB color profile and then open in Photoshop to make more intensive changes like hair/skin retouching or compositing.
After I’ve finished my editing in Photoshop, I’ll save the file and then go back into Capture One to add grain as my final editing step. This way I have full control over the final look and I can change the grain size easily, rather than baking it in with Photoshop.
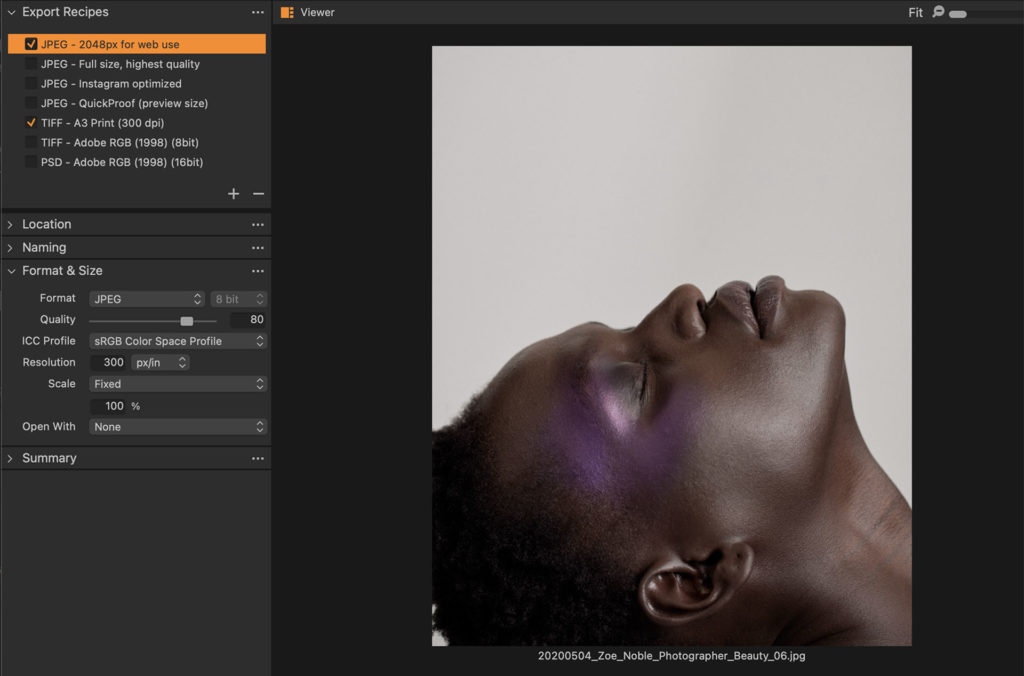
I then use Capture One’s Export Recipes to export my photos in various formats for web and print. I’ll also export a high-res version directly to my Dropbox folder, so I have another back-up copy of all my final photos.
Your number one tip for aspiring photographers in your fields?
BS: You will find your way, so take your time.
ZN: Try and stand out from the crowd and be unique. There are so many photographers out there and lots of them are producing similar work. Clients want to see something new, so try and find out what makes you YOU. What are you passionate about? What do you have to say as a photographer that is different from anyone else? Clients want to work with people who have their own unique vision. This takes time and is not an overnight thing so shoot, shoot and shoot until you discover what makes you special and where you truly shine!
What do you wish you knew at the start of your careers that you know now?
BS: That success doesn’t come overnight and that I should trust my process and I’ll get there. Also, that gear is a tool and that it does not define how good a photographer you are. I used to be obsessed and envious of other people who had better gear than me at the time and now I know better!
ZN: That’s it’s OK to break the “rules” of photography. Because I didn’t assist anyone, I taught myself through books and online tutorials and sometimes you’d hear lots of rules like “never use wide angle lenses for portraits because of distortion,” “Never shoot outside at midday because of hard shadows,” or “shooting macro must be done at a high aperture.”
But as soon as I let go of these and started experimenting and following my gut, I realized that some of the most interesting photos can come from breaking those rules. Shooting at midday is completely possible if you understand how to work with the light or how to position your subject. Hard shadows can be really cool for the right concept! Some of my favorite beauty shots are macro photos which utilize a really wide aperture. When you think of beauty photography, you think of using a beauty dish, and this is the modifier I used a lot at the beginning.
Now I shoot with all types of modifiers, even the sun! Anything is possible!
If you don’t already have Capture One Pro, download a 30 day trial and try it out.
Eager to learn? Access webinars, tutorials and expert help in the Learning Hub – completely free.
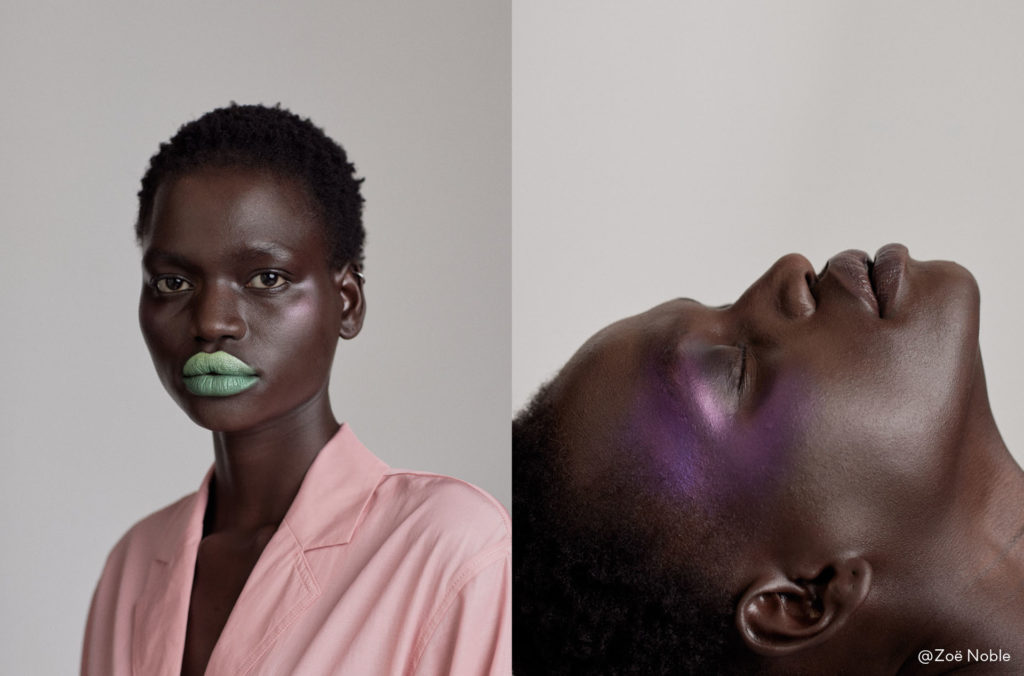
Zoë Noble
Zoë Noble is an English beauty and still life photographer, retoucher and educator, based between London and Berlin. Her commercial and editorial clients include Vogue, Harper’s Bazaar, L’Oréal Paris, Etsy, and Ogily. Passionate about beautiful lighting and natural retouching, her work showcases women as strong, authentic and wonderfully unique. An advocate for female empowerment, Zoë founded We are Childfree, a storytelling platform and community centred on the childfree choice, as featured in the New York Times.
Follow Zoë Noble

Brian Siambi
Brian Siambi is an editorial, commercial and travel photographer working internationally. Born and raised in Nairobi, Siambi’s lifelong passion for the arts led him to a career as a graphic designer before deliving into fashion photography. He started shooting with his phone and grew from there.


