Naming tokens have been a feature of Capture One for years. In 8.1 naming functionality was extended to include more tokens and in 8.2 we have expanded the functionality even further to generate file paths using the tokens. We call this Dynamic Locations.
Dynamic Locations enable you to filter output files automatically into relevant folders, based on the token you have chosen, e.g. color tag or rating. This enables you to organize your images faster and with consistency, reduce user input and increase efficiency.
The “Token”
But what is a token? At its core the idea of tokens has one function: Automation. It extracts some property, stores it and then inserts it in place of the token. For example, renaming an image with the [folder name token] would take the name of the folder the image resides in (parent directory) and use it as part of the name of the image.
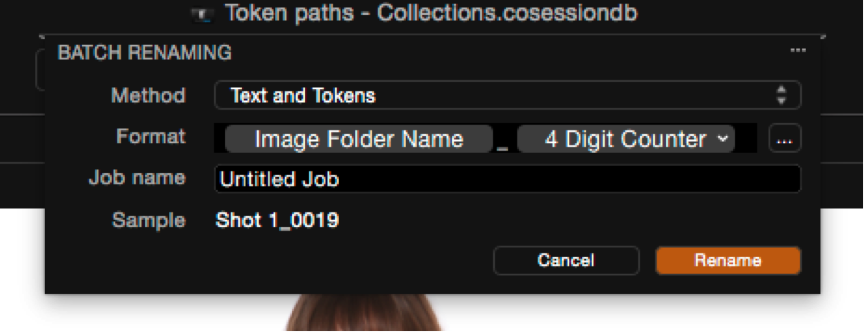 E.g. Batch rename tool using the parent folder as a source for naming.
By using the token instead of typing, much of the mundane and often complex ideas surrounding file management and naming is taken care of. It reduces user error and improves efficiency.
Token paths
“Token path” is a new workflow concept of Capture One 8.2. It has been developed as part of feedback from the Phase One Certified Professional program along with input from the ex-studio techs working in Technical support. It builds on the existing logic of naming tokens for file names, but instead builds file paths (folders) based on the extrapolated data.
For example, color tag in Paths makes a folder called Red for any red-tagged images whereas the color tag token in the name string would process files with the relevant color tag as part of the name – e.g Red_001.jpeg.
Using tokens effectively
The first step when trying out tokens for import or output is deciding the “root folder” on which to build the path. For importation in a typical session this is the “Capture” folder, and for output the “Ouput folder” Any tokens then used in the sub path field will build on this location.
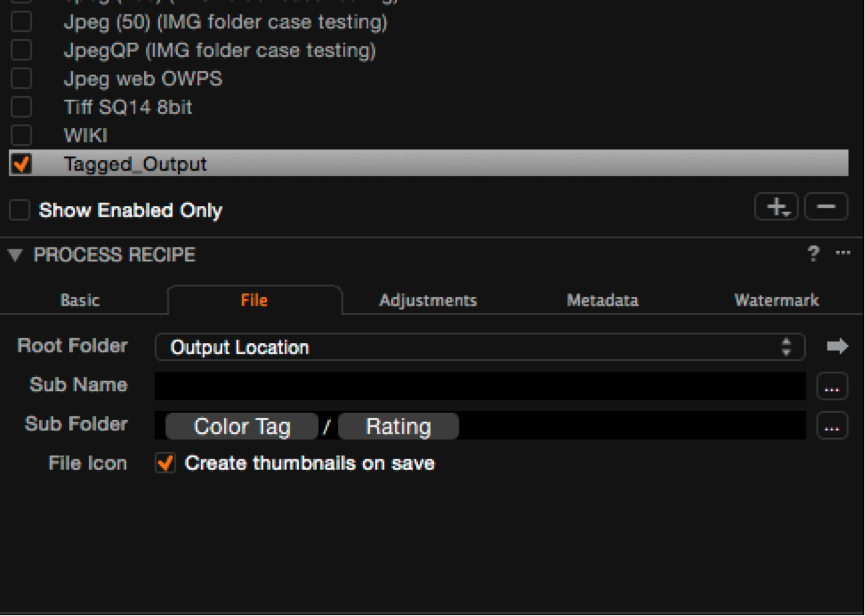 Tip: Try and keep everything relative to the session to make the session compartmentalized and structured. It is important to remember any folder can be actioned as a Capture folder or Output folder. The token paths will then obviously use this as the starting point as the sub path.
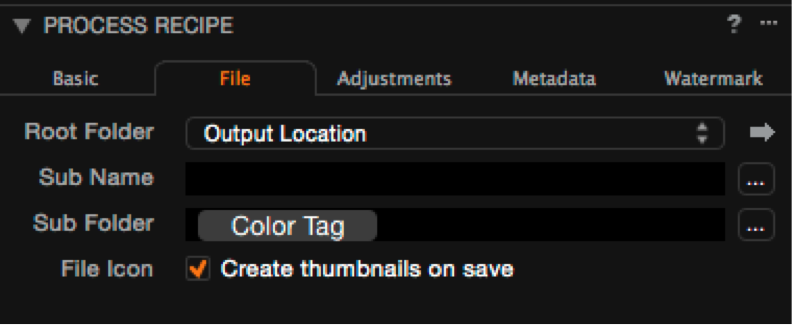 E.g. the result of using the token in sub folder (above) will be Output/Red/image.jpg if you process a variant with a red tag.
Here are some use cases and examples of how tokens might help you take control of your workflow:
Import
One of the most tiresome import tasks is to organize volumes of images by some sort of metric. Date is the most obvious but there are others: file type or serial numbers from multiple cameras for example.
By using the date tokens in the import subfolder field, images are imported and then filed into folders based on the parent image exif date. A large travel story shot over a number of CF cards can then be quickly organized into folders named according to the day it was shot.
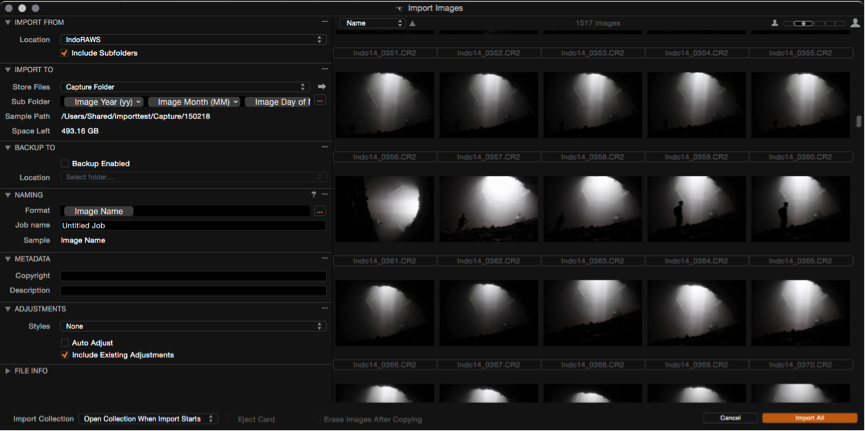 E.g. Set up for importing by date. I’ve set the Capture folder to the destination then used [YY][MM][DD] tokens in the subfolder path. This makes a single date folder inside Capture but I could get creative and make a more nested structure like [YY]/[DD]/[MM] and make Capture/2014/02/14/ for example.
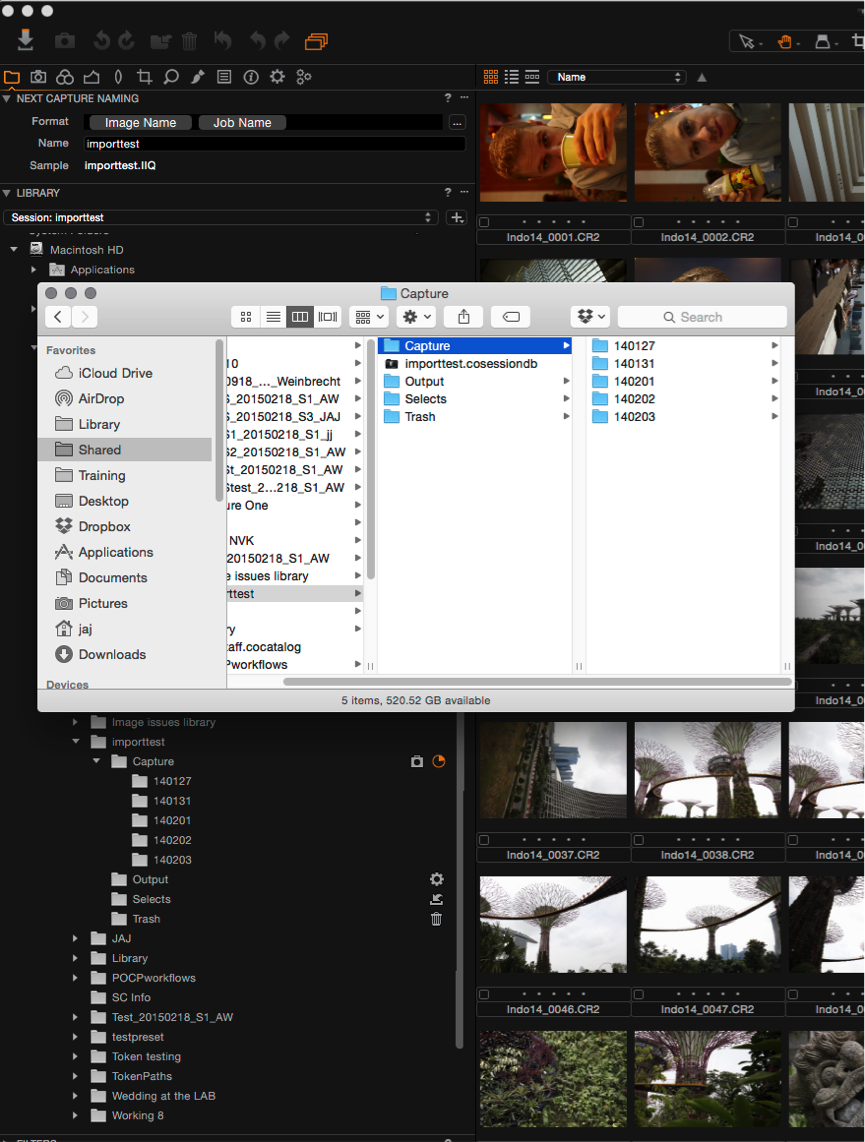 E.g. The importer going to work on over 1500 Raw files shot over two weeks. As new exif dates are discovered, a folder is made and the relevant images piped into the folder.
Tethering
If you are on the case with your shoot prep and make the folders ahead of time you can use the folder name as part of next Capture naming. Then when I change folder, then naming follows. On a high paced set this kind of smart planning pays dividends.
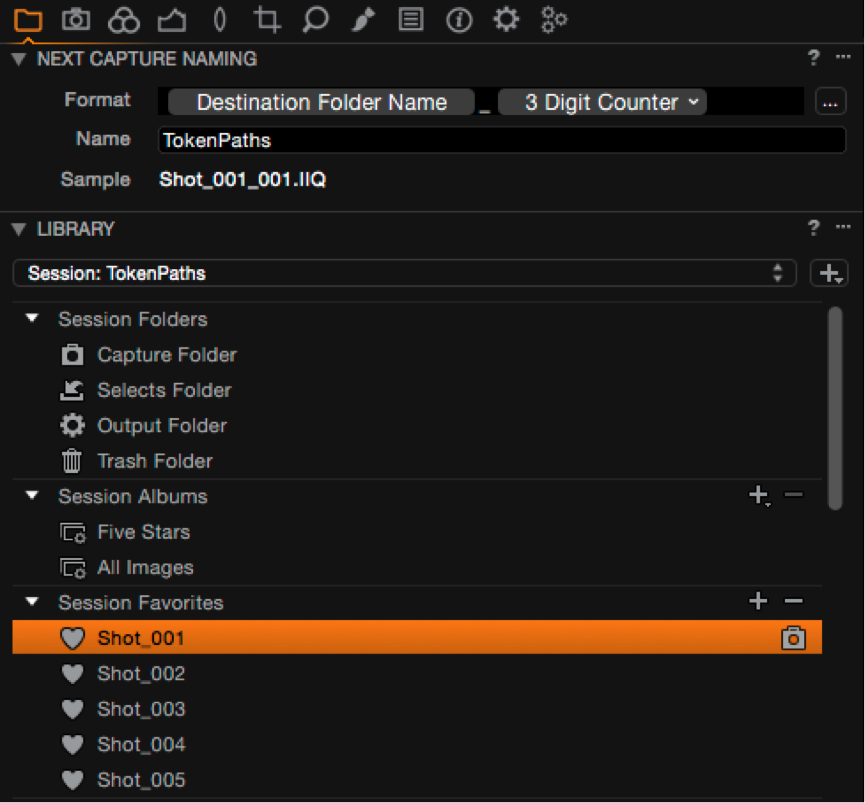 E.g. An example extracting the name of the folder I’m shooting to into the file name.
Batch rename
Tokens can be used for batch renaming. With the new IPTC tokens this opens up huge renaming possibility.
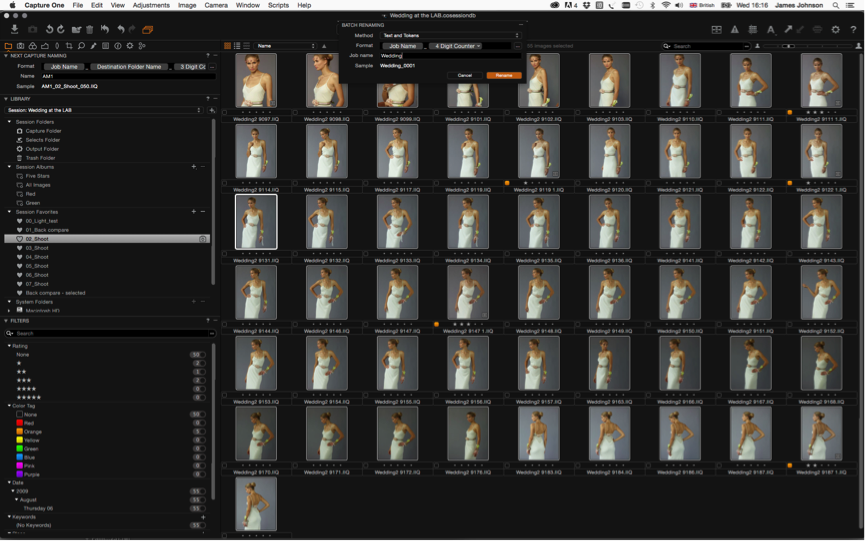 E.g. Batch renaming files using tokens (e.g after deletions) is an easy way to restore numbering and chronology.
Processing/Export
Probably the biggest use-cases for the token paths is Processing. Replicating the input structure in output, division of rating by folder or making collections of images in folders named after some IPTC element (say photos of a location or persons name). A whole shoot, processed to hi res tiff and web-jpeg copies, sub divided into star rated folders? No problem! The file type and star rating token in the sub path will have this done in no time.
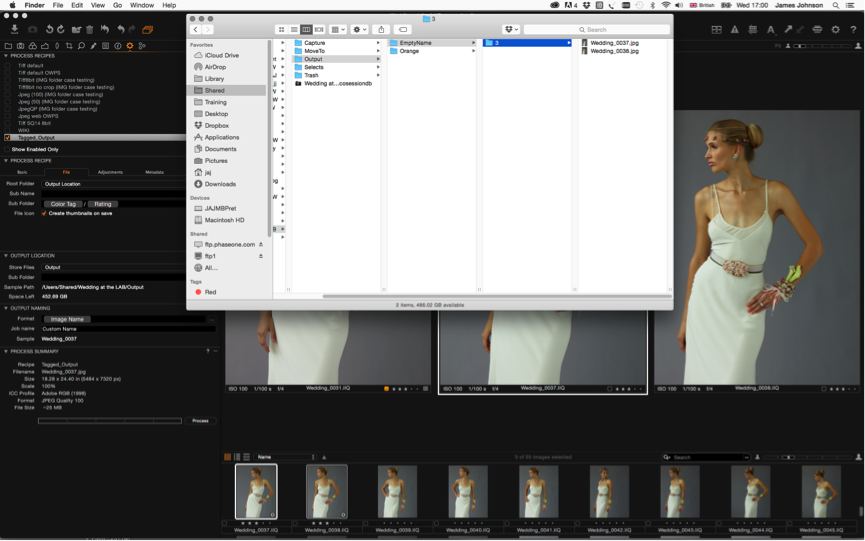 E.g. Sending a mix of tagged and star rated images to output, organizes the images into folders first by tag, then subdivided into rating.
Every recipe has the ability to define a “sub folder” and therefore use tokens. In the output tab there is an additional tool called output location. This sets the “output” folder (same as right clicking a folder in the library>set as output) that can also define a sub folder. Why two places? The two can be mixed! This allows you to define a static element, and then build a recipe-specfic element on top. See the advanced tips below.
Advanced use
Every token has its own variables. For example if I were to use the token: [orientation] in my processing subfolder field, and process a mixed batch of portrait and landscape images I can expect the output folder to contain two folders in output after processing (as the two variables of orientation are “Portrait” and “landscape”). The relevant images are then piped into each folder.
This idea becomes immensely powerful when you look at the kind of tokens available and the workflow data available: date, rating, document names, folder names, file types and metadata.
Like name tokens, path tokens can be combined or mixed with text elements Further nesting beyond 1 folder level can be done by using the applicable OS path delimiters – “ / “for mac and “ \ “for windows: eg. (mac) Output/[parentfolder]/[colortag]
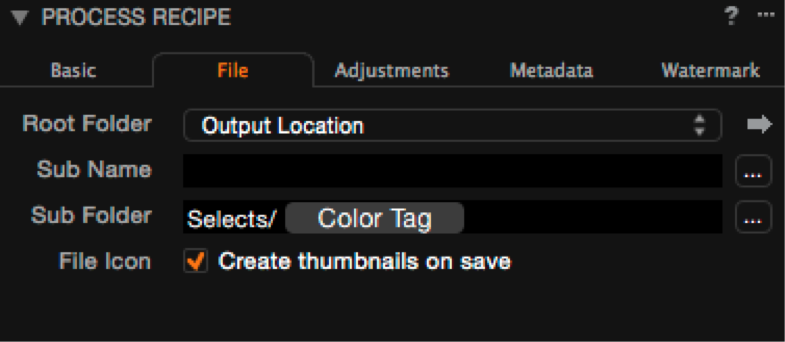 E.g. The result above will be Output/Selects/Red/image.jpg for variants marked with a red tag
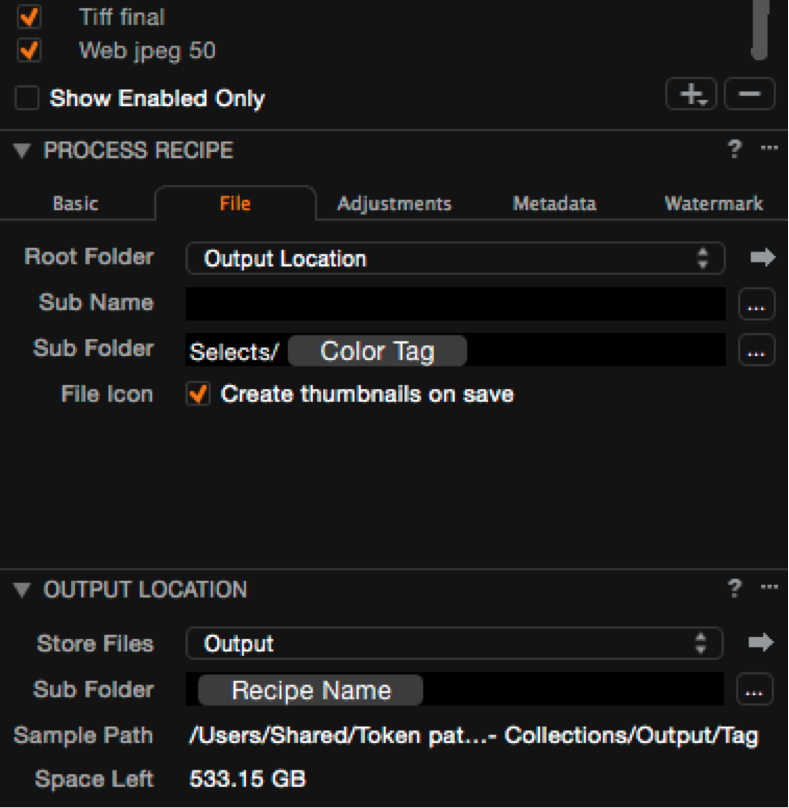
The output location tool also has a subfolder field which can be used in conjunction with recipes. This allows the user to build a static element and then each recipe builds on this.
E.g. In the above example, the output location extracts the Recipe name resulting in Output/Tiff final AND Output/Web jpeg 50 (as two recipes are enabled). The sub folder in process recipe is the same for both recipes – Selects/Colortag. This is then built in each output folder to give:
Output/Tiff final/Selects/red/image.tiff
Output/Web jpeg 50/Selects/red/image.jpeg
Final words
The matrix of what is possible is near infinite and can get pretty complex. Getting the best out of it means understanding the variables for each token and testing it in your workflow. Most of the workflow examples here are session based but the ideas are just as valid for catalogs. There’s no reason why it can’t be adapted to your preferred workflow.
Want to know more about the Dynamic Locations? Check out this on-demand webinar.
Best regards,
James
James Johnson
James is Software Product Manager at Phase One.

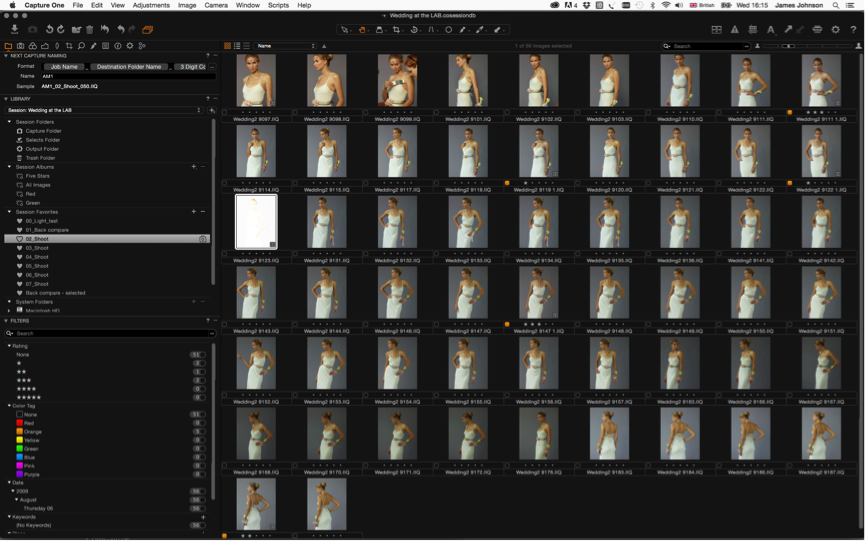

Processing/exporting seem really useful! I love that C1P improves just so fast. Would it be possible to have a video about the new Tokens in 8.2?
The webinar we did on this will be available on Youtube shortly.
http://youtu.be/oEk3Oz5lTto
ok grazie saluto e corti
Well this all makes sense except for color “tags.” What if you do a shoot, download it and have to leave for a couple of weeks befor you work on it. You come back and you can’t remember why you color tagged some files red and some files green! We all know that a red dot is red so what is the point of saying Red beside it. Why can’t we type something manful to us like you can in Apples defunct Aperture or Media Pro? Until we can do this we have to stick a piece of paper to our monitor with a list of the colours that we use and what those colours mean to us.
If you want to make a feature request for anything (related or unrelated to the blog post) then please make a support case at support.phaseone.com so it is properly processed.
If you are looking for a solution in order to use the token ideas above, then you could do this by using a Smart album set to filter by tag, named with your own label. Then you can use the [collection name] token to extract the name.
Bonjour,
J’utilise Capture One Pro au felling, toutes les informations qui sont données étant en anglais je n’en ai pas accès.
Ne pourrait-il pas y avoir une traduction en traduire pour que les clients francophones utilisent ce logiciel? Je ne dois quand même pas être le seul dans cette situation?
Dear Gerard,
Thanks for your input. We will look into implementing the blog in other languages.
All the best,
Gitte Maj Nielsen
Simple task: How to batch output?
When I select / mark some images and click process, only one image is being processed. Strange.
Trying do drag and drop the selected images to the batch tab doesn’t work either.
The user manual cannot help.
Very frustrating to output hundreds of images one by one.
After some months of trial and error and youtube tutorials I still cannot really work with it. May be its only for full-time pros.
Please help me with this basic question.
-Mino
Hi,
The edit primary variant toggle is probably disabled. Look on the top tool bar for an icon that looks like three small squares stacked together. It should be orange to do batches (it is probably grey).
See the help manual here about “Primary variant or selected variant”:
http://help.phaseone.com/en/CO8/Optimizing-Your-Workflow/Workflow-tips.aspx
Is there any way to use tokens in the metadata fields?
Not in the field no. The tokens only extract what is in the field for use in folder creation or naming for the processed variant.
This would be a great feature to add. I often need to embed the original capture name in the metadata of the file because clients will change the name once an image has been delivered, but need to be able to reference back to the original capture name as well. Thanks for your response!
Thanks for your input again.
We will take it into consideration for future releases.
Best regards,
James
What is the difference between the “Destination Folder Name” and “Image Folder Name” tokens?
Destination folder name gets the name of the folder where the image is going and is only available as a naming token for tethering, and as an Export originals folder location.
Image folder name gets the name of the folder where the image file already exists – or source folder – and is mostly used for processing and importing folder creation and naming.
To James, Niels and the rest of the team behind the Capture One Raw conversion SW.
The issue at hand aside, I simply MUST compliment you all for in recent 15th issue of reputable nordic DigitalFoto magazine to have beaten a Giant to its own game. – ‘Cause tested, the score of your SW exceeded that of Adobe Inc. ‘n programs like Lightroom and PS CC, with 0,3 points! – Your SW being rated 9,0 out of 10 to the FORMER(!) king’s confounded mere 8,7 :P…
So I raise the danish flag in hail to your much smaller company and its cutting edge achievement in a field where your ressources (with clearly exception to ingenouity and know-how 😉 were so comparatively less. A 1000 congrats from a subscriper of C1 since presentation at Foto Mass in Forum 2010.
Thank you Jan!
Super strange as this just started happening a few days ago…
Any idea why CaptureOne adds a “1” at the end of each file name after I bath rename a selection of images? They are not dupes or duplicately named prior to renaming.
Instead of “filename_065.NEF” it renames to”filename_065 1.NEF” across the board, other times just a selection gets named this way.
Any help would be so appreciated..!
It usually happen to me when the name is doubled..? (there’s already a files with this name existing in the same folder)
Dear C1 team,
When performing a Tethered capture session..
Is there a way to have a second windows, where it would be possible to handles files & batch rename previous folders. Without having to pause the incoming feed?
Looking forward to hearing from you,
Best,
Julien B.
Hi Julien,
You can shoot into one folder and easily work in another folder. In the Camera menu, browse to Auto Select New Capture and set to NEVER.
But correct, you will have to pause the incoming feed.
Other solution is to use a seperate workstation networked to the Capture station.
David