NOTE: This article discusses an older version of Capture One Pro. To learn more about our latest version, click here.
Capture One’s new Heal Brush “is every retoucher’s dream” says commercial
retoucher Pratik Naik. Get his tour of the new tool plus expert tips on how to use it.
The new heal brush in the latest Capture One update has photographers and retouchers rejoicing around the world. In this blog post, I’ll take you through the new tool – and be sure to start by watching the video to get a visual for how you apply it to an image.
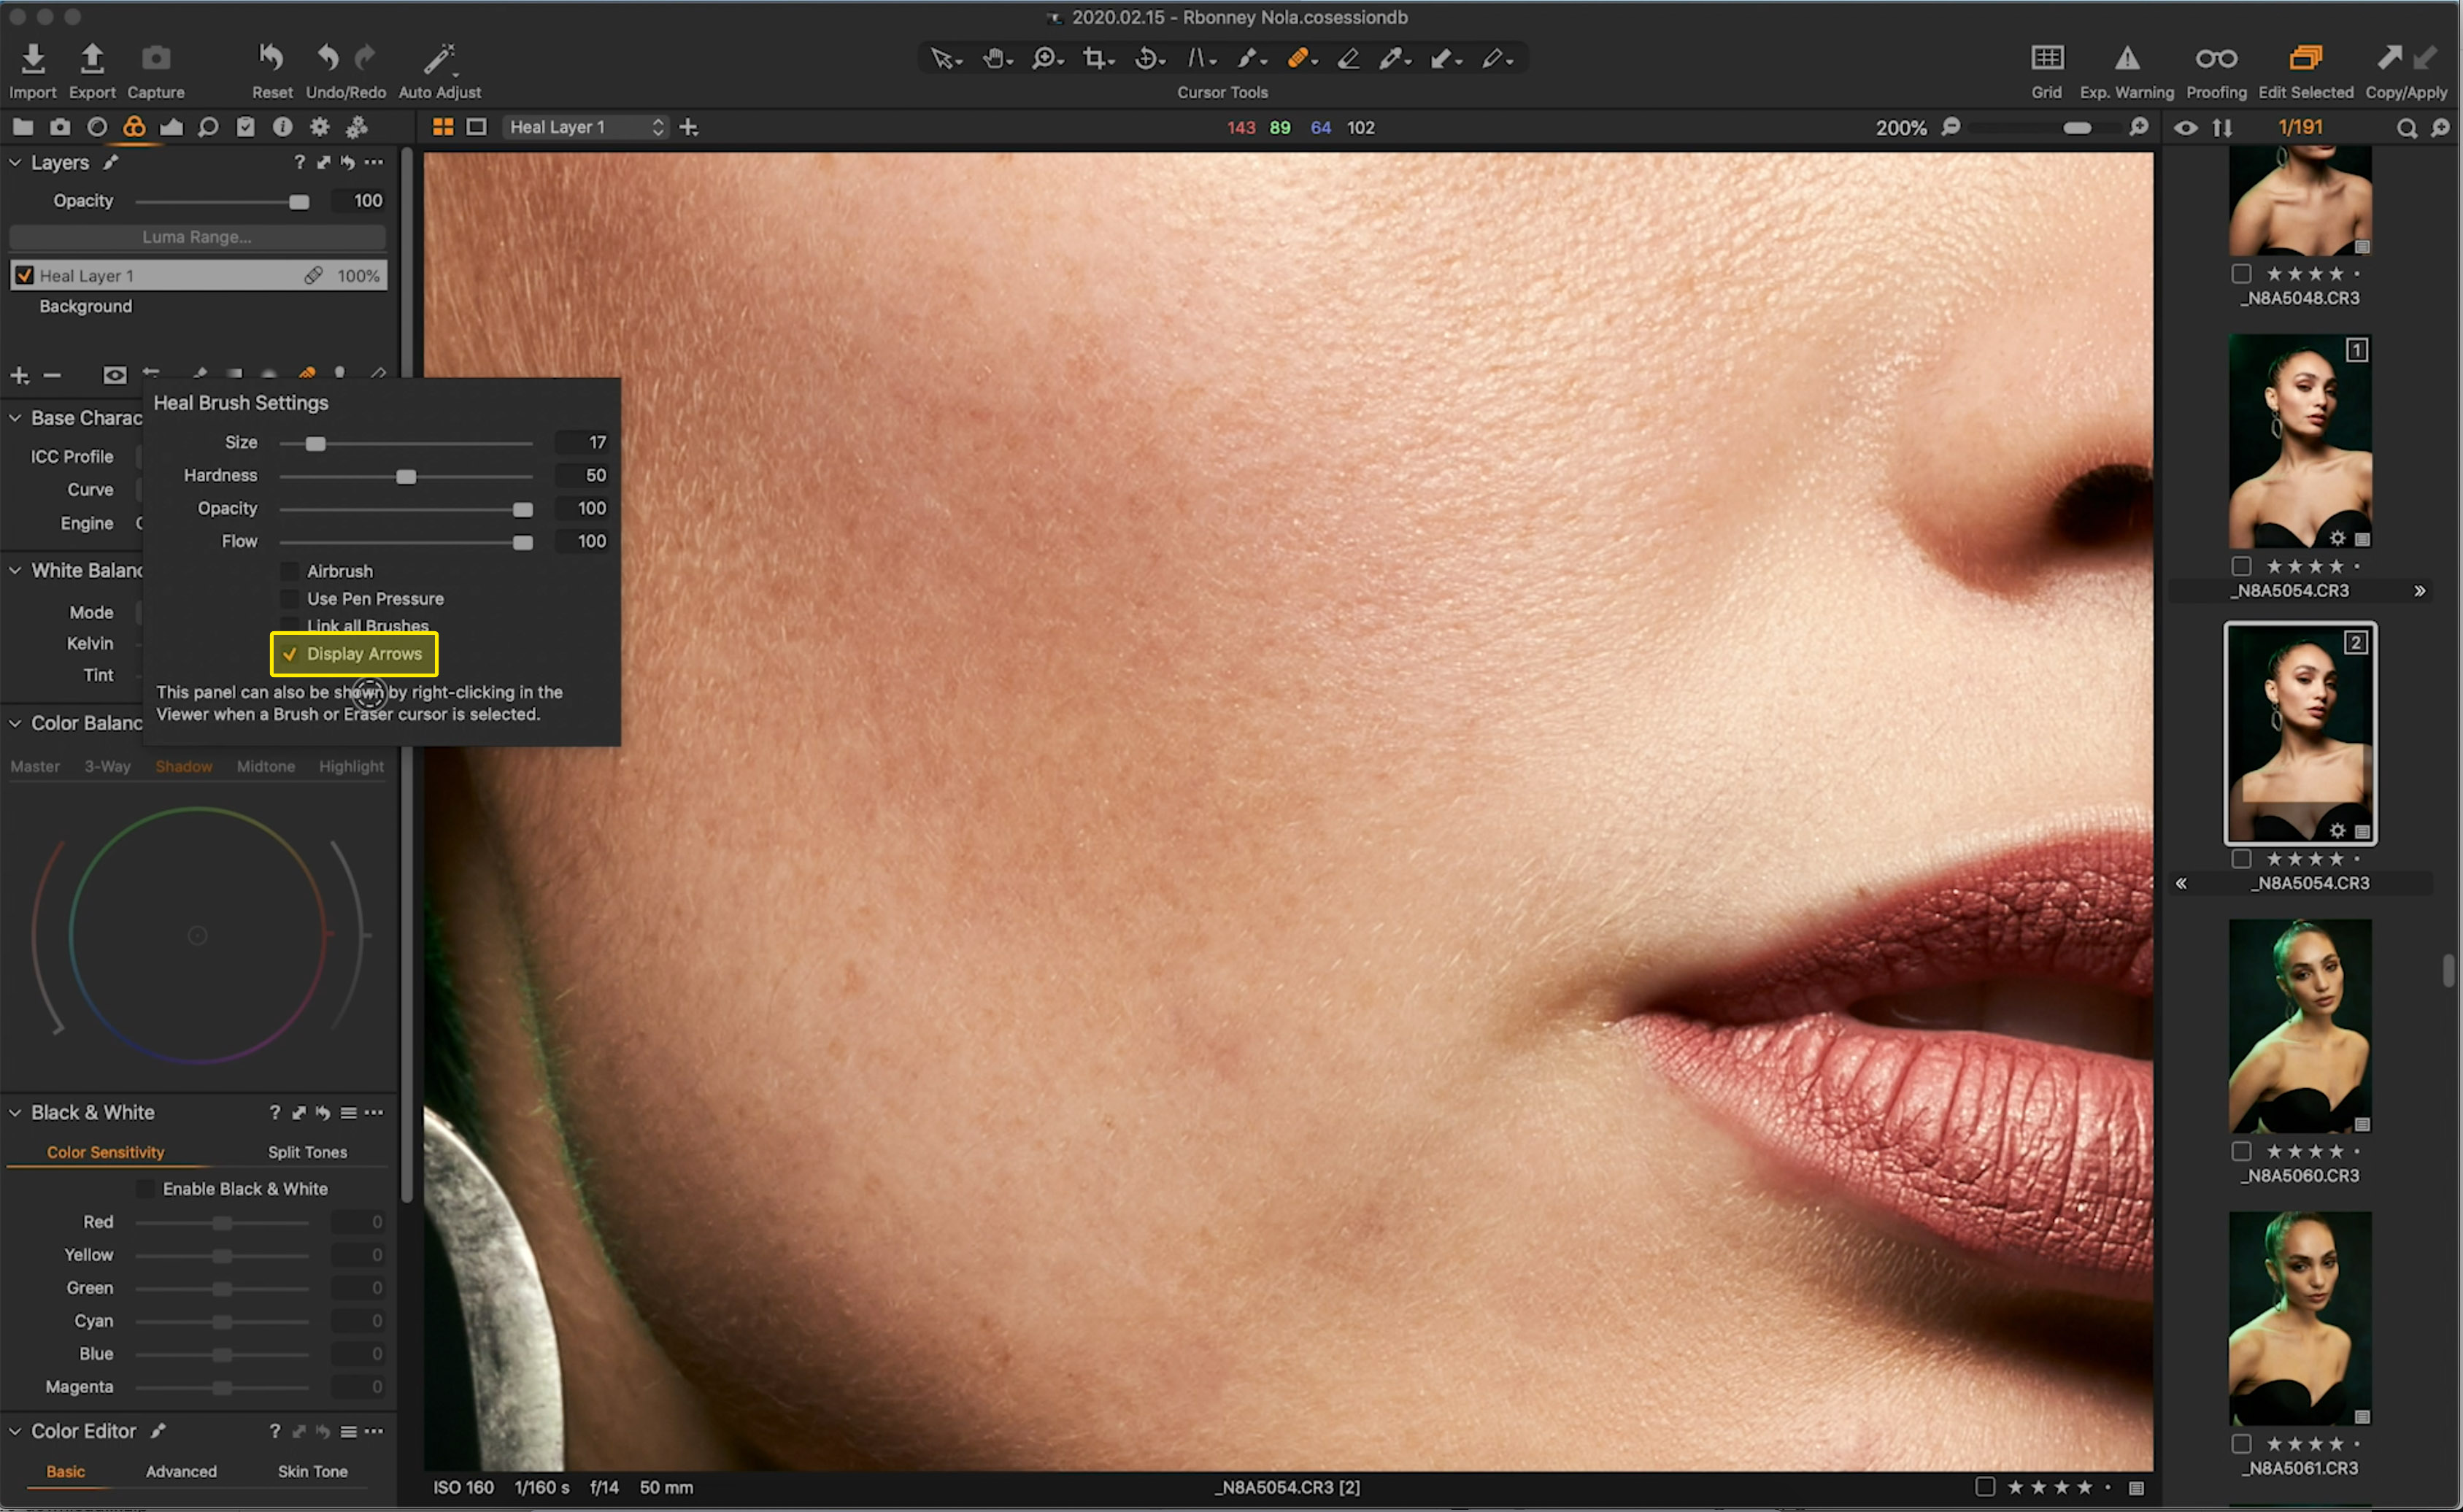
The Heal Brush icon is found in the Layers panel – once activated, it will automatically add a healing layer. Now, you don’t need to add additional healing layers because you can make as many adjustments as you like using the Heal Brush within that one layer. There’s no upper limit for the number of healing adjustments you can make, either.
![]()
Be default, all you need to do is highlight the element or object in your image that you’d like to remove and Capture One will cover it up by calculating the best possible source point for cover. With the improved coding, the results are better than ever and you get realistic precision in even the most complex situations.
Sometimes, you will want to manually select the source point for your retouching. In these instances, you can either move your source point after the healing is done or use it in the traditional sense by sampling a source point first by holding “Alt” or “Option” and then picking one before you remove anything. This gives you a solid handle of any situation, even with complex objects like hair or the edges of lips.
The response time of the tool feels almost immediate, so your workflow feels as fast and seamless as possible. Within the Brush settings menu in the Layer palette, you are also able to turn off the arrows that connect the source point to the result, should you start building them up too quickly. This will give you a clean image to work with without any visual cues.
You can also erase or delete any particular healing action at any time.
Saving my favorite part for last, you can now reduce the brush size and still know exactly how small it is. The cursor will still retain a circular shape to ensure you can work on the smallest details! It will never change to a + icon below a certain brush size, giving you the ultimate control with your layers.
Get a free trial or update your Capture One to try it now – I hope you find it as exciting as I do.

Pratik Naik
Pratik is a commercial and editorial high-end retoucher with a passion for pixels. His obsession with retouching is a passion and profession. Being able to harness the potential of RAW files and see it through to fruition gives him a lot of joy. This joy comes from the ability to work with photographers from all walks of life, to come up with something that is a collaborative effort. They entrust him with their RAW files, and he massages them into what they envision.


