
NOTE: This article discusses an outdated version of Capture One. To learn more about our latest version, click here.
Capture One is without a doubt the most powerful raw converter software I’ve used in my career. I tried many different apps before making the switch, but I was never pleased with the results I got from the other solutions. When I shifted all of my editing over to Capture One, I learned slowly, one step at a time, and discovered the power of all the advanced features it has to offer. In this article, I’ll show you a few of the Pro features and tools that I couldn’t live without anymore and what you may be missing out on by relying on the Express version.
The Express version for Fujifilm and Sony is a fantastic way to get started with Capture One without having to invest too much time or money. It has all the core features you need to edit your pictures quickly and get more out of your images than when shooting JPEG. When I left Lightroom and Aperture for Capture One, I almost exclusively used the basic features, as I didn’t know how to use the rest properly. Back then, there wasn’t as much Capture One learning content out there as there is today. For about a full year, I didn’t use half as many of the features that I use now. At the time, I would have been more than satisfied with the Express version. However, as you read on about the features below, you’ll see that today is a whole different story!
Ready to upgrade to Capture One Pro? Sign up for a 30-day trial.
Color Balance Tool

Let’s start with the Color Balance tool. If I were left with the choice of only retouching skin or editing color on a picture, I’d pick color in a heartbeat. Colors are crucial to set the mood, help the viewer read the image, and balance the composition. The color balance tool is nothing new to those who edit video as well, but surprisingly, no other current photo editing app offers a similar tool, aside from Capture One Pro.
The Color balance tool lets you place colors in the shadows, midtones, or highlights independently, without having to create a luminosity mask for each. It’s very visual to use, relying upon chroma wheels to adjust any setting, and thus you don’t need much color theory knowledge to get great results.

I use this tool a lot when editing weddings to correct color cast issues – it’s especially useful for those reception shots when the lighting condition is less than ideal.

However, it’s not limited to color correction, and it can be used to grade a shot and set the mood. I love using it on layers for beauty and commercial work, it gives me so much control!
Layers

Speaking of layers, let’s go more in depth and talk about them. It’s probably the one single feature I couldn’t live without in Capture One Pro! It works similarly to the adjustments layers found in Photoshop except that one layer can combine multiple adjustments.
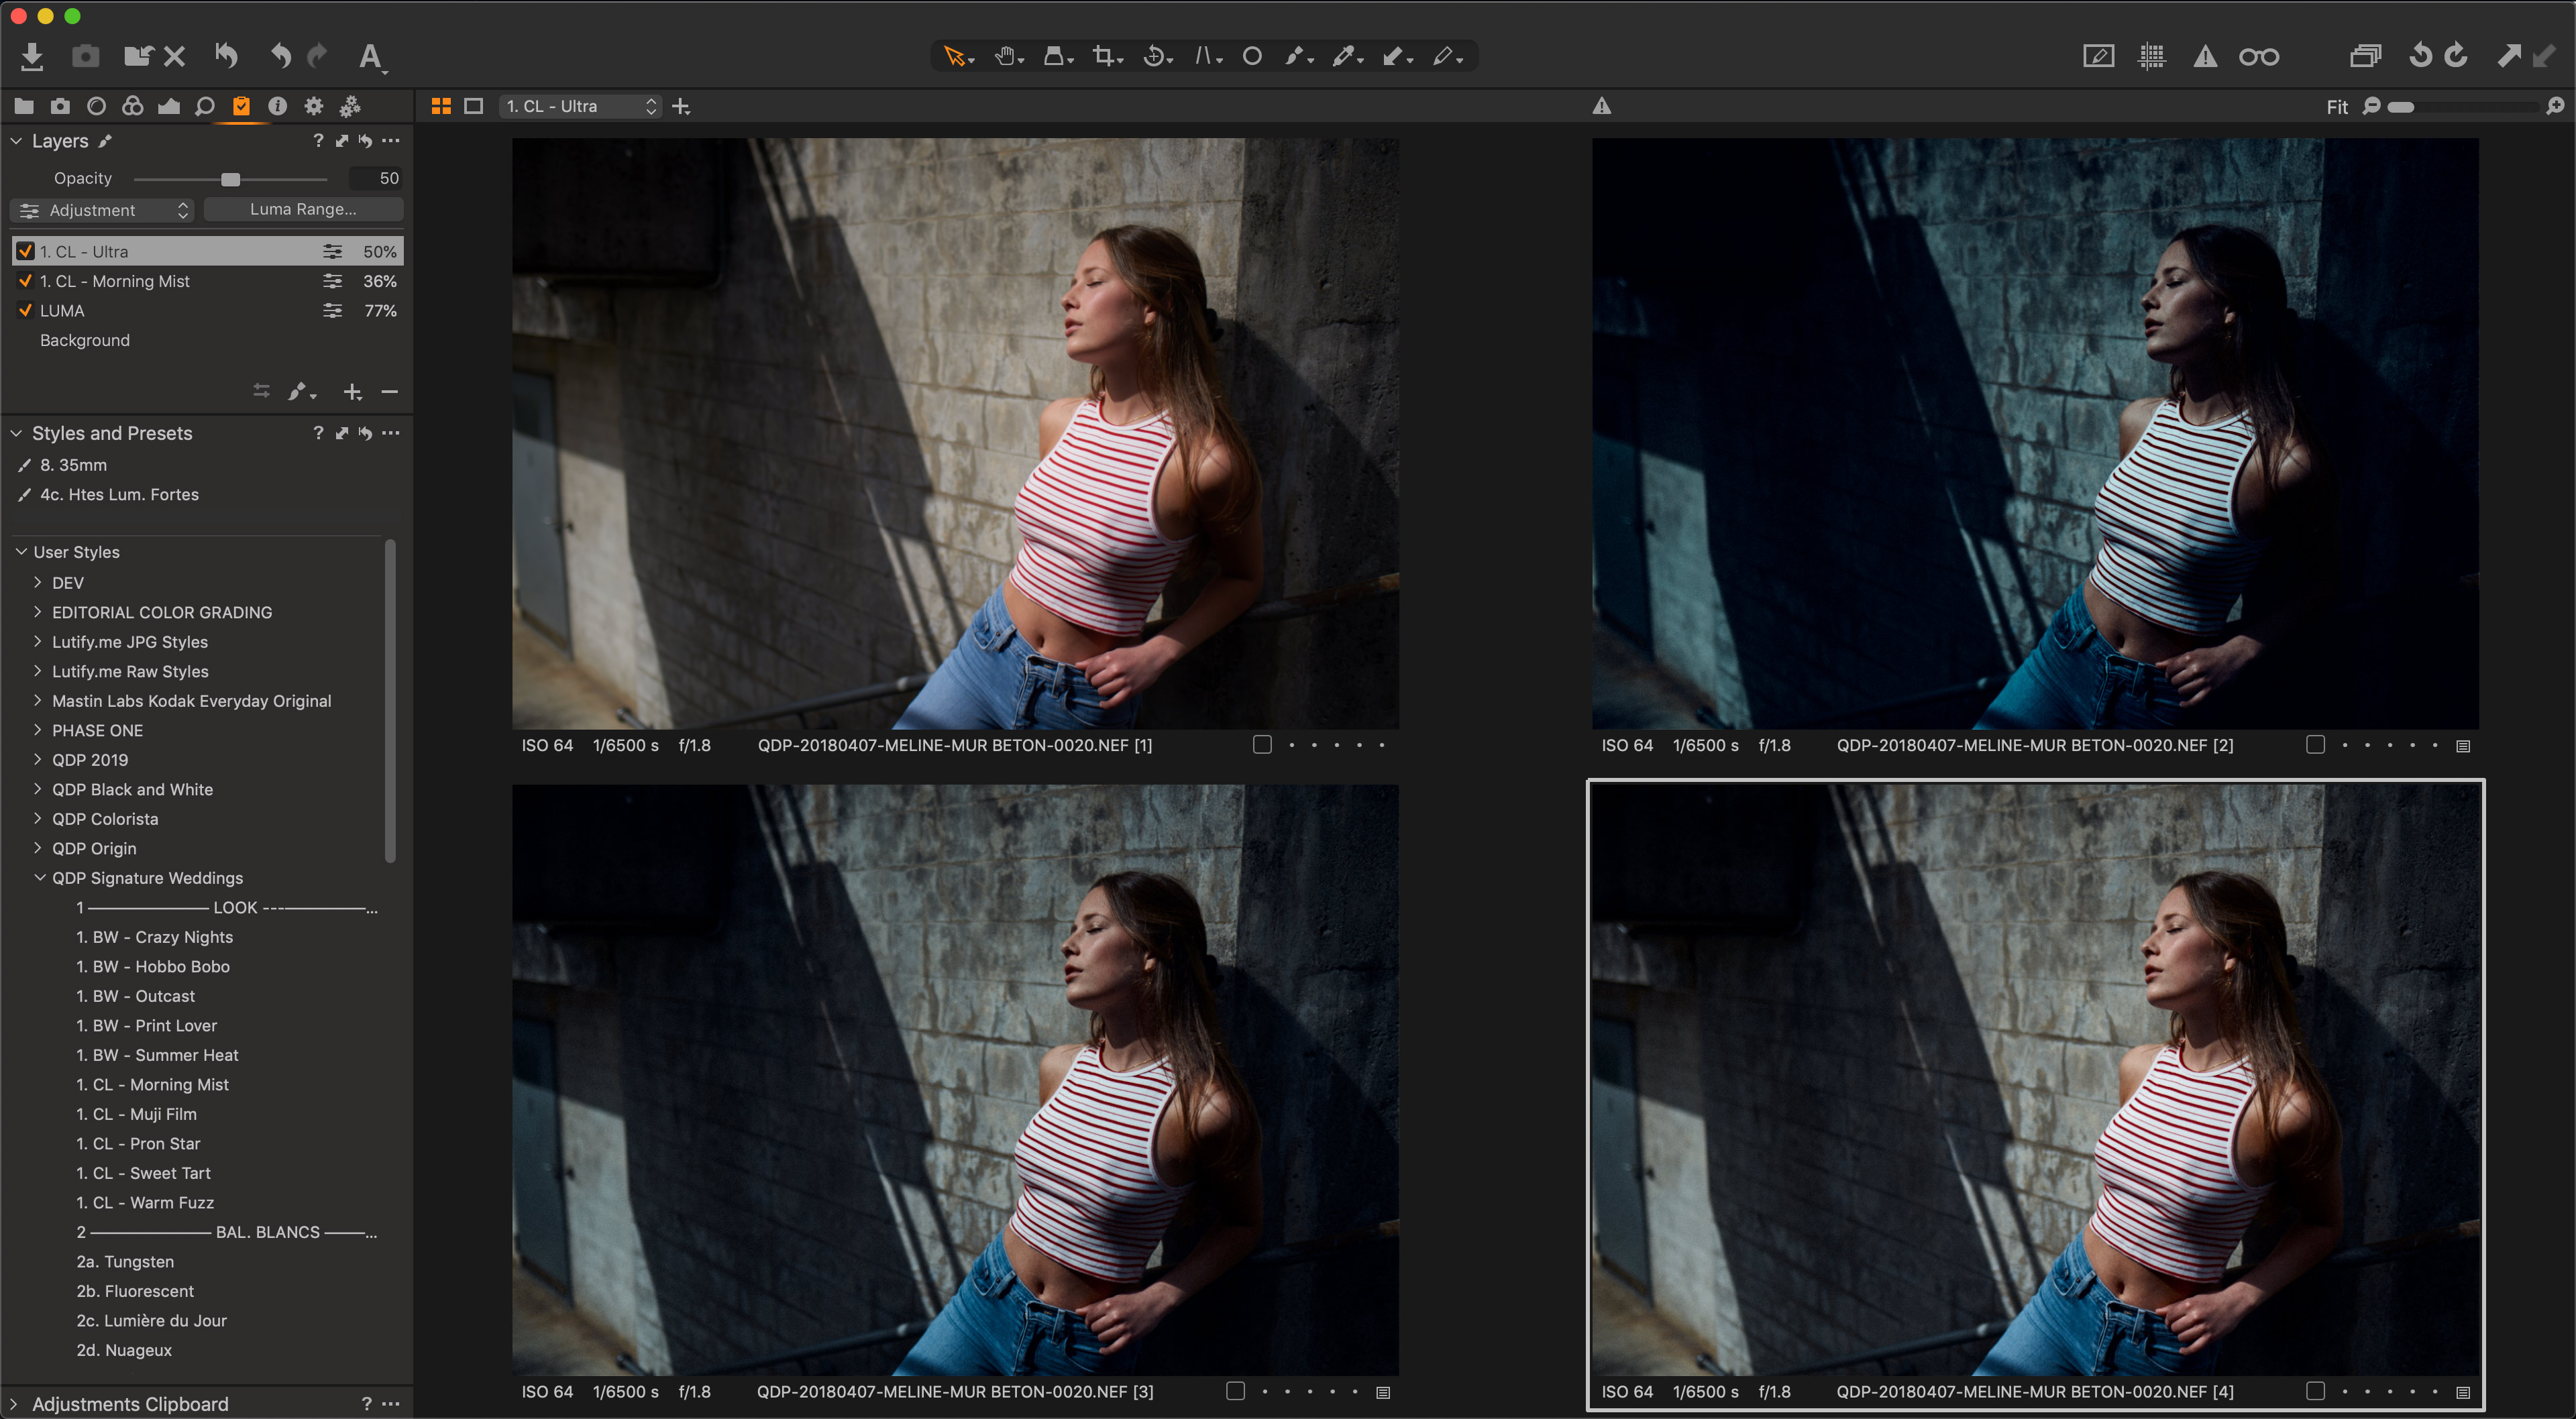
I generally use multiple layers to edit my beauty and portrait work. I like to keep luminosity work, color correction, and color grading separated, so I get as much control as possible. I can easily adjust the opacity of each layer individually and thus alter the look of an image quickly.
Moreover, since Capture One Pro 12, I can even create luminosity masks to go further into my editing and diminish my Photoshop work even more! If you don’t do much texture work or don’t need very advanced masking tools, with the layer features found in Capture One, you can skip the Photoshop step altogether.
Advanced color editor

However, that’s not to say Capture One doesn’t have advanced masking tools. The color editor can be used to create precise color based masks easily or refined color adjustments as well if the Color Balance isn’t enough for the task at hands.
If you use Capture One Express, you probably know all about the basic color editor tab – at least, I hope you do and use it religiously. With the advanced tab, a new world opens up! You can now create custom color channels, and if the adjustment of a single channel is not enough, you can duplicate it to make the change even pronounced! Changing the hue of an element has never been easier!


However, if you don’t want to apply the setting to the whole picture, you can also create a mask based on your color selection. The advanced and skin tone tabs let you create a mask based on your selection and then erase any parts you don’t want to touch.


Also, last but not least, the color editor offers a skin tone tab. If you are a portrait, beauty, fashion, or wedding photographer, you’ll love this feature and wonder why you didn’t know about it before. Every day, I see users on facebook or instagram complaining about skin tones and how difficult they are to uniformize. With the skin tone tool, it’s easy! Pick the skin tones, adjust the hue, saturation, and brightness sliders for uniformity and you’re done! If the adjustment is not precise enough, rely on a mask to apply it locally.
Tethered Capture
Tethering is actually what lead me to find Capture One in the first place. I started shooting in studio and thought it’d be nice to see my image on the computer during the shoot. I started shooting tethered with Lightroom, but it would just keep crashing on me. Then, I noticed quite a few commercial photographers relying on Capture One for their tethered workflow. So I tried it, and quickly realized how powerful and reliable it was! It was and remains in a completely different league to Lightroom.
In a typical studio session, I’ll set my lights, take a test image, edit it, and then shoot the images the client needs. What’s excellent with Capture One, is that 80% of my editing is done once the shoot is over because the settings of the edited shot will carry onto the next ones. I can also pick the images I want to retouch as I shoot them, so I don’t need to spend time culling afterward, but instead, start retouching right away or simply export and send the files to a retoucher.
Furthermore, if you master the session workflow, shooting tethered becomes even more powerful. Sessions are designed to make the studio photographer workflow as fast and efficiently as possible. I like to create different capture folders, so I can have images from one look going into one folder, a second look into another one and keep all my prelight test shots separated.
Capture One’s ability to keep my images neat, organized and edited as I go feels like having an automated digitech on my side. If you are serious about shooting in studio or want to save time, sessions and tethered capture will make a significant difference to your workflow – and I’d even venture to say that it will make a huge difference to your image quality too, because it will free your mind and let you focus on what’s in front of you.
Workspaces
One last feature I’d like to talk about before I let you get back to your editing in Capture One is the workspaces. One of the reasons I could never get used to Lightroom was the fact that the interface wasn’t customizable. In Capture One Pro you can move around the tools, create different tabs or keep everything in a single tab, alter the keyboard shortcuts, and save all of this for future jobs.
I personally edit weddings, beauty, and still life work. Because my workflow is different for each genre, I change my workspace accordingly. For weddings, my editing is all about speed. I want to get through the images as quickly as possible without having to move my cursor around too much. It’s also crucial for me that the speed doesn’t come at the expense of image quality.


When editing beauty or still life work, the process is much more about refining the image and getting the most out of it before retouching it in Photoshop.
As each photographer and each genre is different, it’s essential that the interface can easily and quickly be modified. Workspaces are fantastic for that reason. A well-designed workspace will make the software work for you and not the other way around.
In this blog post, I’ve listed some of the features that, for me, make Capture One Pro the superior choice when it comes to photo editing. It has clear advantages over Capture One Express for professional photographers or enthusiasts looking to take their editing and images to the next level.
If you are still unsure whether it’s worth it for you, take advantage of the free trial and experiment with every feature I’ve mentioned above. During the 30-day trial period, you’ll have plenty of time to play and see how Capture One Pro can help improve your workflow.
Quentin Décaillet
Quentin Décaillet is a product and beauty photographer based in Switzerland. His endless curiosity and hunger for learning new things have led Quentin to create a unique paradoxical visual style. Bold, contrasty, and vivid, his imagery is a combination of his deep passion for art and technology. When Quentin is not working on a project, you’ll most likely find him trying new techniques to push his art further.


