NOTE: This article discusses an outdated version of Capture One. To learn more about our latest version, click here.
Whether you use Styles and Presets as a large part of your editing process, or simply browse through them occasionally for inspiration, they can be hugely beneficial to any workflow. This blog post will describe some best practices to make your Styles more useful and broadly applicable for optimal results.
If you don’t already have Capture One, you can download a free 30-day trial.
Before we move on to the technical tips and tricks, let me just quote a previous blog post about Working with Styles:
Technically speaking, a Style in Capture One is simply a set of pre-made adjustments that can be applied to one or more images with a single mouse click. A Style can include as many tools as you like, thus enabling photographers to create an extensive bank of ready-to-use adjustments for any workflow.
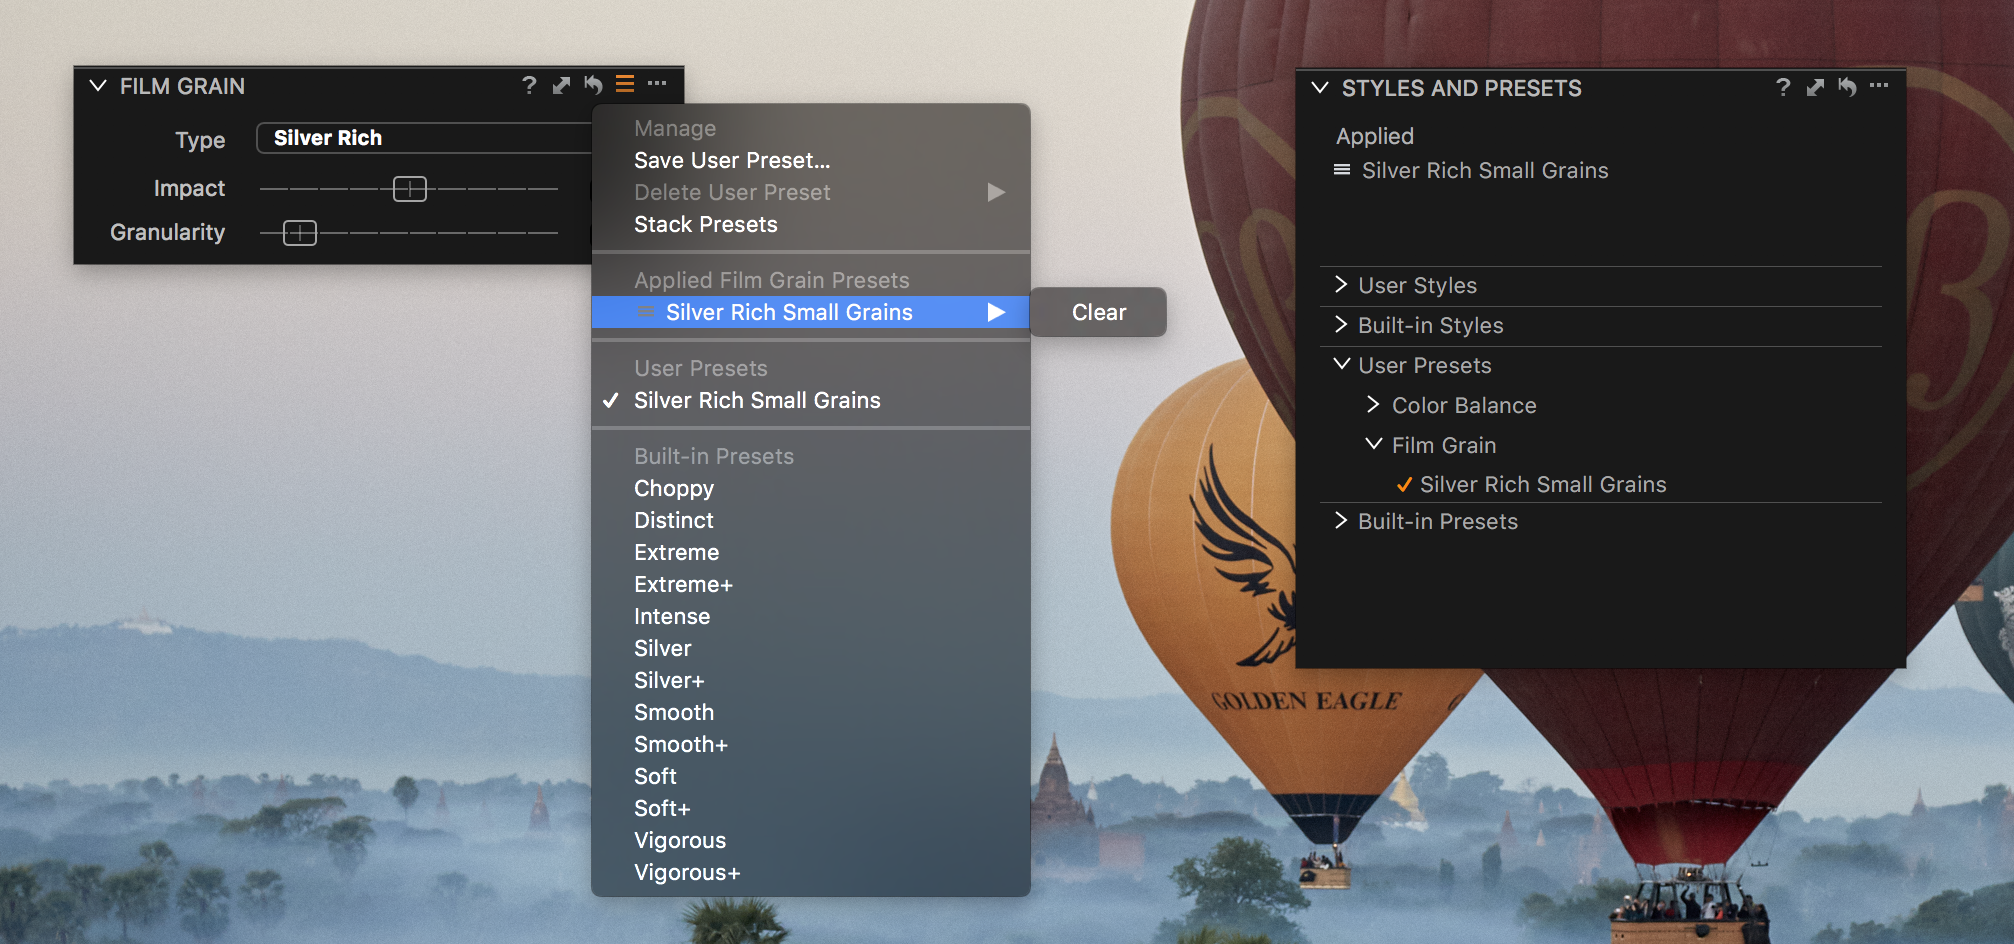
It is important to differentiate Styles from Presets, which also exist in Capture One. A Preset is also a pre-made adjustment, but only for a single tool. This enables Presets to be instantly available from the tool included. If you for example make a Film Grain Preset, it will be available from the Film Grain Tool as well as the Styles and Presets Tool. To summarize:
- Styles: Pre-made adjustments including one or multiple tools, only available from the Styles and Presets Tool
- Presets: Pre-made adjustments for a single tool, available both from within the Styles and Presets Tool as well as the tool included
The Preset ‘Silver Rich Small Grains’ accessed from both Film Grain tool and Styles and Presets tool
What to think about when creating a Style
Since photography operates within many different genres and styles, and the conditions of shooting might even vary from shot to shot, you will want your Styles to be as broadly applicable as possible. As a rule of thumb, I always assume each shot I apply a Style to is correctly exposed and has a neutral white balance. This makes it easier to pull the adjustments in the direction I want. Any White Balance or Exposure changes should therefore not be part of the Style.
Instead, if I want a color shift towards warmer or cooler tones, I use the Color Balance Tool and simply adjust the Master tab. If I want the image to be brighter or darker, I use the curves. In general, I try to keep clear of using slider tools as much as I can. This makes it easier to tweak the image further after applying a Style, while keeping the adjustments of the Style intact.
Recommended tools to include in Styles:
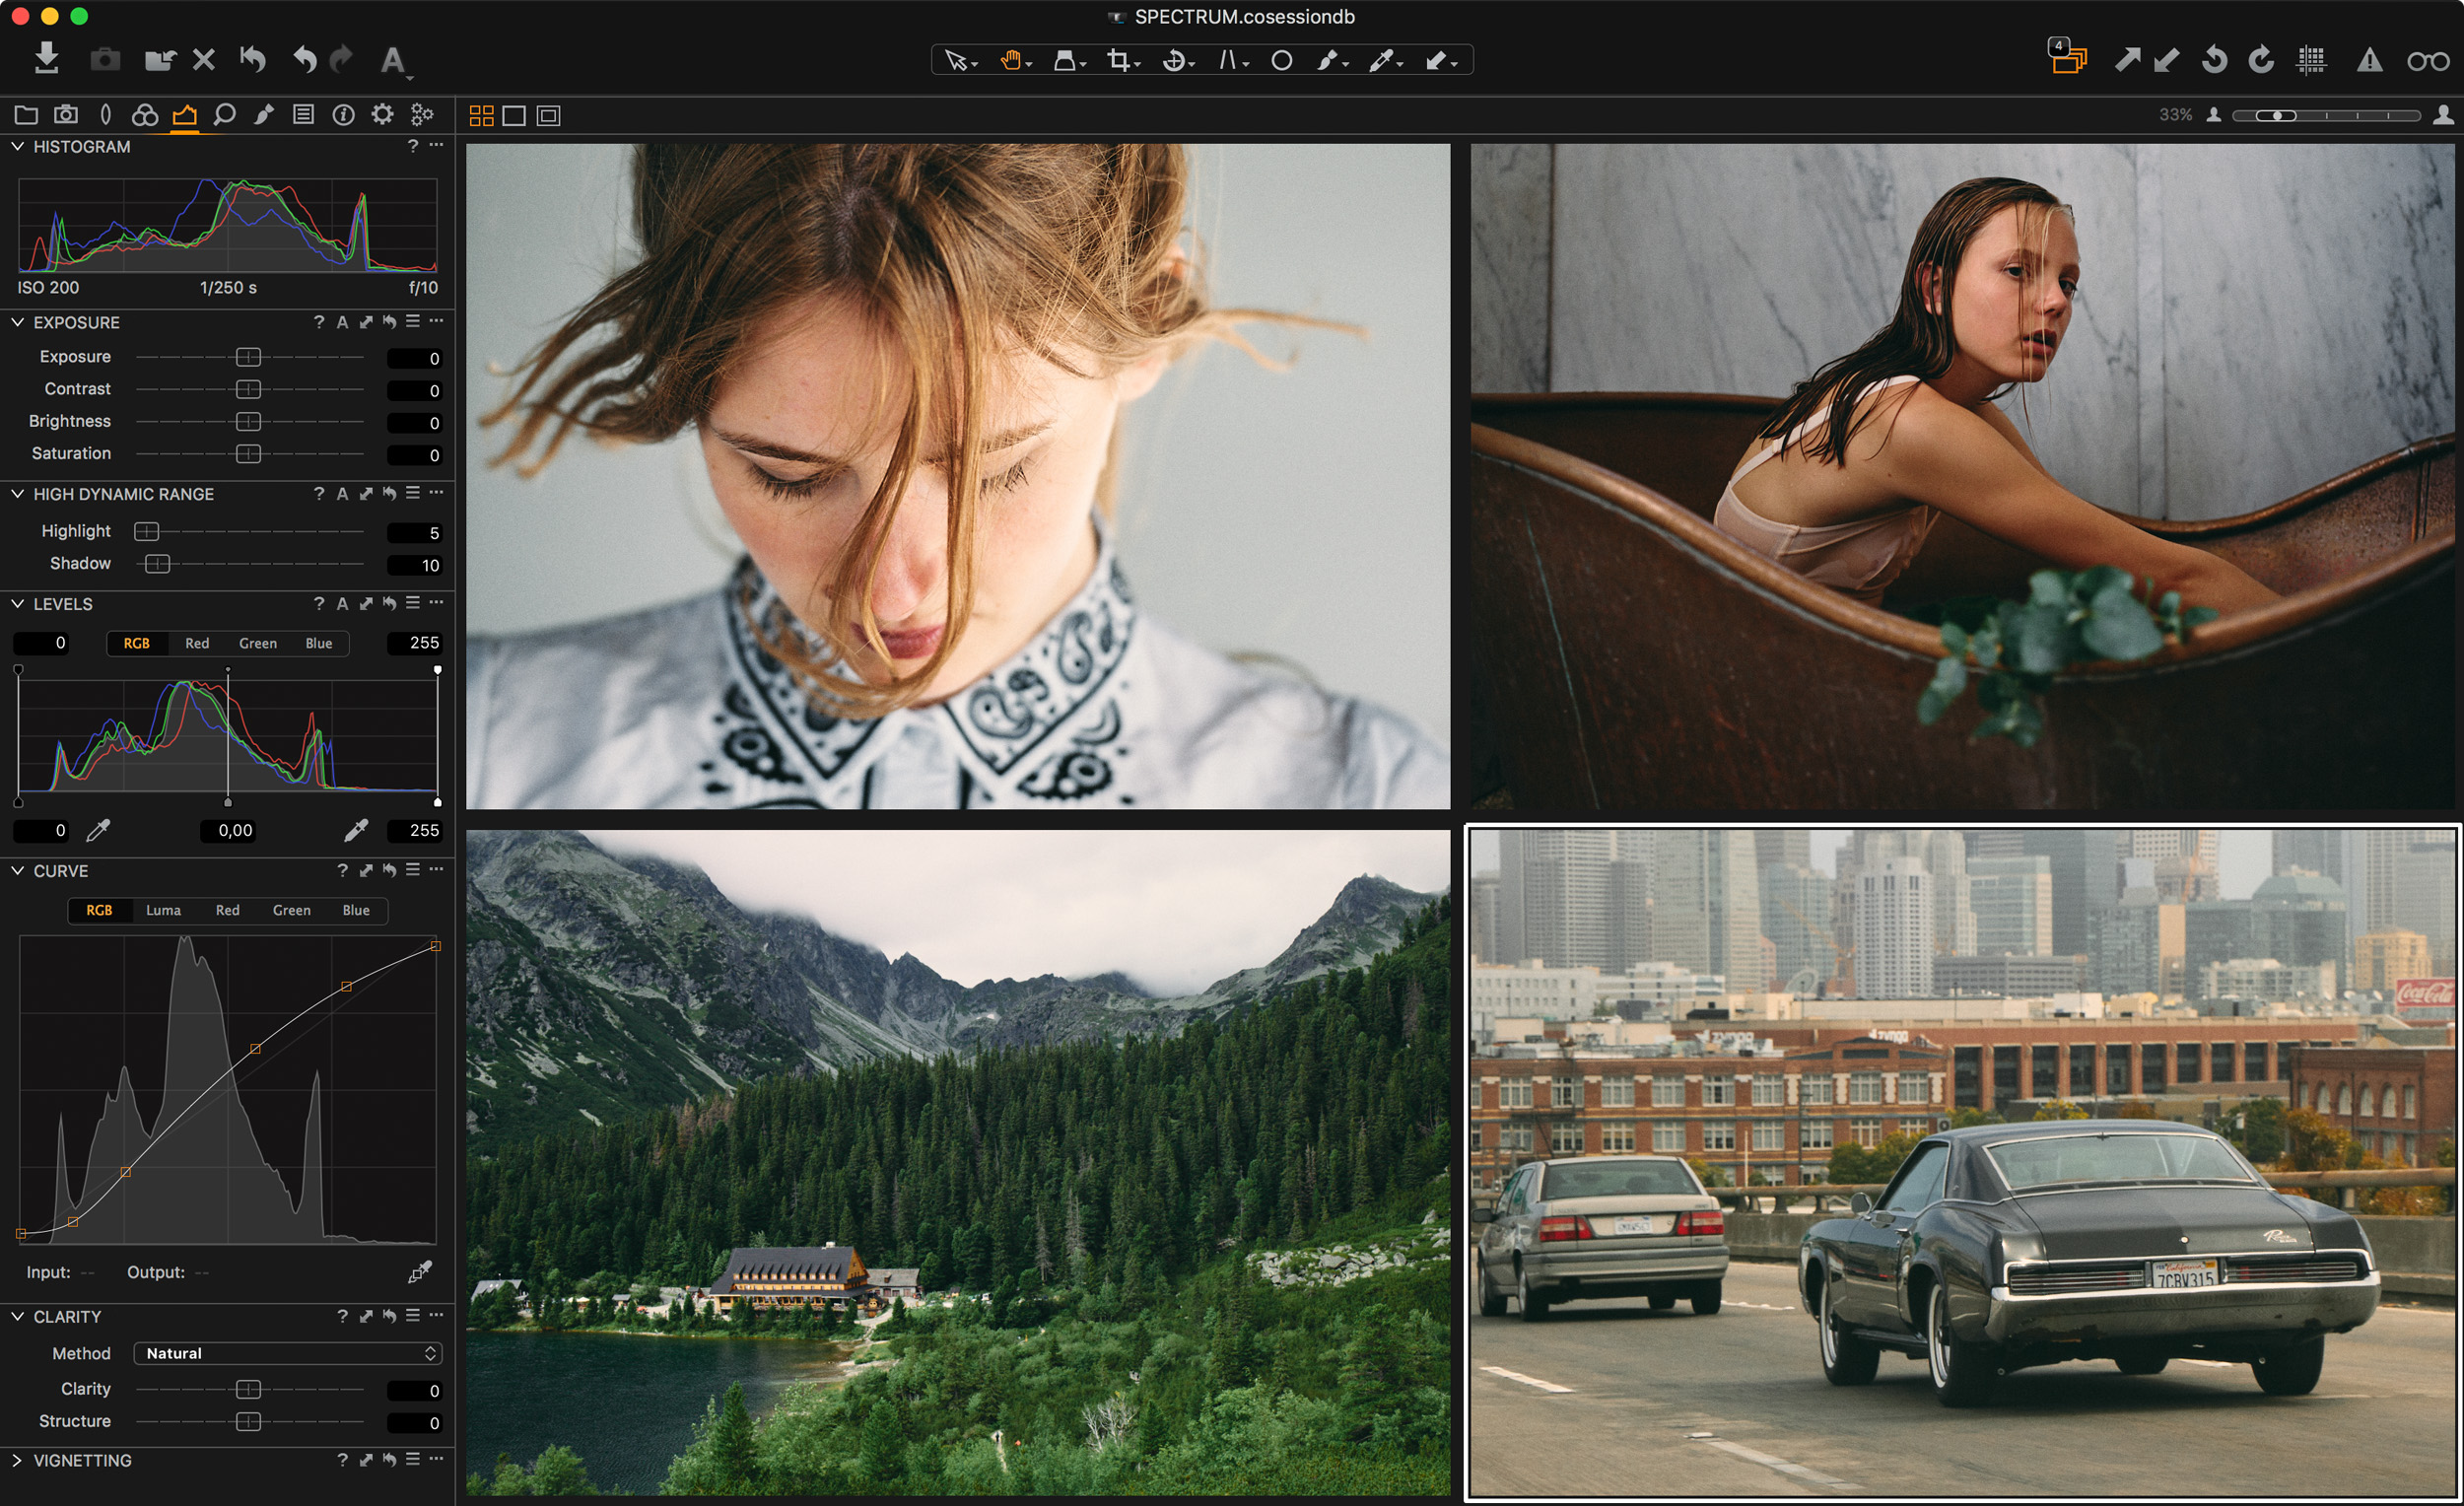
- Curves
- Levels
- Color Balance
- Color Editor / Advanced Color Editor
- Highlight and Shadow Recovery
- Clarity and Structure
- Film Grain
- Vignetting
I will also include a list of tools that I recommend that you do not use in a Style:
- White Balance
- Exposure
- Crop or any other composition corrections
- Contrast, applied with the slider
- Rating and Color Tags (these might accidentally be included if you’re not careful)
You can of course experiment and include anything you want in a Style, but my guess is that you will quite quickly agree that the tools above should be excluded from any Style you create.
Finding that global spread
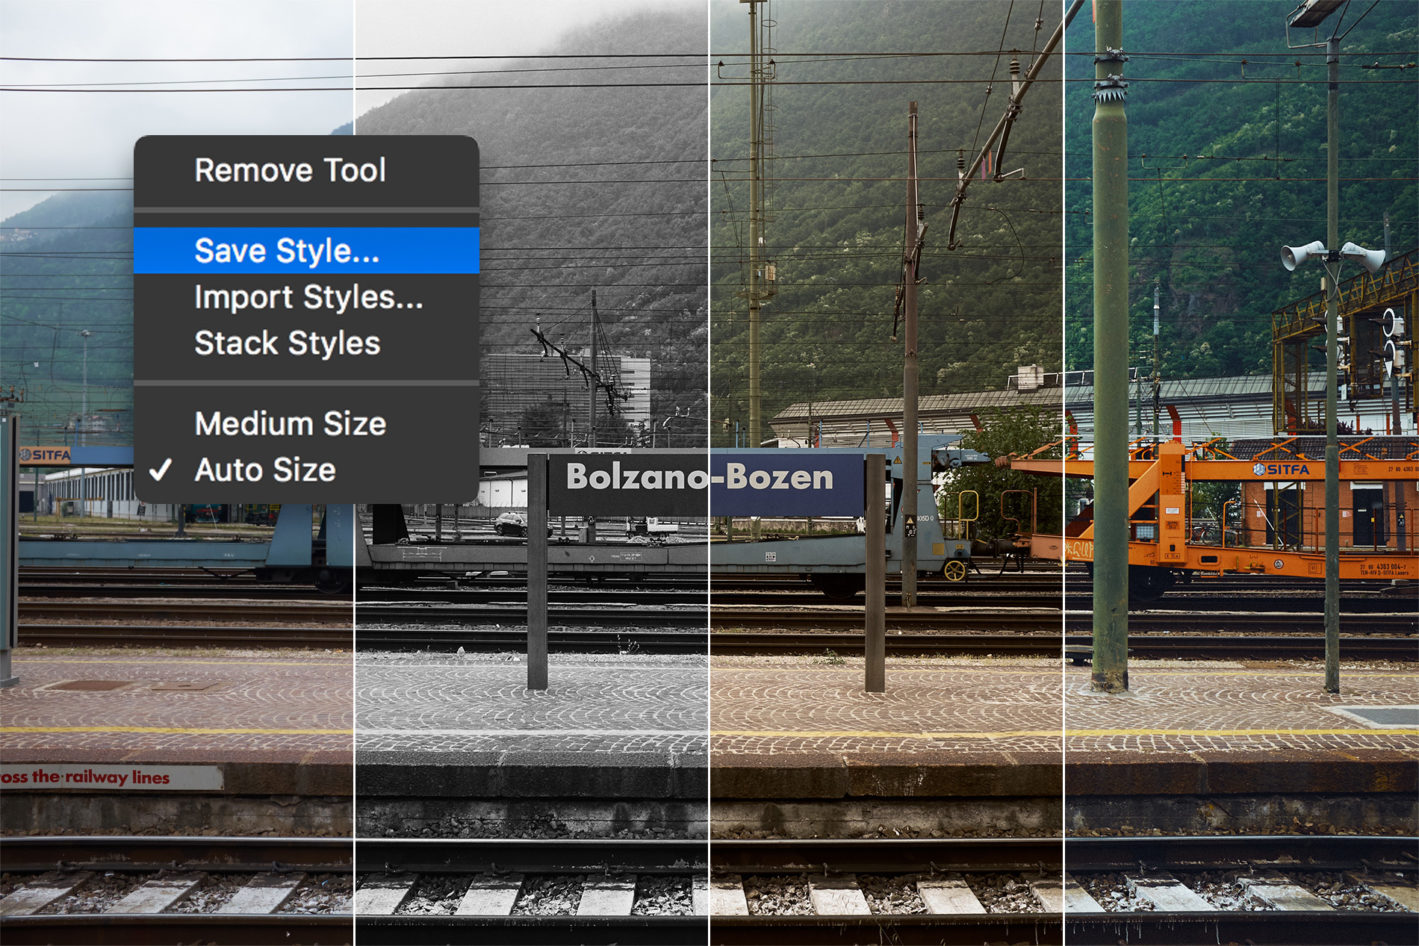
It’s tempting to save your adjustments immediately when they look amazing on your image. Hold on, freeze! This is a crucial stage. You need to test your Style! Find a handful of other images shot under different conditions, maybe even different cameras if you use more than one, and apply the adjustments on these. This can be done using ‘Cmd/Ctrl + C’ for copying adjustments and ‘Cmd/Ctrl + V’ for applying them.
Identical adjustments applied to different images. © Ausra Babiedaite
Do they still look amazing on the other images? If yes, then you’re good to go! Save your new Style and give it a fitting name. You can even create subfolders within the Styles folder to organize your Styles.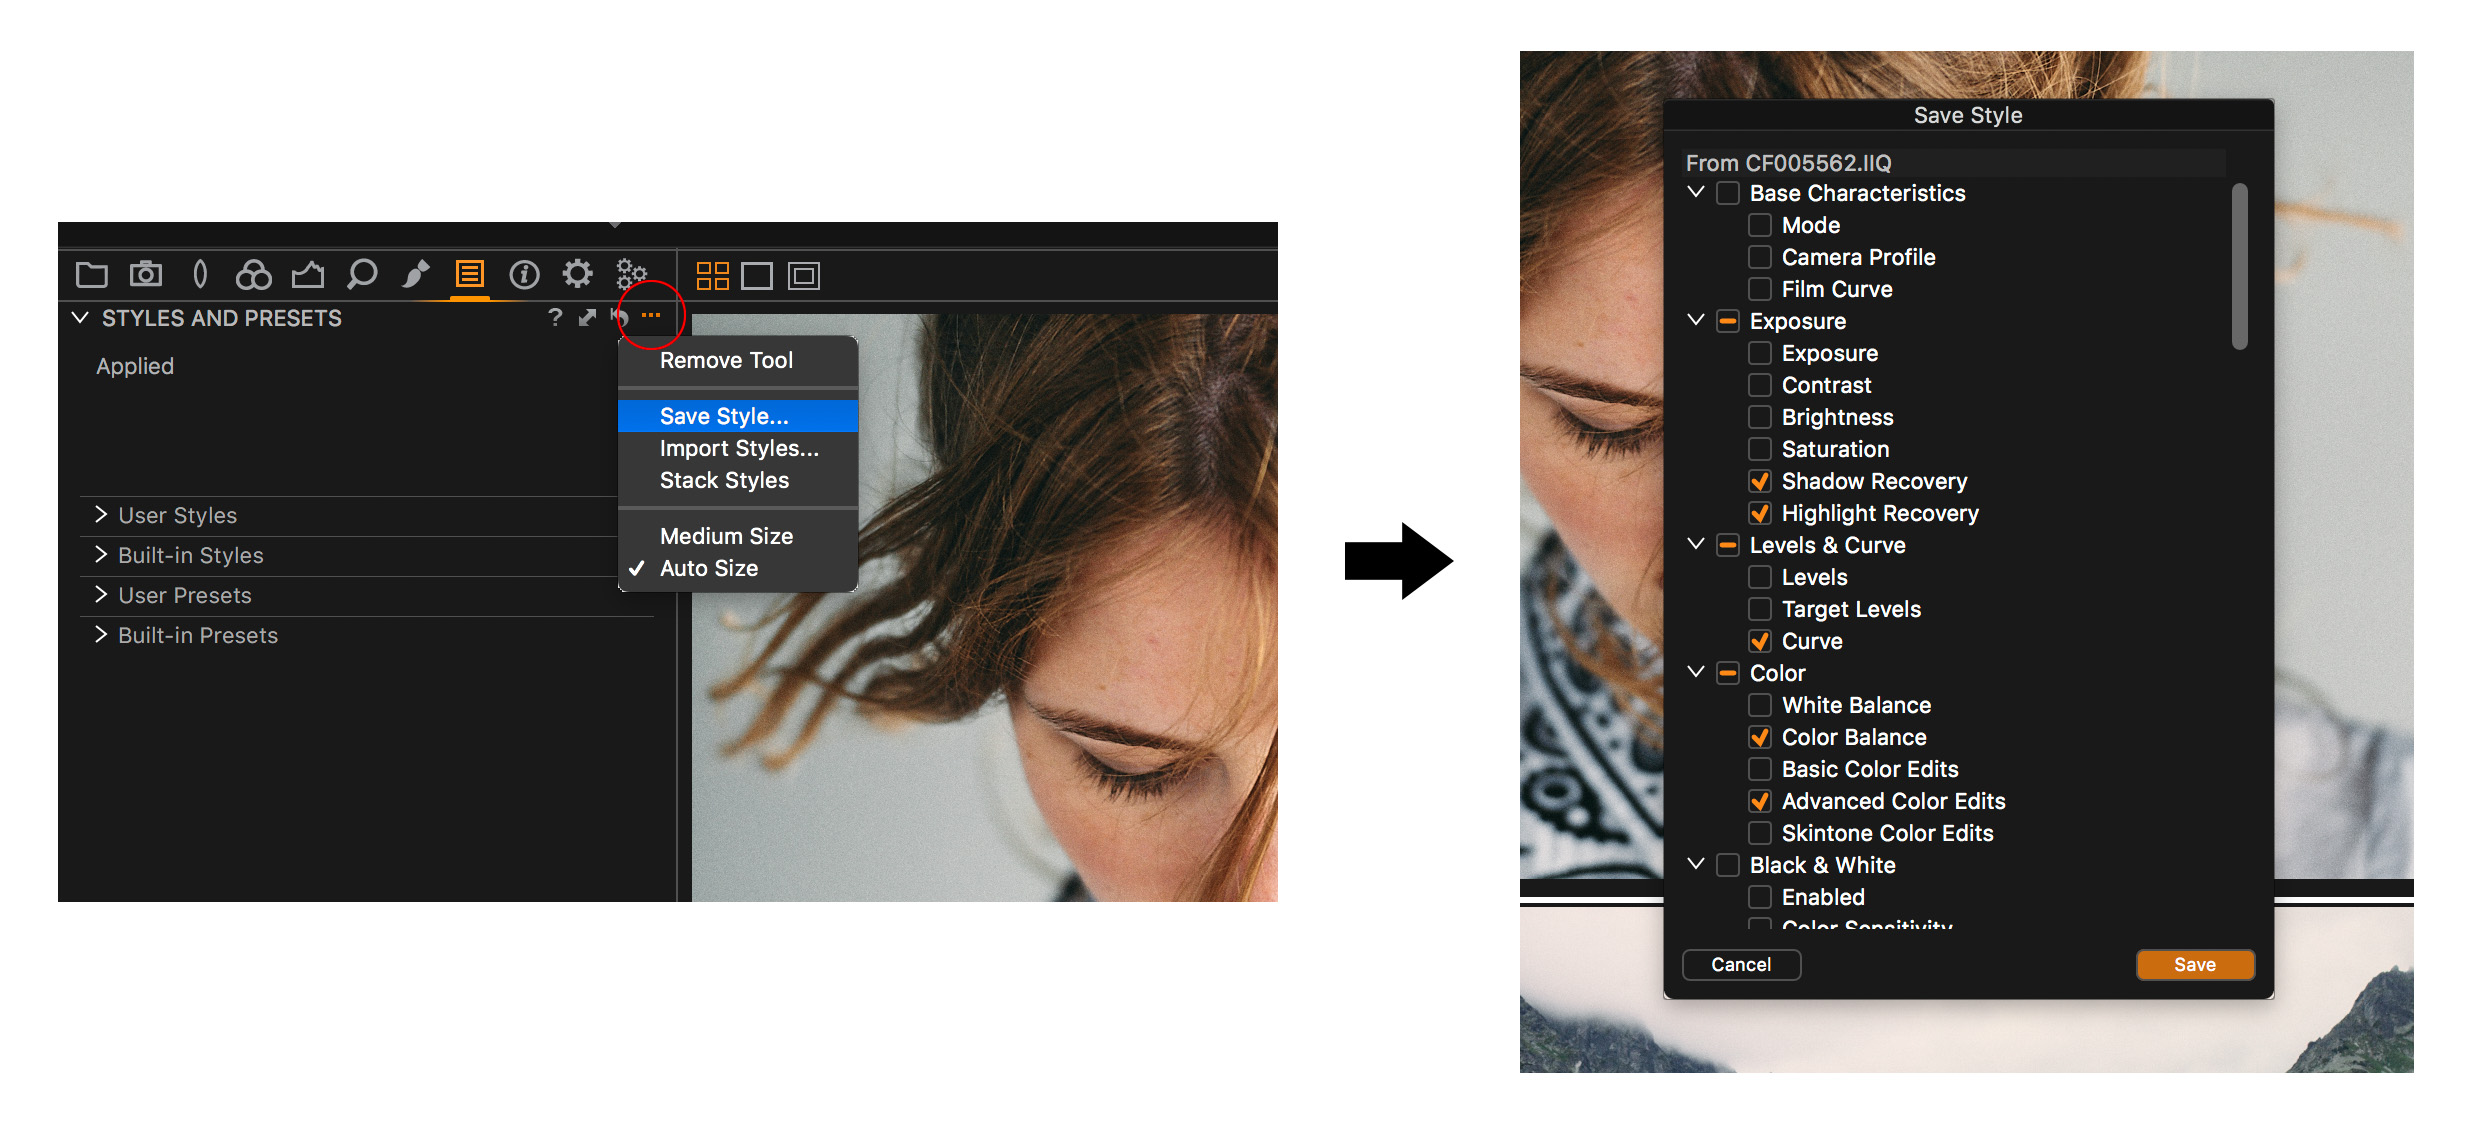
Saving the adjustments as a Style from the Styles and Presets Tool
If the adjustments don’t look amazing on the rest of the images, figure out what to tweak to make them more useful – without sacrificing what you’re aiming for. It might be a little less contrast in the curves, or a bigger change in the blue hue to affect the sky.
Less is more
I have found that understated adjustments that can be enhanced after applying a Style work better than overly adjusted Styles that I need to tone down. They are simply more broadly applicable.
Let the creative juices flow and see what you can achieve with Styles! You might be surprised how it can save you time in the long run.
Visit our User Guide to learn more about Styles and Presets in details.
Alexander Flemming
Alexander works as a Senior Product Manager at Capture One. Previous experience as a Test Engineer along with 15 years of photography have provided Alexander with a broad understanding of the many technical advantages of Capture One Pro.
Thanks, Alexander – it’s an interesting and thought provoking post. I am left thinking that maybe I have been doing something like this ever since I took the plunge, raided the biscuit tin, and installed Capture One Pro.
First things first – my reason for trying it is that I am involved with a group of other photographers, and several of us have been trialling different post processing software, to compare them. This started with Adobe’s last shift in its marketing strategy – a lot of photographers (me included) simply won’t follow them down their chosen path and we had to find alternatives.
So what happened? – in my case, I think it stopped my usage of Lightroom, like driving a car straight into a brick wall. I can’t remember when I last used it at all. Not that I’m doing everything in COP – nor have I actually gone as far as deleting LR from my computer. But to all intents & purposes, it’s no longer in use.
And when I do use COP, most of the things I do to my photos in COP follow the same pattern. Reading your article, I guess I’d have to describe the selection of changes as “my style” – with a few variations here & there, if needed for particular shots.
I was also told I’d find COP was “less intuitive” than LR and that “it will take some time to adjust to it, and become familiar with the controls in COP”. I didn’t actually find any of that, at all.
After playing around with the first 2 -3 shots, it was setting a cracking pace, compared to what I’d been experiencing in LR.
Now – to set the record straight, so there are no misunderstandings on this – that is MY experience of using COP. I could go on to say that I made a few straight comparisons, which showed COP (on MY photos) producing a better result than I could get (with the SAME photos) in LR. I am perfectly OK with finding someone else, with THEIR photos, and THEIR post processing techniques, finds LR is better for THEIR purposes. However before I find myself besieged by trolls, I would just add that it makes no difference whatsoever to what I have just said. If everyone was the same, there’d be no point in photographing anyone else, would there? 🙂
One thing though. Shortly after I installed COP on my computer, an “upgrade” was announced. I’d only just paid for COP and the upgrade was nearly half the price I’d just paid – but only seemed to offer a few additional features. Sorry Phase One – that was lousy marketing and I won’t play. I can do what I need to with the copy I bought.
Hi Richard,
Thank you for the comment and your thoughts!
Regarding your purchase just before the launch of Capture One 11 – if you purchased after November 1st, your license will automatically have a free upgrade included.
Alexander
Hi Alexander –
You don’t recommend using the Contrast Slider for Styles, so I assume you recommend a Luma Curve instead? However, I am curious why the slider will not be a good choice?
Also, what about Saturation? Is the slider okay for that or do you recommend another way to adjust saturation for a Style?
Thank you!
Dan
Hi Dan,
Yes, I prefer the Curves instead of the Contrast slider, as I feel I have more control and can do subtle adjustments to overall contrast. I do use the Contrast slider a lot, but it’s more for individual images.
When it comes to saturation, tweaking it overall by adding an entry in the Advanced Color Editor (clicking the ‘+’) and increasing saturation is different from the Saturation slider. The slider preserves already saturated colors more than the Advanced Color Editor will do. I recommend playing around with both methods to find out what works best for you in specific scenarios.
Initially, I recommended leaving as many sliders alone as possible in Styles, as it would be easier to quickly tweak the image further after applying a Style. Now that it’s possible to apply Styles as layers and even tweak the opacity, that recommendation seems to fade a bit.
Alexander
It would be incredibly useful & above all a huge time saver if it would be possible to save a style which comprises the automatic creation of layers upon applying to a picture… like for instance the dogde and burn layers which I always have to create for every single portrait editing!! You what I mean?
Hi João,
Thanks for your comment. Layers included in Styles would definitely make a lot of workflows easier, yes!
– Alex
Hi, how do you actually organise styles? I want to structure my styles in folders and subfolders. Can’t find how to do that?
Hi Sébastien,
When you save a Style, you can choose to put it into a subfolder. That will organize it a bit. If you already have a bunch of Styles you need to organize, you need to find the location of the Styles on your computer. On Mac, it’s ‘~/Library/Application Support/Capture One/Styles’ and on Windows it’s C:\Users\username\AppData\Local\CaptureOne\Styles. From in here, you can divide your Styles into new subfolders. Remember to restart Capture One afterwards.
Alex
Hi Alex
Just trying out Capture One 20. Have 2 layers with styles applied. The background layer has no adjustments. How does one save this look as a preset? Each time I try ‘Save User Style’, it draws up a blank. Is the ‘Save User Style’ applicable only to Background layer? How does one include adjustments of all layers collectively and save as a style/ preset, to be used for other images over time?
Thanks
Thanks for all the hints. But I found no solution for what I need to do: How can I create an on Style including ALL tweaking, also those I built up by layers? I found nothing relevant. Capture One Pro V20 version 13.0.2.19 – btw: it is still not possible to copy and paste version and build info from “about” box. On my wish list since V11.
Hi Roland,
Thanks for your comment! Currently, Layers cannot be included in Styles, but it is a great feature request.
Regarding copying the version from the about box – simply press ctrl/cmd + c while the box is open. This has been possible for the past many years.
Alex
Alex, thanks for suggesting the “Include Layers into Styles” as feature request. Did you already forward it to development team? Or must I make the request?
Thanks for the hint with cmd+c, I tried of course first selecting the text with the mouse then cmd+c.
I have forwarded it, thanks!
Alex
Hi,
I have been trying to replicate a look from an old photo I developed in Lightroom and decided to use layers so I could tweak them easier as I was building it. I’m now happy with the overall look and want to consolidate the layers into one.
The layers only include tool edits (one layer for colour edits, one layer for clarity etc) and I want to save it as a style. I cannot see a way to move the edits I made onto the base layer. Is this possible at all? Trying to replicate a curve, for example, is going to be pretty tricky if I have to do the same thing on the base layer.
Thanks!
Paul