NOTE: This article discusses an outdated version of Capture One. To learn more about our latest version, click here.
A Style is simply a collection of different adjustments stored as one selectable function. So a Style could contain one, two or several different adjustments that are available in Capture One Pro 7.
A Preset simply saves the setting in a particular tool. Like a certain curve shape or sharpening value.
Both Presets and Styles have their uses and I will look at both of them in this blog post.
Most importantly, good use of both of these features will save you time and introduce you to another of the many great features Capture One Pro 7 has.
First we will look at the basics of creating a Style and a Preset.
Creating a Style
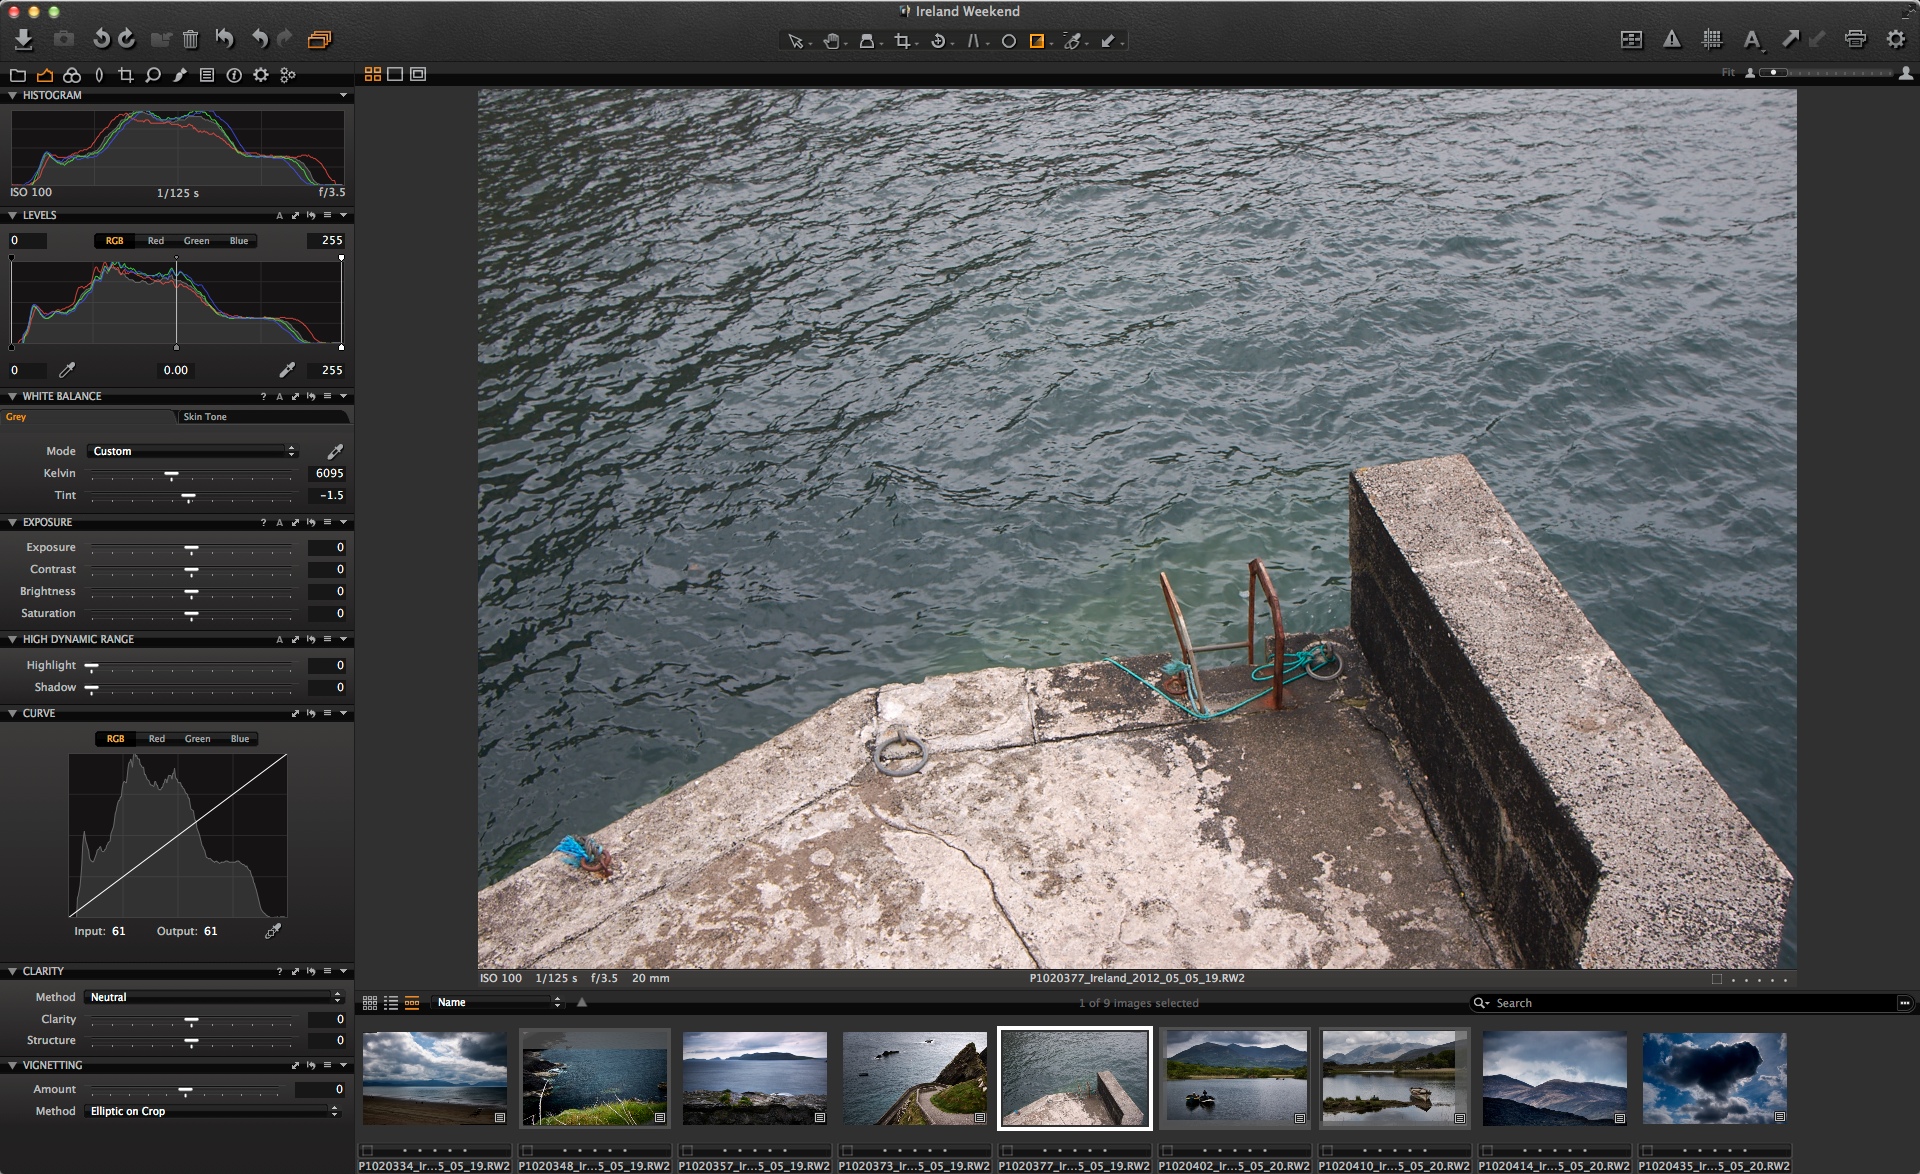
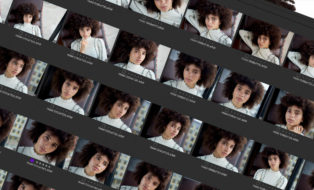
It’s very simple to create a Style. First choose an image on which you wish to create a basic style. I’ll use the lead image in this blog post. Here it is, as a colour version.
I want to try to make a default Black & White look that I can use with all my images. Basically, a good starting point from which I can explore further.
Before I start, I make sure I create a Variant, by choosing ‘Image > New Variant’ so that I have a virtual copy of the image to play with, without disturbing the adjustments I have already made on the colour version of the image. Read more about Variants here.
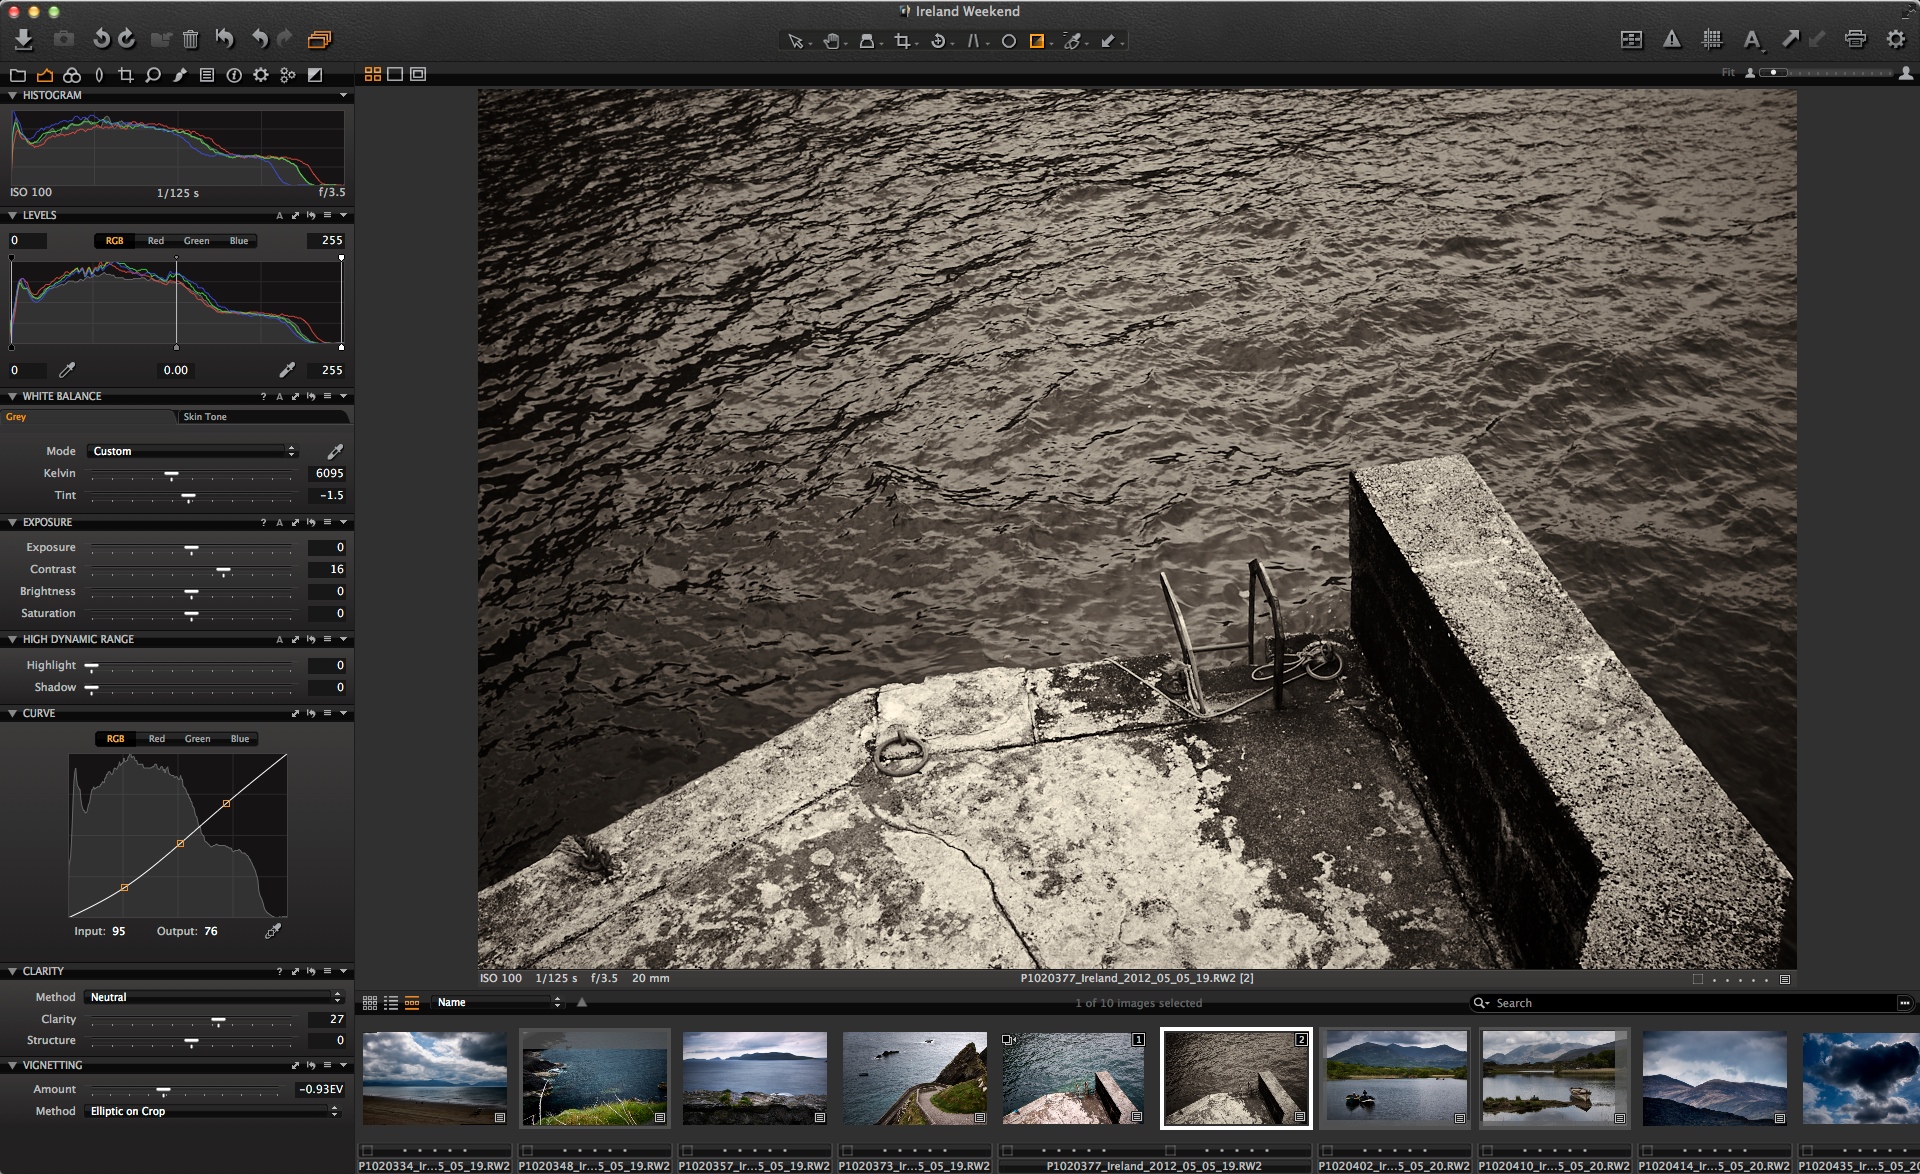
So after converting to Black & White and adjusting the Contrast, Curve, Clarity and Vignetting I arrive at this result.
Also with two Variants displayed like so in the Browser.
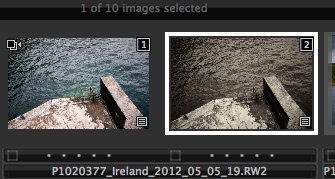 For my Black & White conversion I was careful not to adjust Exposure, for example, as this will be unique to individual images. It will be just a starting point to speed up the initial conversion of an image to a Style, before making individual corrections to each image.
To save a Style, browse to the Adjustments Tool tab, indicated by the orange circle.
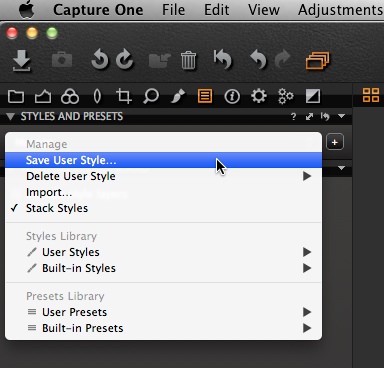
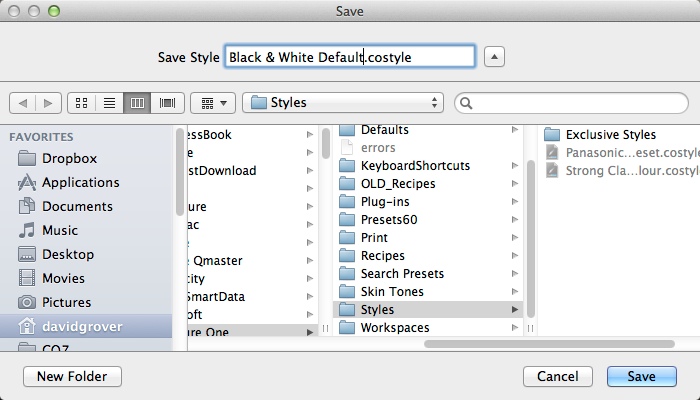
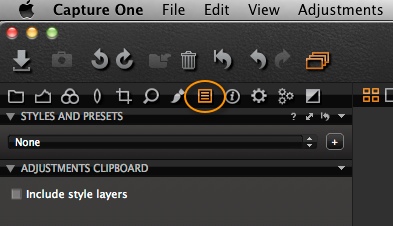 By default, Styles and Presets are the first tool, in this tool tab. Click on the drop down menu and choose ‘Save User Style’.
 The ‘Save Style’ dialog will open and indicate what adjustments are part of your style. To leave any of those saved adjustments out of the Style, simply deselect it. For example, in the window below, we could simply deselect ‘Contrast’, if we did not want that as part of the Style.
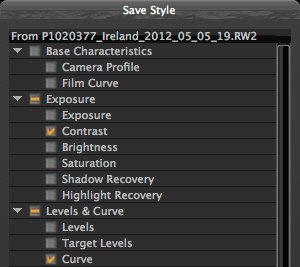 Click ‘Save’ at the bottom of that dialog and then choose a name for your style.
Your saved Style will then appear in the drop down menu in the Styles Library section. Simply click on it, to apply that style to the current image.
You will also see in the Styles Library that there are a number of built-in styles. You might like to experiment with those too, or use them as a starting point to move on from.
Creating a Preset
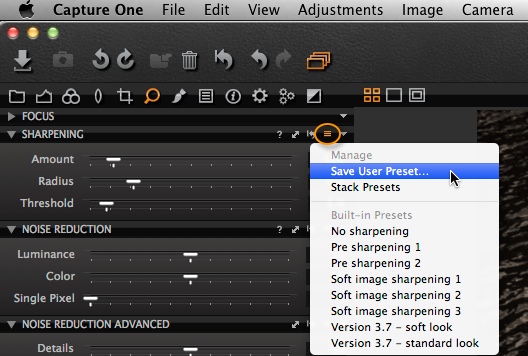
Most tools in Capture One Pro 7 allow you to save a predefined adjustment, which you can recall at any time, much like a Style, but just for an individual tool.
For example, if we wanted to save our current sharpening parameters as a Preset, I just need to click on the Manage Presets icon (indicated by the orange circle) and choose ‘Save User Preset’.
Again, you can choose if you want to include all or some of the parameters of a particular tool.
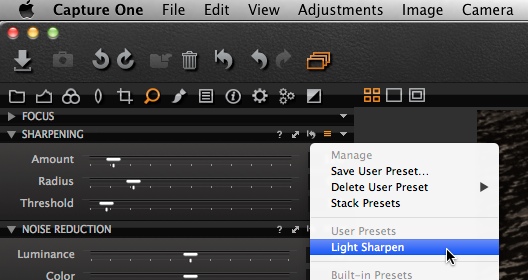
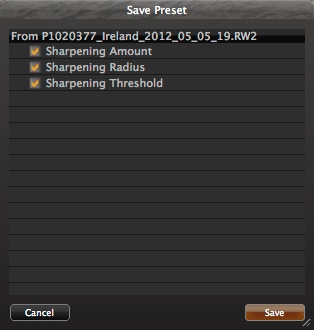 Finally, choose a name for your Preset and click Save in the next dialog. Now, you can select and apply your Preset to the current image, from the same pull down menu.
Using Styles to Improve Workflow
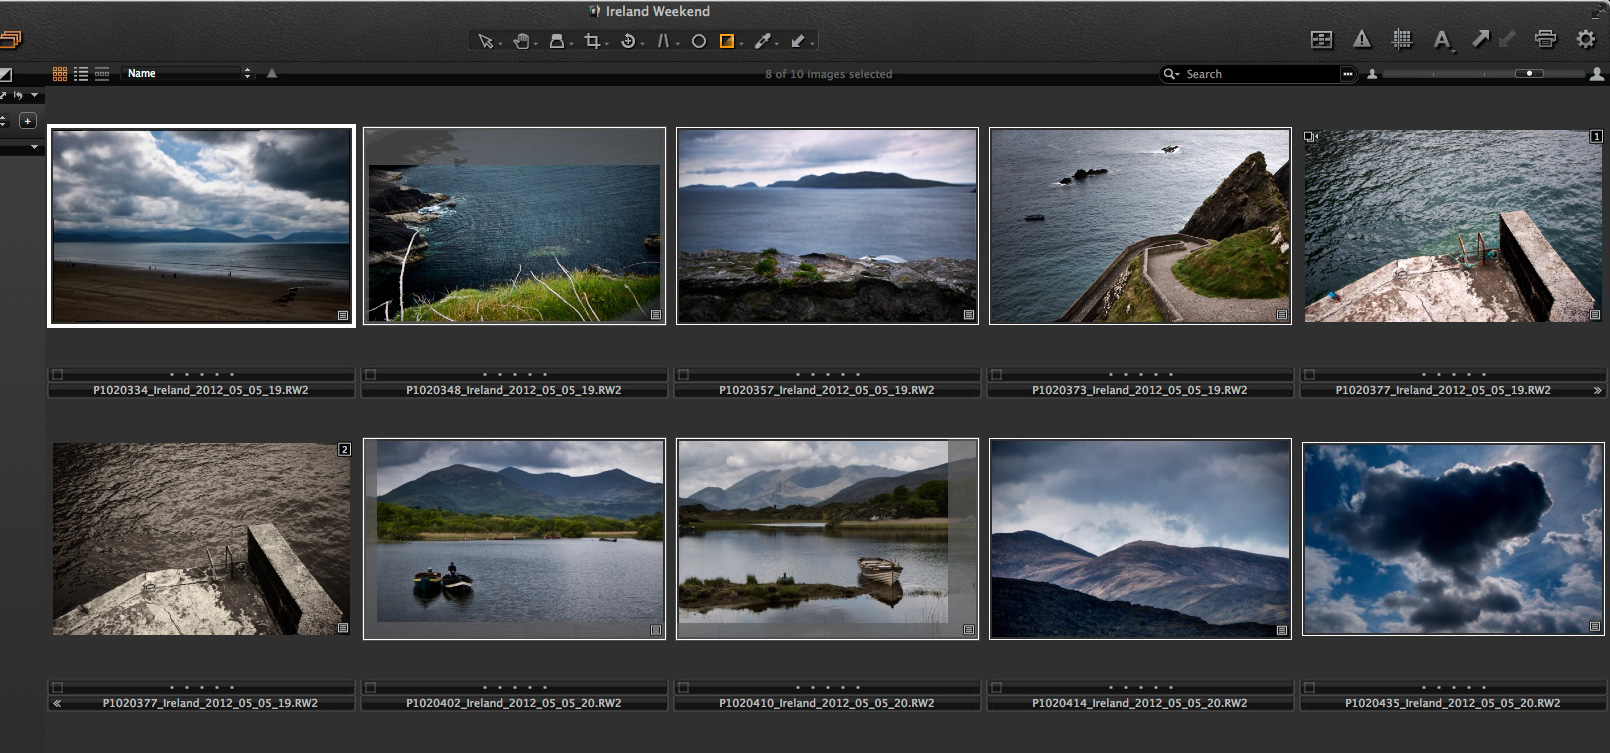
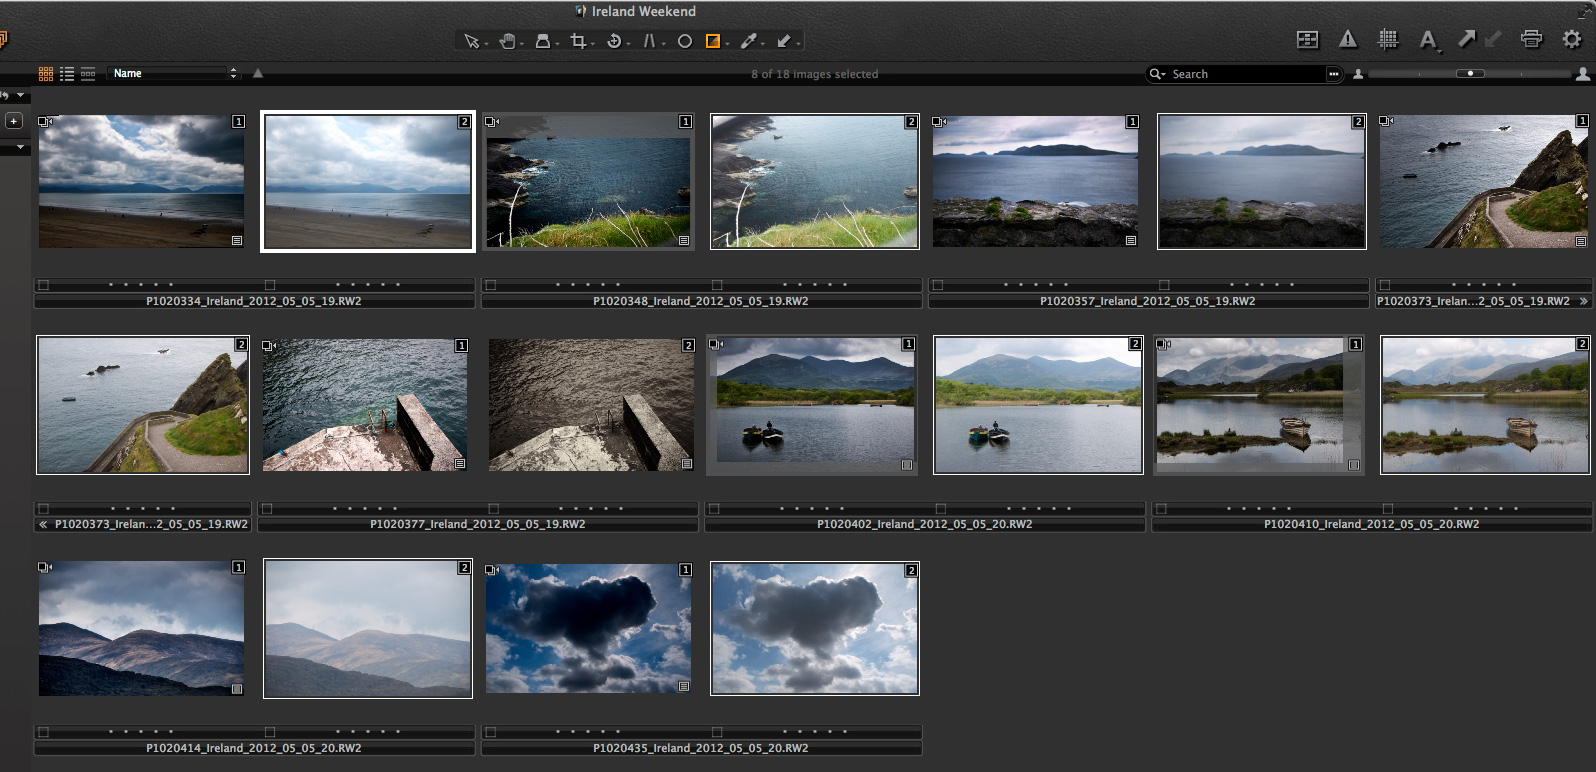
Let’s go back to my original selection of images.
I have selected all of them, except for the lead image, which I created the Style with. Again, I want to keep the original colour conversion, so I’ll create a new variant again in the same way as I did before, by choosing ‘Image > New Variant’. I will now end up with this.
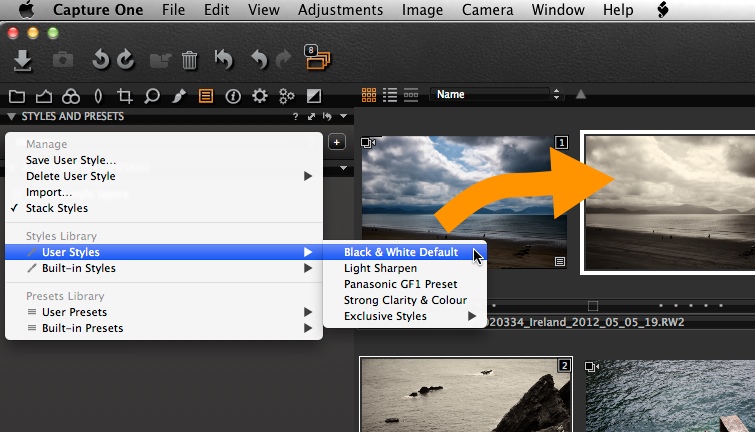
There is a second Variant for every single image in my collection. Capture One Pro 7 has also kept them selected, so now it is very easy to apply my Black & White style, by choosing it from the Styles and Presets Tool.
Notice that simply by hovering on any Style will give an instant preview to the thumbnails in the browser.
This is great for a quick look at several different styles to choose the most suitable one.
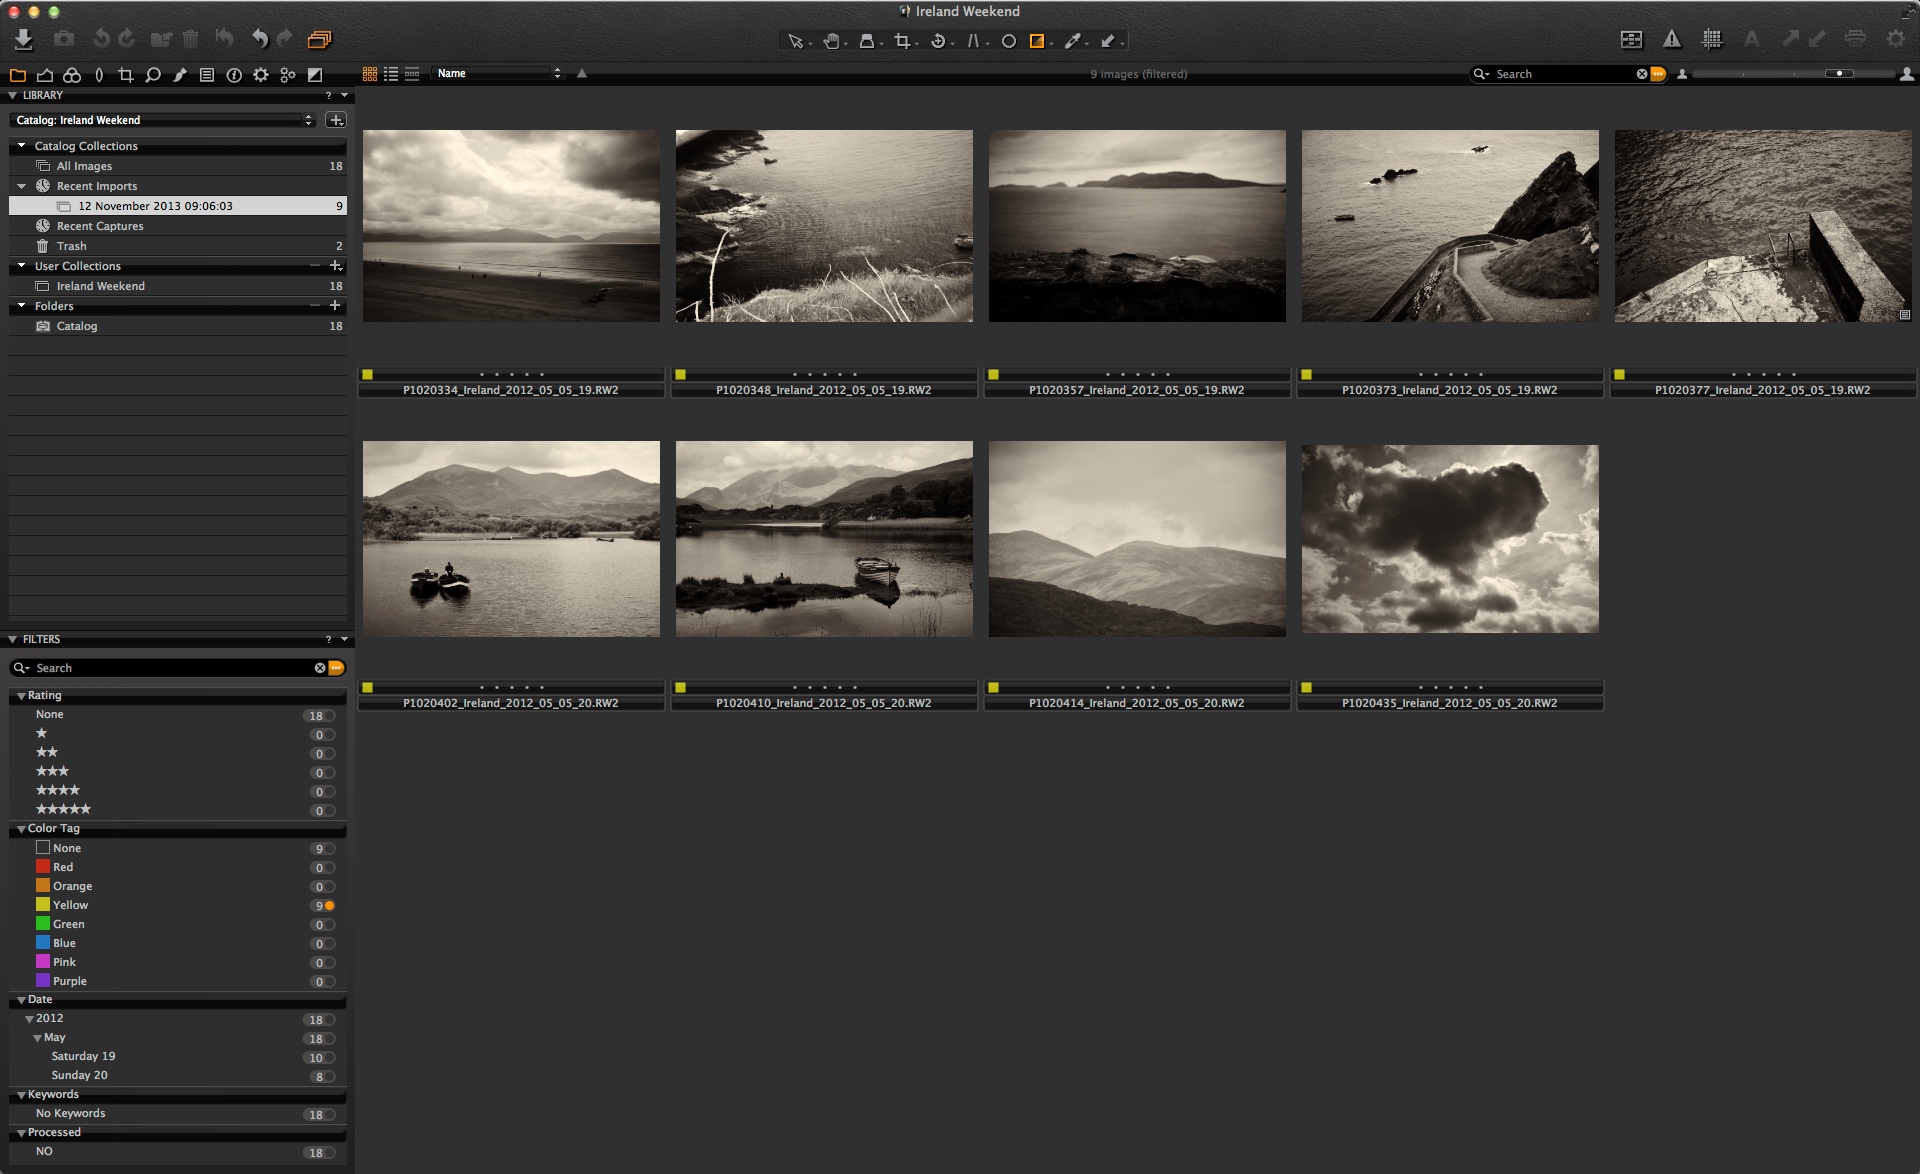
So now all of my second Variants have the Black & White Default Style applied. One more smart action I can do, is to hit the star key (*) on my keypad, which will colour tag them all as Yellow. I tend to use this tag to indicate a Black & White image, but you could use a different colour tag or perhaps even a keyword.
Then I can filter the collection in the Filters Tool, to just show me the Yellow tagged images, thus the Black & White images only.
Now, I have a great starting point to continue working with in Capture One Pro 7. To use a Preset, it is very similar to before. I have selected all of my images and chosen the Preset I made earlier.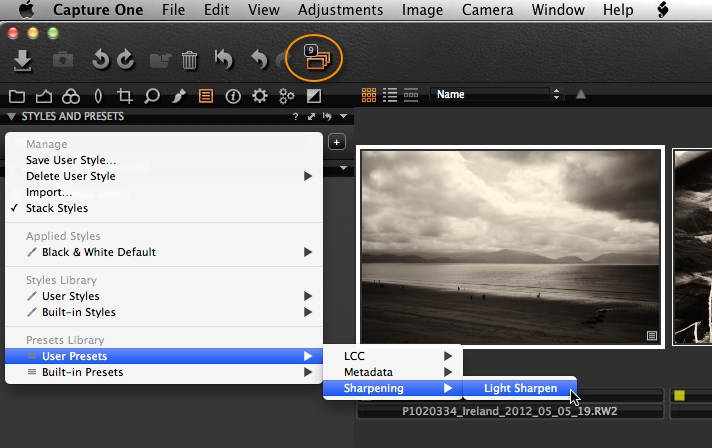
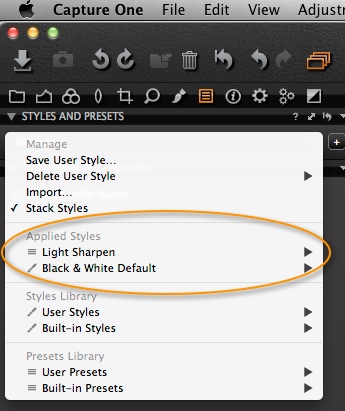
If we check the pull down menu once more, we can see that we have one Style and one Preset applied to each image.
Other Uses for Styles and Presets
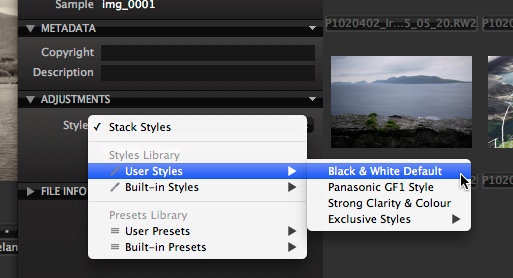
Styles and Presets can also be applied on Import and also during tethered capture. In the Import window, look for the option in the ‘Adjustments’ section.
Here we can apply any Style or Preset as we import the images. This can be a huge time saver as I often use a Style to add some default corrections I like for specific cameras (notice the Panasonic GF1 Style in the above screen grab), and a Preset to add some basic Metadata.
This saves having to apply those parameters when the import has completed, saving you time in post production.
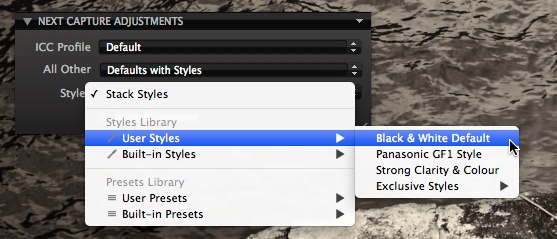
If you are capturing tethered, first choose ‘Defaults with Styles’ from the ‘All Other’ drop down menu in the ‘Next Capture Adjustments’ Tool. Then select a Style, Preset or both from the ‘Styles’ drop down menu.
This way you can instantly show your preferred style to your client as the images are loaded into Capture One Pro 7.
Best regards,
David
David Grover
David Grover is part of the Capture One team, bringing you help, advice and education on a variety of subjects and platforms. David can be found on most weeks delivering live Capture One Webinars or anytime on our YouTube Channel.


Well David, fine in principle but no two monochrome images are the same.. As indeed are no two full chrome images. Each, is unique and in MHO should be treated as such. Would you not be better building a workflow that allows for full adjustments to the image by simply scripting convert to monochrome?
Couldn’t agree more David!
That’s why I describe it as a start point for further adjustments.
Now if only Phase One would improve access to Presets and Styles. The drop down menus are the most counter-intuitive way of doing so. I constantly see myself NOT using them just because of that.
What is needed is a revised palette with a button style interface. Lightroom shows how to do it and that’s not a bad thing. I can’t imagine anyone actually loving the current way of applying Presets and Styles.
Im not sure I agree Thomas.
The pull down menu works well, especially if you have a lot of styles to sort through. Not forgetting that you get an instant preview without actually having to select it.
Anyway, thanks for your observations and ill take a look at the Lightroom interface out of interest.
David
It’s a pity that nothing changed since a year. I think it would take one or two days for one developer incl. testing to implement a suitable solution like lightroom has (+ with your instant preview).
As soon you have changed that I would use Capture One instead of Lightroom… At the moment it unusable for event photographers…
Thanks
Thanks for your comments, Maurer.
Slightly off piste I know but I so wish Capture One would make Catalogues ‘optional’. All these admittedly wonderful enhancements to the already excellent product are in themselves great. But once Catalogues entered the arena the game changed. Notwithstanding several exchanges with Support, i still find myself reverting to V6.x – with in excess of 70k worth of digital images I gave up on building the catalogue. Even migrating from Media Pro suggests the same length of time (in days) to complete on a Quad Core MacPro with oodles of RAM. Moving on to Presets and Styles would be so much more helpful and valuable if or when I could ignore catalogues..
But Catalogs ARE optional! Just use Sessions – they work how C1 did all the time, with discreet settings and preview files in a sub-folder to the original RAW files.
No need to use Catalogs at all.
Absolutely Thomas!
So David, you can work in Capture One 7 with Sessions, exactly the same way you did in Capture One 6, except far superior RAW conversion, better noise reduction and improved and additional tools.
Personally, I use Catalogs for my own photographic projects and like it very much. I agree it can be improved but there are many misconceptions about Capture One Catalogs which I am working hard to correct!
David
We’re getting a bit OT here but nonetheless I want to emphasize on one big improvement I wish for catalogs:
They should give us the option to write out the settings files on demand and/or in realtime while we are working in the catalog.
This is a safety measure but also an easy way to find files looking the way they were processed by simply pointing C1 at them.
Currently this is only possible with an awkward workaround by exporting “Originals” and then deleting the resulting RAW files and moving the settings files where we originally wanted them.
Thanks David and Thomas both. And it is good to learn that refinement of such an excellent product continues. And thank you. I will revert to Sessions.
I like the possibility to use style and presets, but I don’t use it enough I think… One thing I’ve experienced to be a challenge is to make an overall correction to a set of images, which are adjusted individually.
Say I adjusted a series of images regarding exposure (some -0,5, some +0,5, some +1 etc) If I, for good reasons, wants to add +1 (exposure) to the whole series, I usually end up with the same exposure-setting (being +1) for the images.
How would I add overall adjustments to allready individual adjusted iimages?
thx
Hi Morten,
I guess what you are asking for is an accumulative addition to an adjustment?
There is no current way of doing that, and to be honest, we haven’t heard that this is a desired feature. However, ill see if I can come up with a way you can do it, but I don’t think it is really going to be possible!
Best Regards,
David
Lightroom has a way of doing this, however it’s implemented in the Grid and Loupe Display module rather than the Develop module. It’s called Quick Develop Panel and executes what they call “relative adjustments”. Many wish this option would also exist in the Develop module (as a check box maybe?) and those who need it need it dearly.
It’s one of those functions that typically those who edit large amounts of images (wedding & event photographers for example) are looking for.
I second your wish plus I’d love to see a function similar to LR’s “Match Total Exposures” where the final exposure value (derived from ISO, shutter speed, aperture and LR’s exposure setting) will calculate a new exposure setting for photos with a different ISO/aperture/shutter speed.
GREAT for anybody who shoots in aperture or shutter speed priority. Just as you can equalize white balance over a number of images with any RAW converter, with this you can equalize exposure.
I much more prefer Capture One because of the way nicer look it produces compared to LR, but some things can definitely be learned from LR which is a great workflow tool.
Thanks for answer.
Though I’ll keep looking and hoping for a solution! I’m not really sure how to explain and understand an ‘accumulative addition’…
I sometimes have clients, that for various reasons wants a whole series of images adjusted in the same direction (brigthness, colorcorrection or clarity/texture etc.) and more often than not these series are images from different location/lightningsituations, so they are allready individually adjusted. I would like to meet my clients request with a single edit/correction rather than fifty!
It suprises me, if I’m one of the few with that need?
I could export images and run them through a bacth-process in PS, but that’s not why I use CO.
Hi 🙂
I was thinking that maybe you guys could feature some styles and presets on your blog that people have created (assuming that people like to share). A simple example might be a “wedding” style or a “SciFi” Style, that could be a starting point.
I know styles and presets are very image (and person) specific.
Or it might be a blog post entitled “The first 5 adjustments I always do to landscapes” that could then be included as a style (to the blog entry).
🙂
Hi Paul,
Yes, that’s a very good idea. It would be nice to share styles better between us.
Ill give it some thought!
David
Brand new to Capture One. Would like to import my Lightroom catalog. Can I create a Style beforehand without having to use an existing image already in my C1 catalog…since I don’t really have anything in there yet? If so, how?
I’m not sure if this thread is still active, but I too was trying to determine if there is a way to make relative adjustments to a group of images. Lightroom provides this capability and it is one that I think would be very useful to have in Capture One as well: http://blogs.adobe.com/kost/2015/08/relative-vs-absolute-adjustments-to-images-in-lightroom.html
Hi Sarah,
Your link isn’t working.. Can you check?
David