
NOTE: This article discusses an outdated version of Capture One. To learn more about our latest version, click here.
Last week, I flew down with my creative partner, Yanyanista, to sunny Miami, and spent time shooting with the Phase One XF 100MP Camera System for our Master Class on Fashion Photography. We shot on-set and on-location at the ultra-cool Miami Ad School, which was perfect for our concept of “dreamland”.
The idea for the images was planned initially by making a creative mood board. Next, Yanyanista brought in her styling magic, and we casted our models and crew. We wanted an unusual setting with surreal elements and the best gear possible, and nothing compares to the XF 100MP. The Phase One camera shoots lighting fast. It always far exceeds the images that come from my mind’s eye.
What sold me right away on this camera was that it has the largest sensor ever produced at a consumer level and such an incredible dynamic range. Up to 15 stops of Dynamic Range! There is literally so much one can do with their images, and fine-tuning them with the new Capture One Pro 10 only makes the dreamland even more realistic.
Watch the BTS video of the Master Class, and read along to experience our dreams come true, step by step.
Preparing the shoot
A week before the shoot, we planned out the mood board to be full of unique dreamy locations. We sourced ideas and images to make our imagination come to life on paper. We started casting with the modeling agencies in Miami while we were in NYC, and chose Karina from Front Management, and Taylor from Next Management. They had just the look we needed to make our unique dreamland ideas shine. We learned on set that they were also very sweet girls, too, with wonderful characters and energy.
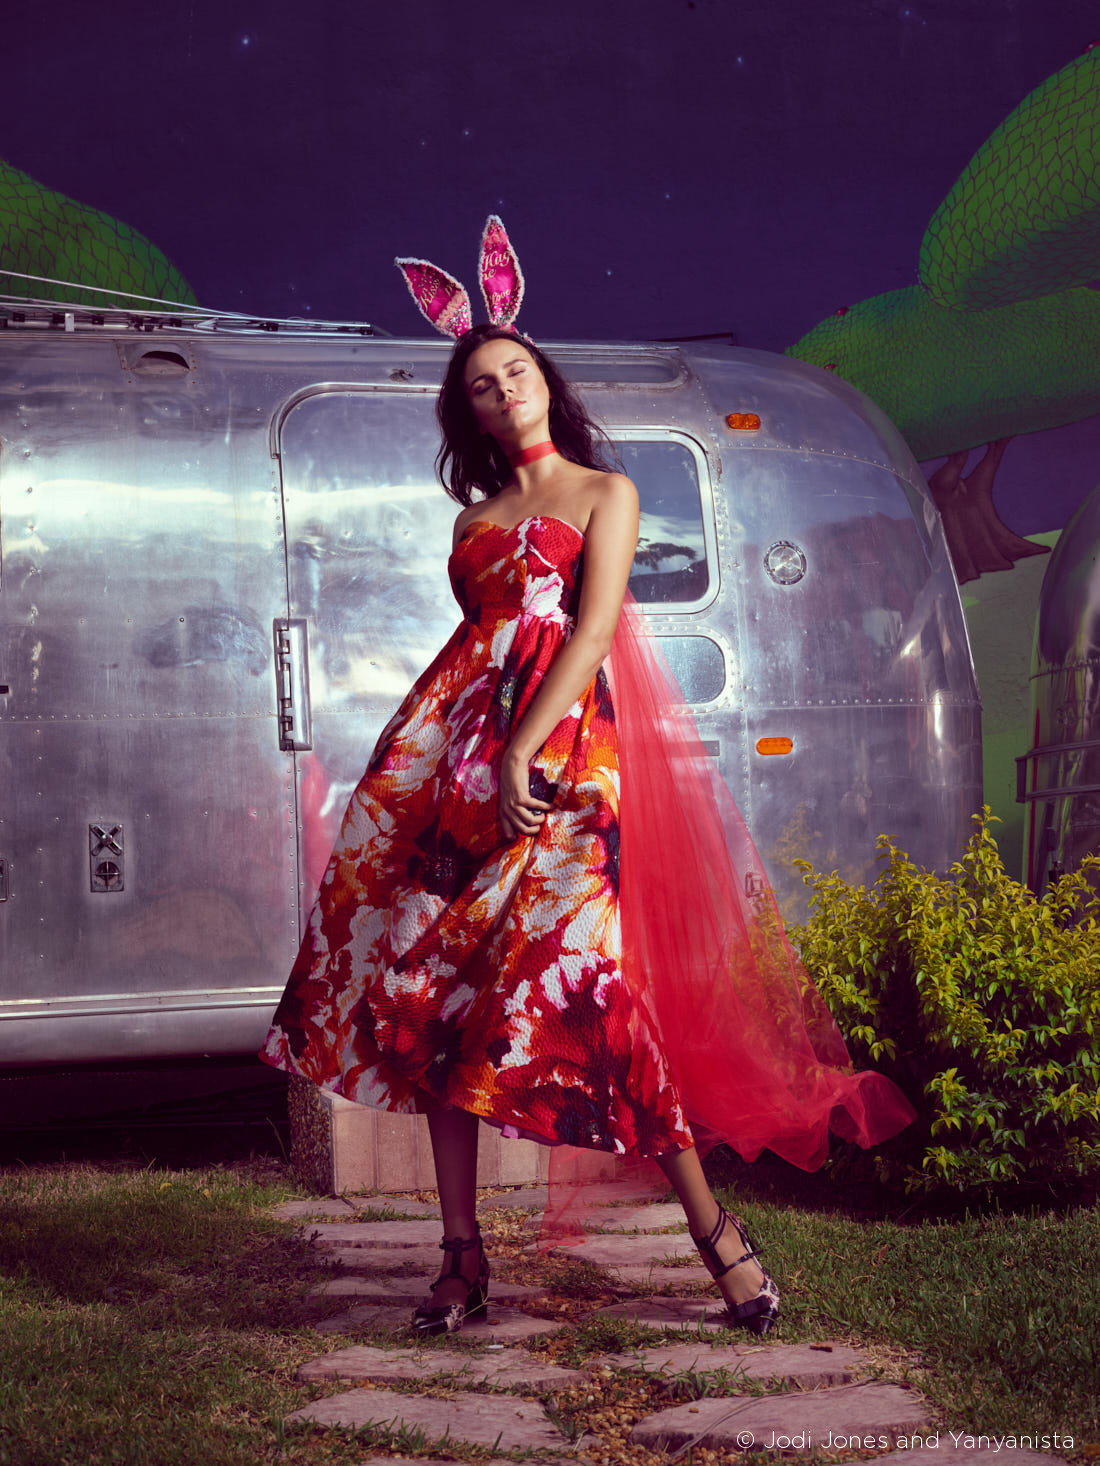
The inspiration was very natural. We planned the shoot based on magical creative backdrops similar to Alice in Wonderland. Not your usual locations. Location was to be set outside because we were fortunate to be shooting in wonderful warm Miami.
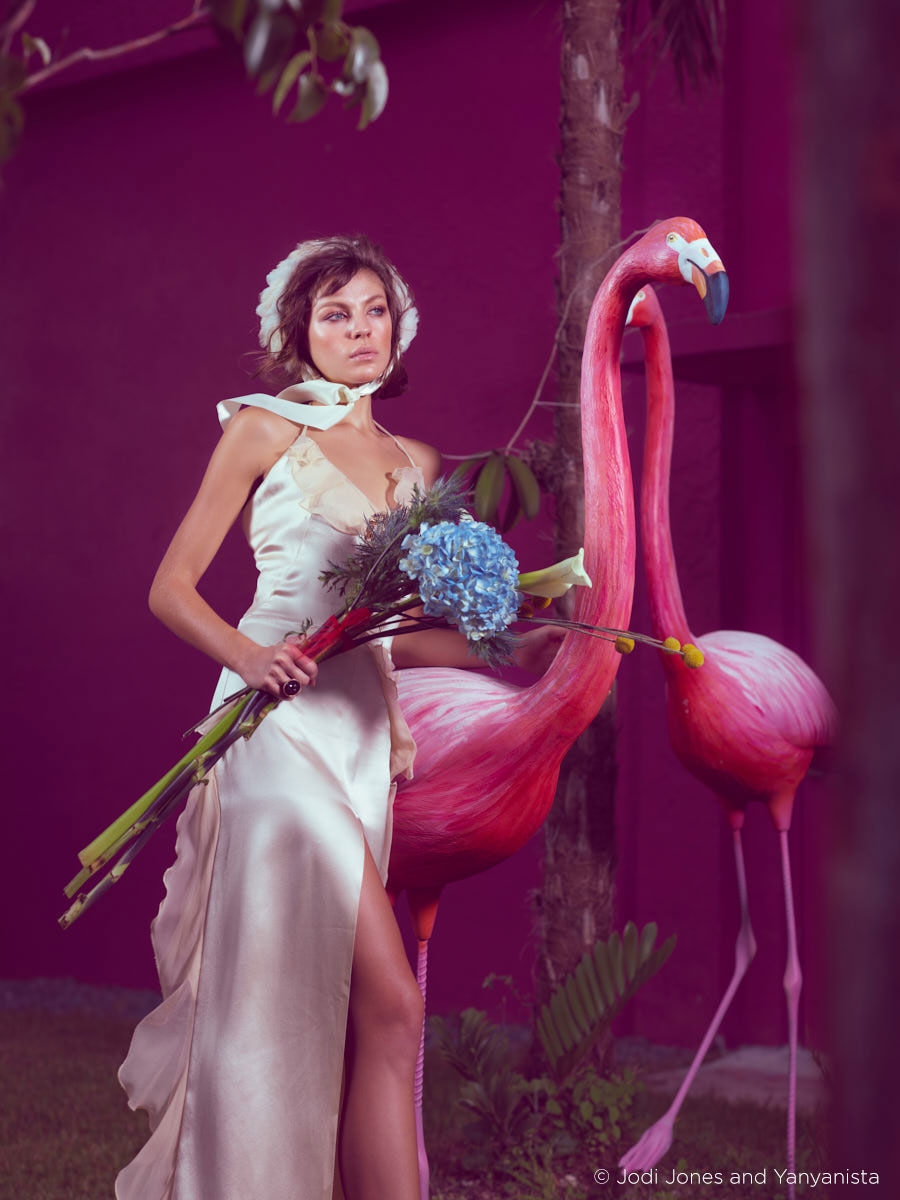
“The style is the essential part of the story telling. When I saw the location, I knew that something bazaar was going to be created there. Ideas were flooding in my mind. I immediately thought of one of my best friends, couture designer Anthony Manfredonia, and his gorgeous Rose Collection. I also thought of using cute headpieces from Ayuko H. Millinery and silk gowns from Manuel De la Cruz. I contacted the designers and they were super excited for the ideas!” stated Yanyanista.
We had stepped on a plane in NYC at 40 degrees Fahrenheit and stepped off to a perfect 80 degrees in Miami. We had really interesting backdrops of graffiti, a bull, flamingos, large pink buildings, greenery, and an air stream trailer. It was very important to utilize it all. Miami Ad School was very gracious to let us run around like kids on a playground shooting with the XF 100MP. We had so much fun.
Tethering on set
At the Miami Ad School, our students and I shot for two days with a huge 10 foot monitor to display the images while shooting. We were able to tether and immediately see the massive files in full perfect clarity, exposing every gorgeous detail. Amazingly, we had no problems tethering such high resolution images. In fact, it was lightning fast. And the sharpness of the files was intense.
We simplified the workflow by tethering directly into Capture One Pro. We used the Mac core desktop indoors and MacBook Pro laptop outdoors, always tethering. It let us see our composition, that our lighting was on point, and easily see when we got our shot so we could move on to the next shot quickly.
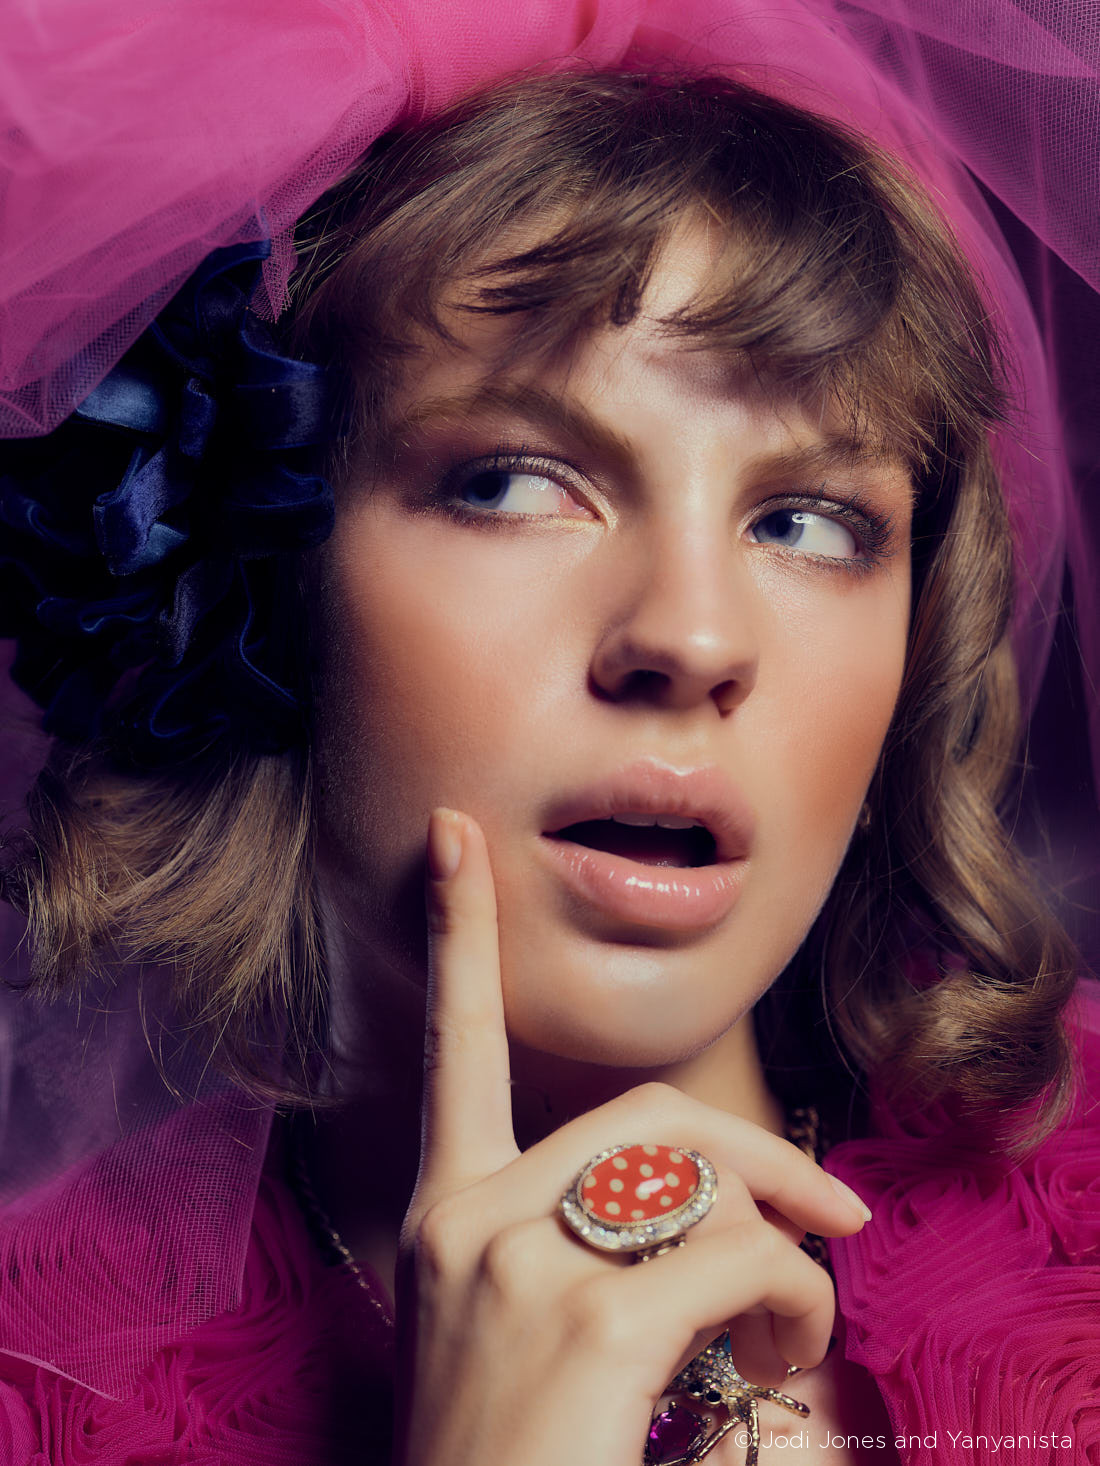
We shot the two models in a variety of locations, shooting beauty indoors and fashion outdoors. Our incredibly smart digital tech helped us handle the files and see the beautiful images immediately upon each shot. Some students had their iPads with Capture Pilot, which allowed them to see each image on their individual screens. Very cool!
Great gear takes the project to the next level
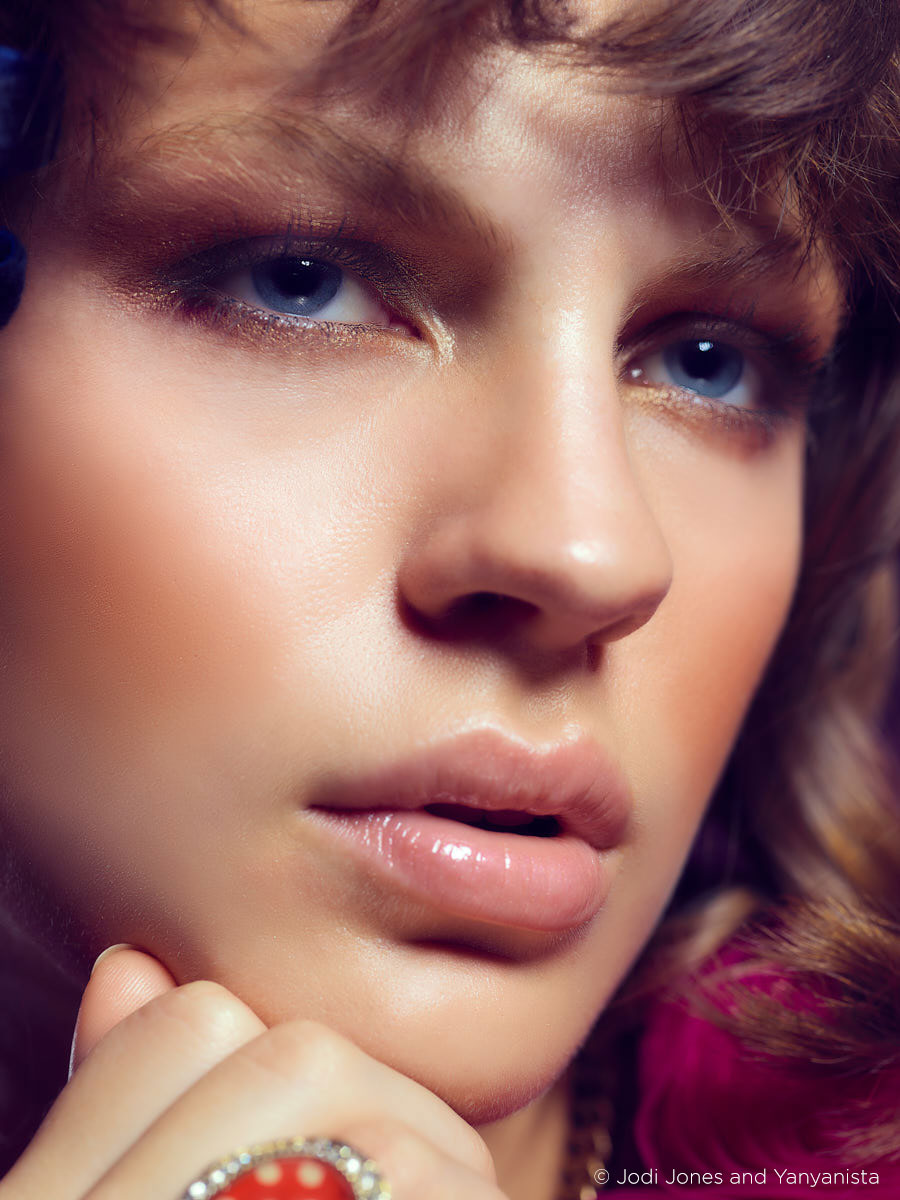
We had the Profoto D2 portable kit on-hand, along with the bright Miami sun. For the beauty shots we used the Schneider Kreuznack 120mm macro that was simply amazing. It has to be one of my favorite lenses of all time. It is so sharp and crystal clear. The depth of focus is extreme. One centimeter difference makes all the difference. This lens has gorgeous depth and sharpness.
Outdoors, we used theSchneider Kreuznack 55mm and 80mm prime lenses. Both are super sharp. I believe this is the best glass available on the market. When working with a large file you want to know the sensor actually has space to read the light coming into the camera. On a DSLR you know that the frame is small and therefore squeezing more information into a smaller space.
When working with medium format it allows the pixels to breathe. The light affects the sensor similar to using film. It is inherently beautiful straight from the camera, with little or no processing necessary.
Our “Dreamland” images came alive with the Phase One XF 100MP Camera System. Is it better than a DSLR? Without a doubt it is!

Fine-tuning with Capture One Pro
Capture One helps stylize and color tone your images for every shot, giving you a unique touch. It renders the picture color wonderfully.
Yanyanista broke down the steps in Capture One and Photoshop for retouching. She started with getting the most from the file in Capture One. Bringing up the shadows, setting the dreamy mood by lowering the clarity and desaturating the skin tone.
The images deliver a natural texture and tonal feel. In Photoshop, she worked on cleaning up the skin with her special techniques. And separating layers to isolate color tones.
The process was long but worth the detailed attention. We first broke down the concept, creating the right feeling with styling, mood boards and the location of Miami Ad School. Then, we made it happen with the great gear like the powerful portable Profoto lights and the glorious Phase One XF 100MP camera. Finally, Yanyanista processed the files with Capture One.
Our students in Miami were very discerning professionals working in high profile commercial studios that need the ultimate image quality for their jobs. The XF 100MP camera has breathtaking detail in both highlights and shadows.
On our large monitors, they saw images coming into Capture One via tethering that barely needed any retouch in Photoshop. With 500MB 16 bit 100%-scaled TIFFs you can crop into the image for any detail needed.
Capture One Pro Workflow in Pictures

1. Make sure the image selected is focused
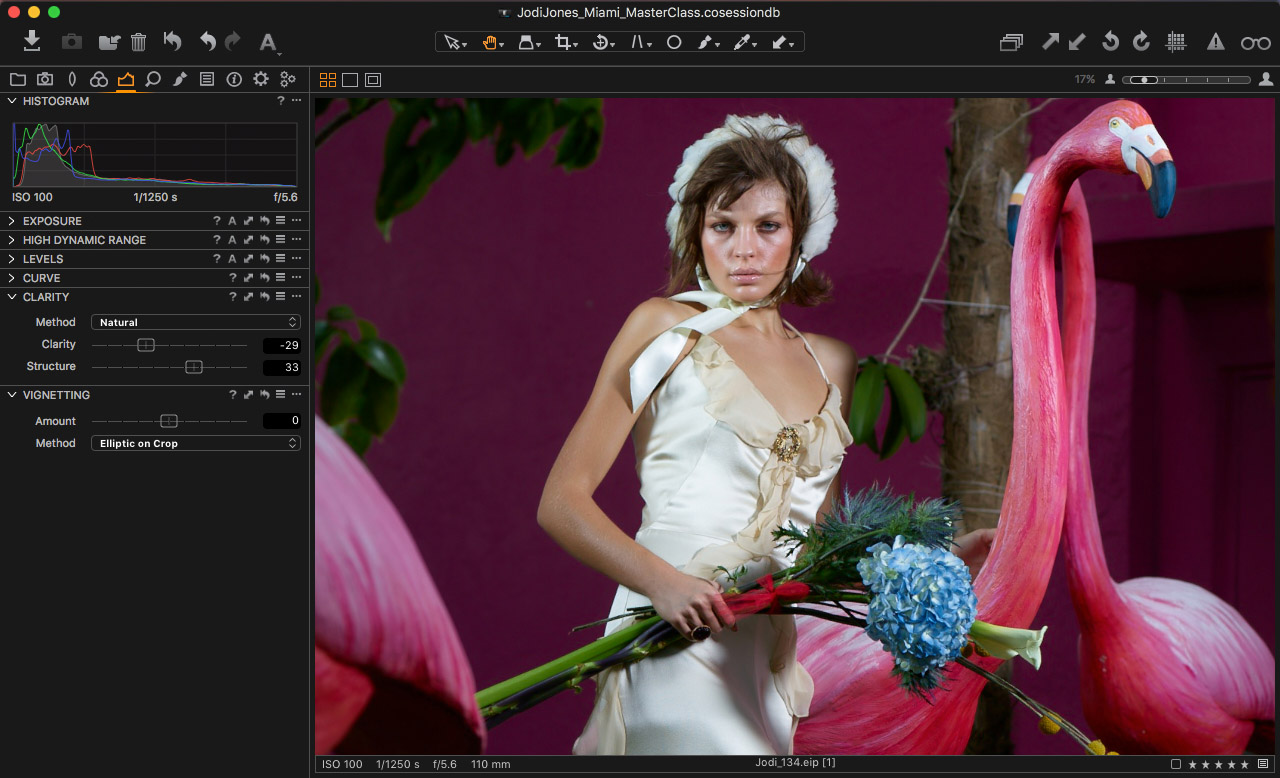
2. Create flawless skin by decreasing Clarity while increasing Structure

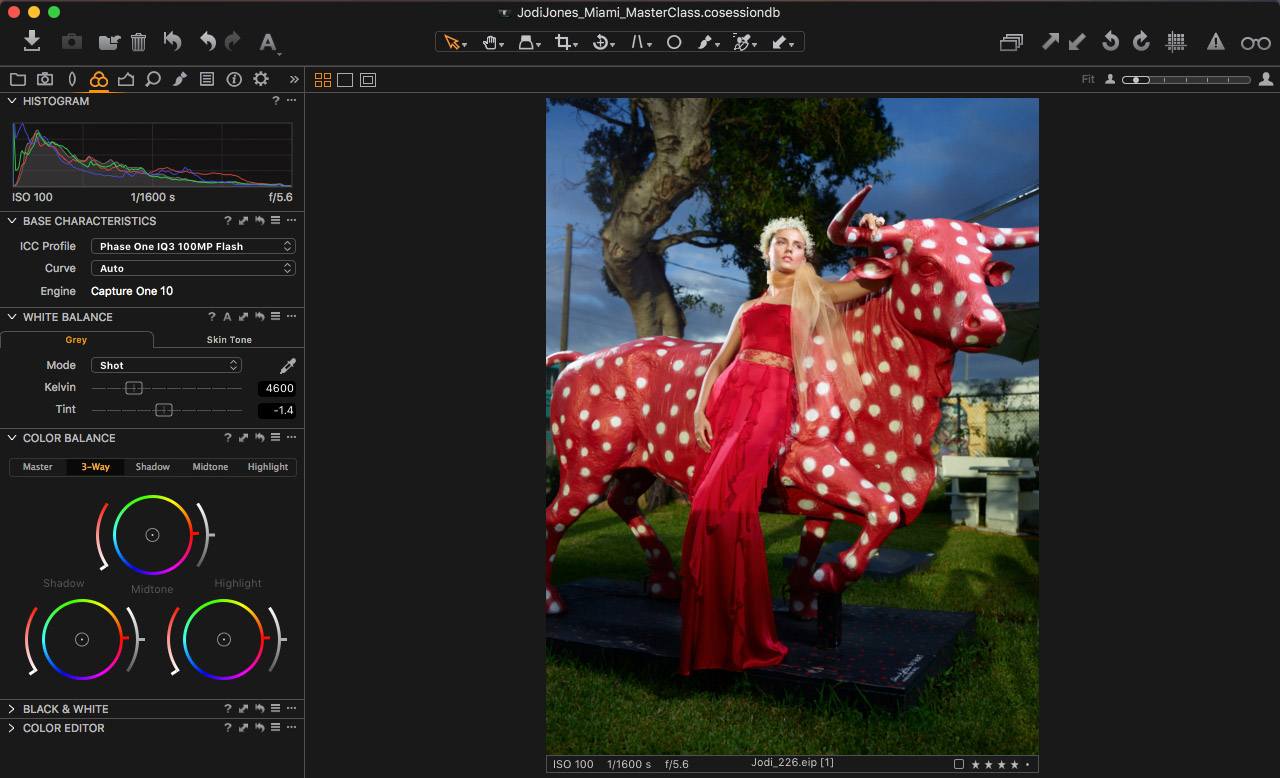
3. Create a dreamy and surreal color tone with Color Balance
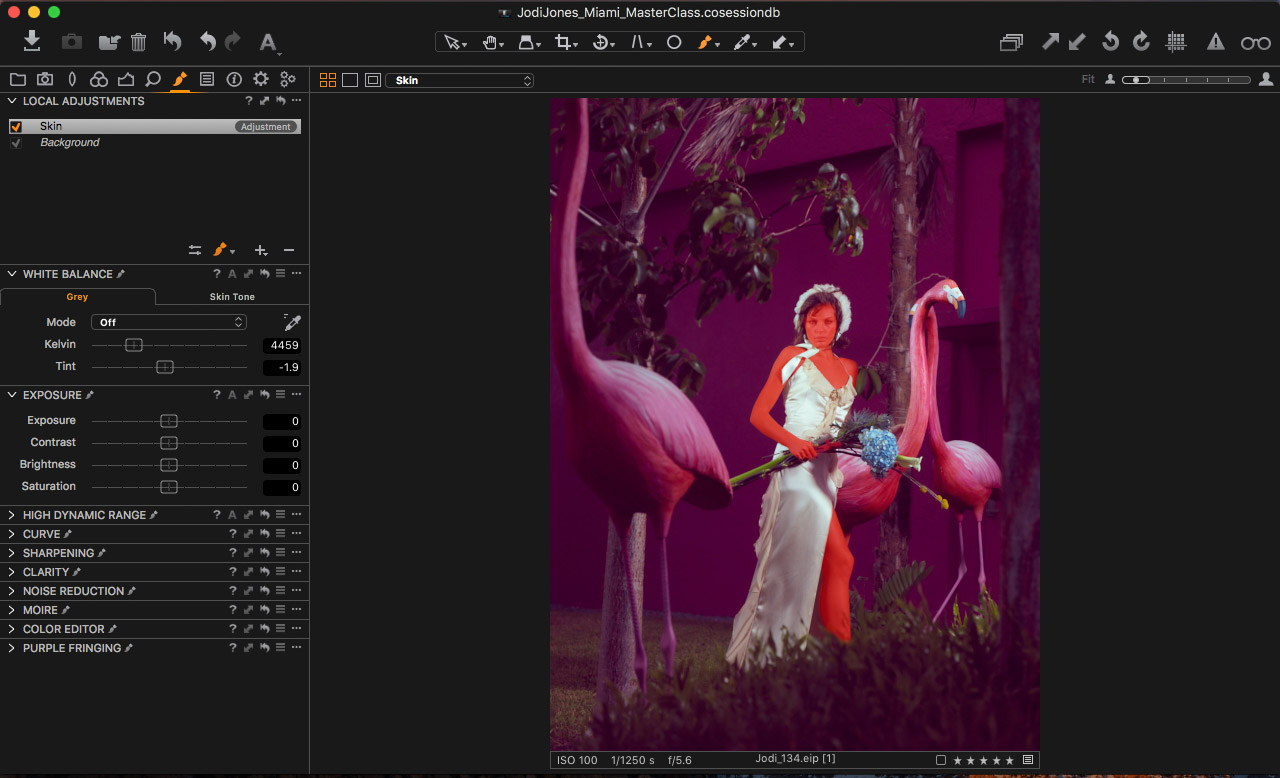
4. Add a new layer on Local Adjustment, draw mask on skin area

5. Use the Color Picker Tool in Color Editor to sample the midtone on the skin, then make adjustments in Hue, Saturation and Lightness
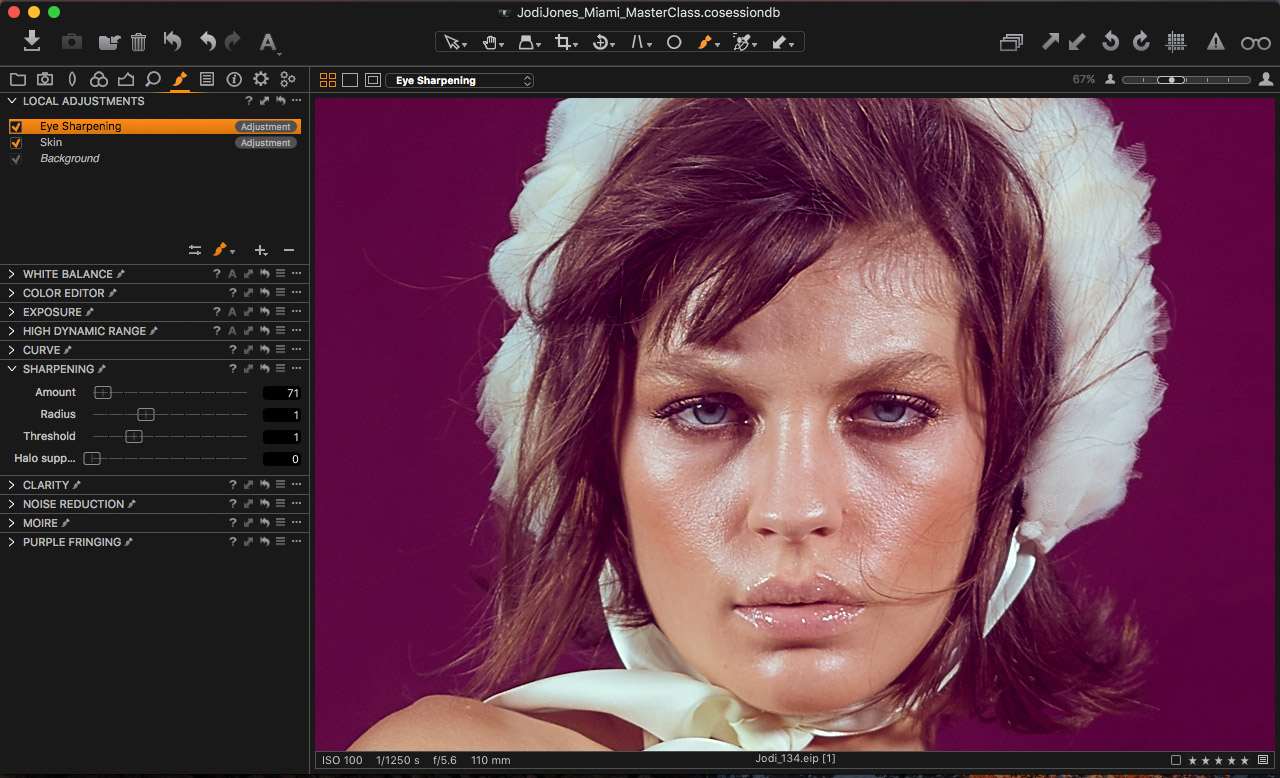
6. Add another layer and draw mask on the area of the eyes, then increase the amount of Sharpening
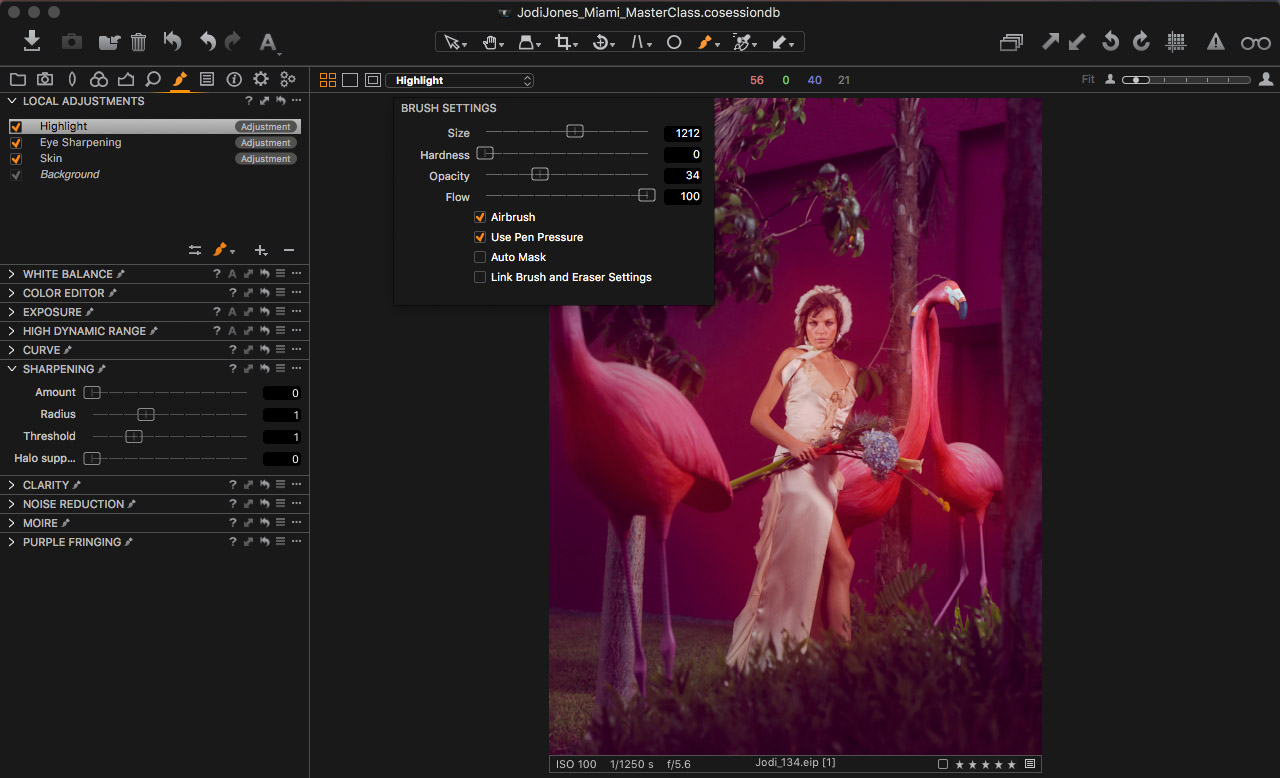
7. Add the final layer and decrease the opacity of the brush, Paint on the areas around the model and other subjects softly

8. Before and after
9. Select image from another look
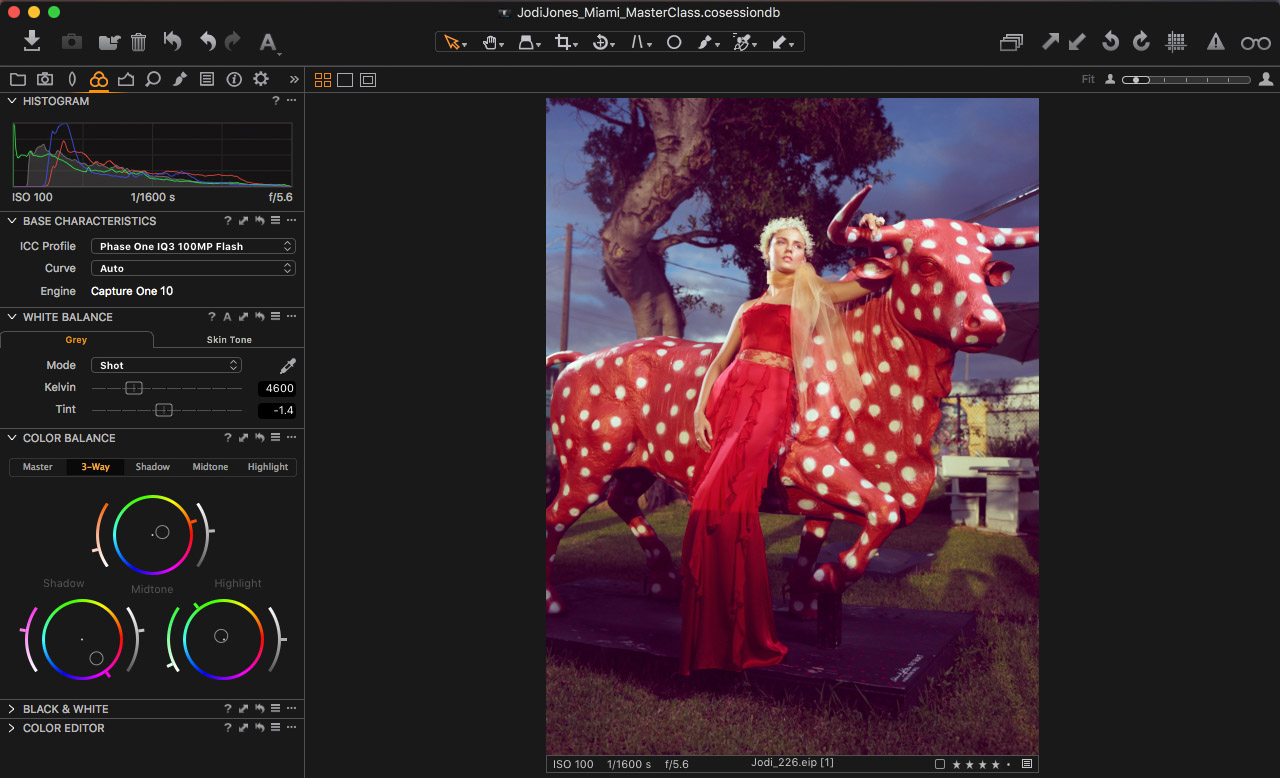
10. Apply similar adjustments of the first image in Color Balance
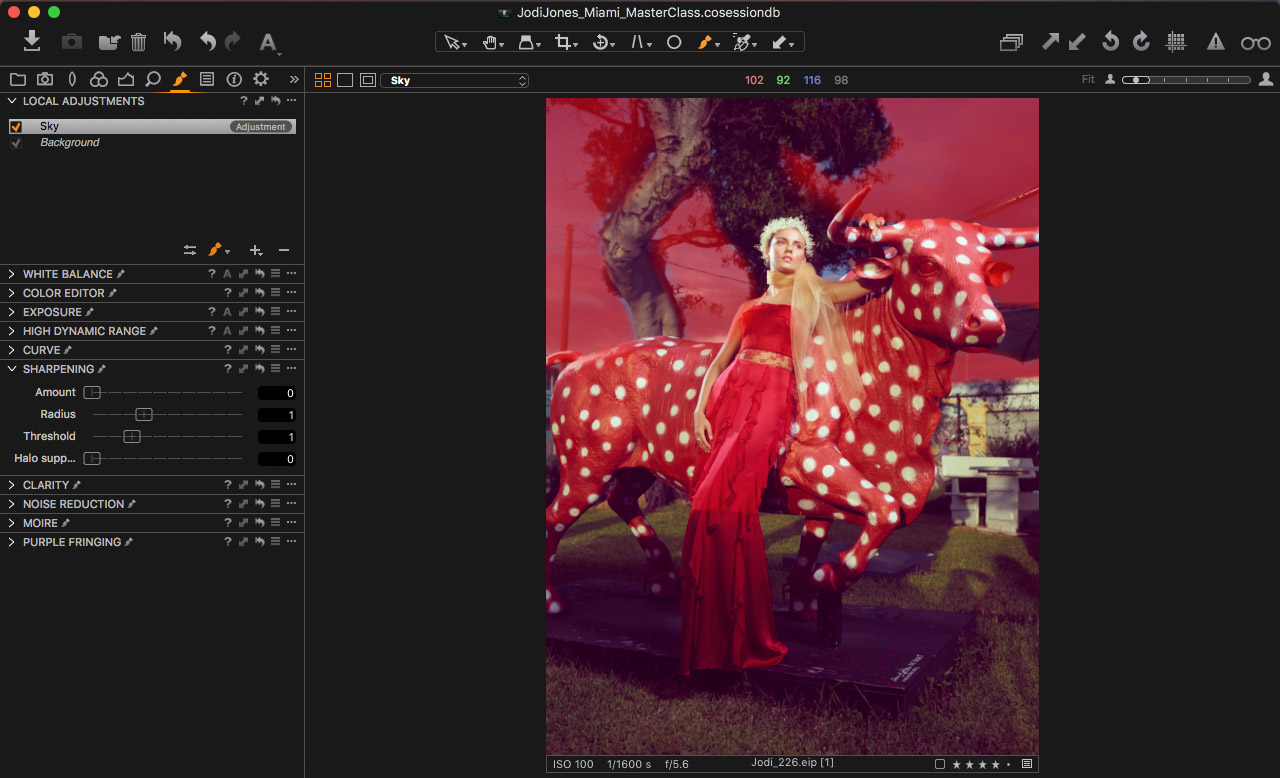
11. Create a new layer and paint mask on the area of the sky
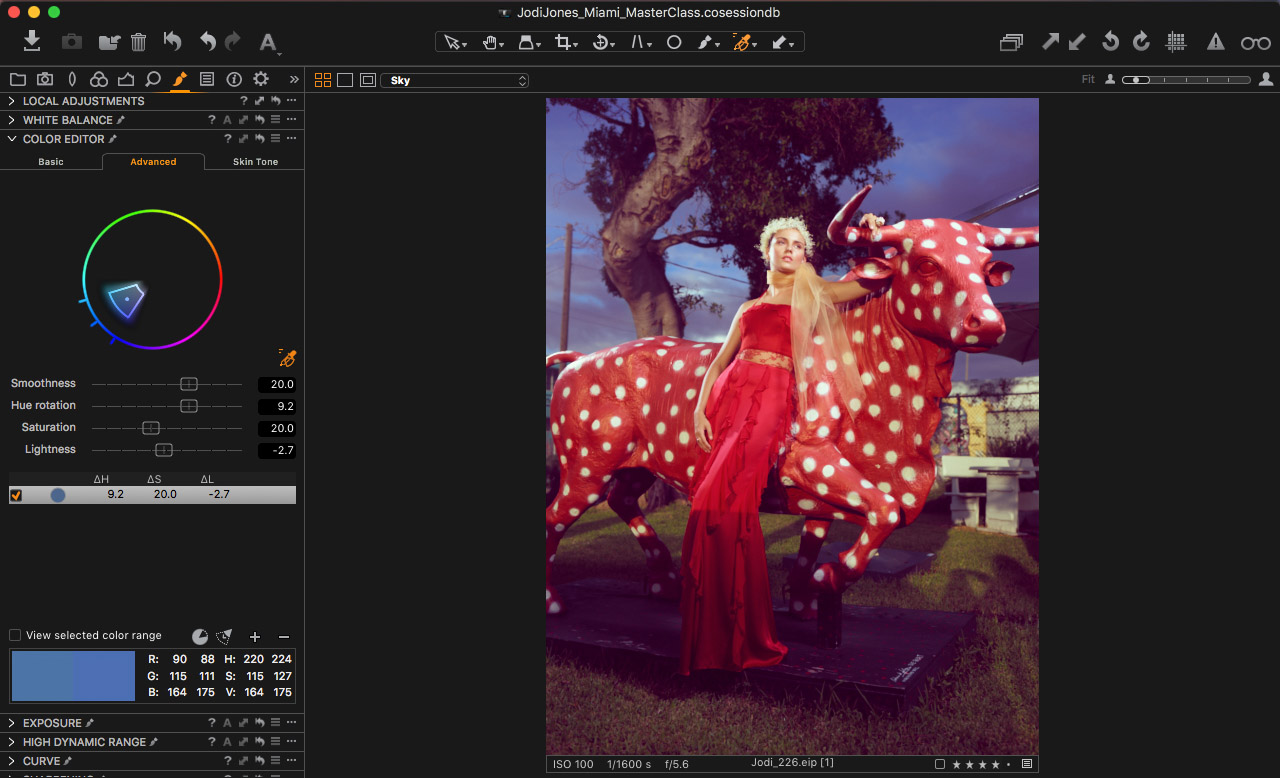
12. Sample the color of the sky and make color adjustments in Color Editor

13. Before and after
That was all from us. Feel free to leave a comment here on the blog.
All the best,
Jodi Jones & Yanyanista
Retouching by Yanyanista
All Photos by Jodi Jones
Article by Jodi Jones & Yanyanista

Jodi Jones
JODI JONES is a two time SILVER LIONS AWARD WINNER at the CANNES INTERNATIONAL FESTIVAL of CREATIVITY for 2015 and the founder of Jodi Jones Studio, a visionary studio that specializes in Creative Direction, Photography, Motion, Branding, Consulting and Marketing. Jodi helps companies like AKQA, McCann, Kenneth Cole, Bullett Media, NY Observer Media, and Art Not War communicate their message. Jodi’s photographs have appeared in Vogue, Vanity Fair, Cosmopolitan, Time Magazine and countless others. The TV Show “Women on Top” did a full episode on her life as a photographer. Jodi is now traveling the world inspiring and speaking at seminars and workshops on creativity, entrepreneurship, and photography.


