
Capture One Pro is extremely versatile. It’s always been a powerhouse when it comes to handling RAW images. With Capture One Pro 9, more powerful color tools have become available – so powerful that personally I’ve moved almost all of my color grading to Capture One Pro, versus Photoshop. In this post, I’m going to talk about how I use Capture One to achieve a desired look for fashion and portraits.
To start things off, let’s have a look at the original RAW image of Chelsea in Capture One Pro:
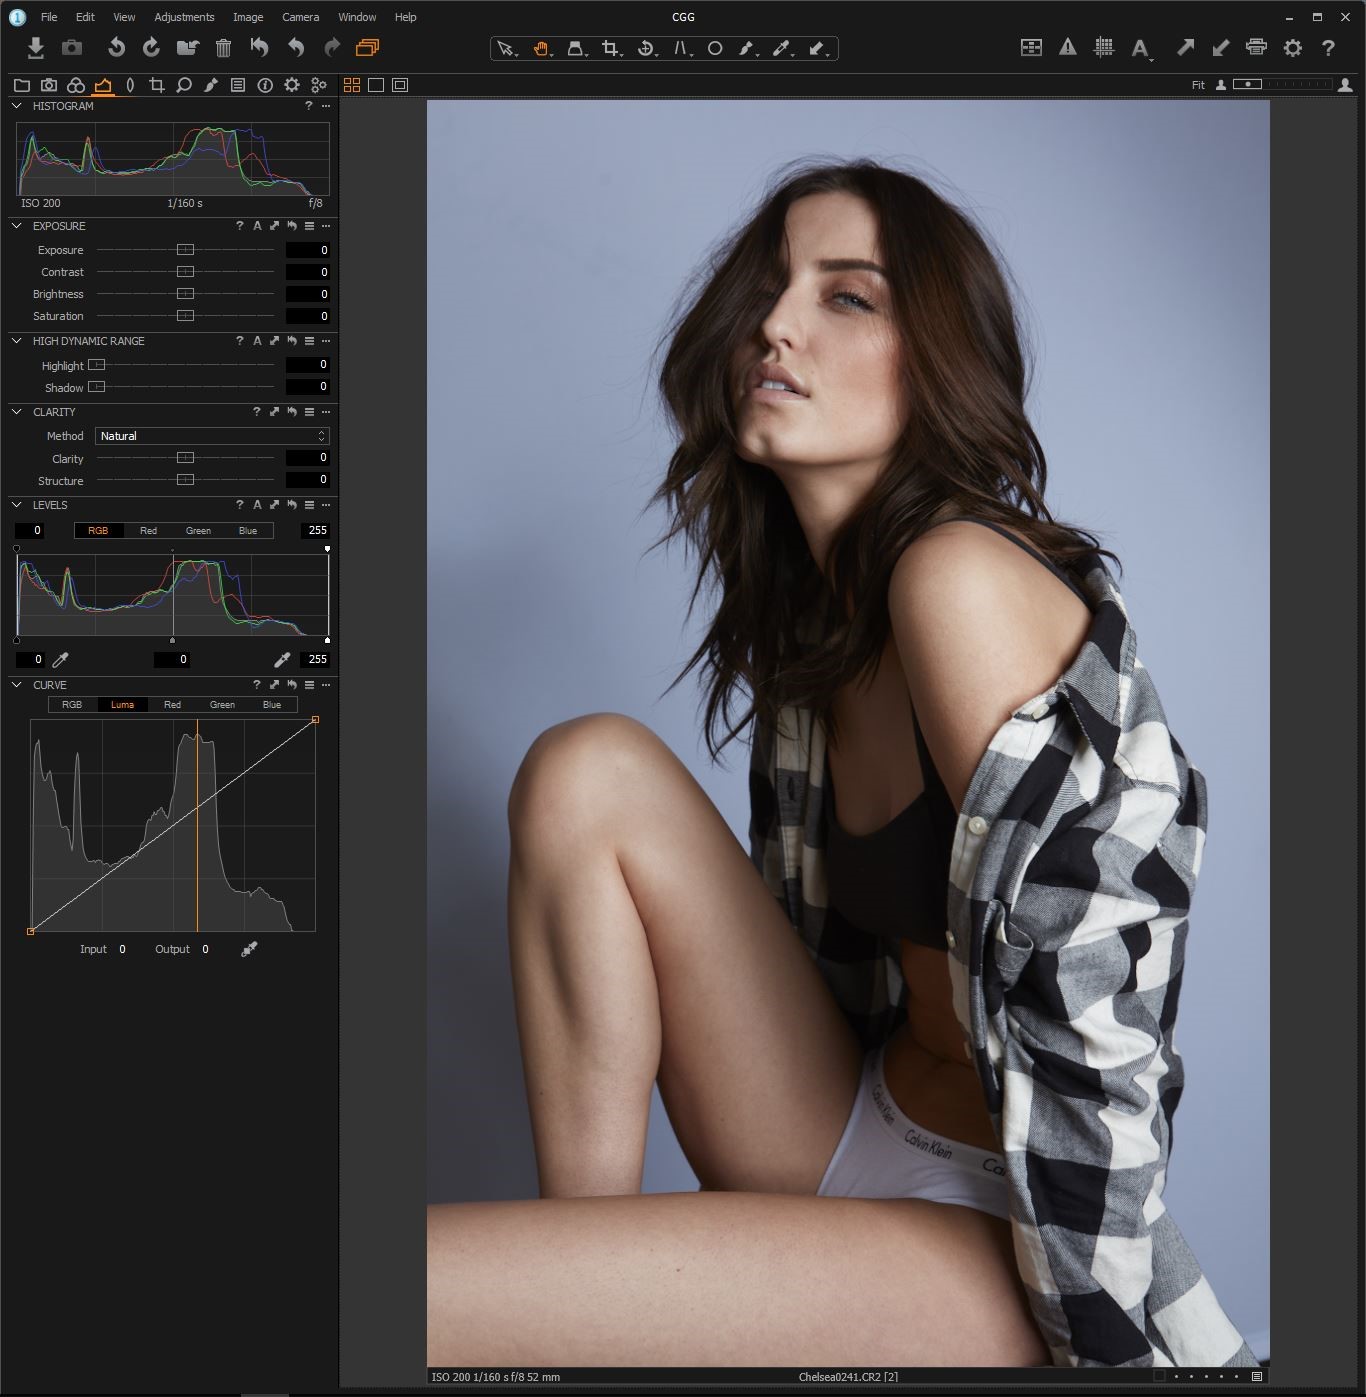
Original image
Luma Curves
Firstly, the hair was a little dark in the shadows so I wanted to slightly bring out the detail without impacting the image dramatically, which is normallt what you would see using the shadow save slider.
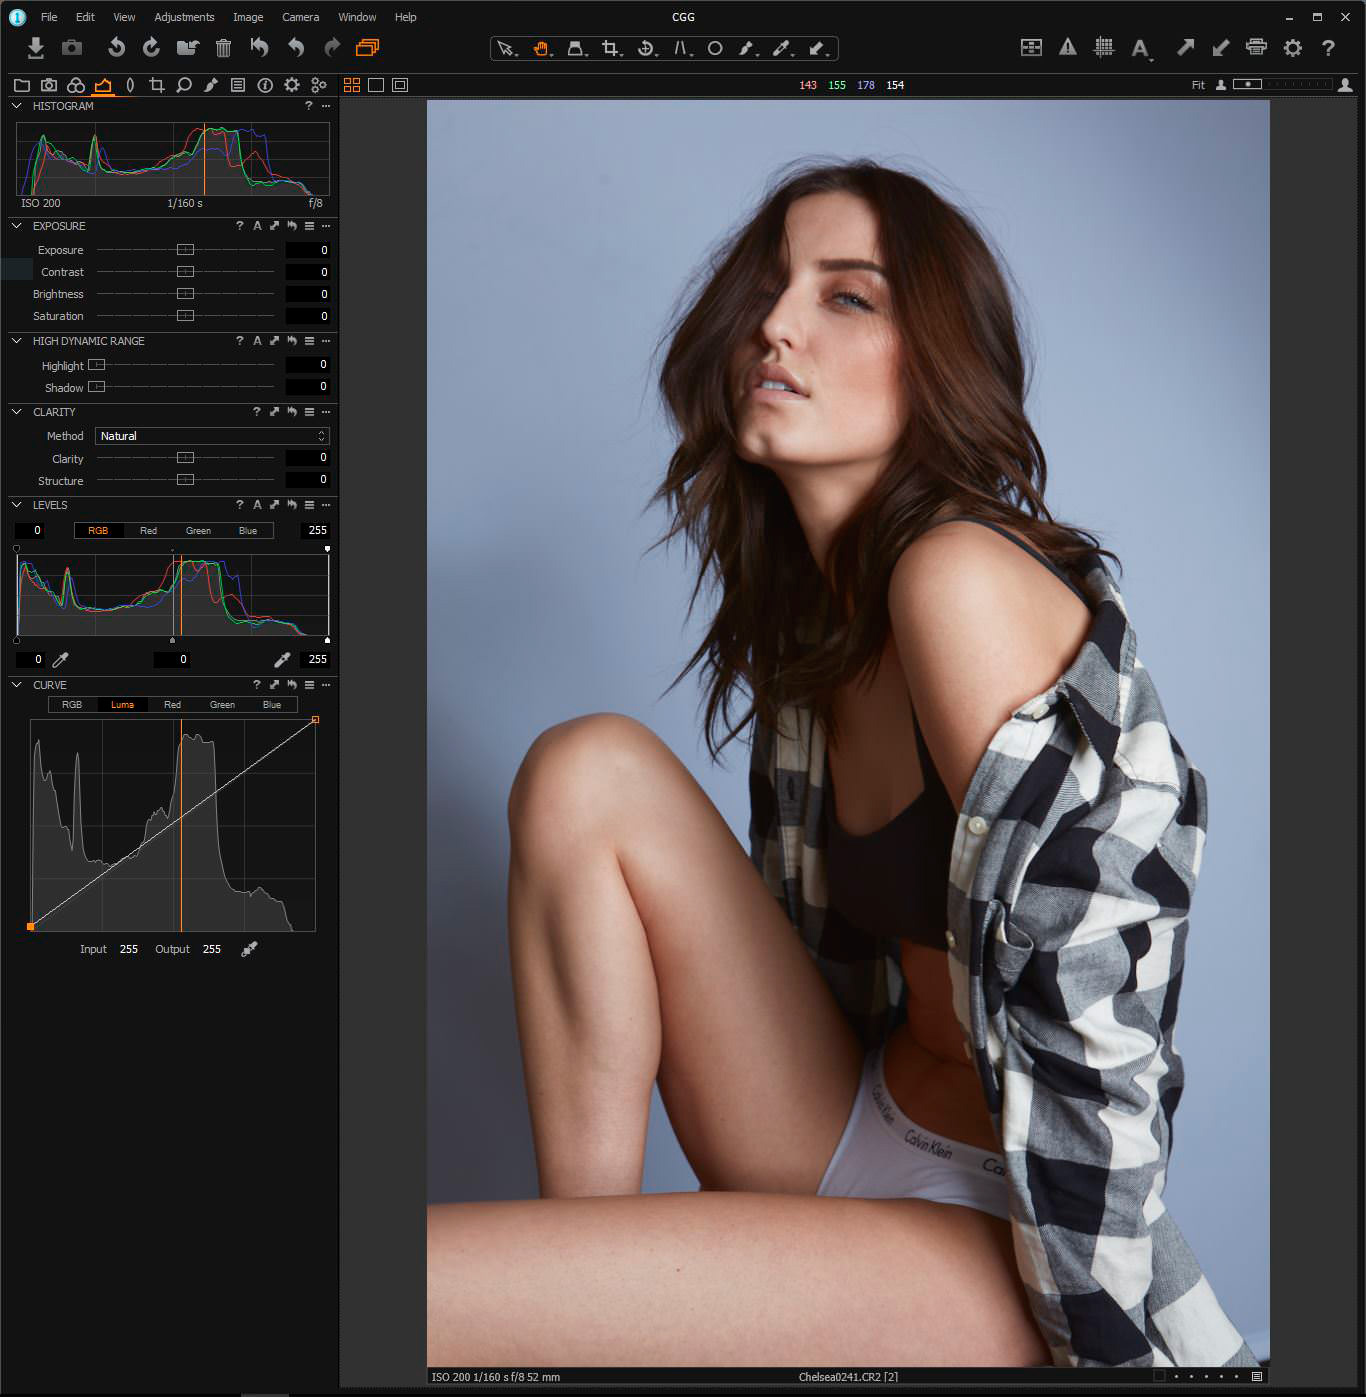
Black tone Changes with Luma Curves
Using the Luma curve, I slightly brought up the shadows. The new Luma curve is great since it doesn’t affect saturation. I often use the curve eyedropper tool to pick out the areas on the histogram that I want to affect. In order to reduce the affected areas, don’t forget to lock down elements outside of the area that you are working with.
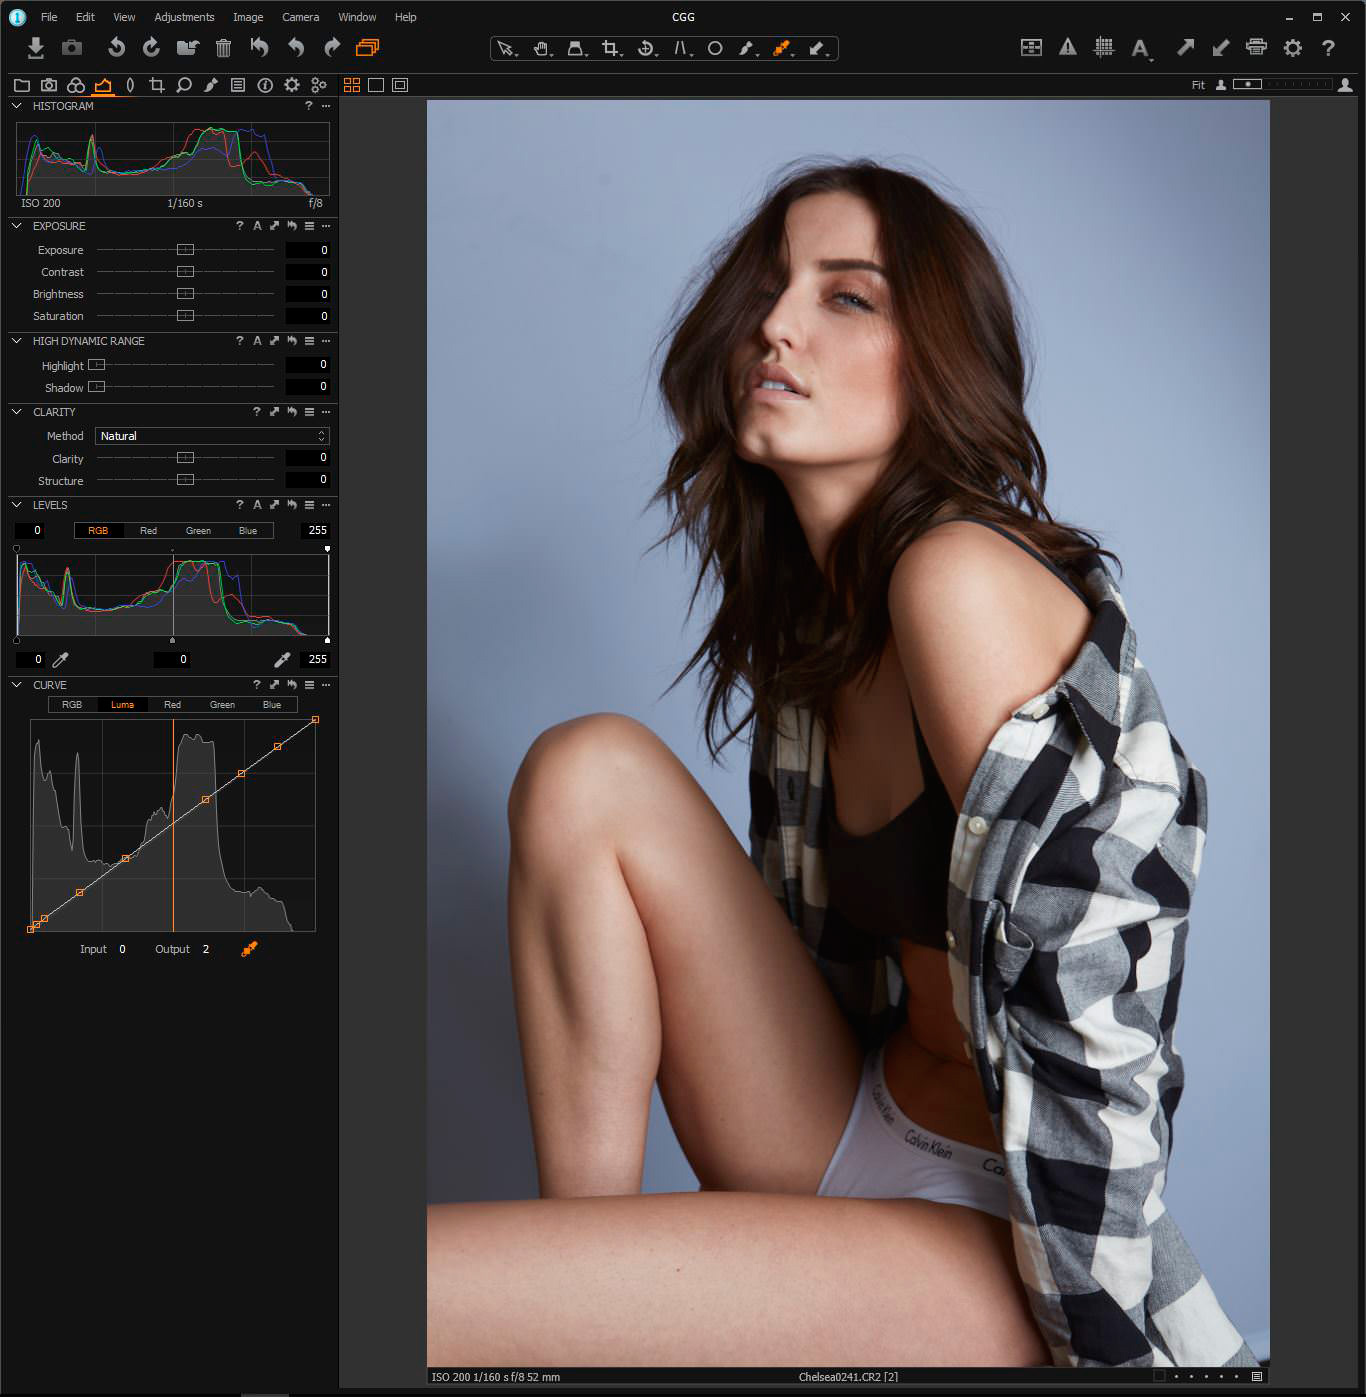
The change is subtle, but sometimes subtle changes are all you need
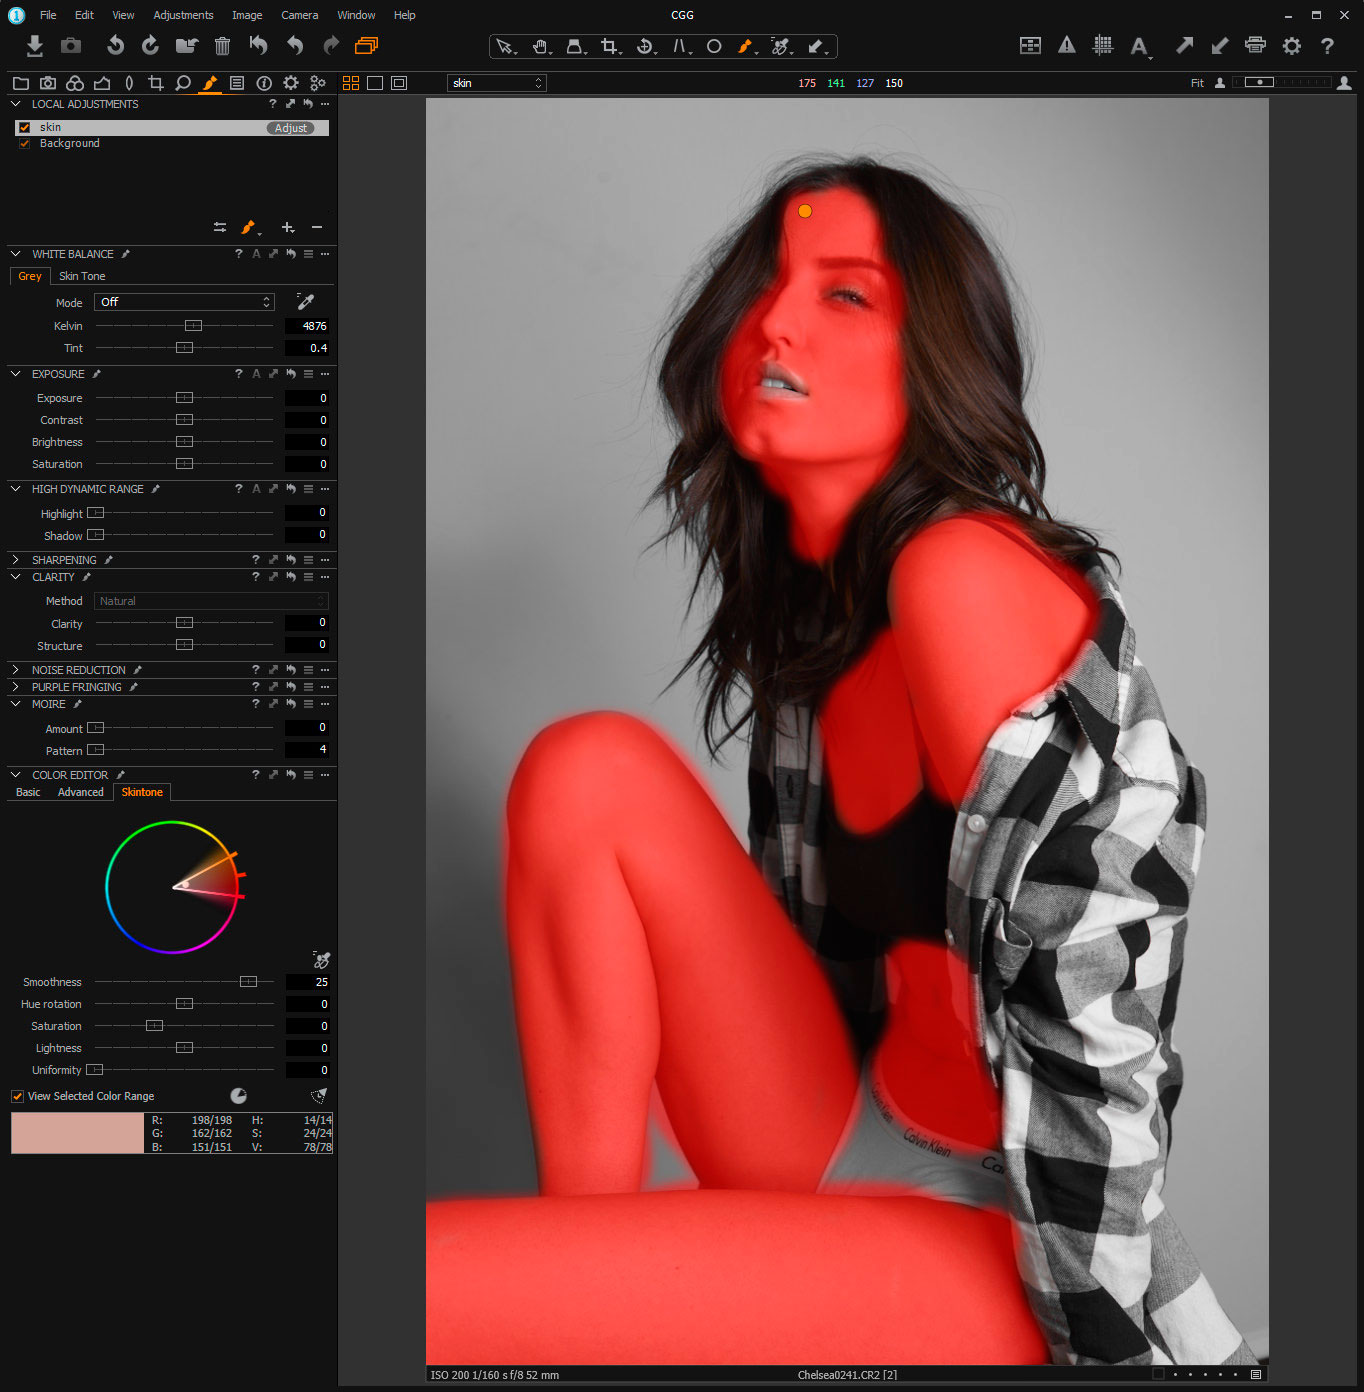
Skin tone uniformity
Our model, Chelsea, already has great skin tones. What we want to do is to bring the shadowed skin tones more in line with the well-lit skin tones. To do so, I jumped to Local Adjustments, created a new layer and named it “skin”. From there, I went to the Color Editor and selected the Skintone tab. Here, you want to grab the eyedropper and select an area of skin. I often turn on the “View selected color range” checkbox so I can see exactly which tones I am selecting.
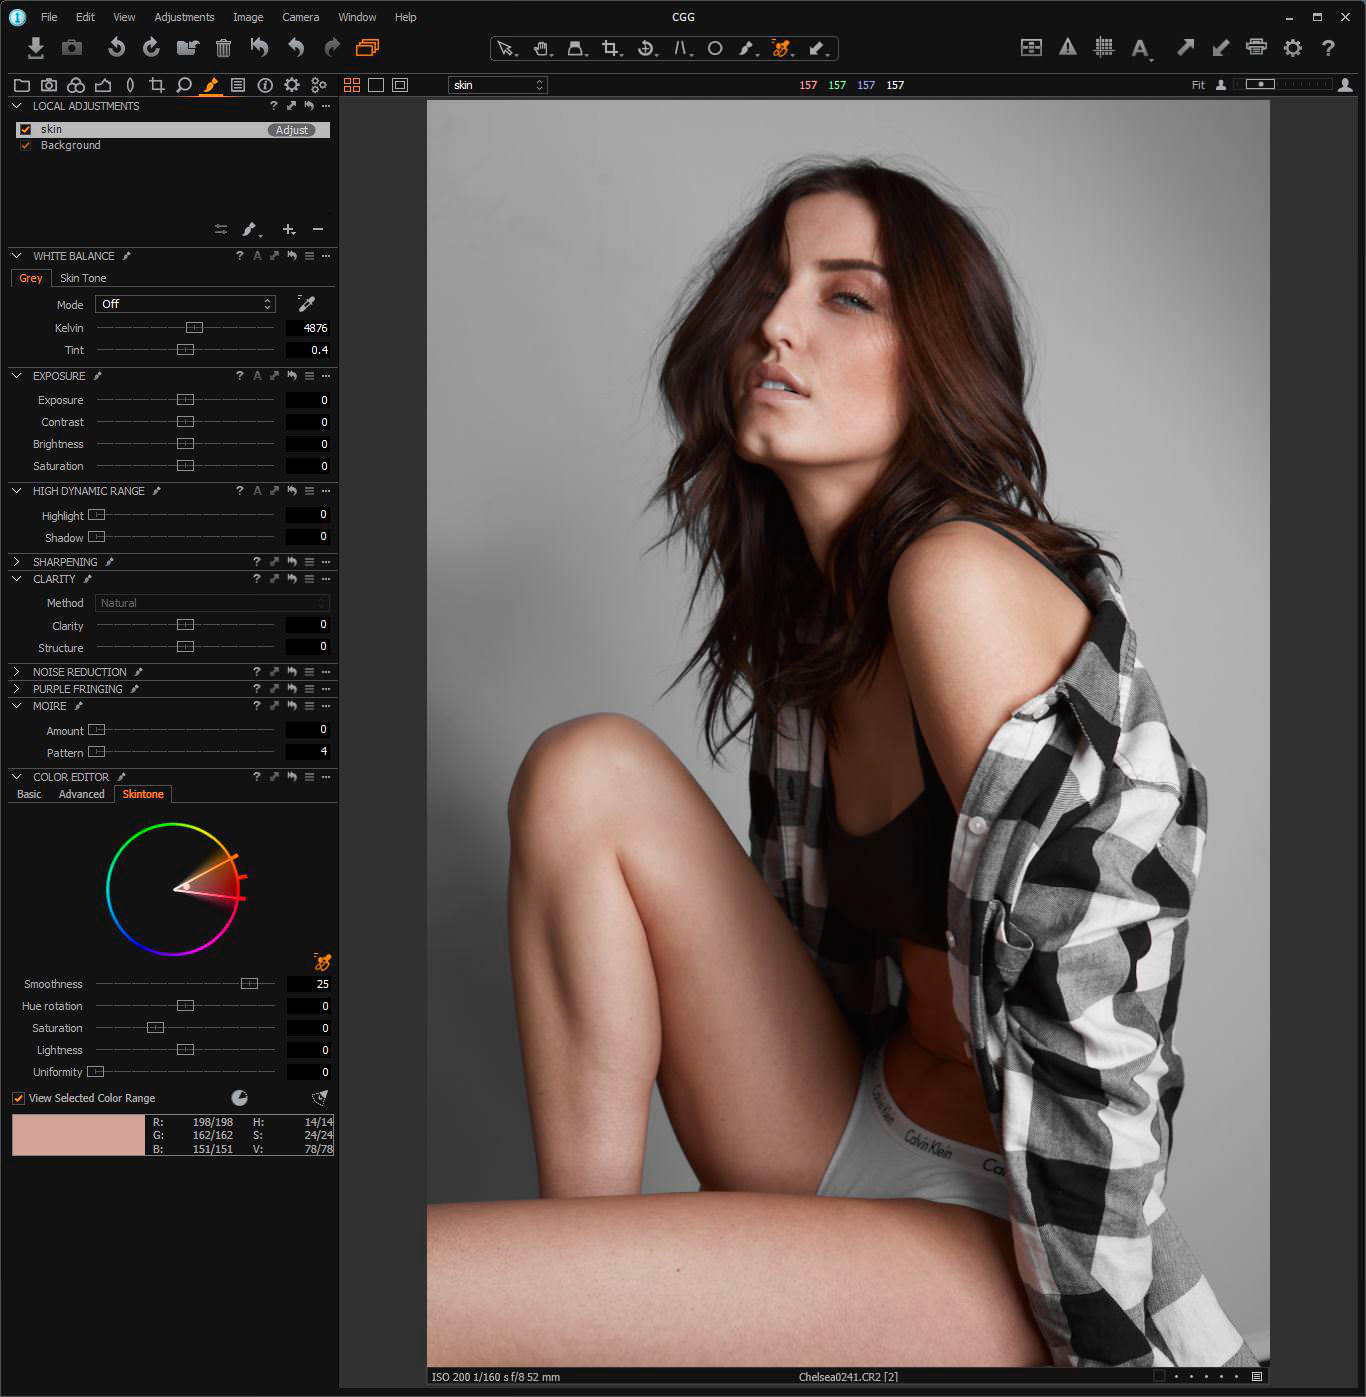
Quick mask with skintone eyedropper
You will notice that we are only selecting her skin tones as the blue background is not showing. This is a great quick mask, however, we do not want to alter her lips. Therefore, I will typically throw a secondary mask on. Make sure you are on the skin adjustment layer and paint away.
More complex mask to remove lips
After writing the post I discovered that with the release of Capture One Pro 9.1. there is actually also a new feature making it possible to transform a color selection into a mask. The feature is called Create Mask from Selection and it would have been very helpful in this case. See more in this tutorial. From 2:30 onward.
Now that you have a great mask, you want to turn up the uniformity slider. This can be found in the Skintone tab, which will blend the tones nicely. Often, I find the tones a little red, so I’ll play with the hue rotation tool to achieve the desired skin tone.
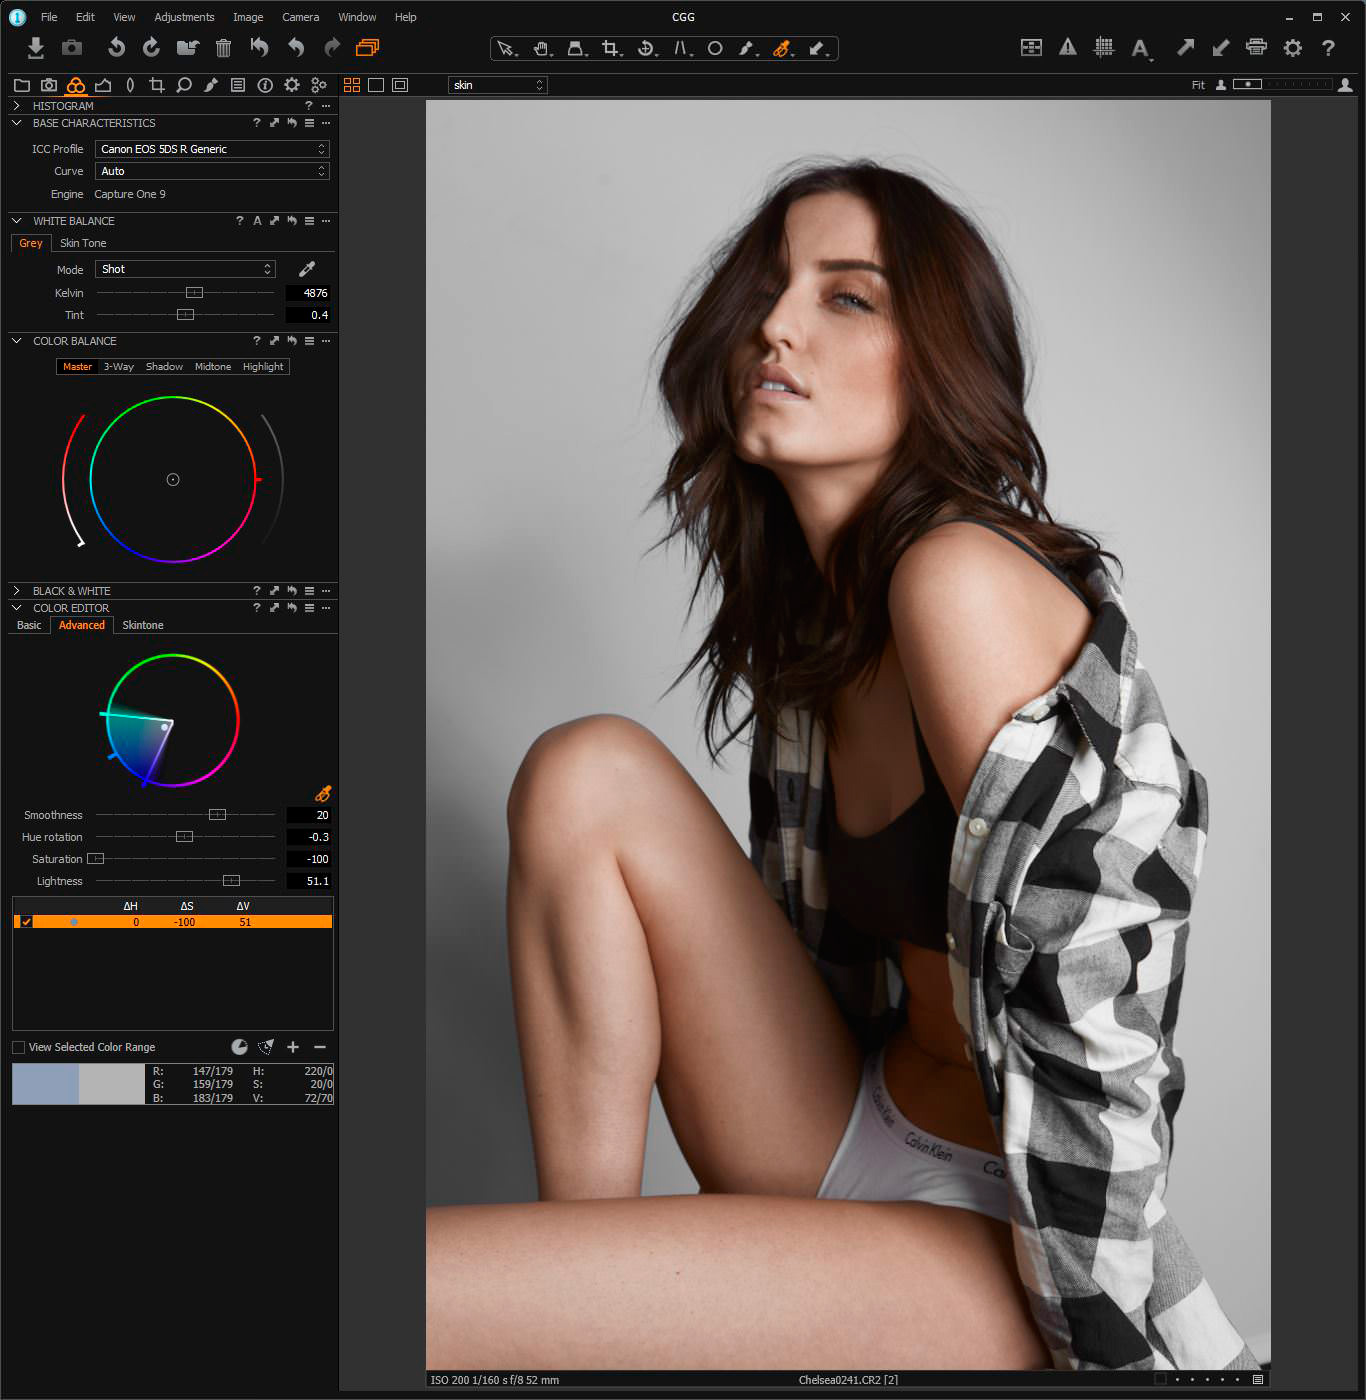
Color Editor for subject isolation
For this particular image, I wasn’t a fan of the blue background. Having the “view the selected color range” check box on gave me the idea to eliminate the blue background. To do this, I used the Color Editor tool and selected a spot on the background with the eye dropper. Make sure to be under the Advanced tab.
You will notice the sampled color appearing in the list and now it’s ready to be adjusted. I pulled down the saturation to -100 to get rid of the blue all together. Moreover, I pulled up the lightness a bit, to brighten the background.
Removal of blue background with the Color Editor Tool
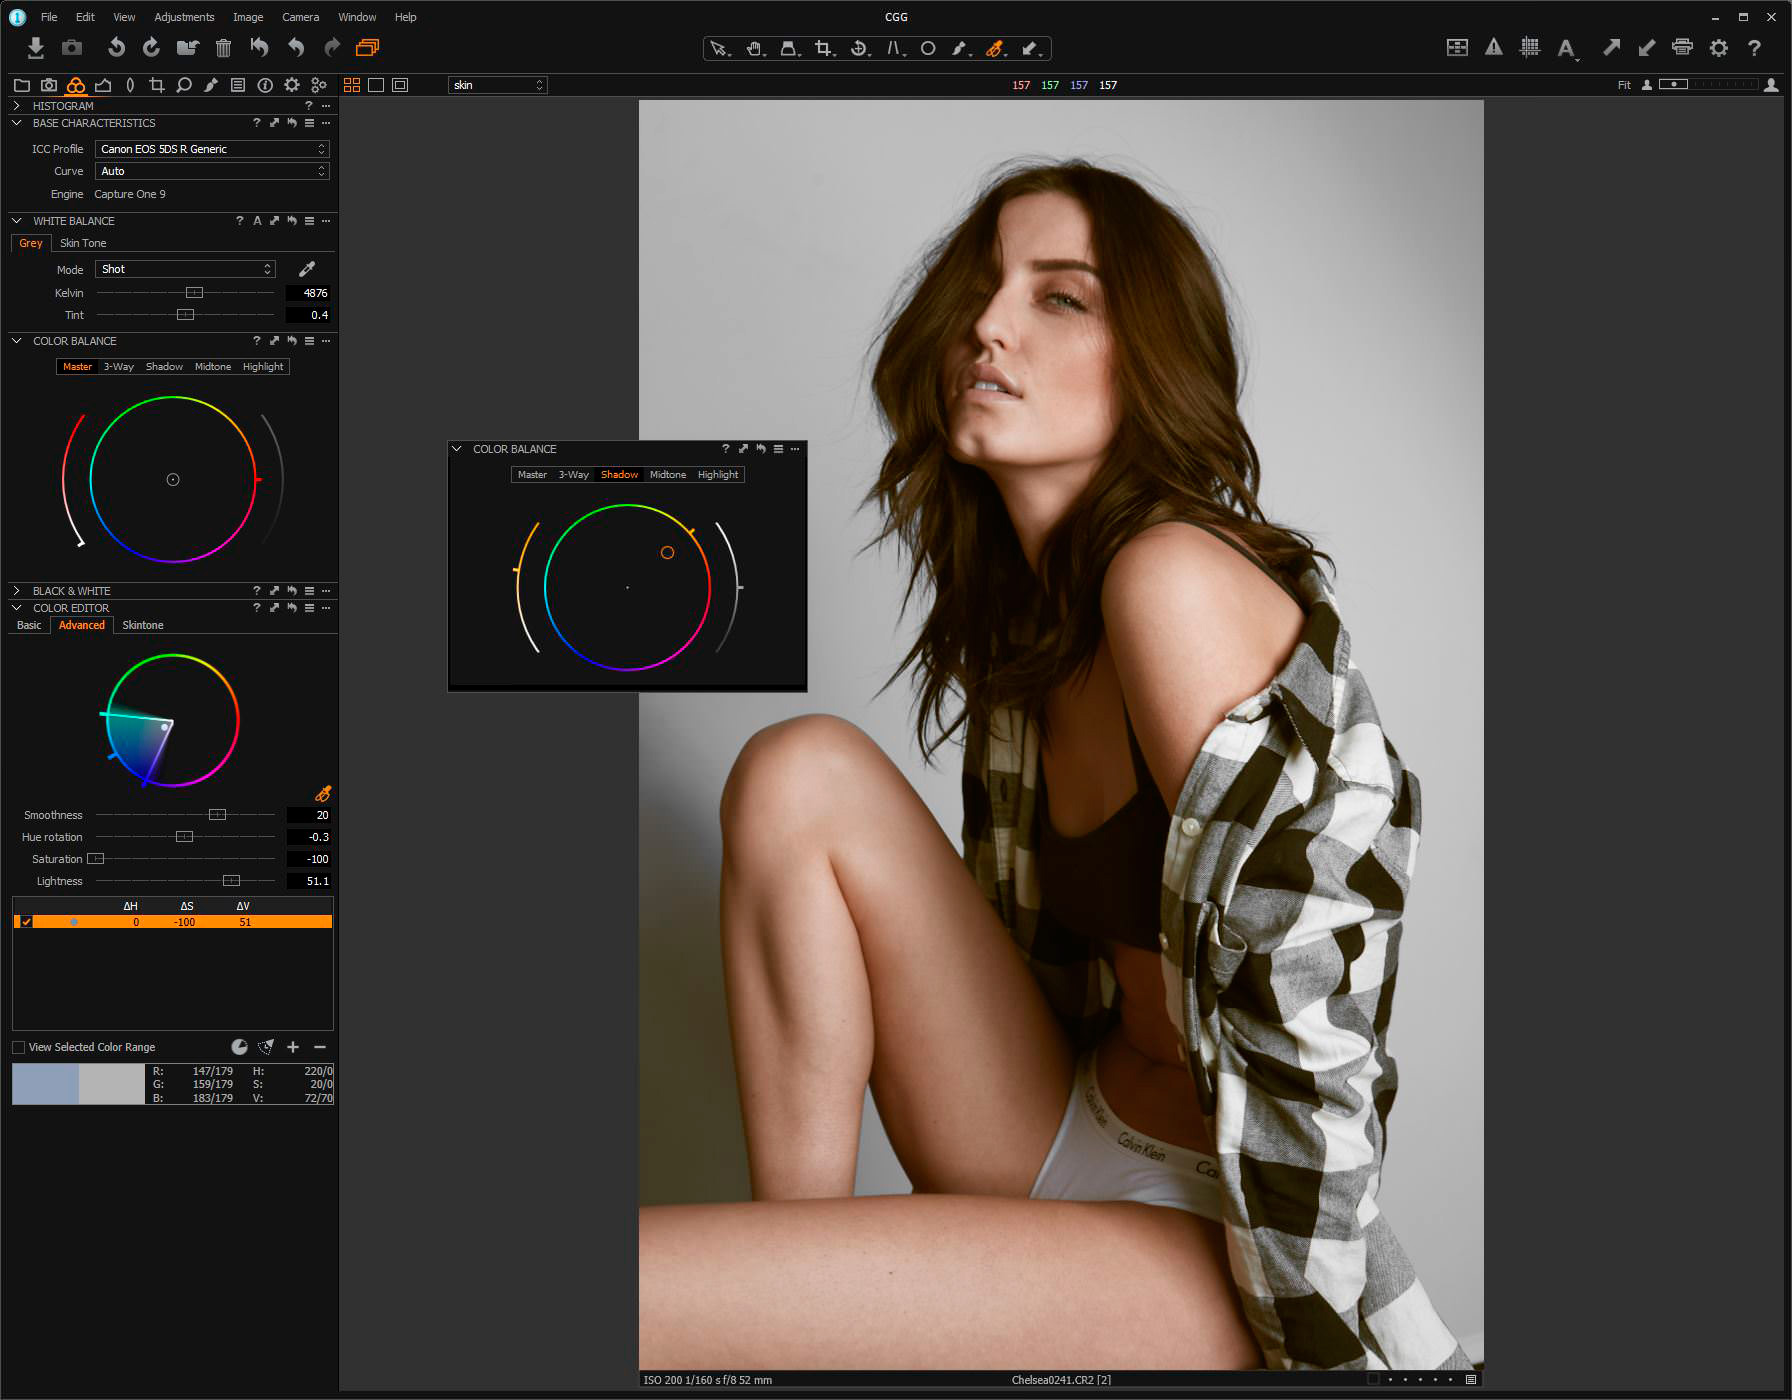
Color Balance Tool for shadows, midtones and highlights
Now that the image is at a good baseline, I played with the colour balance. With the Color Balance tool, you can shift the shadows, midtones and highlights independently on hue, saturation and luminosity.
You can do something sutble… (see below)

Or something drastic… (see below)

Drastic Shadow hue shift
For this particular image I wanted to add just a slight orange to the shadows so I dragged the circle over to the right. You will notice two curves on either side of the large circle. The left is for saturation, and the right is for luminosity. The notch on the circle identifies the hue. So, there are really two ways of approaching this; You can either play around with the small circle in the middle, or dial it with the notches to your liking.
Adjustment Layers for eyes
Furthermore, I noticed that the eyes could use a little light, so I jumped back into the adjustment layers and masked the eyes, turning up the shadow recovery just a bit..

Ahhhh, just right
For this example, I didn’t adjust the mis-tones or highlights, only the shadows.
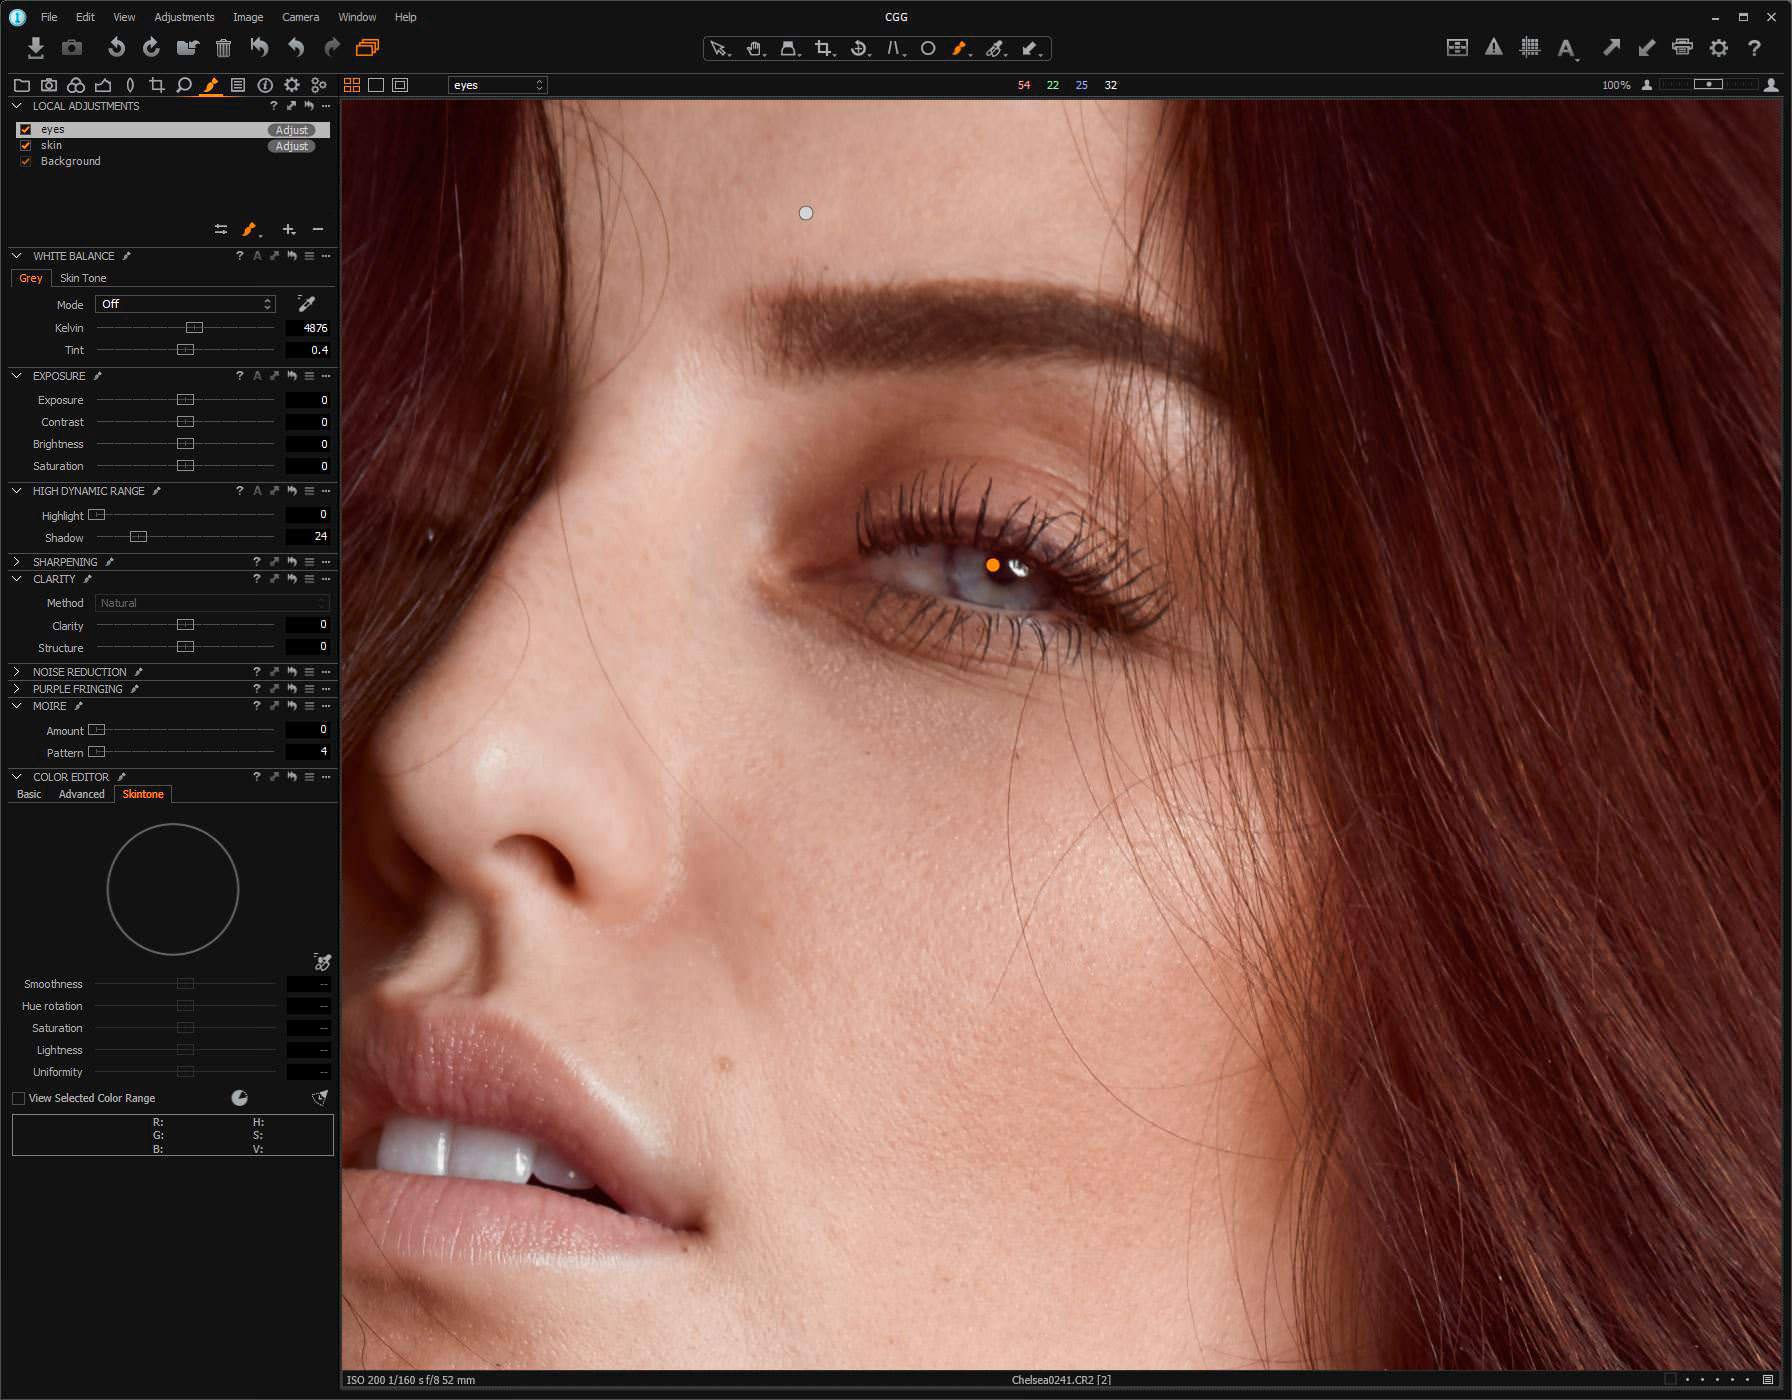
Bring up the shadow in the eyes with the adjustment layer
The final result
And that’s basically it! It doesn’t seem like we’ve done much to this RAW file, but let’s review the before and after pictures below:
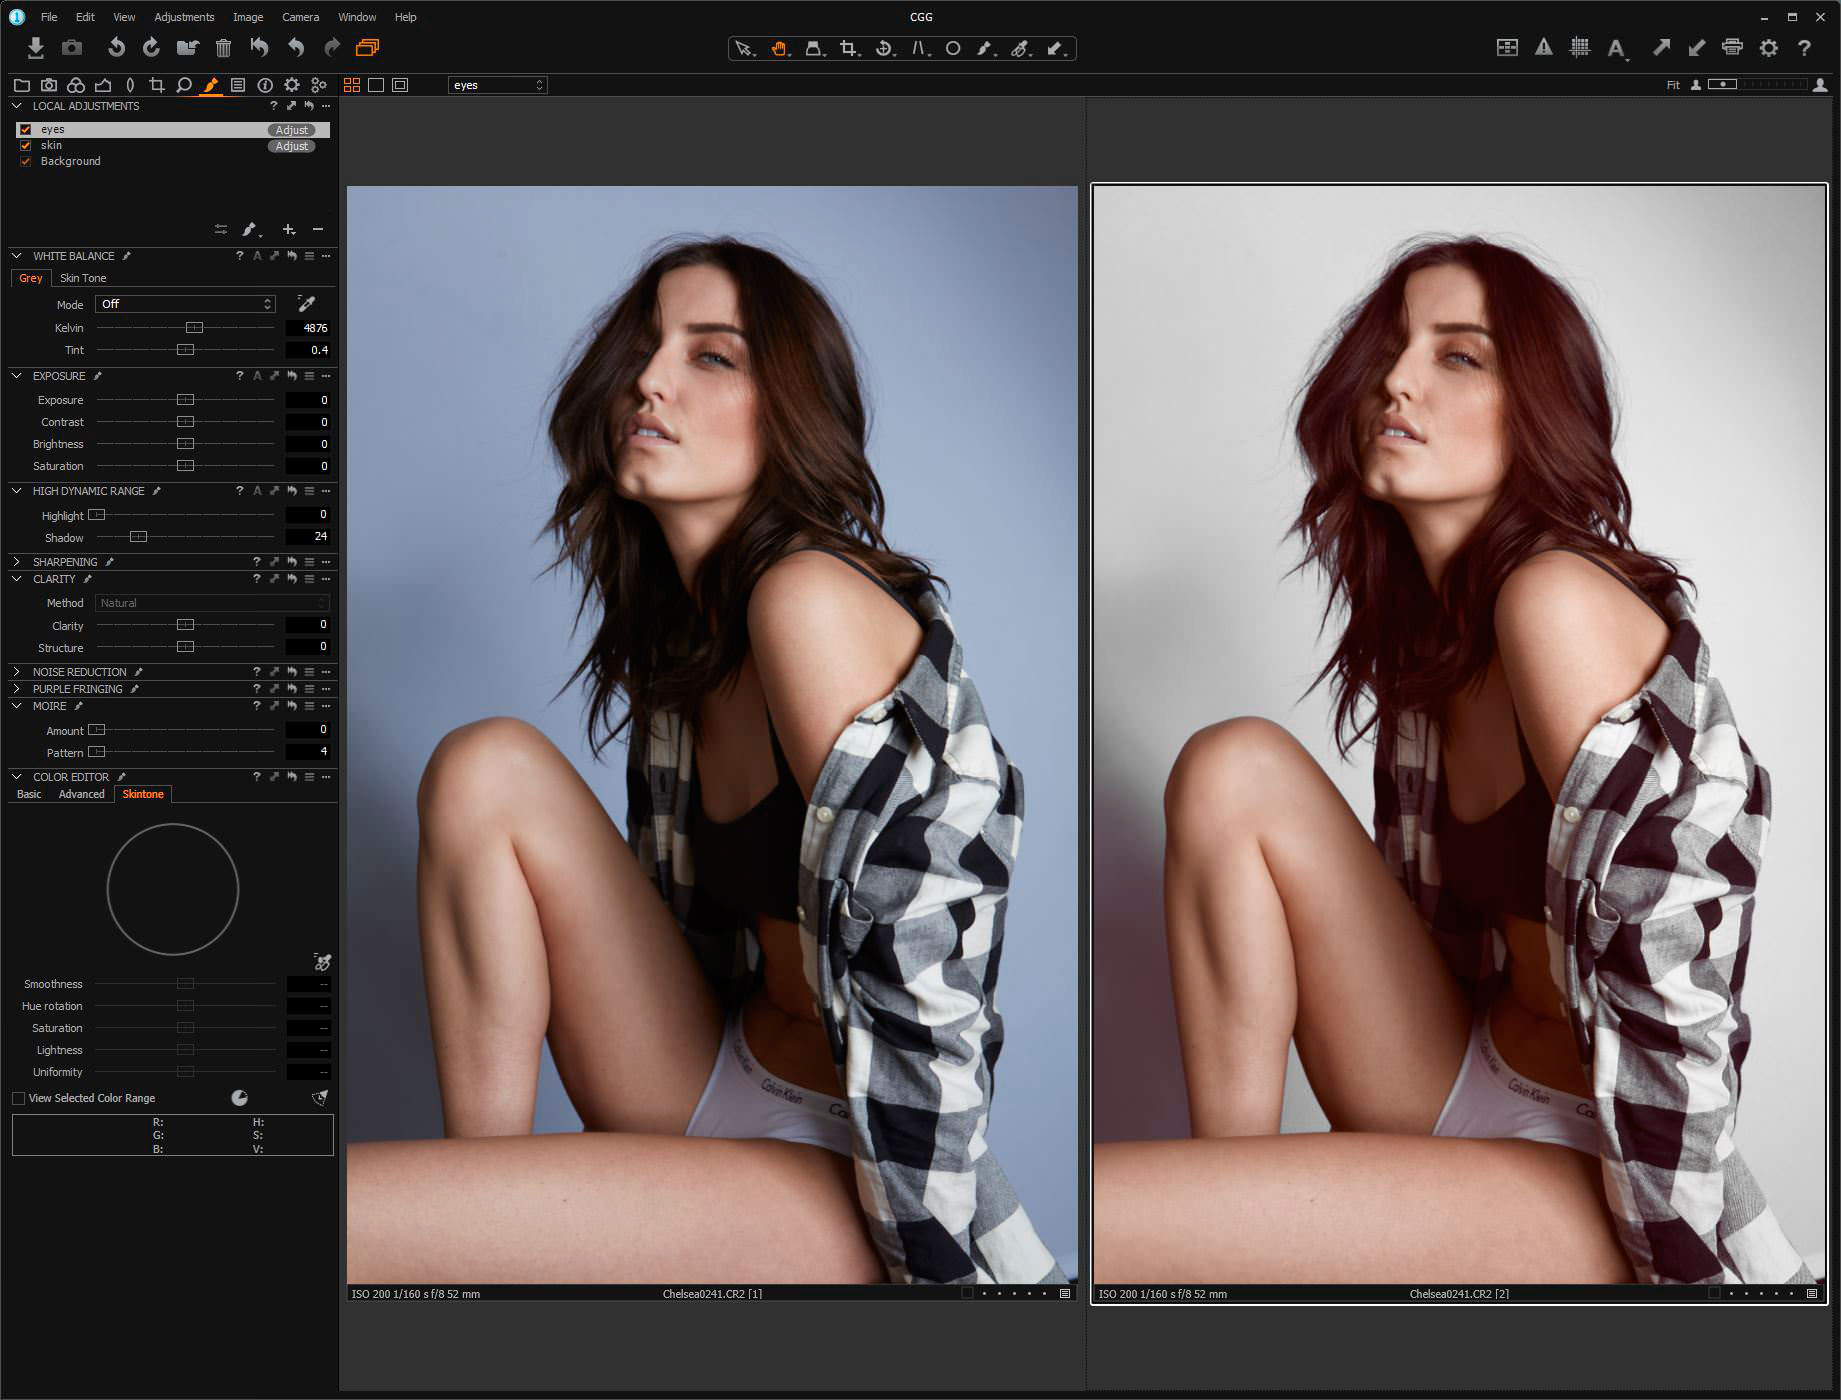
Final RAW conversion comparison
As you can see. we now have an image that is more isolated (removal if the blue background), with more consistent skin tones as well as a nice push to the warm tones in the shadows.
This RAW image is ready to be exported into photoshop for retouching.
I hope this quick tutorial helps you on your next portrait or fashion shoot.

Derek Heisler
Derek Heisler is a seasoned conceptual photographer and director who has contributed to National Geographic, Sports Illustrated, NASA, and TED. A native of Calgary, but travels great distances for great conversation. Find him at @derekheisler on Instagram and derekheisler.com.


Hi,
I wonder how an “example” photo of a person can be with the sleeve on focus while the eyes of the person are far behind the focus… I understand that the issue is the color, but I look at the image as a whole. I look at the image at the top of the page. I may miss something, so please explain.
Thank you,
Florin.