
As a new Phase One 645DF+ and IQ280 user, I’m continually marveled by the amount of detail I can achieve in my food and still life images.
With 13 f-stops of dynamic range, everything is there, and sometimes I need to gently coax the viewer into areas that I want them to see, as well as parts I don’t want to draw attention to.
Rich detail even in the shadows
Nowhere do I see this more than with dark dramatic shots that maintain full, rich detail even inside the shadows. For this personal project of dark, moody still life images, I utilized some pretty powerful and basic features of Capture One Pro 7 to edit and process this series. Let’s take a look, shall we?
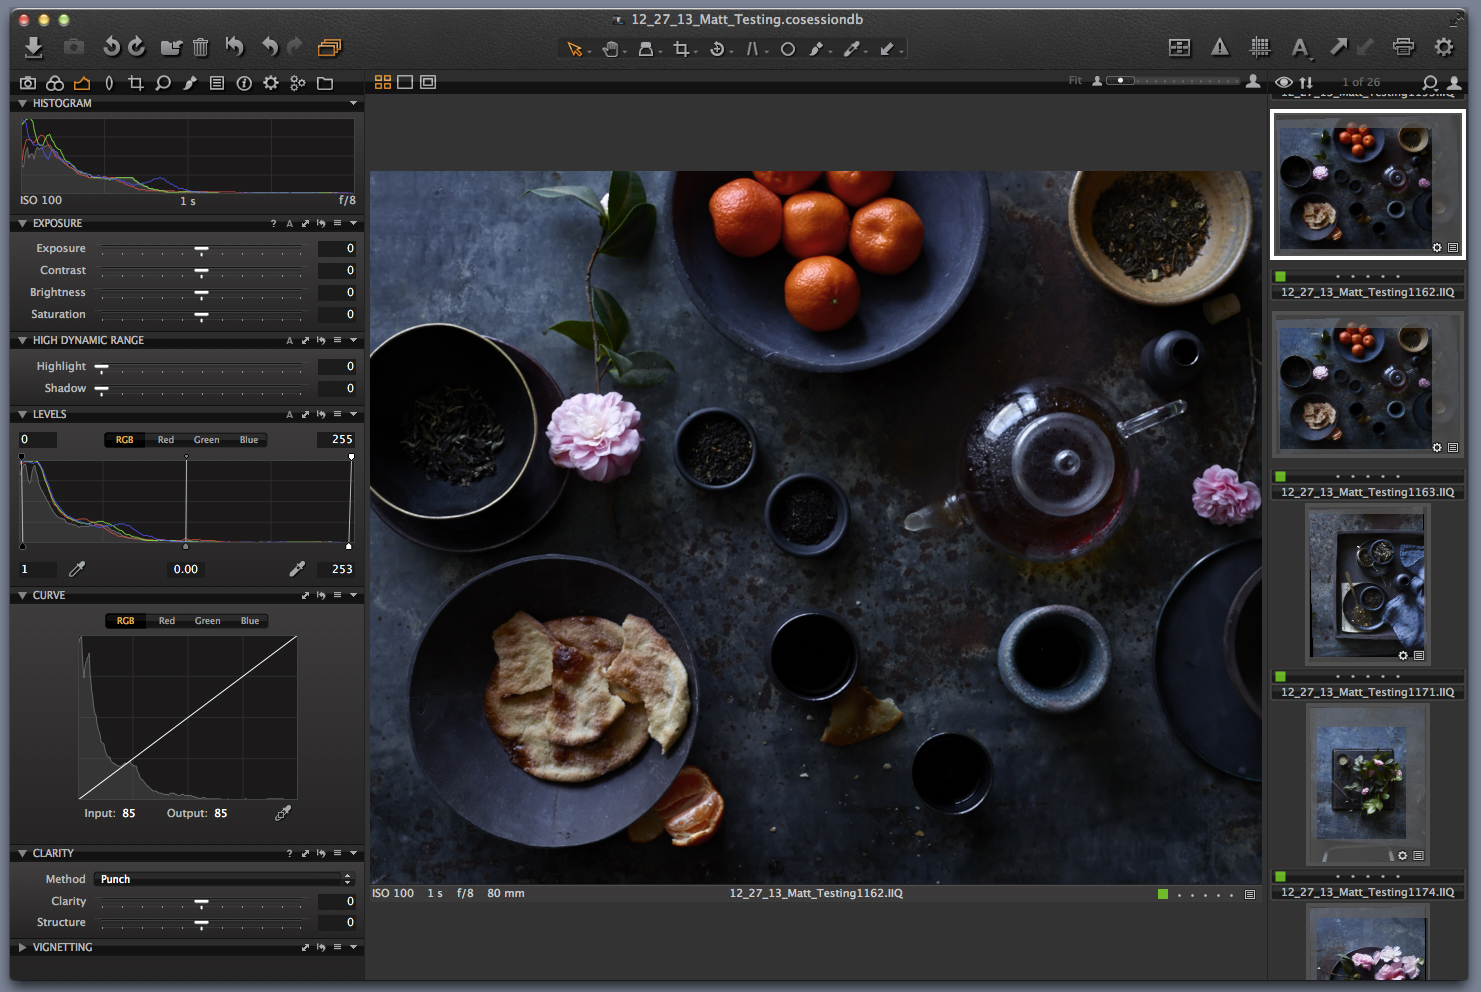
This shot of tea and snacks (with a few camellias from my garden tossed in for good measure) was shot overhead with just one light source (a big giant window with diffusion material over it).
My exposure is exactly where I wanted it to be, and I like the shape and direction of the light. However, I’m seeing some things I want to see and missing a few other things I’d like to minimize. Image photographed at ISO 100, 1 second, f/8, 80mm.
Food photography is all about details
My first plan of action is to get the shot where I’d like it in terms of density, shadow, and color. These are all super quick and easy in Capture One Pro 7, and I’m able to see things in subtle ways making minute adjustments. With food photography it’s all about details, and I rarely need to make massive, over-the-top adjustments to a file.
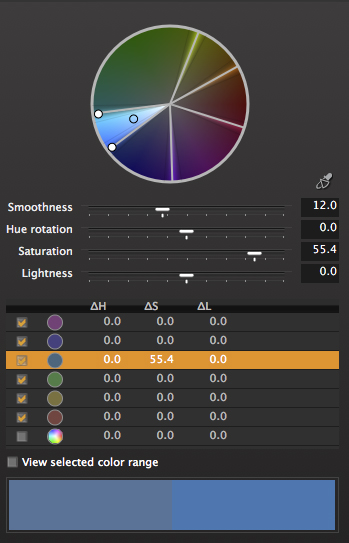
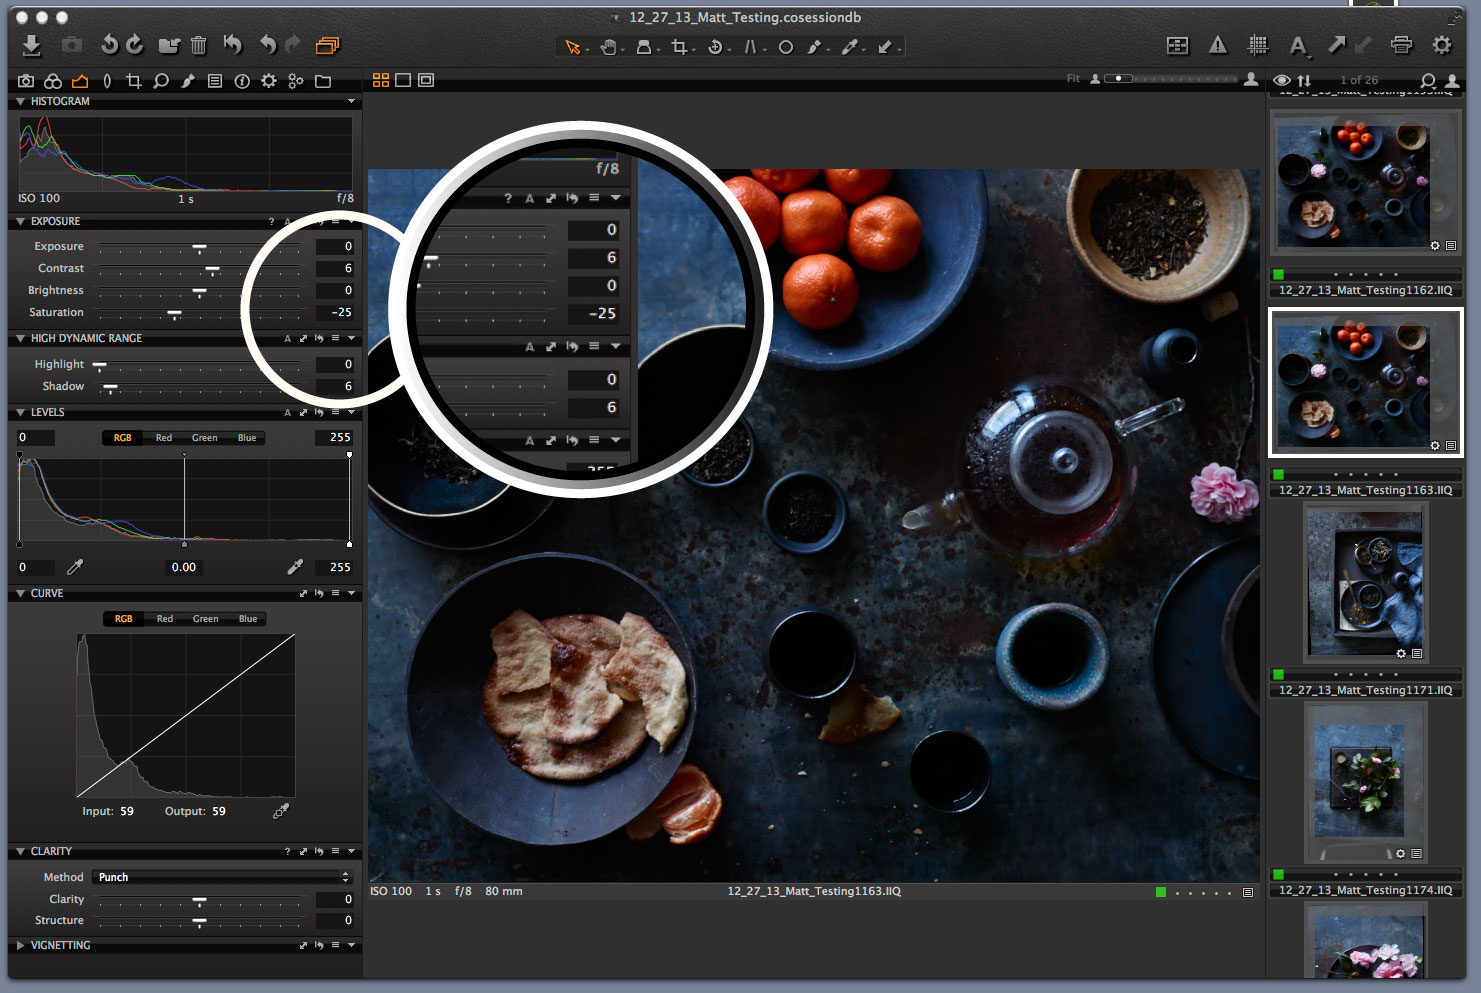
 First, I wanted to bring out some color in the distressed zinc farm table. I selected the color in the Color Editor and boosted saturation (see screen grab above). Next I increased my contrast just a bit by 6 while decreasing my overall saturation by -25 (screengrab below).
That might seem counterintuitive considering I just boosted my blues a step earlier, but I prefer to get individual locations of color in the right hue before affecting the overall shot. Also, in the High Dynamic Range I increased shadows by 6 just a tiny bit so that I could see some detail of the table in the shadows. Not much, just a bit.
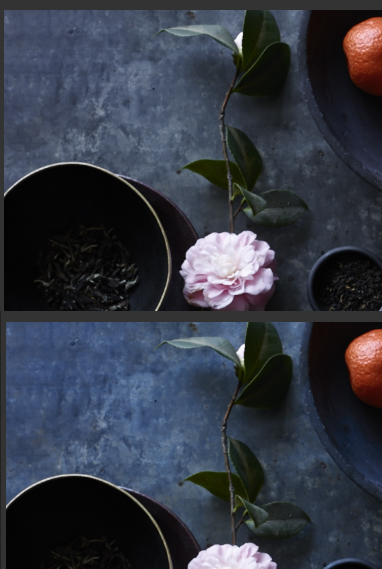
With color and exposure exactly where I want it, my last stop before processing involved opening up certain parts of the image. Since this was a tea story, I wanted to be able to show the various loose teas in the stoneware bowls, and this is where Local Adjustments come in handy!
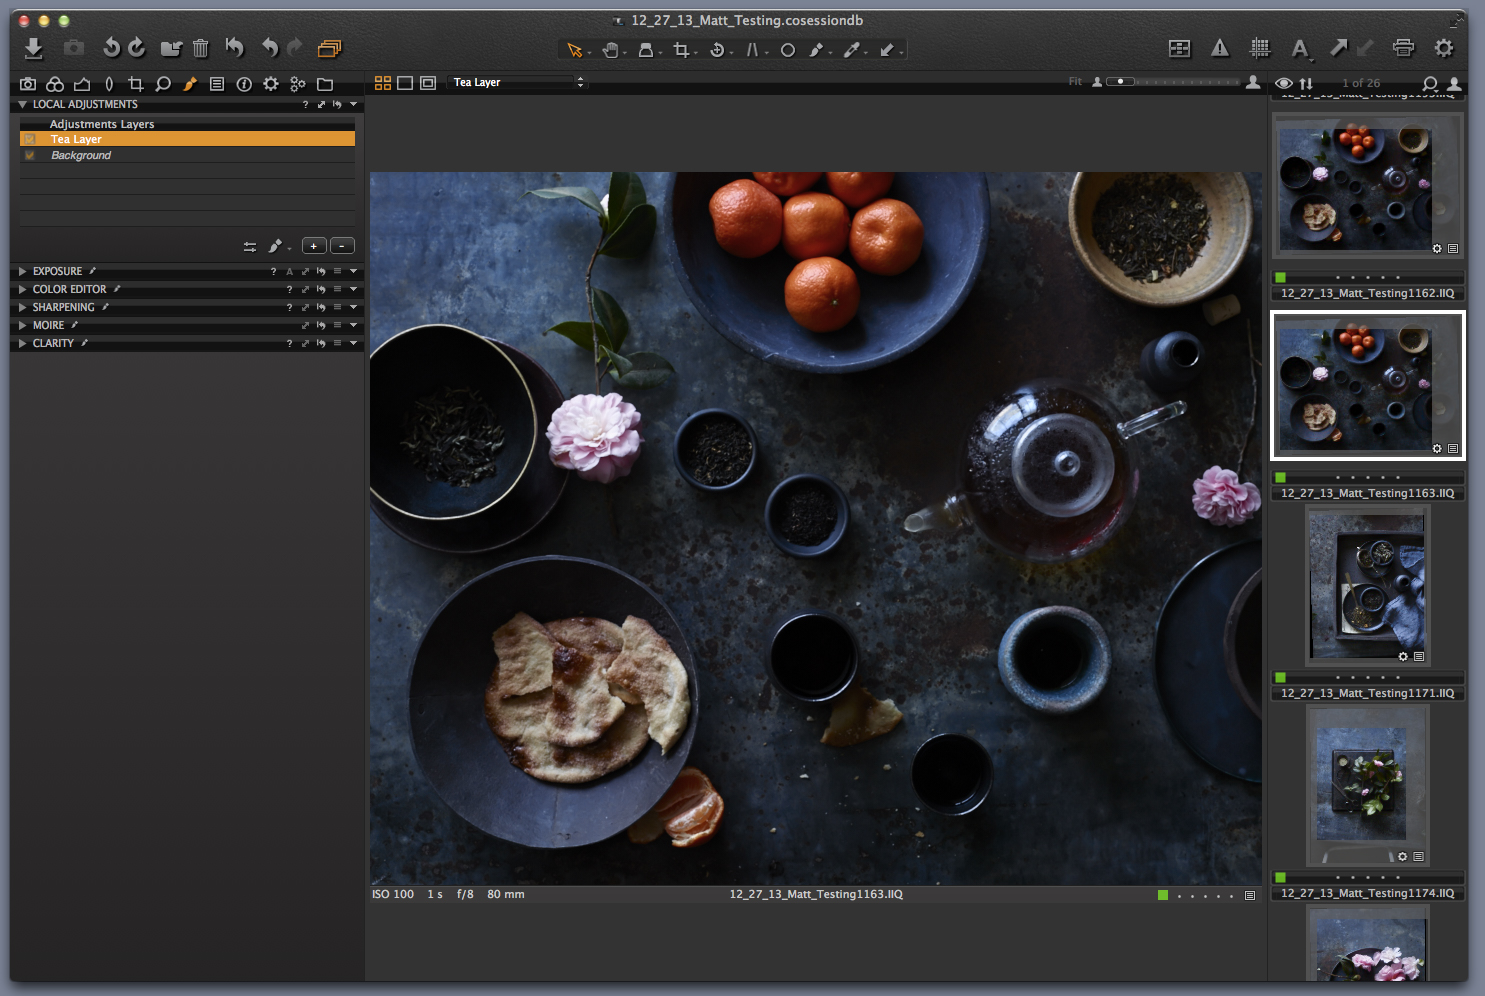
I created a new layer called “Tea Layer” (screen grab above) so that I could select just the tops of the bowls and lighten just a bit.

Moving the exposure slider all the way allows me to see exactly what will be affected. In this case it’s way too much but still nice to see before dialing it back down (screen grab below).
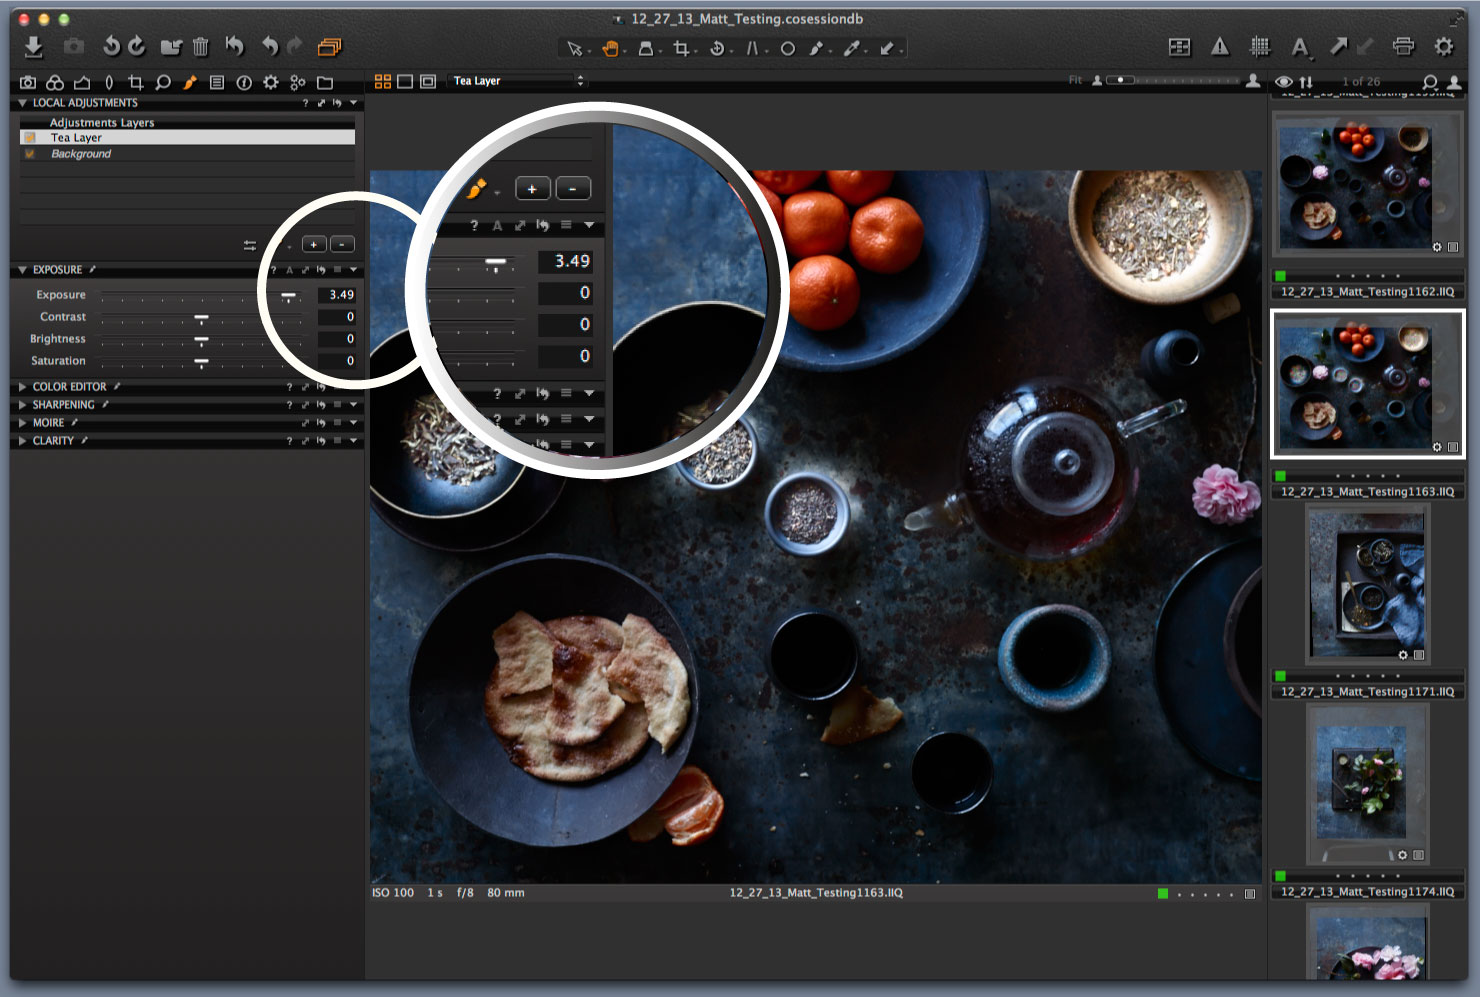
The tea is now visible, and it’s subtle and in line with the rest of the image (screen grab below). I should also note that while there is tea in the other vessels but I don’t feel it necessary to do the same process to those. And overhead shot of liquid in a dark cup won’t reveal much detail anyway, no amount of editing can change that.

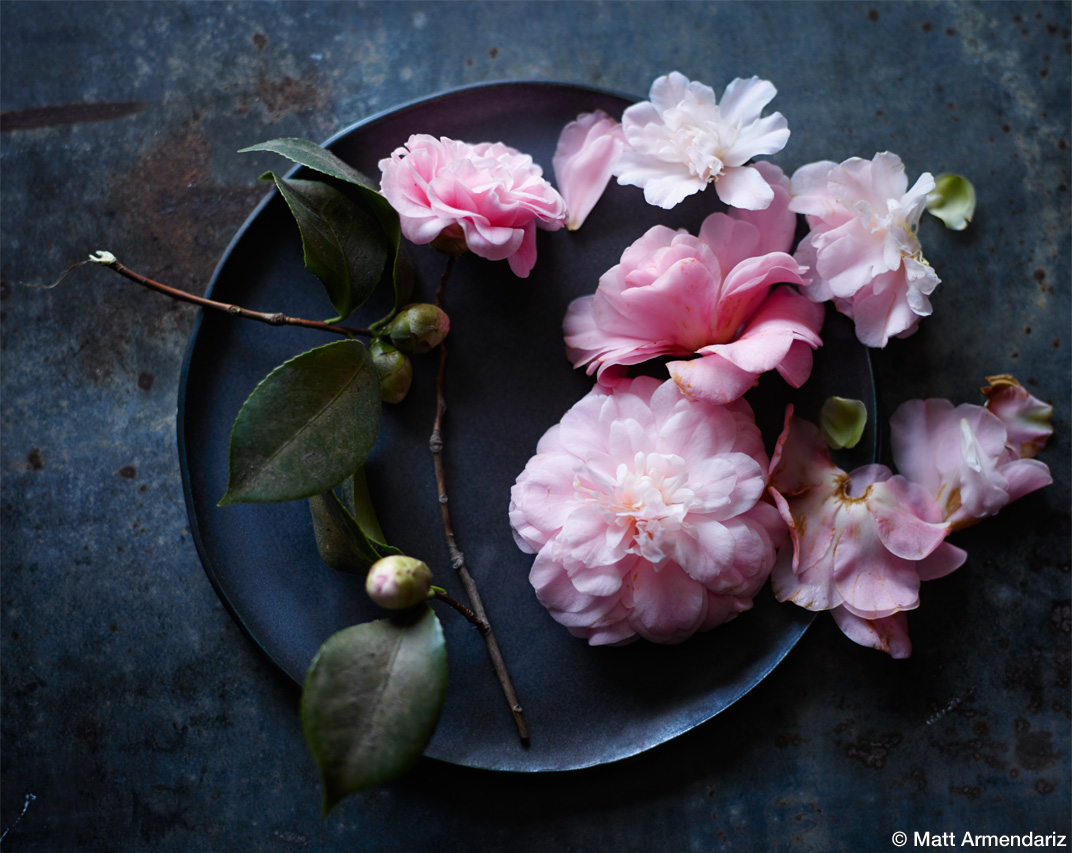
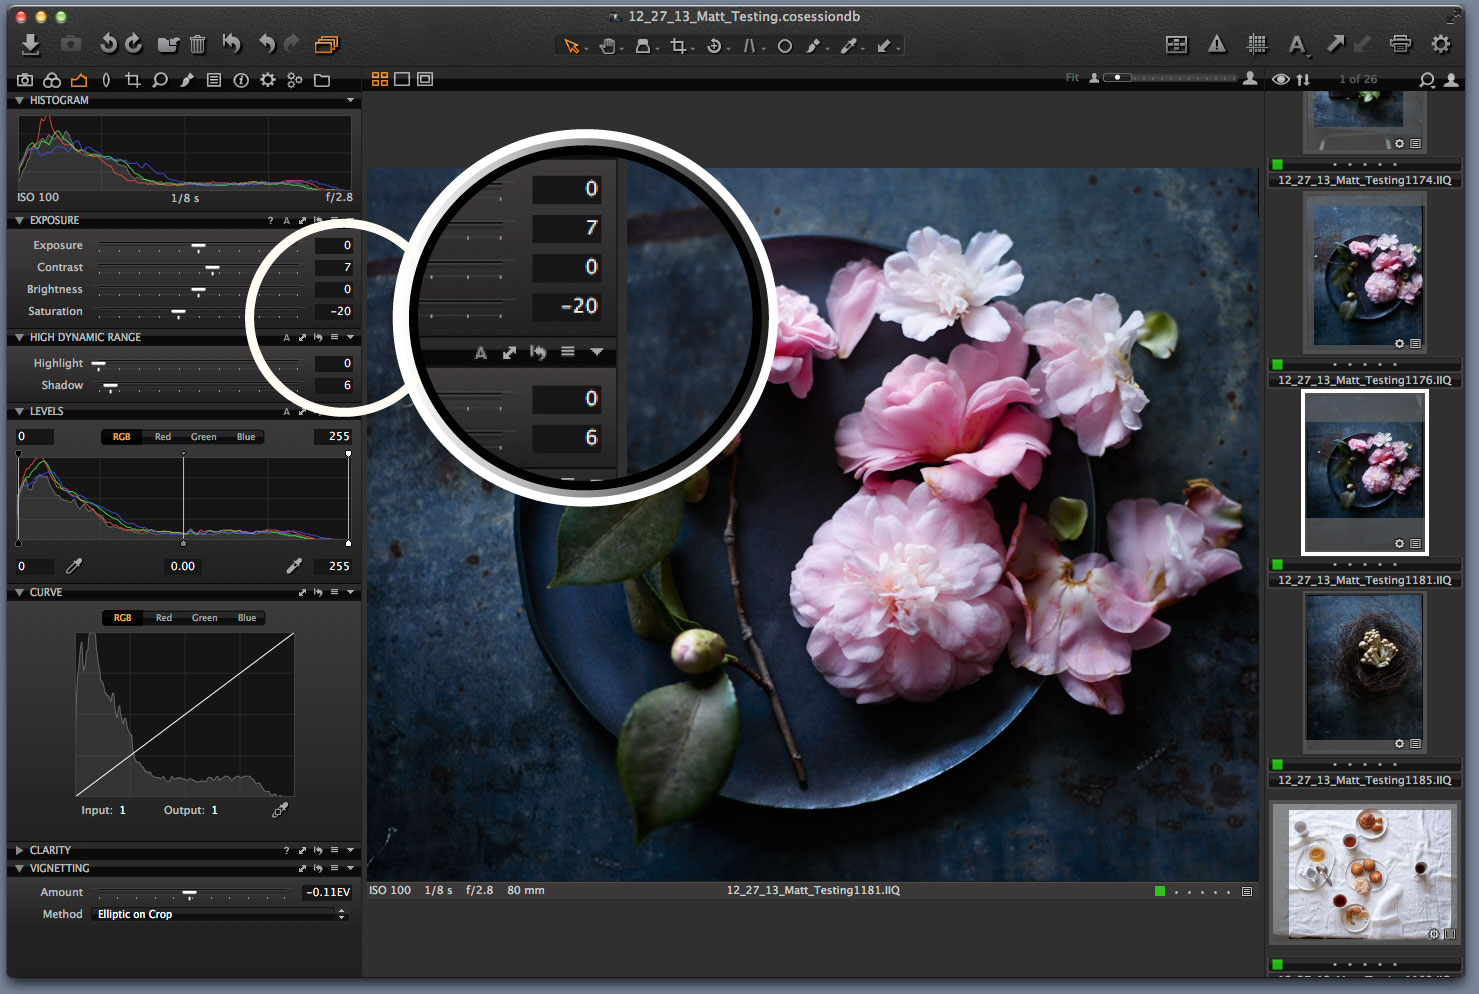
My second shot involved more camellias from my tree, their date-of-expiration and browned leaves paired well with the texture of the table and dark ceramic plate. Image photographed at ISO 100, 1/8s, f/2.8 with a 80mm lens.

It looked good to me, but was missing a bit of drama and punch. Like my previous shot above, I saturated the blue in the table for added depth in color.
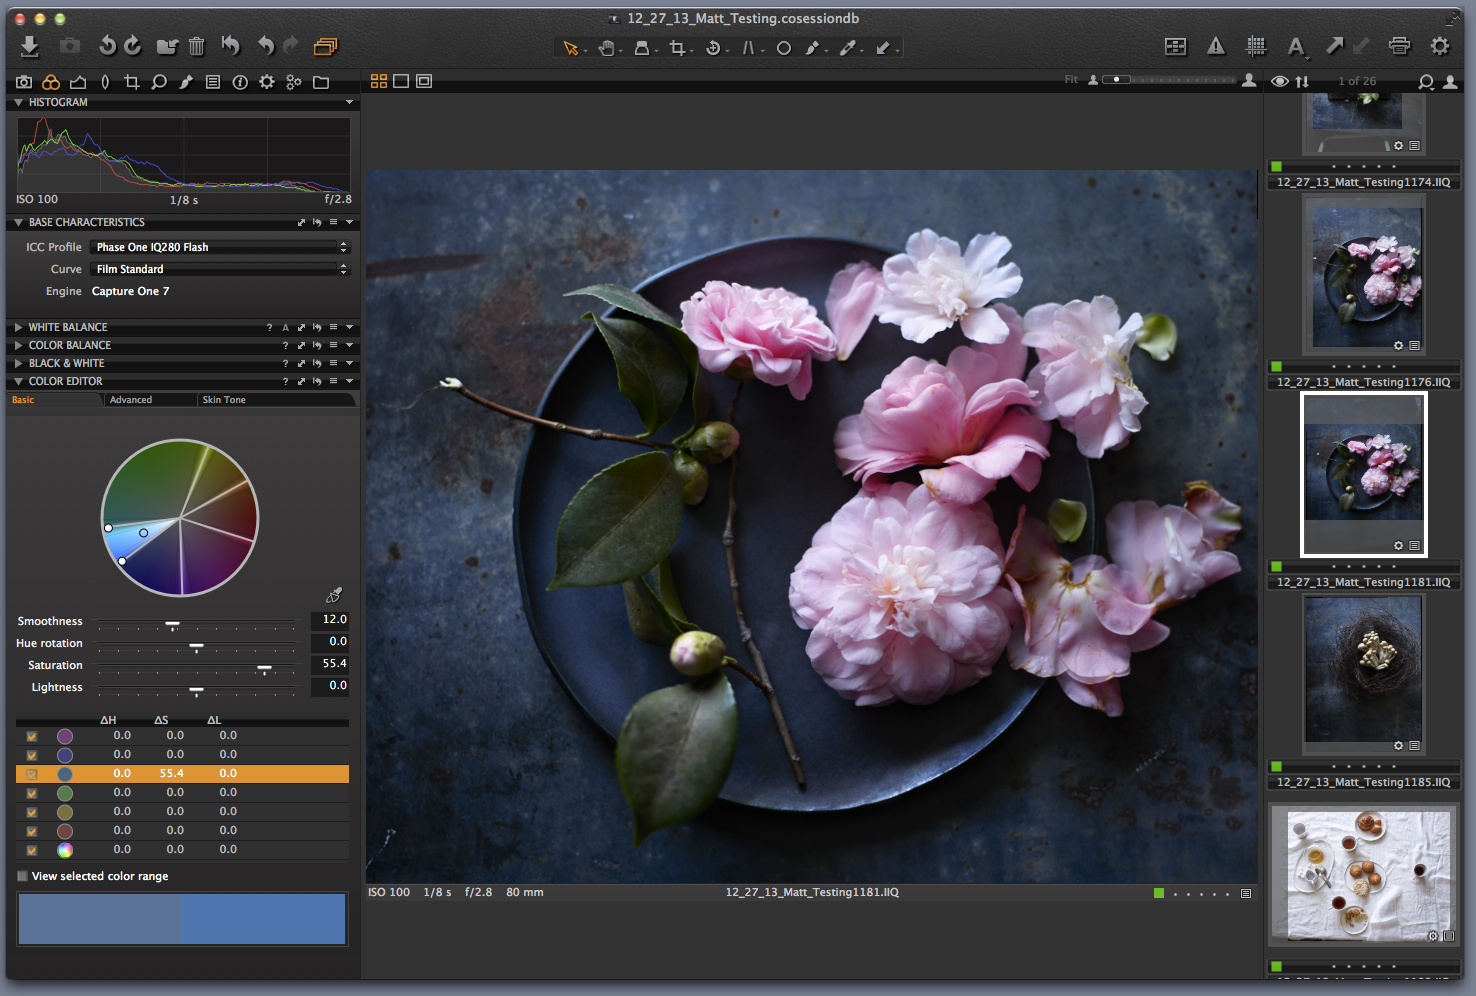
Next I went to my exposure panel and bumped up contrast by 7, removing overall saturation by -20, and adding a bit in High Dynamic Range (shadow, 6). I followed that up by adding a tiny amount of vignetting (screen grab below).
Now that I’m done, I simply process out in a good size so that I can print for promotional materials and my portfolio. Easy!
Best regards,
Matt
Matt Armendariz
Matt Armendiaz is a food photographer and writer, based out of Los Angeles, USA. As a former graphic designer and art director in the food industry he's surrounded himself with great food before he began branching out into photography and blogging. Matt’s photo clients include Food Network and Coca Cola among others.


Nice teaching class. I’m quite convinced of leaving from Lightroom 5 and Photoshop Elements and start seriouly working with Phase Pro 7.
Do you like to make some considerations about?
Joao Roberto
Hello Joao,
thank you! For me I prefer how it handles raw image processing and color editing, especially when working with IQ files from my camera. And the fact that I can customize panels so easily is a plus for me. Luckily, Capture One lets you try a demo version for 30 days before purchasing so you can experience it yourself. Let me know what you think!
Best regards,
Matt
I am also a food and still photographer using a Leaf Aptus back with a technical camera and I make very similar adjustments to my images. I usually work with clients at my side during tethered capture sessions and it is extremely helpful to make and explore these type of adjustments with the client observing to optimize the image. We edit and process the select shots very quickly as we go and I rarely have to open up the image in PhotoShop for additional editing. And at the end of the day, the art director leaves DELIGHTED with finished TIF files on his portable hard drive. I could never do this as well with a DSLR and a Lightroom/Photoshop workflow.
Robert, thank you for your comment.
I’m so glad you brought up an aspect I haven’t put into words: Capture One is really a well-integrated part of my workflow! Being tethered and exporting files during the shoot is invaluable for studio photography and fast clients, not to mention how beautifully it handles and creates those TIFF files 🙂
Best regards,
Matt
Nice post Matt! Curious to know how you like shooting with the Phase One 645DF+ and IQ280. I usually use Lightroom for tethered shoots but am experimenting with Capture One Pro 7 on my next shoot. Would love to hear your thoughts on pros and cons of using one program or the other!
Hi Kristen!
Thank you for the comment! Ah, working with the Phase One 645DF+ and IQ280 is like a dream, it really is. I just invested in my own digital back and ended up with the IQ180, which was the best investment I’ve ever made. So hard to explain what a massive difference the quality is until you shoot with it, but let’s just say I am still giddy over it 🙂 Glad to hear you are experimenting with Capture One 7, what do you think? I couldn’t work without it, it allows me to shoot tethered, make my adjustments in real time, and export immediately afterwards into any format I need (blog size, print size, etc). The only cons would be that it might take a few moments to figure out how its set up as everything is customizable, but that’s about it. I couldn’t work without it and it’s allowed me to stay in 1 program rather than use a bundle of others.
Best regards,
Matt
Hello Matt. I am glad to know that Kristen Hess, and I do believe many others photographers have the same questions about Capture One Pro, an Lightroom and Photoshop. I would love to hear your comments about Hess question. Thanks . Joao Roberto.
Thanks again Joao! For me it’s really a whole collection of features that make it my preferred editing software. Color handling, RAW file handling, but its subtle ability to handle shadows, sharpening, and editing is fantastic, and the fact that all I have to do after my edits is process the images to have final TIFFs is a dream for me 🙂 It’s cut the time I spend on editing way, way down.