As an assignment we were asked to portrait our friend Michael, one of the owners of Zurich’s L’Ei’Out design agency.
We had the unique opportunity to portrait him in the south of France, Provence Region. We were very lucky to find a cool spot, a unique piece of furniture – and to have a great guy in front of our Phase One camera. The rest was an easy job for Capture One Pro 8.
Tremendously improved conversion
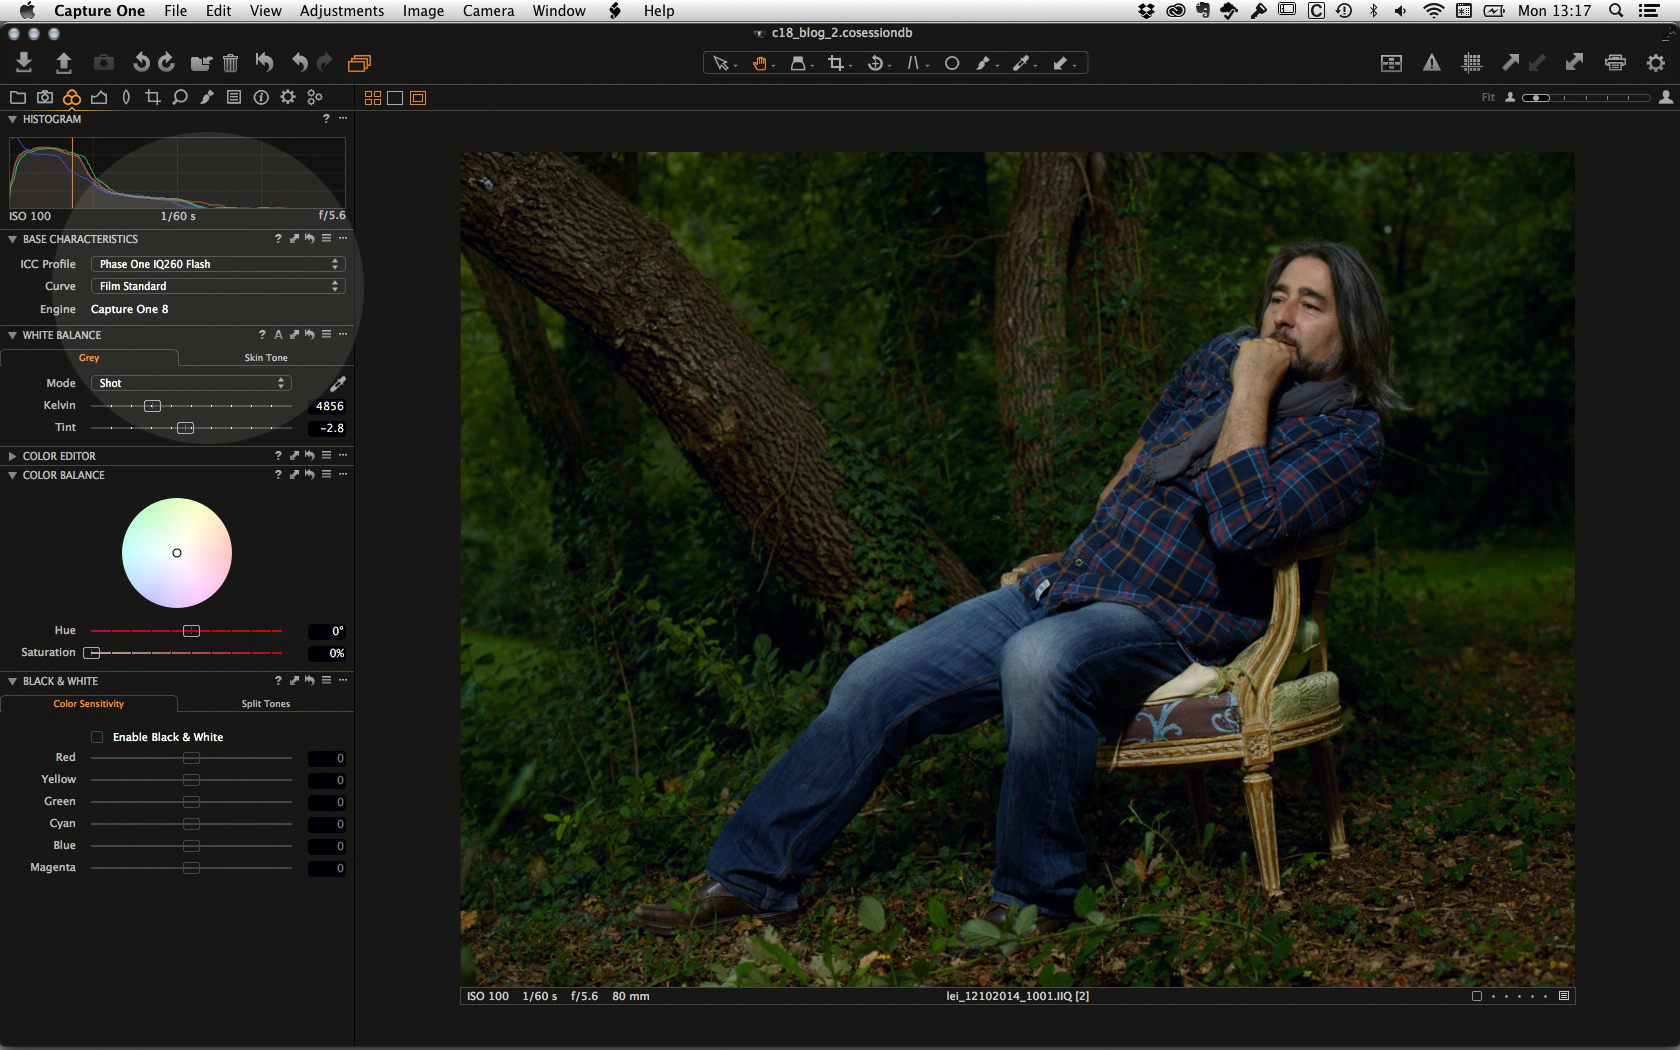
First I started to import the image into a Capture One Pro 8 session and chose the Base Characteristics for our Phase One IQ260 and used a “Film Standard” Curve. See screenshot below.
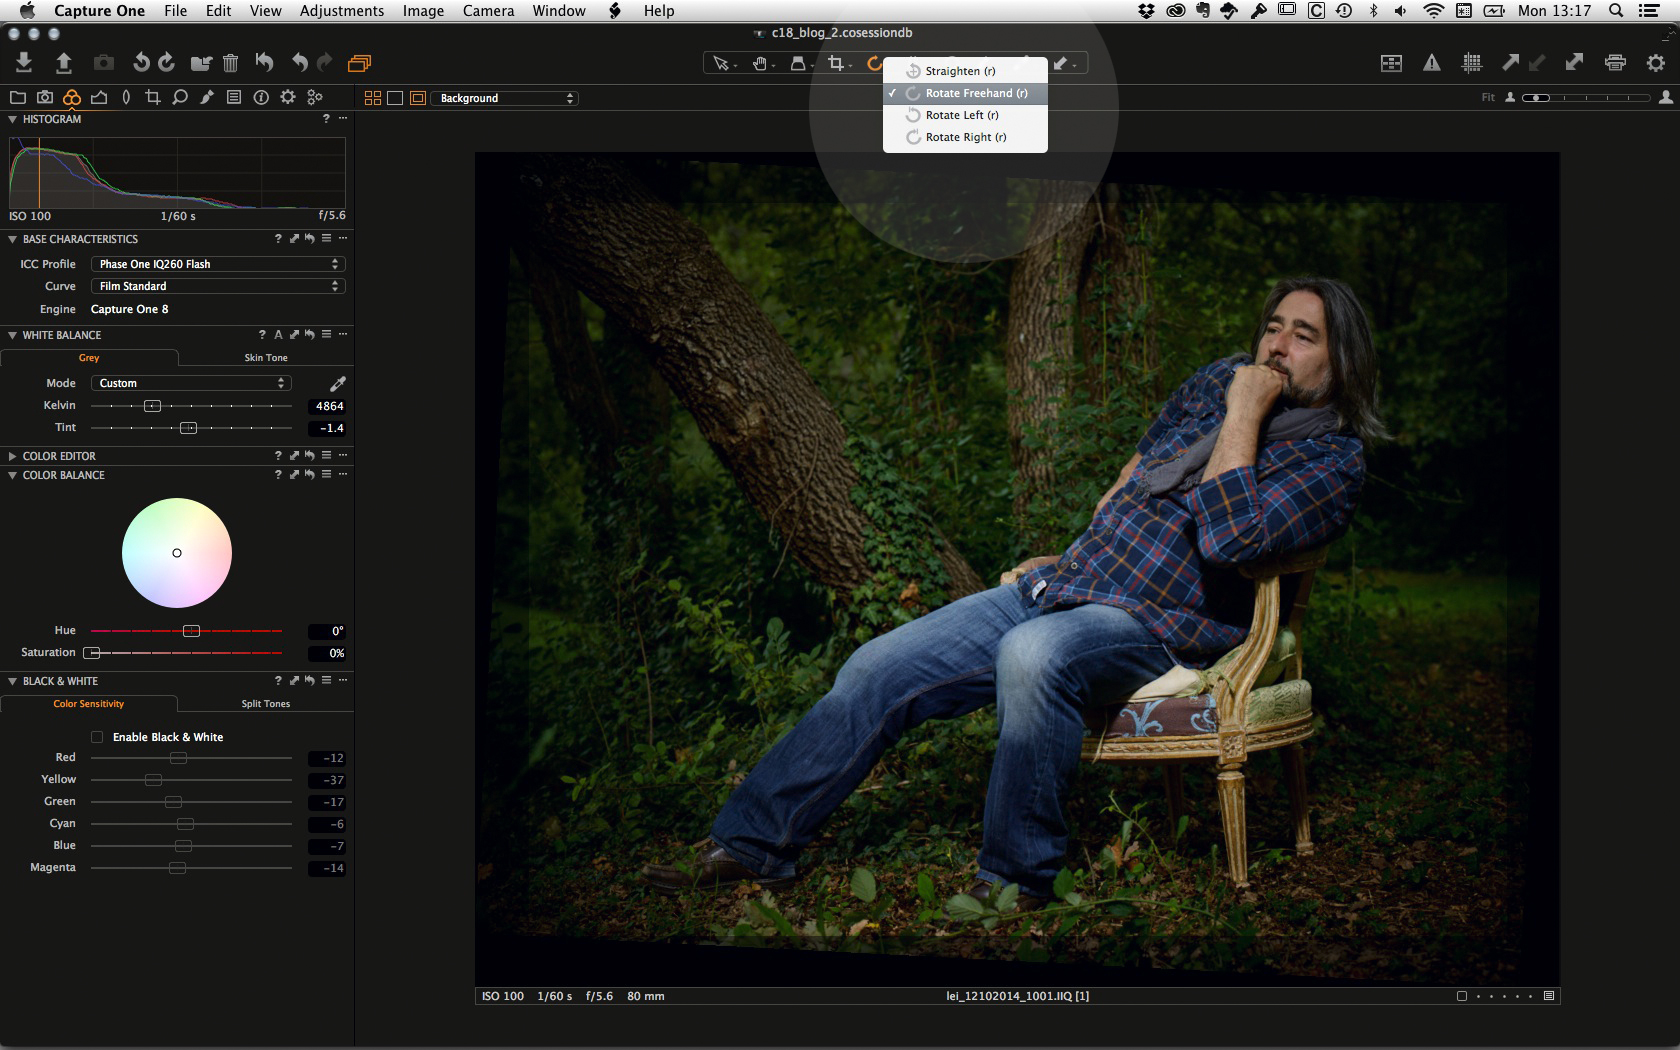
Then I rotated the picture a bit by using the new “Rotate Freehand” tool: just pick the tool, click somewhere in the picture and rotate as you wish! See below.
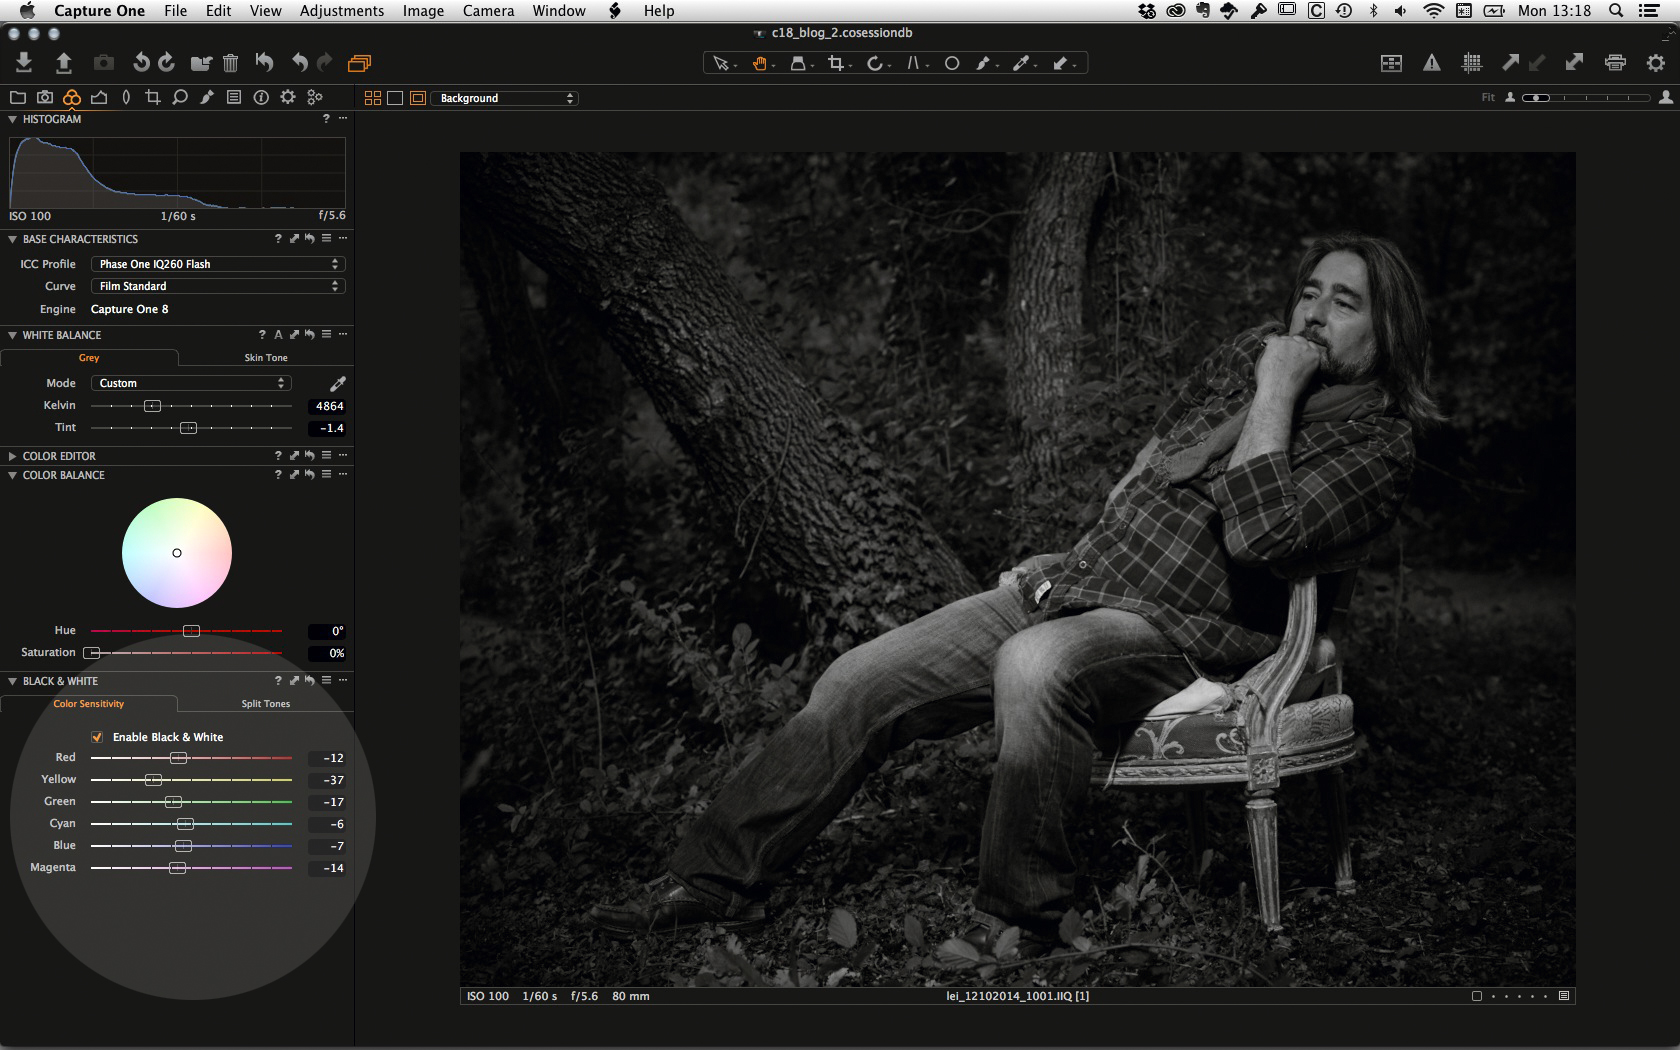
The Black and White dialog box in Capture One Pro 8 is still the same as in the previous version – but the result of the conversion is tremendously improved! I turned yellow and green down to get a deeper and more dramatic appearance since I had a lot of foliage in the picture.
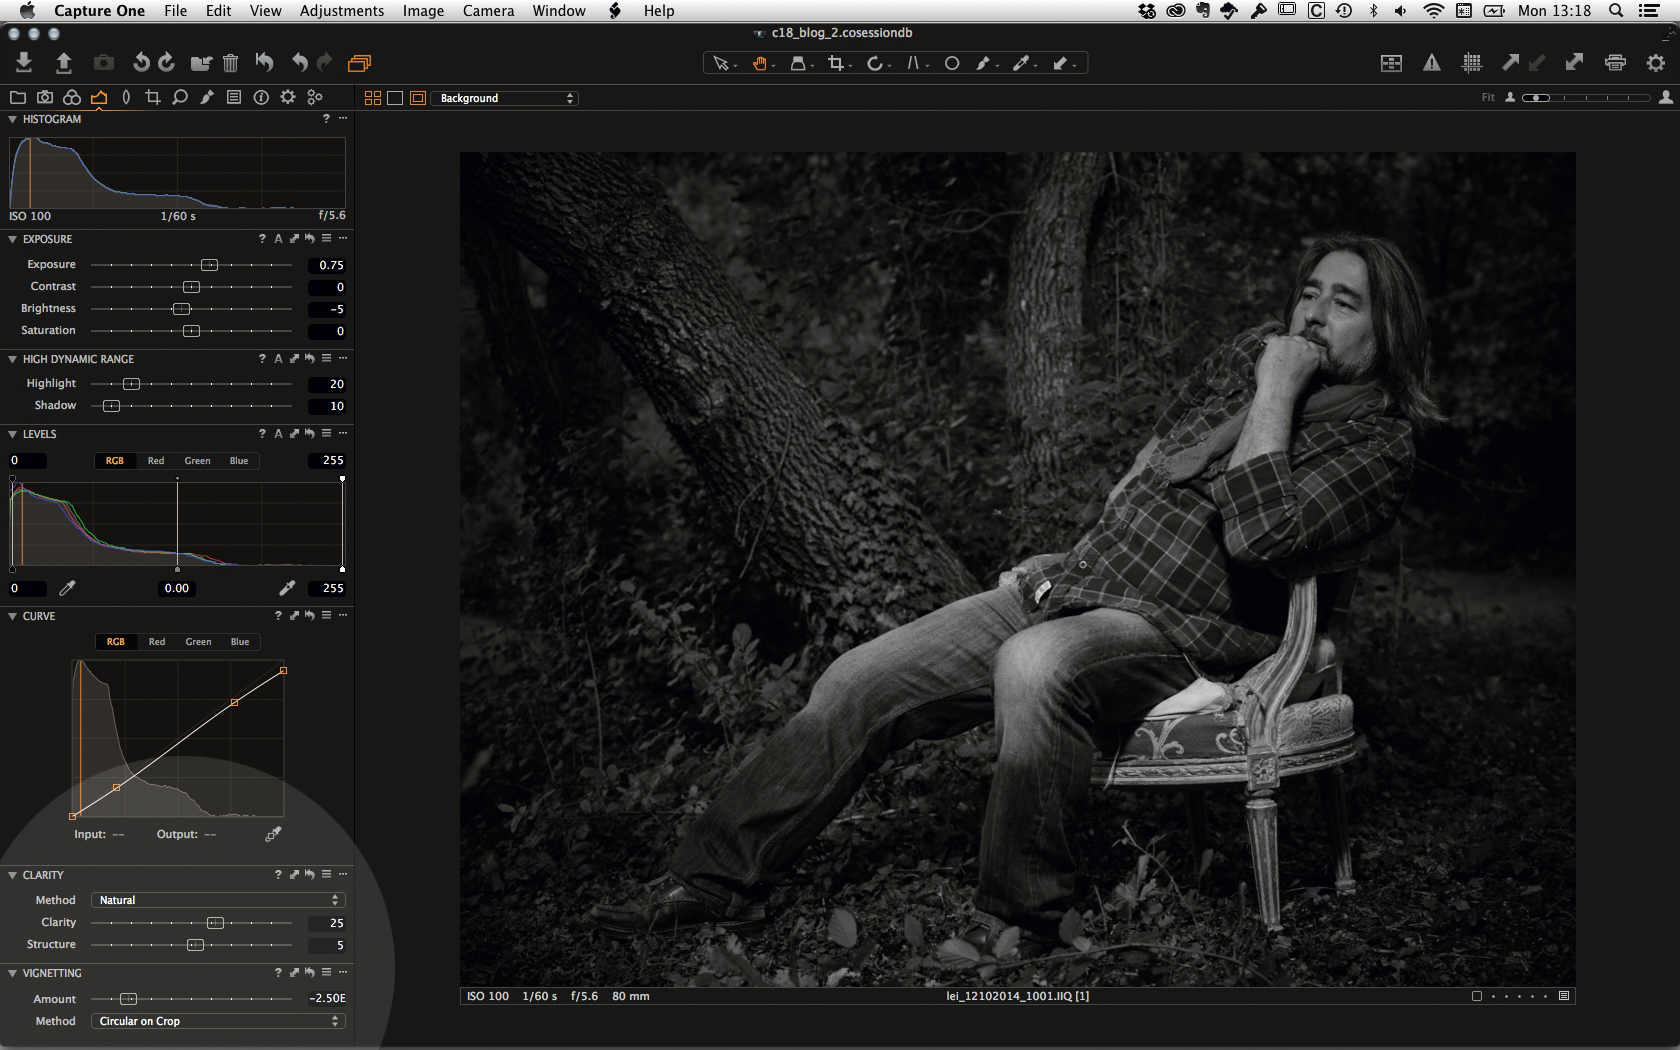
In the Exposure tab I opened the shadows a little bit in the HDR tool and applied a slight s-curve to add some more contrast. I have chosen the new Clarity method “Natural” and darkened the corners of the picture with the vignetting tool massively to get the picture more into a classic black and white look.
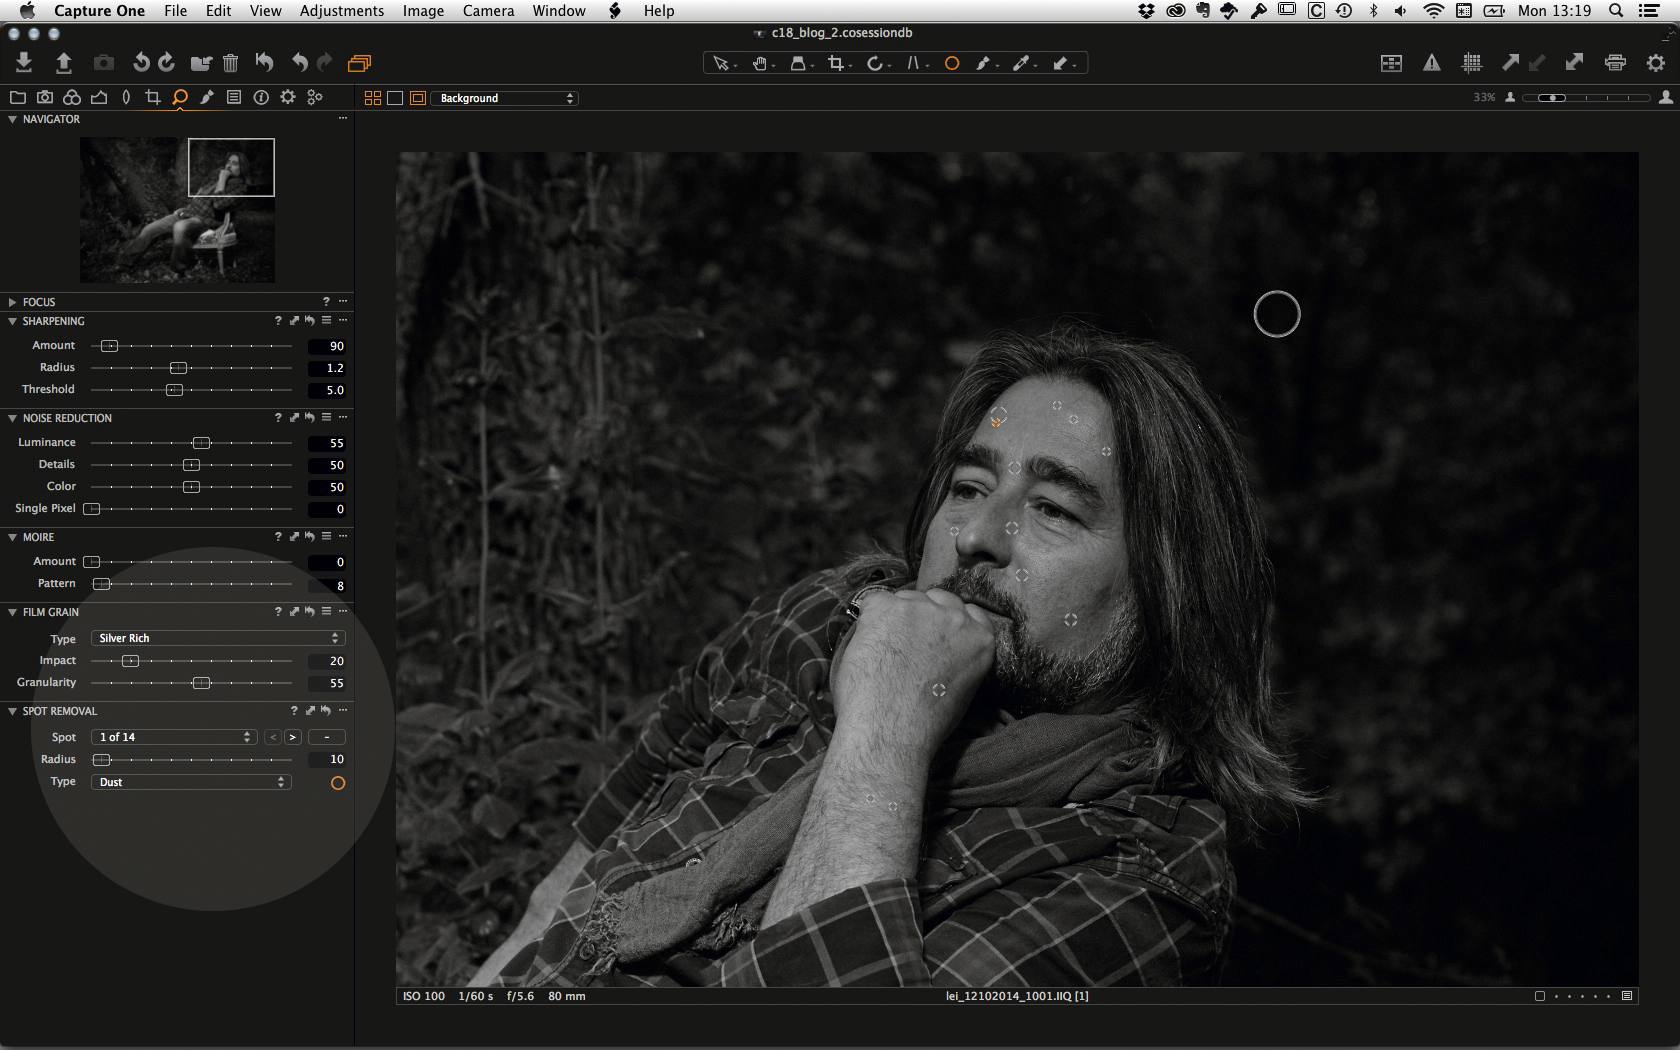
The new Film Grain tool is great, especially for black and white pictures. For this picture I used the grain type “Silver Rich” and have chosen the granularity to my taste. I also “misused” the Spot Removal tool to do some simple corrections in Michael’s face and also removed a bright and disturbing spot in the background!
Now… the fun part: With the improved Local Adjustment tools in Capture One Pro 8, it’s really easy to do some dodge & burn within Capture One.
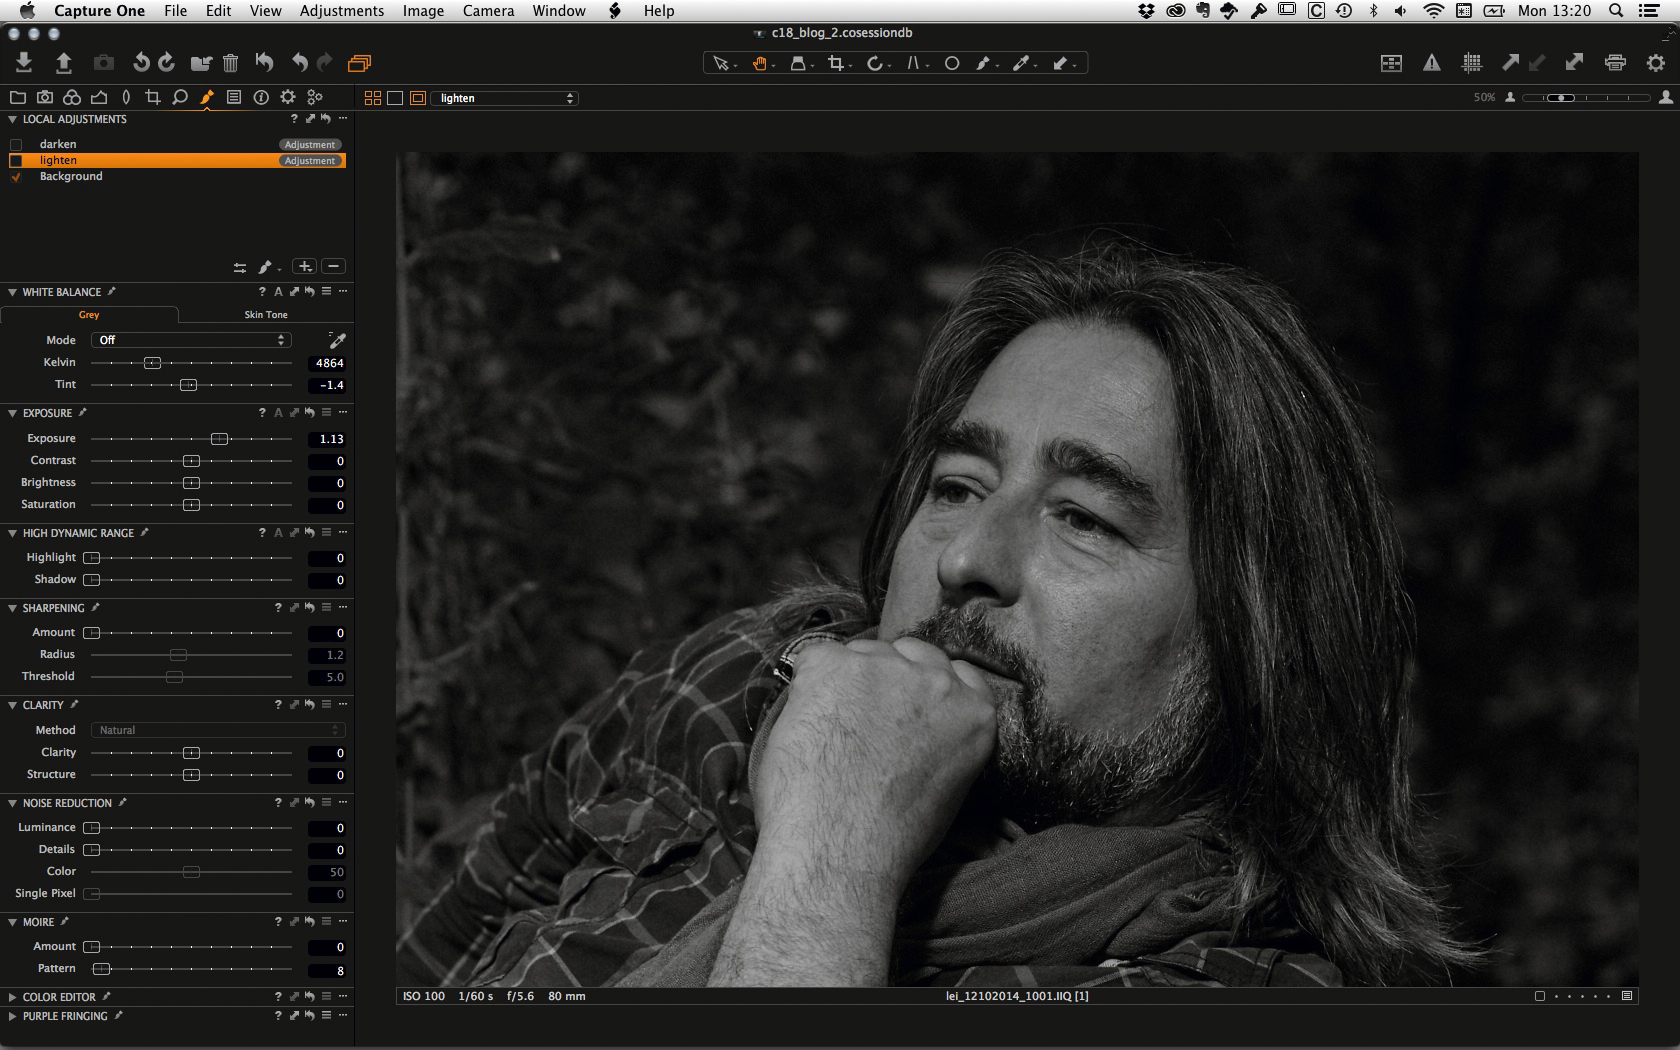
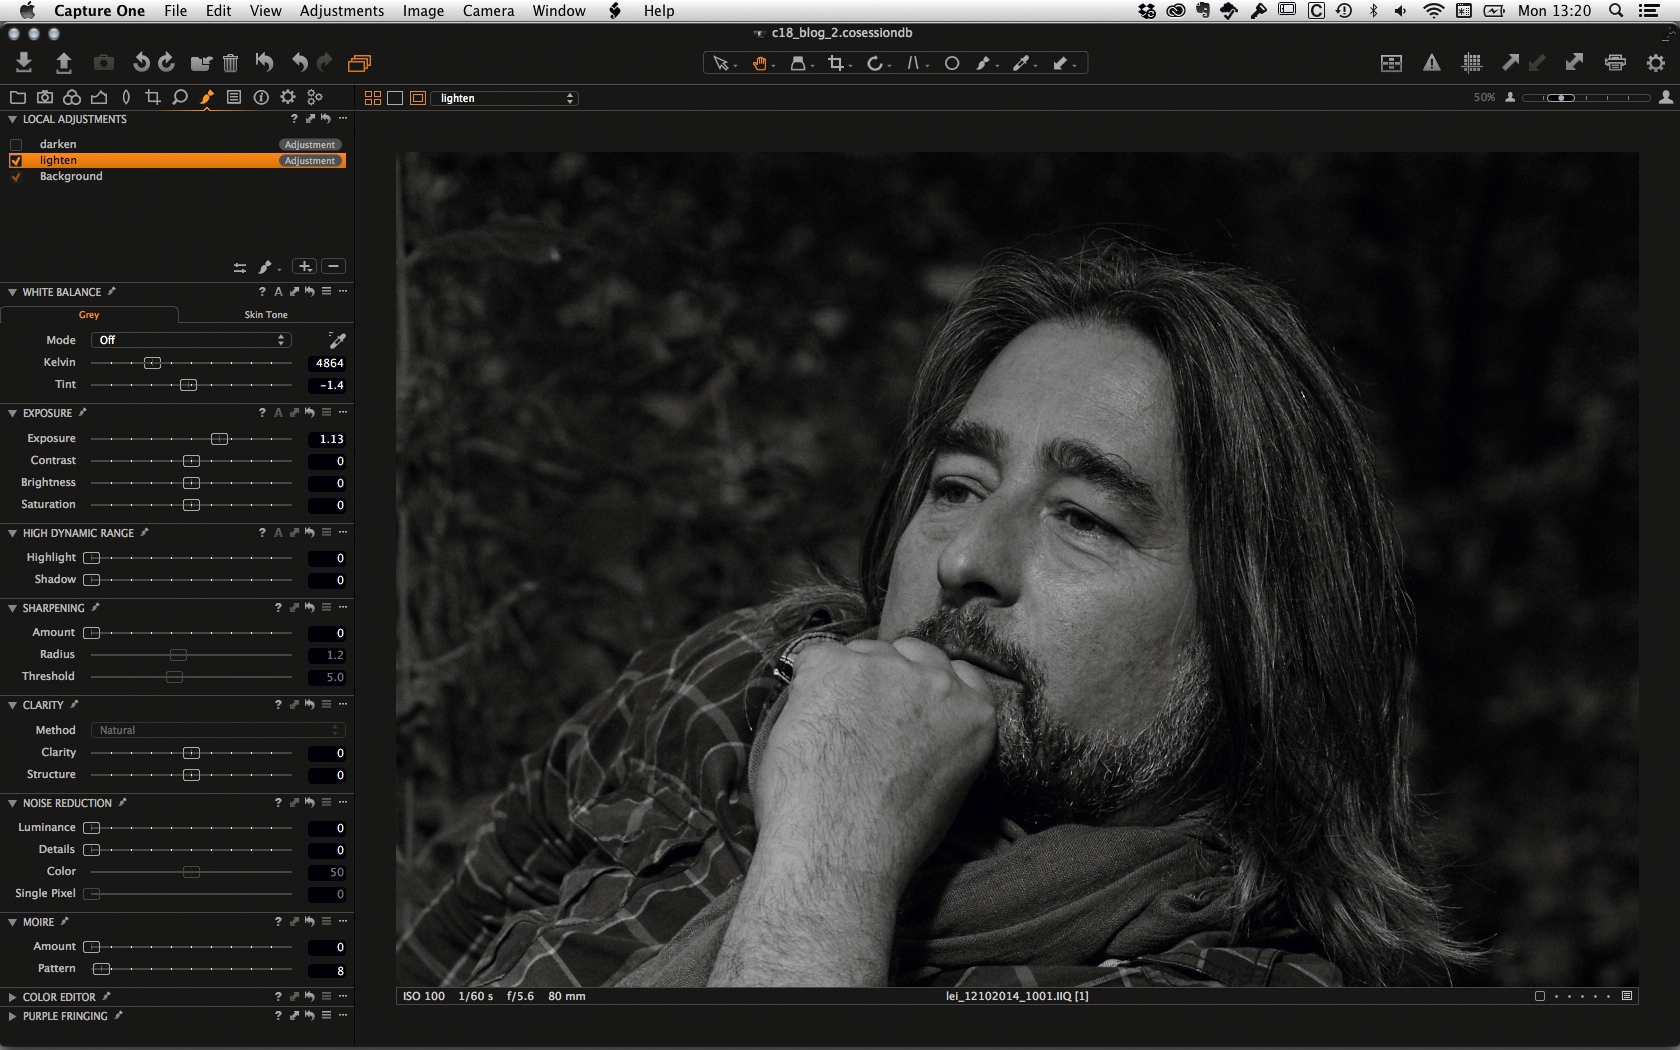
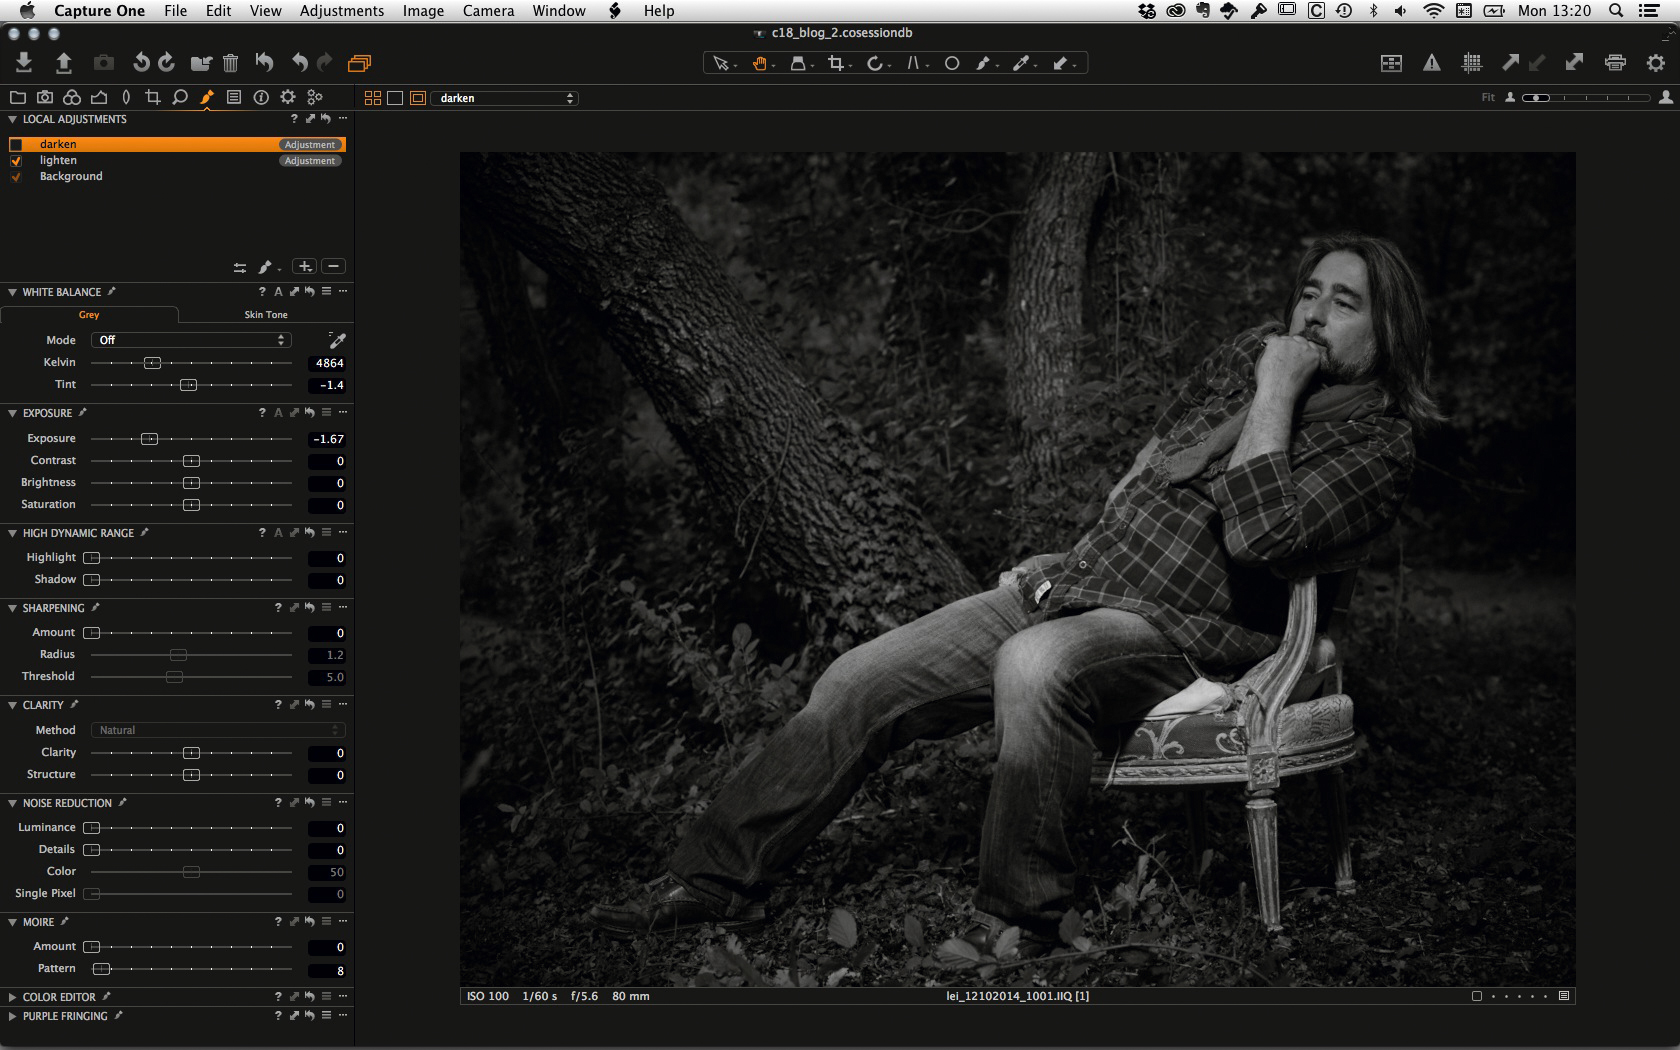
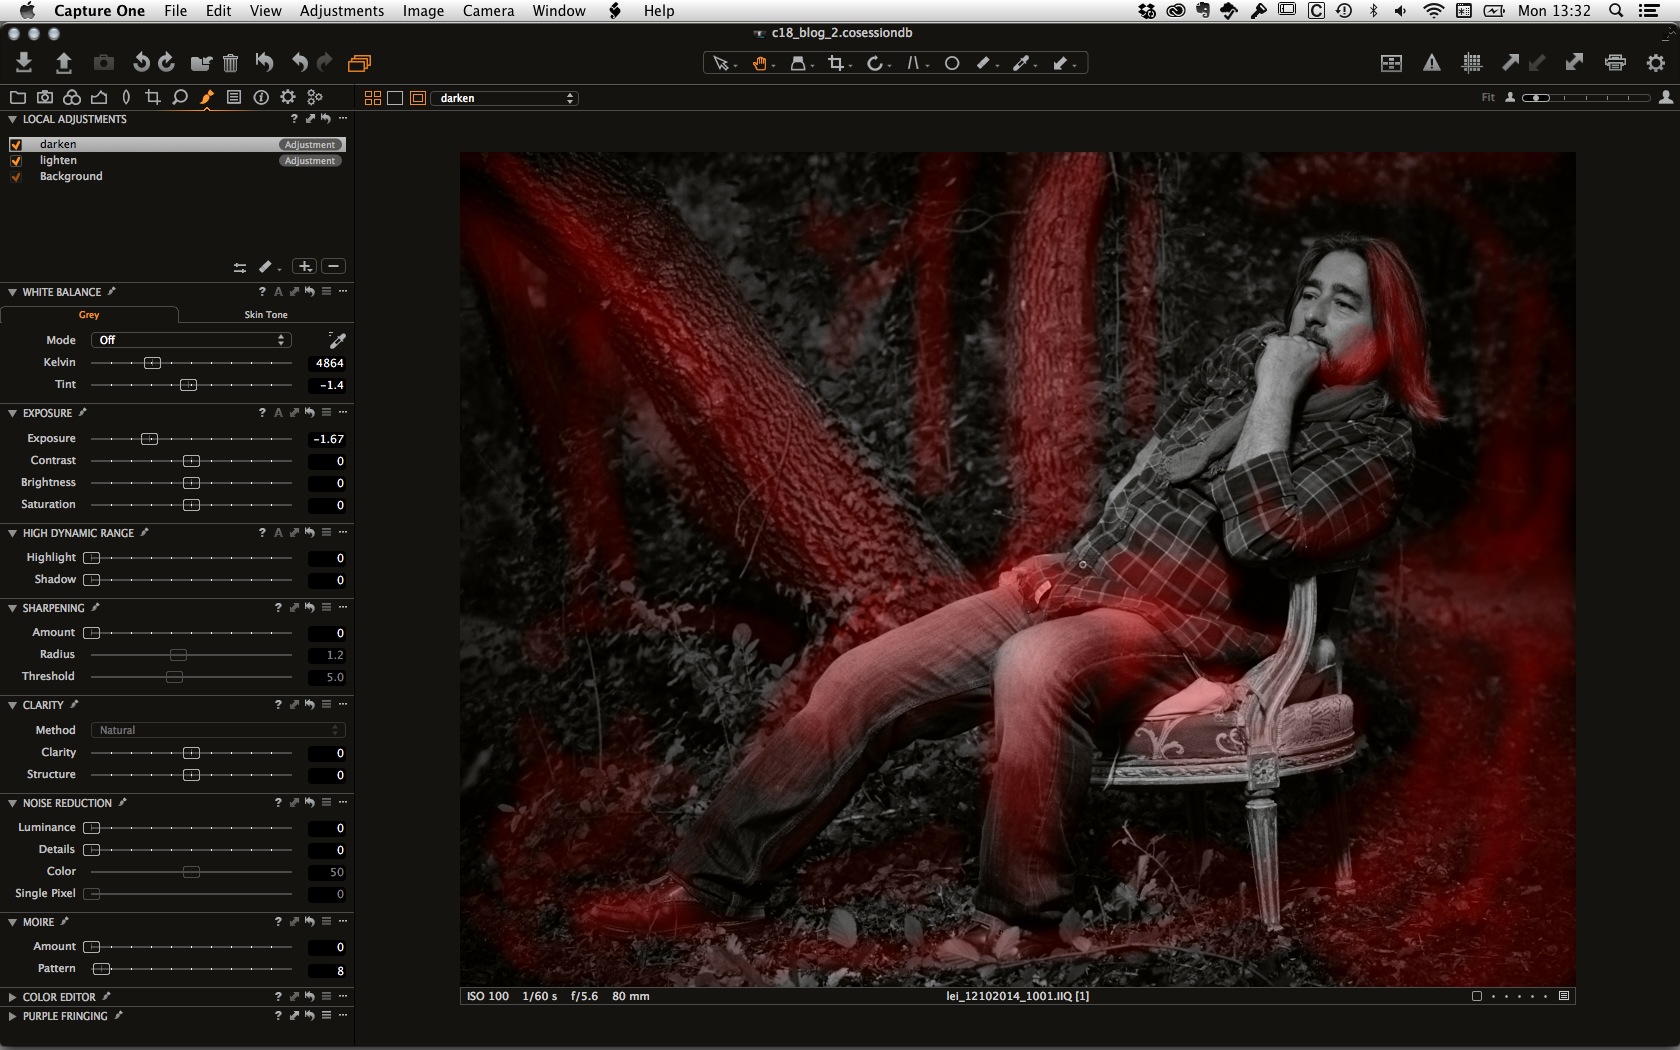
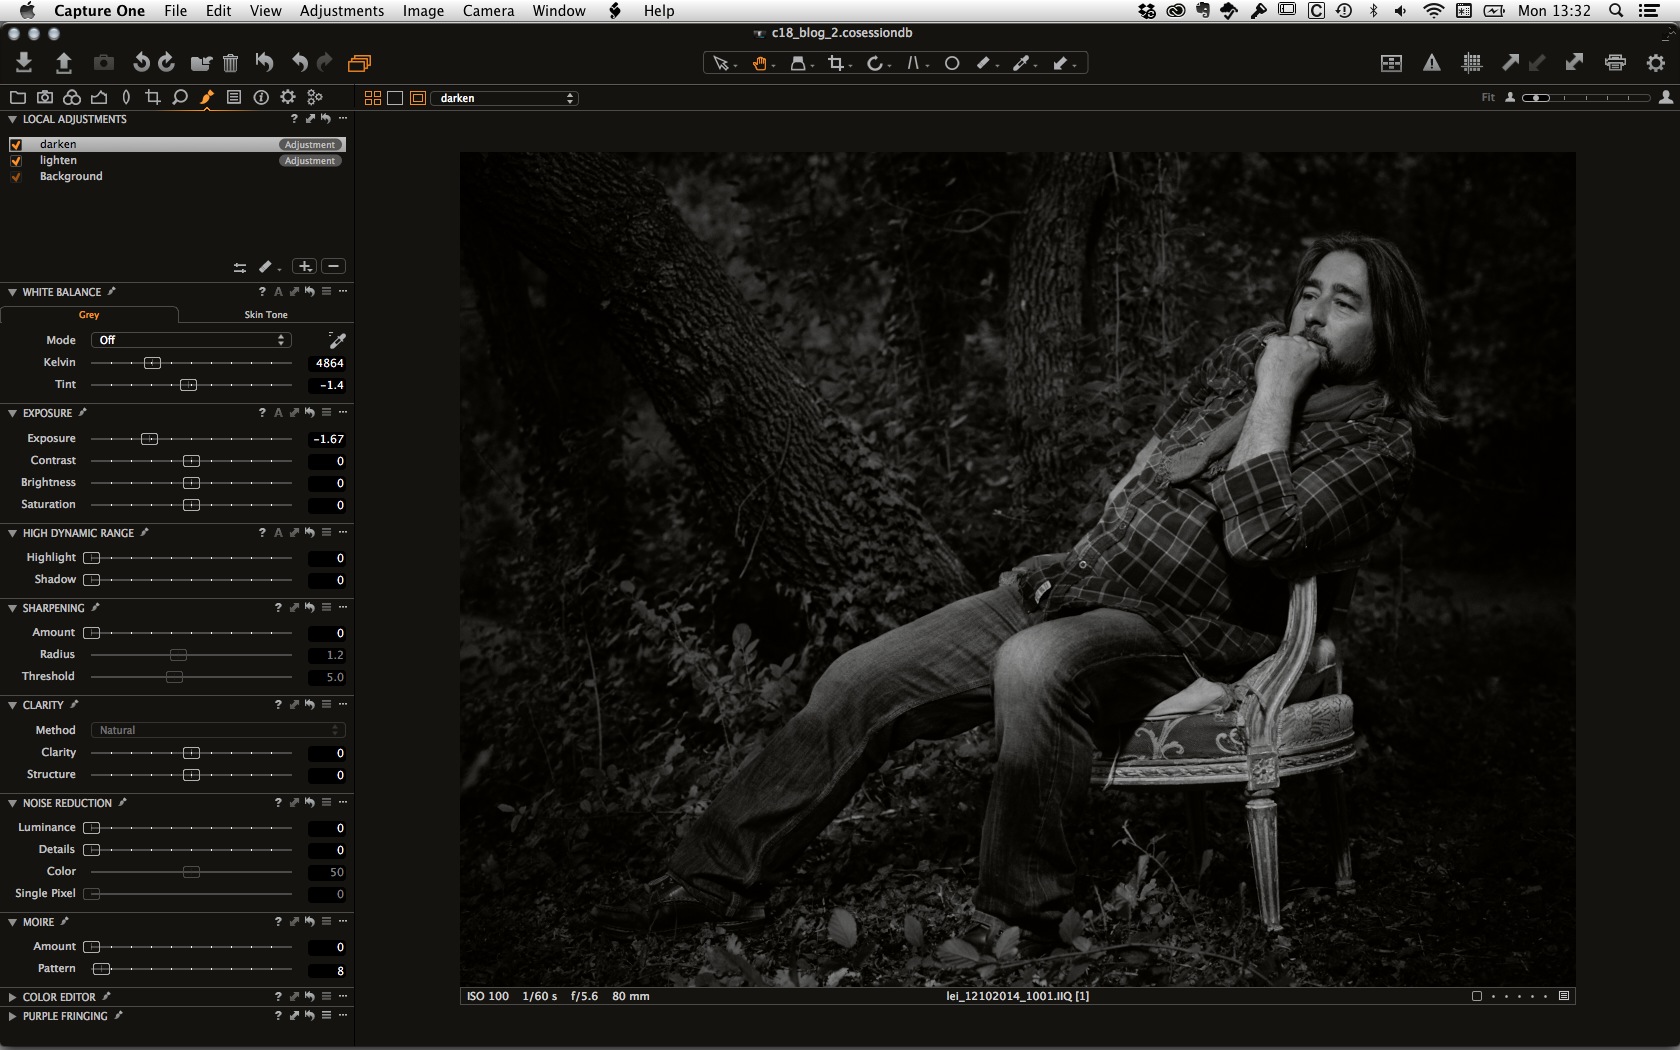
I created two correction layers “lighten” & “darken” and drew the masks accordingly. Just use a soft brush with a low opacity! I lighted some minor parts in the face and darkened the background and parts of the jeans. With the massive performance increase in version 8, drawing a mask is really fast and easy now!
So this is the “lighten” part before:
So this is the “lighten” part before: And this is the version with the correction and the mask applied!
The same with the darken layer. Here is the version before:
This is what the mask looks like:
And this is the version with the correction layer applied!
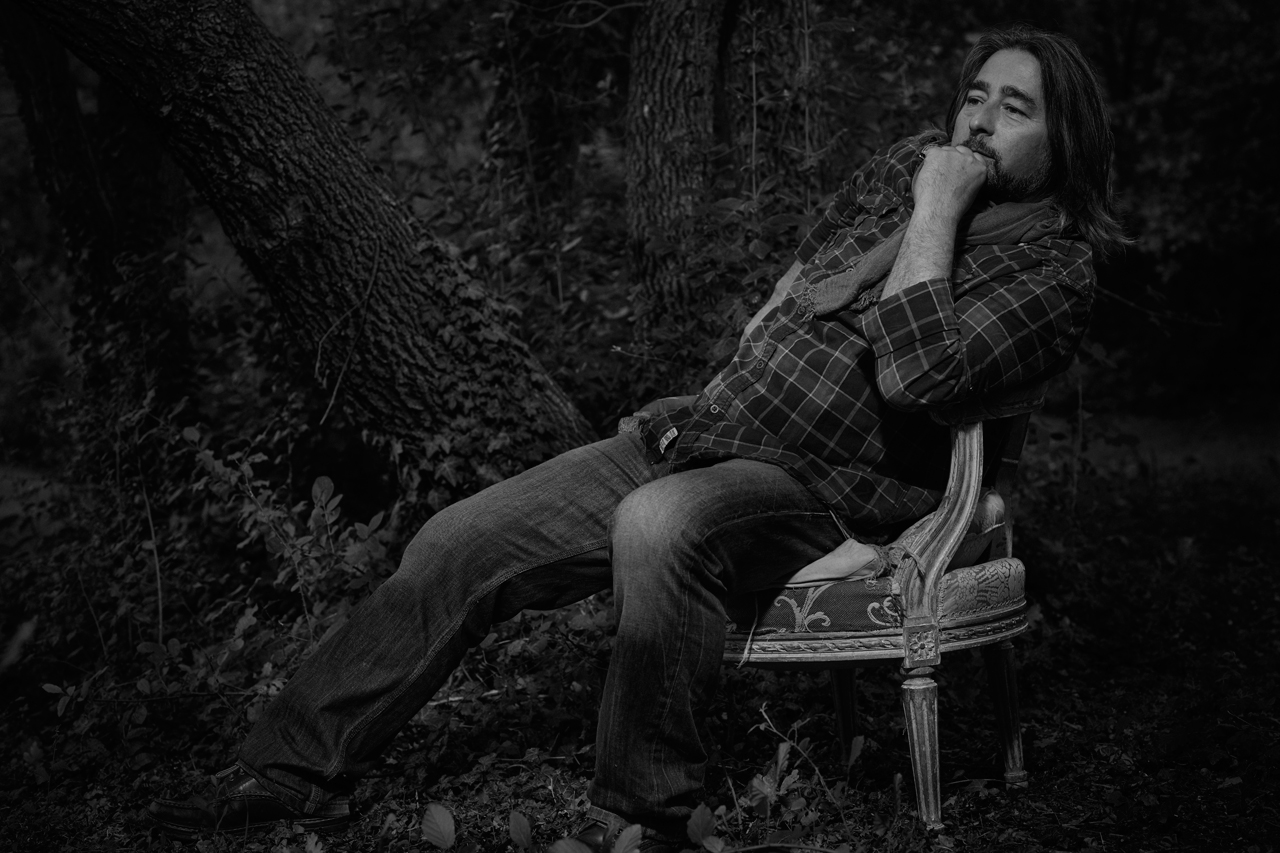
Below is the final image out of Capture One! Please note that the whole process – including the dodge & burn part – took us less than five minutes! I hope you enjoyed that little trip to France!
Best regards,
Andreana and Alex
Scanderbeg Sauer
Scanderbeg Sauer
Extremely industrial, extremely loud, extremely dirty, extremely distant locations to most of the people - you can bet that there's where they will be. Their photographic work is primarily focused on the meeting of the corporate, industrial and personal, all characterized by a unique visual expression and consistent vision.


ok molto bene
Thanks, Enzo.
Glad you liked it.
All the best,
Niels
Oh dear, I have just downloaded Silver EfexPro 2. This new program Capture One Pro (also just bought) seems so much faster. And hay I can open Nikon D810 raw files, unlike on Photoshop CS6. Booked into all the webinars this month to get as much info and unto speed as I can.
Great information! Thank you!