A camera with a large dynamic range will allow you to better retain the details in both the shadows and highlights at the same time.
Not all camera manufacturers have realized the importance of having a large dynamic range, and images shot with these cameras are more likely to show clipped highlight details.
When working with a RAW file you do have the possibly to recover some of the clipped highlights details as all three color channels typically do not clip data at the same exposure level.
As you get to know your camera, you will learn how much overexposure an image can handle while it is still possible to recover all details. The benefit of doing this is to get brighter shadows and more headroom to open up the deep shadows without showing noise.
Sometimes, you end up with images where the highlights are too blown out and all attempts to recover the clipped data leads to strange looking colors close to the burned-out areas. Capture One Pro 6’s Color Editor can be the only solution to fix such false colors.
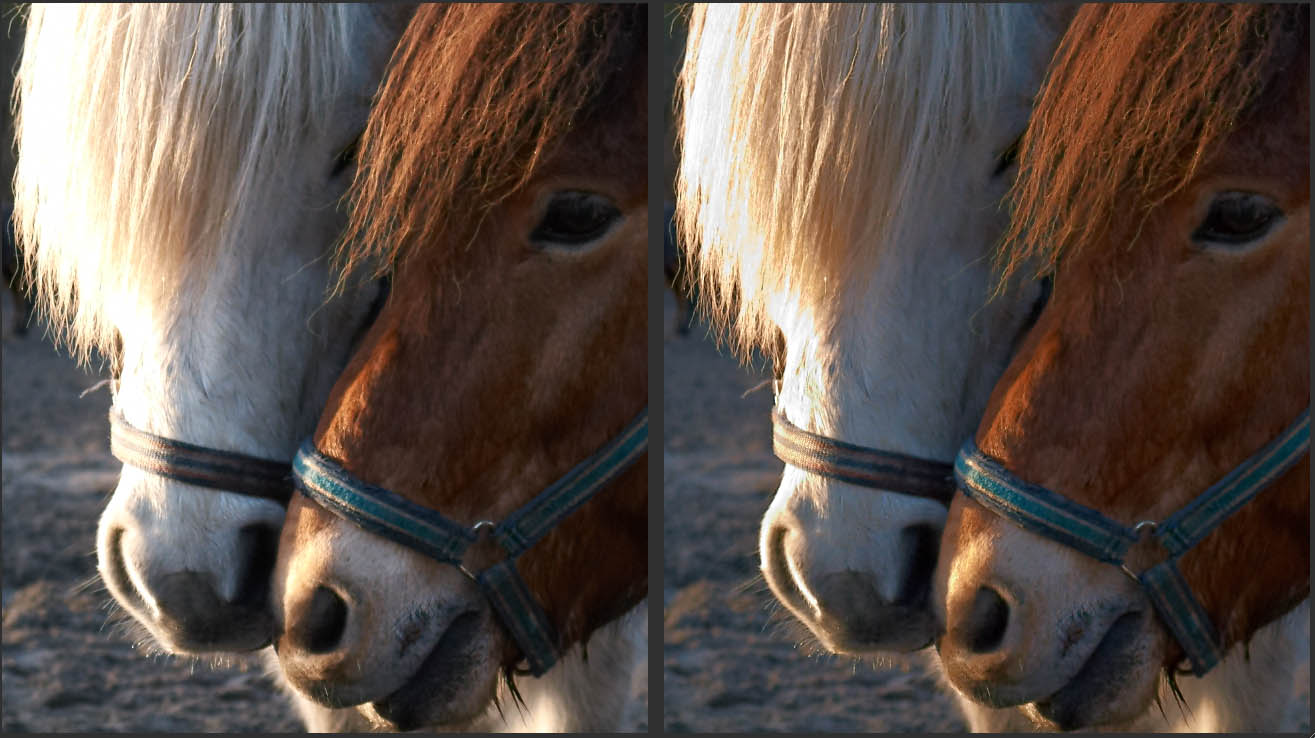
The image above was shot with a camera with a limited dynamic range. To the left, you can see the image straight out of the camera where the highlights are clearly burned out. To the right, you can see the image after the highlights has been recovered and the false colors fixed with the Color Editor.
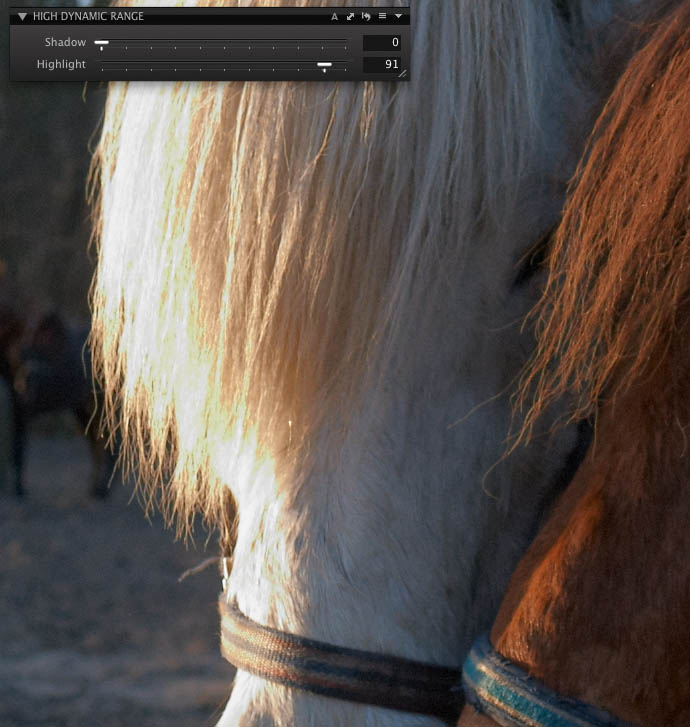
Capture One’s High Dynamic Range tool is the tool to start with when fixing the burned-out highlights. As the image was shot with a camera with a limited dynamic range, there is very limited headroom for the highlights. I can barely recover the details and I get some false greenish color in the recovered zones.
To fix the false color, I’ll use Capture One’s Advanced Color Editor. I’ll make the correction in an Adjustments Layer as I don’t know for sure whether the false color also appear as a natural part of the image.
1. Add a new adjustments layer in the Adjustments Tool by clicking the ‘+’ icon.
2. Invert the mask as you want to make sure that you work on the whole image while setting up the right parameters for the tool.
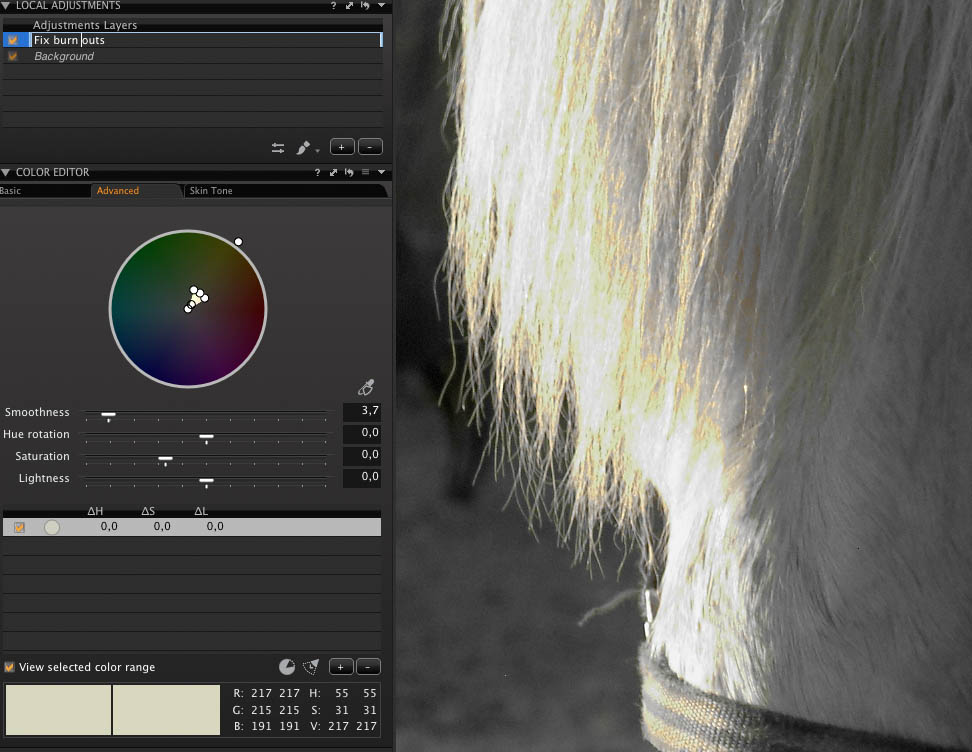
3. Pick the false greenish color with the color picker.
4. Adjust the selection by checking the “View selected color range” on.
5. Reduce the Smoothness slider and turn the hue a little towards the green color in order to isolate the false color.
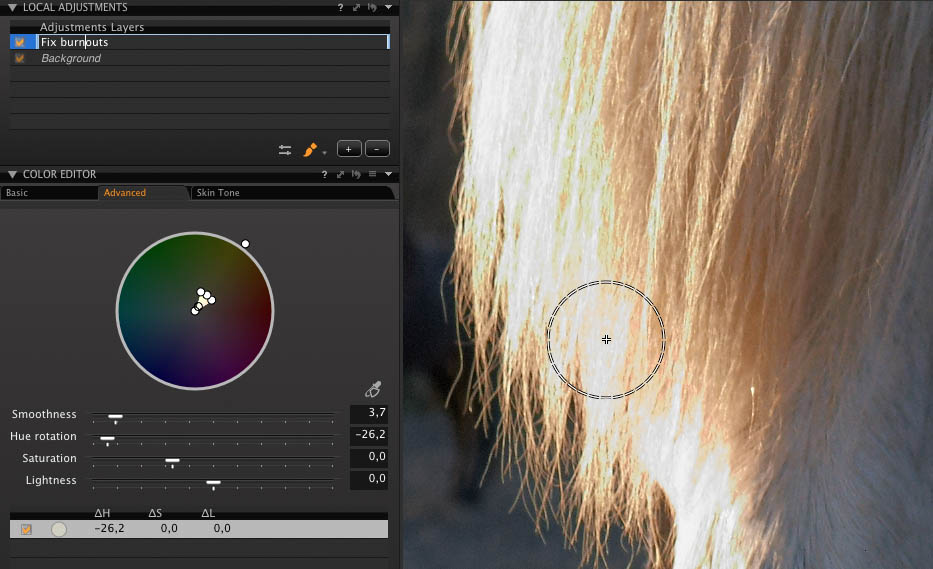
6. Uncheck the “View selected color range” and adjust the hue to a more yellow/brown tone.
7. Invert the mask and brush in the color corrections.

The Image Quality Professor
The digital pioneer, Niels V. Knudsen, is Phase One’s Image Quality Professor and founder of the IQP blog. Moreover, he is responsible for breakthrough advancements in image quality both in Phase One’s medium format camera systems and in Capture One Pro.



Thanks for another excellent tutorial! I was working on an image with similar issues and could not properly correct minor color problems as illustrated here; this tutorial will certainly help.
waiting when you starting making 2-5mins video tutorials for such a lessons.
save my time and others.
Thanks!!! Estoy ajustando un catálogo con fondo negro y zonas metálicas ¡puedes imaginar que me has ayudado mucho!!
Thanks!!! I am fitting a catalogue with black fund and metallic zones: you can imagine that you have helped me very much!!
This is a very interesting method for me. But I’m not that much used to working with the layers tool, so I don’t understand the tutorial from topic 7 on. How can I invert the mawsk a second time. If I click at the triangel in the Local Adjustments-bar, I only receive Remove Tool as a choice. So can you explain the individual steps of Topic 7 more detailed. Thanks!
Hi Peter,
You can check out my tip on inverted masks in local adjustment layers for a more in depth explanation of the process.
https://blog.captureone.com/2011/05/19/inverted-masks-in-local-adjustments/
I hope this helps.
All the best,
Niels
Impressive. I’ve seen recovery of shadows but I always thought that burned out is burned out, which meant lost forever in the 255 255 255 range. This is surprising, I’ll experiment with that some day that I have too strong hilights (like brides’ dresses in full sun).