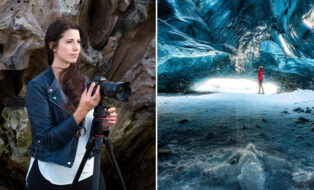
I’ve been shooting time-lapse for several years now and learnt a great deal along the way. I’ve put together this short video tutorial for anyone wanting to get a great start in time-lapse. Shooting this stuff can be as complex or as simple as you like.
http://www.youtube.com/watch?v=kGnJrW36PEQ&w=590&h=443
Here’s my top tips:
- Always shoot Raw, as you can see in the tutorial this gives you amazing control and flexibility when using Capture One Pro 7
- Shoot in manual exposure
- If the light is changing we sometimes use aperture priority (Try to use spot metering, and locate a building or some other fixed object to meter off)
- Fix the camera and don’t touch it once shooting (the tiniest bit of movement can ruin a whole sequence)
- Use shutter speeds around 1/15 sec or slower, we tend to shoot around 1/4 sec
- Use ND filters so you can get the shutter speed down in strong daylight
- Understand where the sun is moving
- For more dynamic results use a motorised dolly or slider, this works best with some sort of foreground object.
Once you’ve got the images processed, there’s a number of ways to construct the time-lapse, I tend to use Quicktime 7 or an App called “Sequence” by Frosthaus AS available on the App store (sorry I can only make suggestions for Macs).
That’s it, please don’t hesitate to leave a comment if you have any questions.
Thank you,
Adrian
Adrian Weinbrecht
Adrian Weinbrecht is one Europe’s best established commercial advertising photographers and shoots for a diverse range of top-tier international clients like Sony, UBS, BBC, Jaguar Land Rover, Adidas.


Hi Adrain, great post !
What was the interval between your shots? And what was the total time counting from shot 1 to the last shot? Long time-lapse makes you wanna stay close to your expensive DSLR 🙂
thnx,
Ruud
Hi Ruud
Thanks so much for the feedback, yes I totally agree about keeping close to the Camera. Although in Public places I’m usually more concerned about people kicking the tripod.
I’m going to post a longer explanation on the shot interval in the comments in about 30mins.
Best
Adrian
Thank you Adrian so much, this has really helped me!
I am trying to get started with some time lapse footage. You make it look so easy, it is inspiring to me.
You did the tutorial very well!
Thanks, kind regards
Andrew
Hi Andrew
Thank you so much for the kind words, there’s some nice stuff on your website.
I notice you live in Switzerland, I spent a lot of time in Geneva and Lausanne many years ago, I Love Switzerland.
Warmest wishes
Adrian
Adrian,
Enjoyed your “how to” on Time Lapse, I appreciate the shutter speeds of 1/4 to 1/15 sec that you gave but you did not indicate the interval between the captures
Peter
Hi Peter (and Ruud)
Thanks for the feedback.
My apologies it’s taken a bit of time to get back to you, I’m somewhere in the South of Turkey at the moment.
You’ve raised a very good point, I’m very sorry I didn’t address in the Time-lapse Blog piece. Ruud has also asked the same question.
Anyway, here’s how we estimate/calculate the desired interval.
The first thing, is to have some idea of how long you want the time-lapse to be, very often we are using time-lapse as part of larger/longer video. We normally aim to have a time-lapse of roughly 10secs. As we are based in Europe we tend to shoot video at 25FPS (FRAMES Per Second) so to get 10secs of time-lapse footage you would need 250 frames, 10secs x 25fps = 250 frames. I usually like to have a few frames extra so I will set the camera to shoot 300frames. This makes for 12sec in total, its always good to have a bit extra. This gives us ‘handles’ on the clip. Note: If we are shooting for a USA client then we will edit and shoot at 30FPS, so we have to multiply by x30 instead of x25. This is because video in the USA is usually edited at 30fps. This has to do with the electricity cycles in different parts of the world.
Once I’ve worked out the clip length, I then tend to observe the scene before me. Generally, the slower things in the scene are moving, the longer the interval will be. So let’s imagine we have a scene with clouds, but the clouds are moving very very slowly. I will observe how long it takes for the clouds to move a noticeable distance. If this is 10secs then I will set the interval to 10secs. If the clouds are moving very fast and you can easily observe this in 1sec, then this becomes my interval. 1sec.
I don’t recall exactly what the interval was in the Hong Kong time-lapse, possibly around 4secs. It really is very subjective depending on the subject, when I first started shooting time-lapse I used to shoot too many frames. This just wears your cameras out. I strongly suggest doing a quick calculation at the beginning
I really hope this helps.
Best
Adrian Weinbrecht
http://www.adrianweinbrecht.com
An interesting tutorial, plenty of pointers for improving T-L shots. How about a few techniques along similar lines for when doing motion T-L, obviously masking would be a problem, so how do we overcome the problem.
Hi Mike
I might look into Motion Time-lapse for a future Blog article. This was really meant to be a introduction to Good Time-lapse.
In terms of masking yes you are right, you would need something that would track with the Scene. There are a few different pieces of software that can do that, however because you will not be working at the raw level of the images (you’d normally work on an outputted video clip eg Pro-Res) the results wont tend to be as significant as the local adjustments made in C1.
Best
Adrian
Hey Adrian,
thank u for sharing the great tutorial!
It is really usefull ^^
all the best
Lu
Adrian thank you for this wonderful explanation.
I’m progressing every day thanks gents like you.
Congratulations
Thanks Pascal and Lu
Thank you Adrian,
I always enjoy your wonderful videos, you are a great teacher…
Thank you Benoit
HAPPY NEW YEAR !
Adrian
Dear Adrian,
Thank you very much for your great tutorial on time-lapse photography.
Jean-Marie Comeau
Montreal
Merci Jean-Marie
HAPPY NEW YEAR !
Adrian
Hi, and probably Happy New Year!
I have bought COP7, and I like it better and better. I can’t figure out how to set a timer in COP7.
Do you really need a separate timer? I’m going to do several day and nights, but…..
can’t find the timer.
I would like to see a timer schedule with changes(camera settings) in COP7.
Best Regards,
Jan
Hi Jan
Can you please explain a bit more what you mean when you say a ‘Timer’ in Capture one ? I think you are referring to shooting tethered ? I always shoot to Card for Time-lapse.
If you are speaking of controlling the camera through C1 yes you can do this with many cameras.
But the Camera timer or ‘Intervoltometer’ still needs to be used, this is built into many Nikon cameras and for Canon you need a cable release with this feature usually by Canon.
I think you are referring to Ramping the exposure e.g. it the shutter speed changes over a certain period of time. I’d love to see this in C1 PRO.
Anyway HAPPY NEW YEAR !
Adrian
Hi again Adrian,
I’m referring to having a built in interval-timer in C1. Ramping would be great too! It is impractical to do what I want to do without shooting tethered, I do it with the “EOS-Utility”. It works great, but…. I would love to see the same functionality built into C1, + ramping.
I have 10274 pictures in 7 days now. The camera is built into a Pelicase, with heating, power supply for camera, and a 15m usb cable.
This is standing outside in winter weather conditions in Oslo, Norway.
I’m shooting raw of course, so 10274 images is about 213GB diskspace.
So scheduled timer functions would be greatly appreciated here 🙂
Berst Regards,
Jan
Hi Jan,
Maybe this will be of interest for you?
http://www.vivolaboratories.com
David
Phase One
It sure has a small footprint, but …. as it does not save to external media, it’s no good.
My need is for prolonged time, like seasons, or a whole year. Shooting raw, this would be unpractical. But this is what I want to do.
http://www.weye-feye.com/weye-feye/ looks promising. I have bought this, but have not checked it out yet.
1 week testshooting was about 213 GB….
I will also need a camera without mechanical shutter, or a camera that will be able to shoot 525600 or more exposures, preferably more than that.
Does anybody know what to choose?
Best Regards,
Jan
David, is the Michron compatible with phase 645 body?
Or has anyone used an external involmeter with a phase body?
Thanks
Hi Martin,
I have / had a Michron myself but unfortunately it would not work with my Panasonic GF1.
It looks like Vivo don’t list the camera as supported so my only advice would be to get hold of a remote release cable…
http://www.phaseone.com/en/Camera-Systems/Accessories/Features.aspx
..and see if you could hack it. I.e. remove the shutter button and attach the right plug to the ‘right’ cables. But that could be an expensive experiment if the Michron doesn’t have enough juice to trigger the camera – which was the case with the Pansonic.
If you want to have a go, I can try to find out what pin does what on the 645DF body.
David
Thanks for the info David, I don’t think I’ll try any hacking yet lol, my question was more if it is currently working. The way things are going a solution may present itself sooner than later.
How fix flickering between shoots in Capture One? LR Timelapse is only for Lightroom..