
The Spot Removal Tool in Capture One Pro 7 removes two different kinds of ‘spots’ you may see on your images. There are dust spots that are present on the camera sensor itself and spots or blemishes on the image subject – for example skin blemishes.
Capture One Pro 7 is able to remove both of these with the Spot Removal Tool. By default it can be found in the Details tool tab.
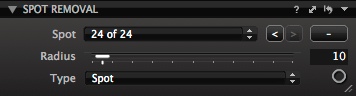 You can select between spot or dust removal.
Multiple spot removal points can be placed on the image and they can be a range of different sizes and not limited to just Spot or Dust removal.
Example – Spot Removal
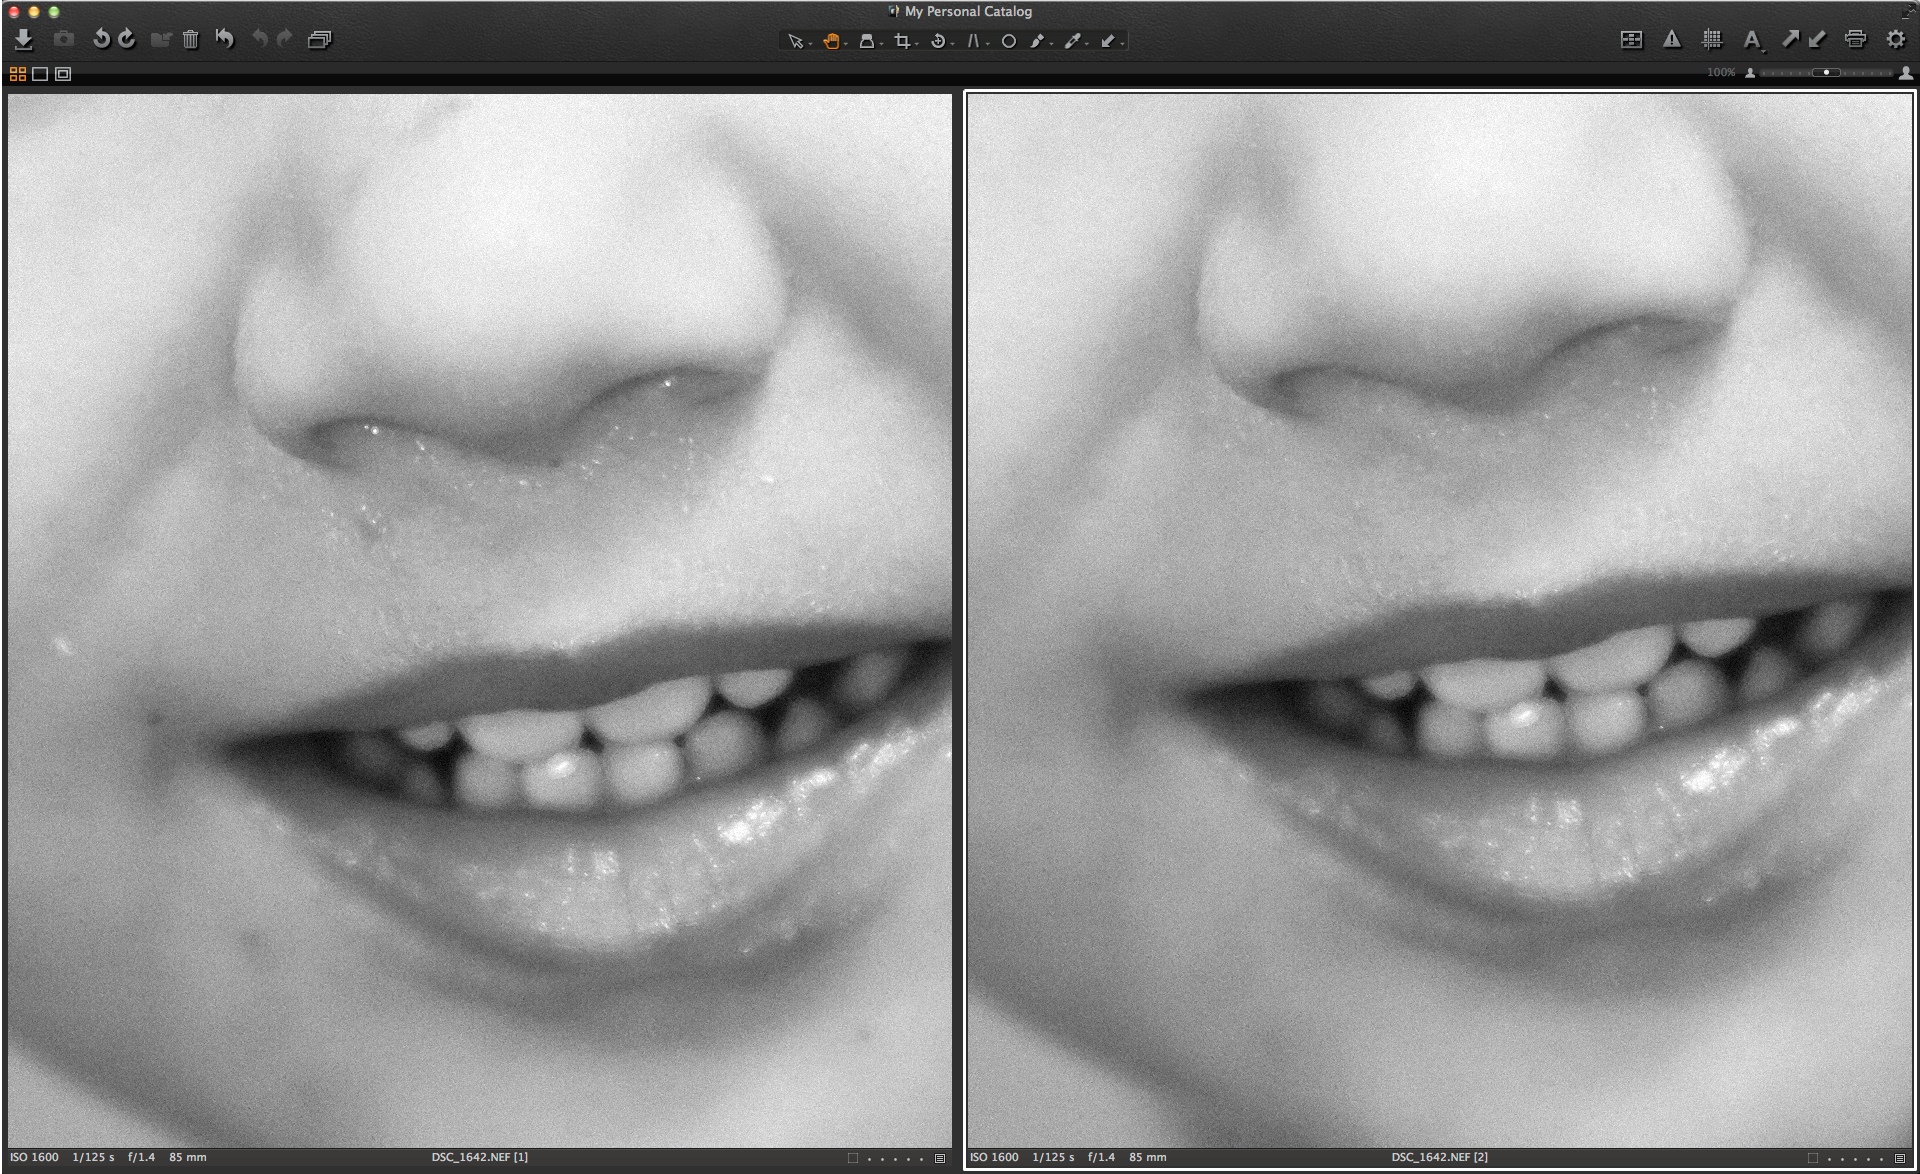
This image has a number of spots around the nose and mouth, which we can clearly see if we enlarge a little.

One possibility would be to export the image to Photoshop and use the clone or healing brush to remove the spots. However, that involves an extra step, which will take additional time.
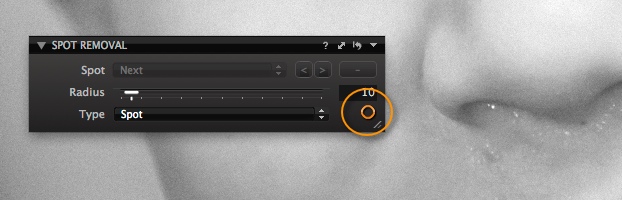
To remove spots in Capture One Pro 7, first select the ‘Remove Spot’ Cursor Tool. It can be selected in the Spot Removal Tool itself or from the Cursor Toolbar.
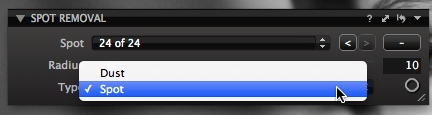
The ‘Type’ menu selects between removing a ‘Spot’ (Blemish on the image itself) or ‘Dust’ (Dust on the camera’s sensor). The algorithms we use to detect and remove the dust are quite different for each type, so it is important you choose the correct one. You can choose this before clicking on the spot to remove or afterwards, so don’t worry if you initially choose the wrong option.
Adjust the radius of the spot removal tool, by dragging the ‘Radius’ slider to the left or right. Try to aim for a spot removal tool size a little larger than the spot itself.
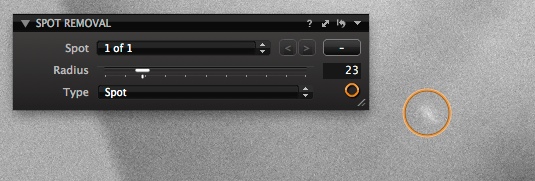
If you need to change the parameters, like the type and size once you have placed the spot, you can do so in the Spot Removal Tool. Additionally you can also adjust the radius by hovering near the edge of the spot.

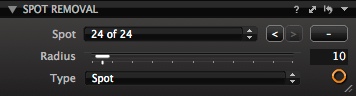
Once a number of removal points have been placed on an image the Spot Removal Tool will look like this.
In the ‘Spot’ pull down menu you can select individual removal points and adjust them further. Click on the minus icon to delete a point.
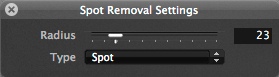
Finally, you can also right-click with the Remove Spot cursor for fast access to the parameters.
Here is a comparison of the same image with and without spot removal.
Here is the image with the Spot removal points shown.

The procedure is exactly the same for removing Dust spots from the camera sensor itself.
Best regards,
David


Thanks for the explanation of the removal tool.
According to my experience the dust removal tool is a bit weak in its ability to remove all dust spots. Sometimes I have to switch to the spot tool in order to remove persistent dust spots.
What’s great about the removal tool is it’s ability to preserve texture.
Is it true that the removal tool can be used for a maximum of one hundred spots?
Most of all I’m missing a proper cloning tool in C1, like for example in LR 5.
Hi Thomas,
Thanks for your observations.
Yes! The maximum number of spots is 100. Hopefully enough for most images. 😉
David
Thank you also for this tutorial.
I have a question about downstream processing following spot removal. I sometimes need to remove spots from black, red or blue backgrounds when taking pictures of jewelry. Unfortunately, when I save the image as a jpeg spots remain in the jpeg, even though they are not visible in the editing session. Perhaps I am doing something wrong?
Gerry
Hi Gerry,
Are you outputting a standard JPEG or is it a Quickproof?
David
Hi David,
Thank you for your reply.
I am outputting as standard JPEG with quality at 100 and scale at 100%.
Gerry
Hi Gerry,
Ok, that is strange! Perhaps a good idea to contact support so we can get to the bottom of it.
http://www.phaseone.com/en/SupportMain.aspx
Use the last link on that page.
David
Hello,
Is there any way to increase the 100 spots removal? Or maybe some other way to bypass it?
100 is currently the limit, I am afraid.
Are you spotting dust marks on the sensor or something else?
Hi David,
I am trying to remove dirt marks off the otherwise white plumage of a penguin. I have used the 100 spots available and would like a way to accept these changes so I can continue the process. (The penguin has clearly been rolling in the sand!). But if I try to copy the picture as a variant it still has the same 100 spots. Is there another way, please? Otherwise would it be possible to request the Capture One folk to greatly increase this, please? Many thanks!
+1 to a request to increase the number of spots past 100.
Hi Craig,
Noted. Thanks for your feedback
Best regards,
Gitte
I can’t work with that limit of 100 spots. I take lots of dog pictures and I print them big. On a black dogs, there are zillions of white spots to remove… That 100 spots limit could be a deal breaker for jumping to CaptureOne, which I otherwise appreciate a lot. What a bummer!
I also would like to see the 100 spot limit removed/increased.
I retouch professionally and like COPs color tonality in regards to skin tones. but the 100 spot limit is not suited for my workflow where I try to stay in the raw converter as long as possible for the retouching. afterwards I go to PS.
Another vote for the 100 spot limit to be removed. If you have images taken with the original Canon 5D (known in my family as “the dust magnet”) you will instantly understand why. Also wildlife photos with lots of flies or bugs around trees.
Also, is there any possibility of introducing a threshold layer or similar to view the spots better, similar to Lightroom’s capability to visualise spots? Without this, it is all too easy to miss smaller or less dense spots which nevertheless are still there and frustratingly show up in and spoilt the final image or print.
I totally agree with you Graham.
We also shoot with the 5D MK2 for a while now and there seems to be a lot of spots on the sensor after the last cleaning. Don’t know if that has something to do with canon.
But the 100 spot limit is also problematic with phase one images. We did not have dust marks there but when we shot 3 teenagers with very heavy acne I could just retouch ONE teenager in COP and the rest had to be done in Photoshop. Seems stupid to me.
as I mentioned above – I would like to stay as long as possible in the raw converter before switching to PS for final retouches.
the 100 spot limit seems a little bit arbitrary. I doubt that it has something to do with performance. in PS I sometimes retouch 100-300 spots for a still life images (for dust which we had no time to remove on the set) in the RAW converter.
by doing it this way I can e.g. change the color temperature after the fact without redoing the retouching.
But with acne filled teenagers I would rather use the raw engine of COP instead of PS because of the better developed skin tones.
The 100 limit seems to make no sense to me from a software developers point of view (I could be wrong).
Just add a “0” to your limit and I am happy.
Old thread, but I hope it’s still monitored.
+1 million on this one. With a limit of 100 spots, I am finding that I have to prioritize spots and just accept the ‘less offensive’ ones, or I have to continue post in PS. I absolutely love C1P, over Lightroom, but can’t cut the cord on Adobe until/unless this 100 spot limit is ousted, or greatly increased.
Not a completely « spot-on » comment but… I wish it could be possible to patch a line (like an electrical wire in the sky for instance) and make it disappear.
It was an easy task to do in that antique software that was called, if I remember well, Aperdore.
Can’t believe there is a 100 limit on this. Why? I’m evaluating Capture One and hit this snag 2 hours in. I am removing blemishes from a portrait. Got 2/3 done and hit the limit…now what?…add another software to the workflow like ON1 or Lightroom? Was about to purchase, but glad I didn’t (yet). Is there a registry hack or something out there?
Is there a way to toggle on & off the cursor marks when you’re fixing multiple spots? Makes it hard to see if the orange circles are all over the image. Also, is there nothing similar to the healing brush in COP? Used it a ton in LR & saved many trips to PS. Thanks.
Hi Greg,
If you choose another cursor tool, i.e the Pan tool (H on your keyboard) then they will dissapear. Then you can go back to the spot tool. Don’t forget you could assign a shortcut to that as well.
You can heal elements in Layers.
Watch here around the 3:15 mark -> https://learn.phaseone.com/capture-one/11/image-editing/layers-co11/
David
I’ve reached the 30 days of free trial for C1 V12. The limit of 100 spots is not acceptable to me. So, I’ll see you in a next version whithout limits. Bye!
Would it not work as a workaround to export the image with 100 spot removals as a TIFF, say, then import that TIFF and use CO to apply another 100 spot removals?
agreed. the limit of 100 spots is ABSOLUTELY ludicrous, and so is the fact that we’re forced to work with ONLY a round spot and have no way to draw the spot to be healed. in lightroom a hair can be drawn out with spot removal. in capture one, it can not. in lightroom, you can get your spot as small as necessary. in capture one, half the time the smallest size is too big. as i say in the BUG REPORT every time it crashes, THIS PROGRAM IS STILL NOT READY FOR PRIME TIME.
Yes, but I suppose you’d want to be sure the TIFF is saved losslessly before inducing “replicative fading” as Beverly Crusher called it on Star Trek.
I find it scarcely credible that after all these years, there is still a 100 spot limit, no ability to draw (e.g. to remove a hair), and no way to visualise spots (similar to Lightroom’s visualise spot toggle). Maybe there is some fundamental underlying software issue (I am not a programmer) which prevents C1 from having the equivalent of Lightroom’s threshold views, which are indispensable for viewing and masking sharpening and noise reduction as well.