
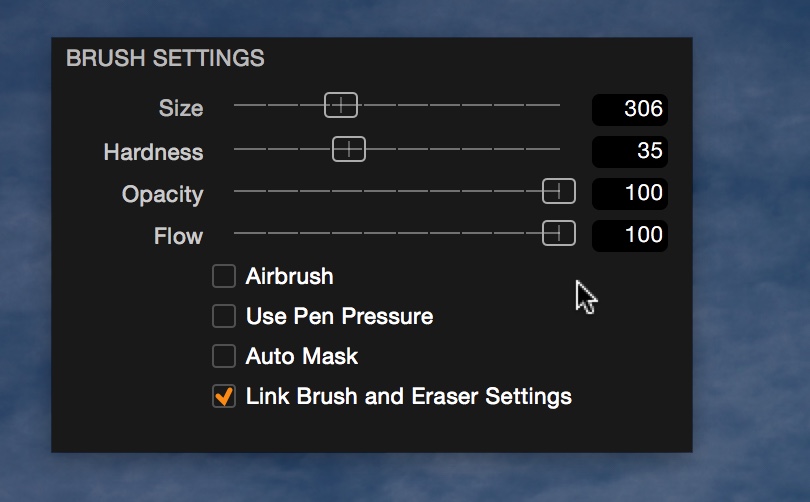
In Capture One Pro 9 we added a couple of new features for drawing Local Adjustment masks.
These were Flow amount and Airbrush mode.
In this particular blog post we will take a closer look at the Flow setting in the Brush Settings dialog. It’s really important if you want to ‘dodge and burn’ (Selectively lighten and darken parts of the image) and will lead to better results in a shorter space of time.
That’s got to be good!
Lower flow, more brush movements
In Capture One Pro 8 (where there was no flow control) you can liken that to a setting of 100 in Capture One Pro 9. But what does that actually mean?
First of all, it helps to think of Flow as a movement based setting. So with a flow set to 100, one single pass of the brush onto the image will deliver a mask to the maximum set Opacity (in the example above that would be 100).
With the Flow set to 50, it would take two passes to reach an Opacity of 100.
So in conclusion, the lower the Flow, the more brush movements it takes to reach the maximum set Opacity. This is why you should also consider Opacity settings when thinking about experimenting with Flow.
So, what’s the benefit?
With no Flow control, it becomes much more difficult to make gradual controlled changes of a mask. In Capture One Pro 8, if you want to build up or reduce a mask, you have to lift the pen or mouse in-between every brush stroke with a very low Opacity set. It does work, but the control and speed of the result is somewhat diminished.
Therefore, using Flow is particularly handy for dodging and burning as mentioned earlier.
Selective Lightening and Darkening (Dodge and Burn)
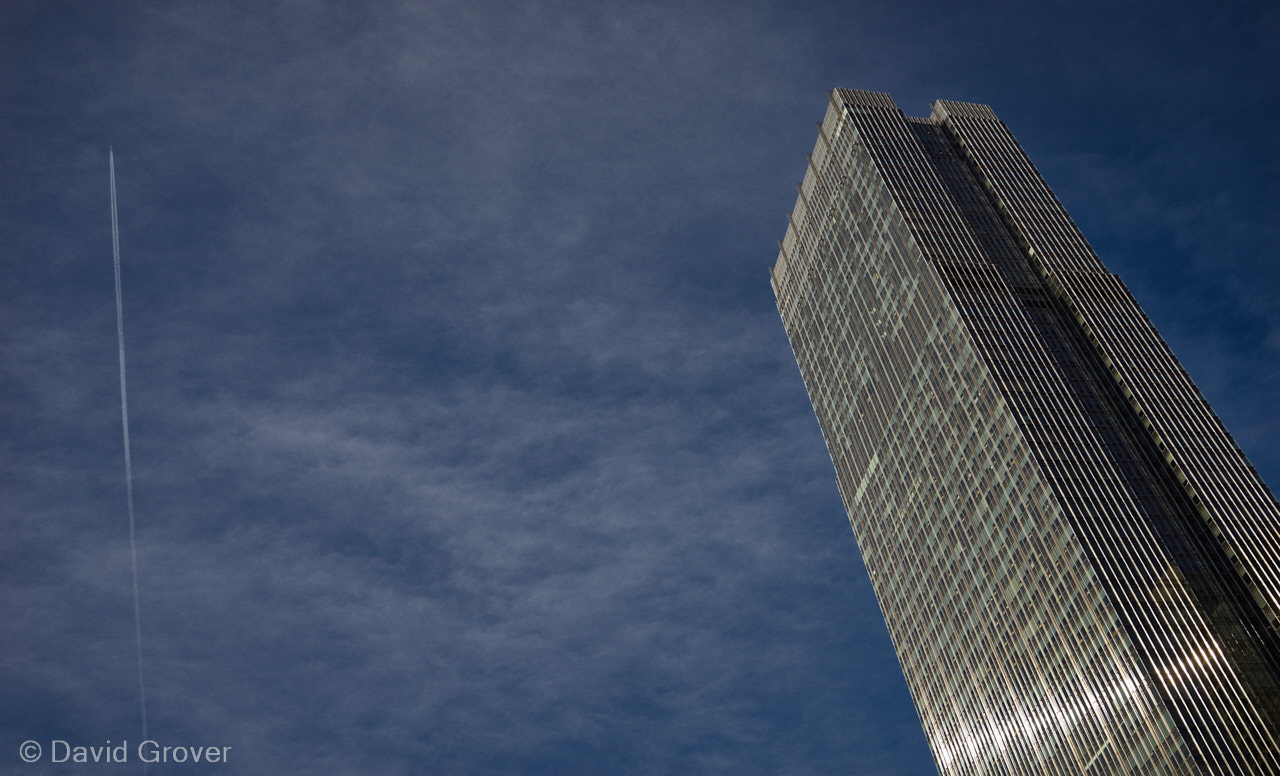
Here is a simple shot, currently with one Layer named ‘Sky’, which is adding a small Luma curve to the blue areas of the image.
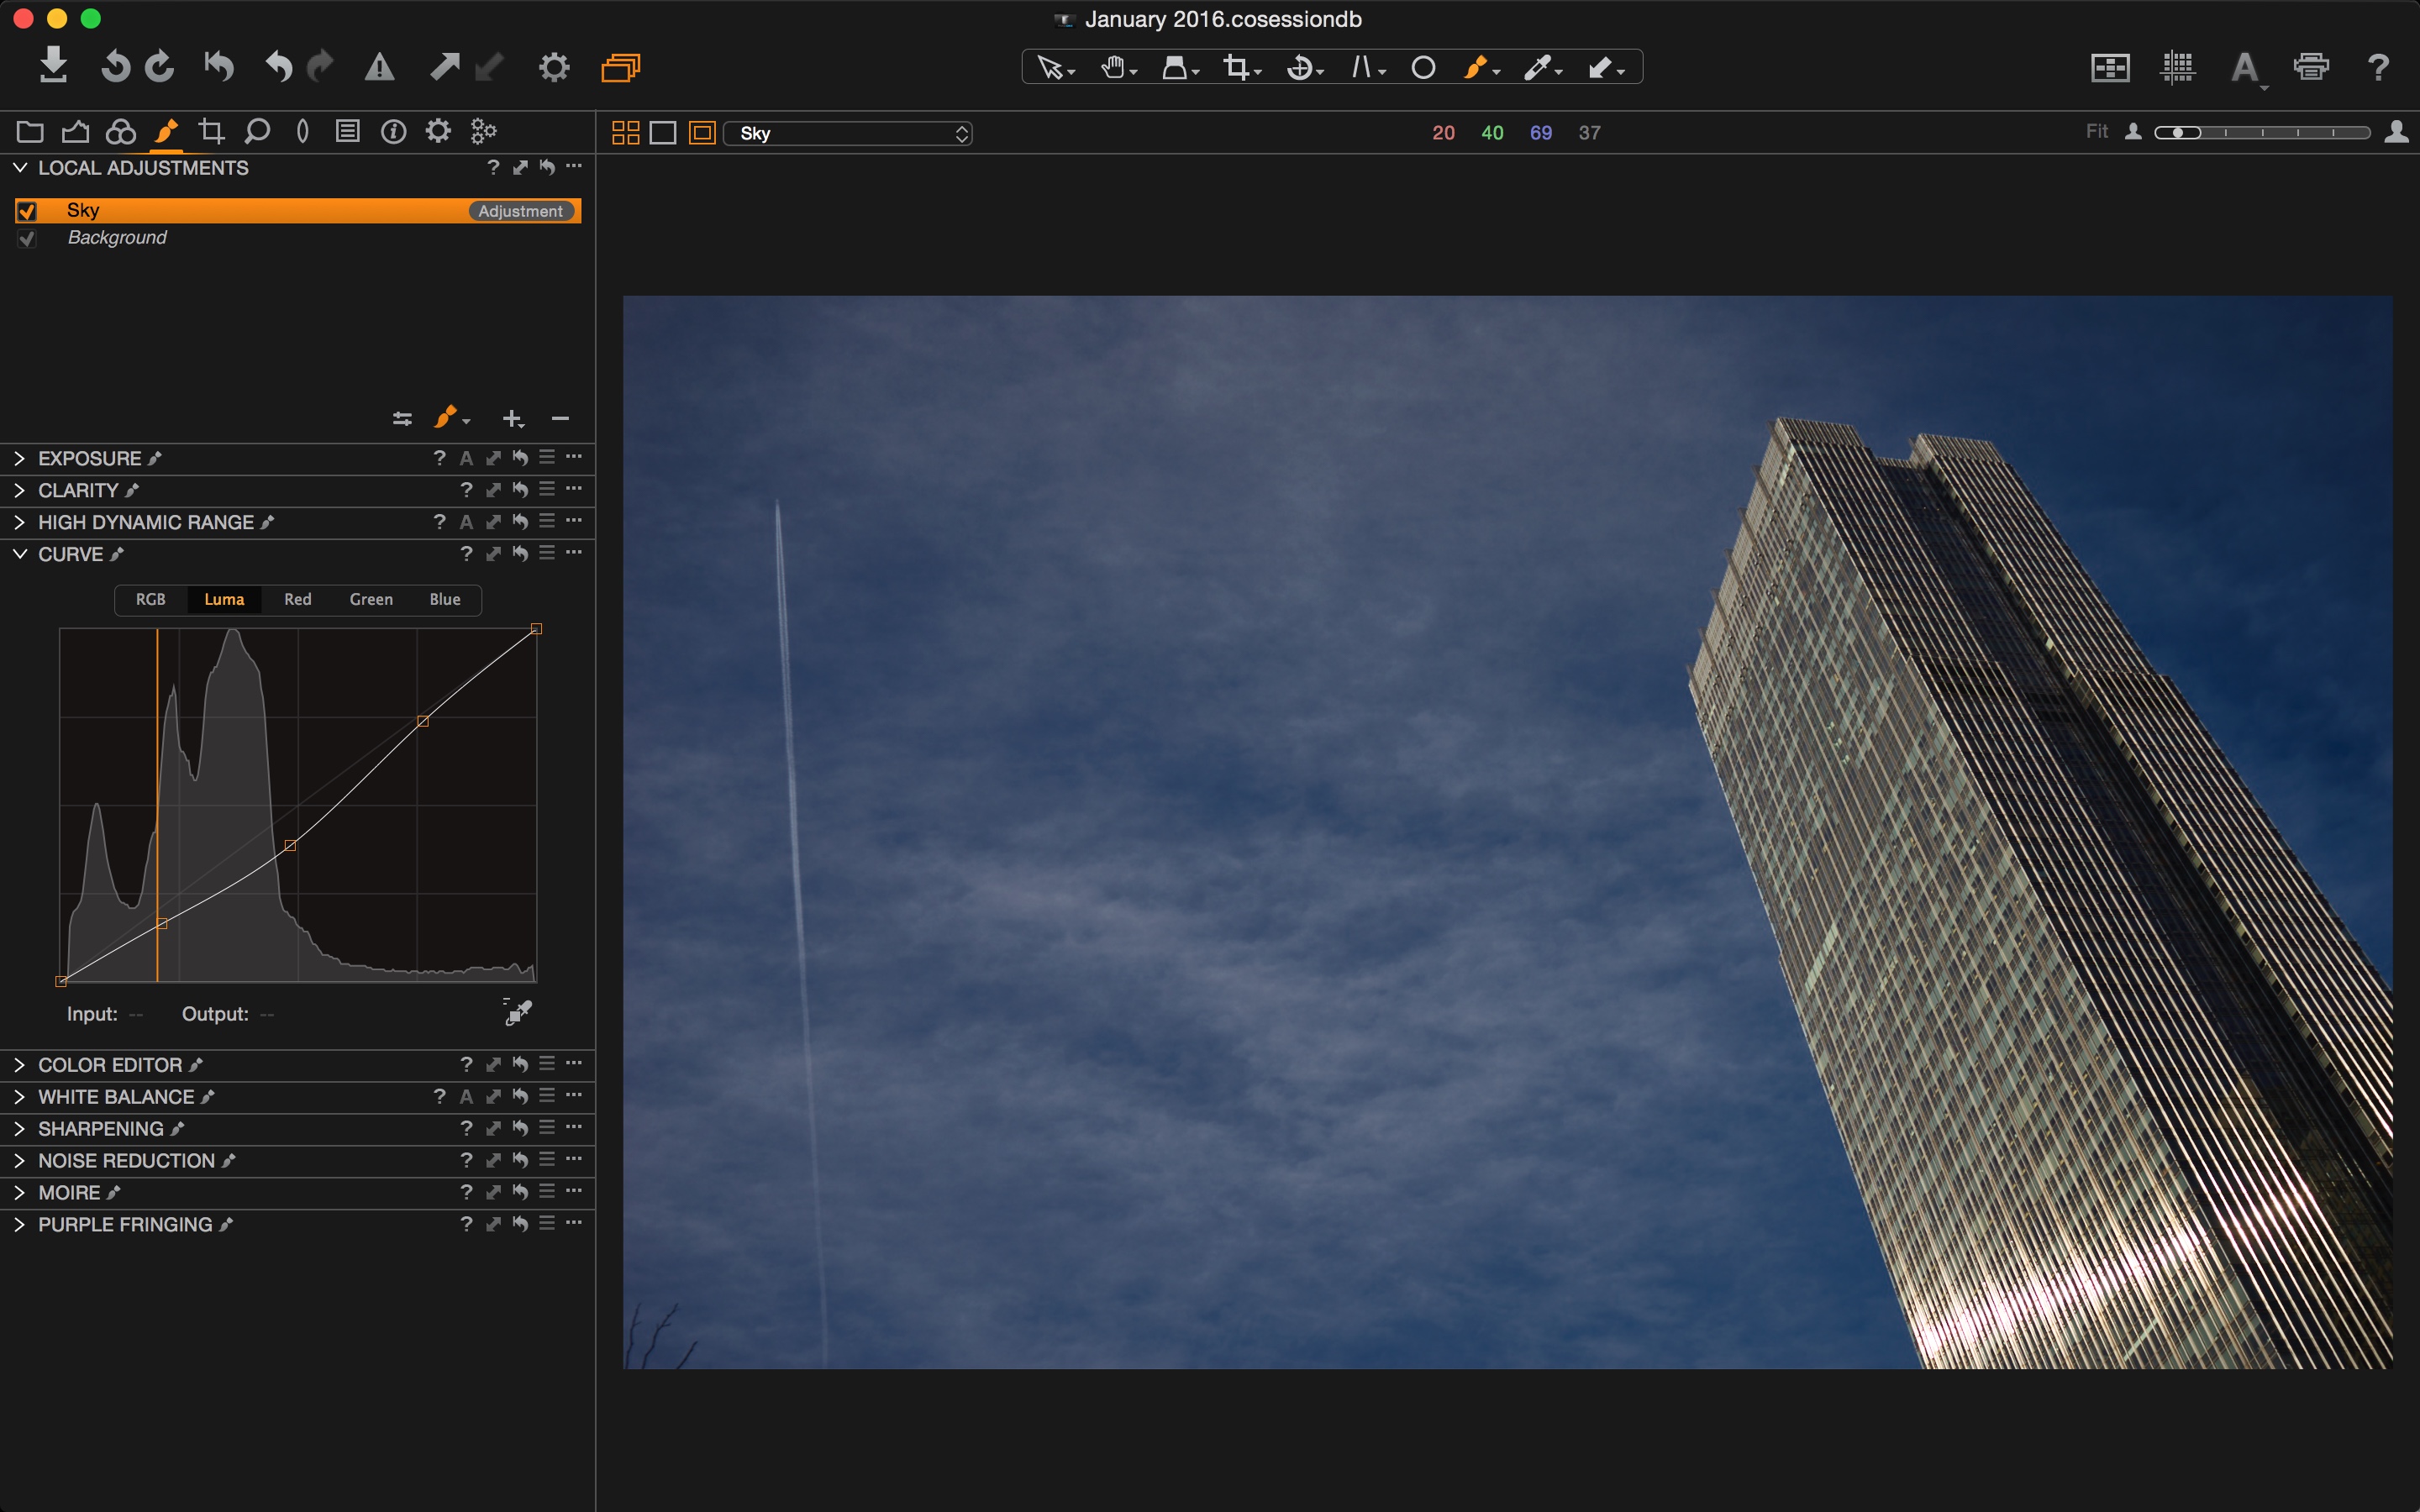
I want to experiment with bringing down the exposure on parts of the building and sky a little, and the easiest way to do this is with a Local Adjustment.
Before doing anything, I make a new Layer called ‘Selective Darken’.
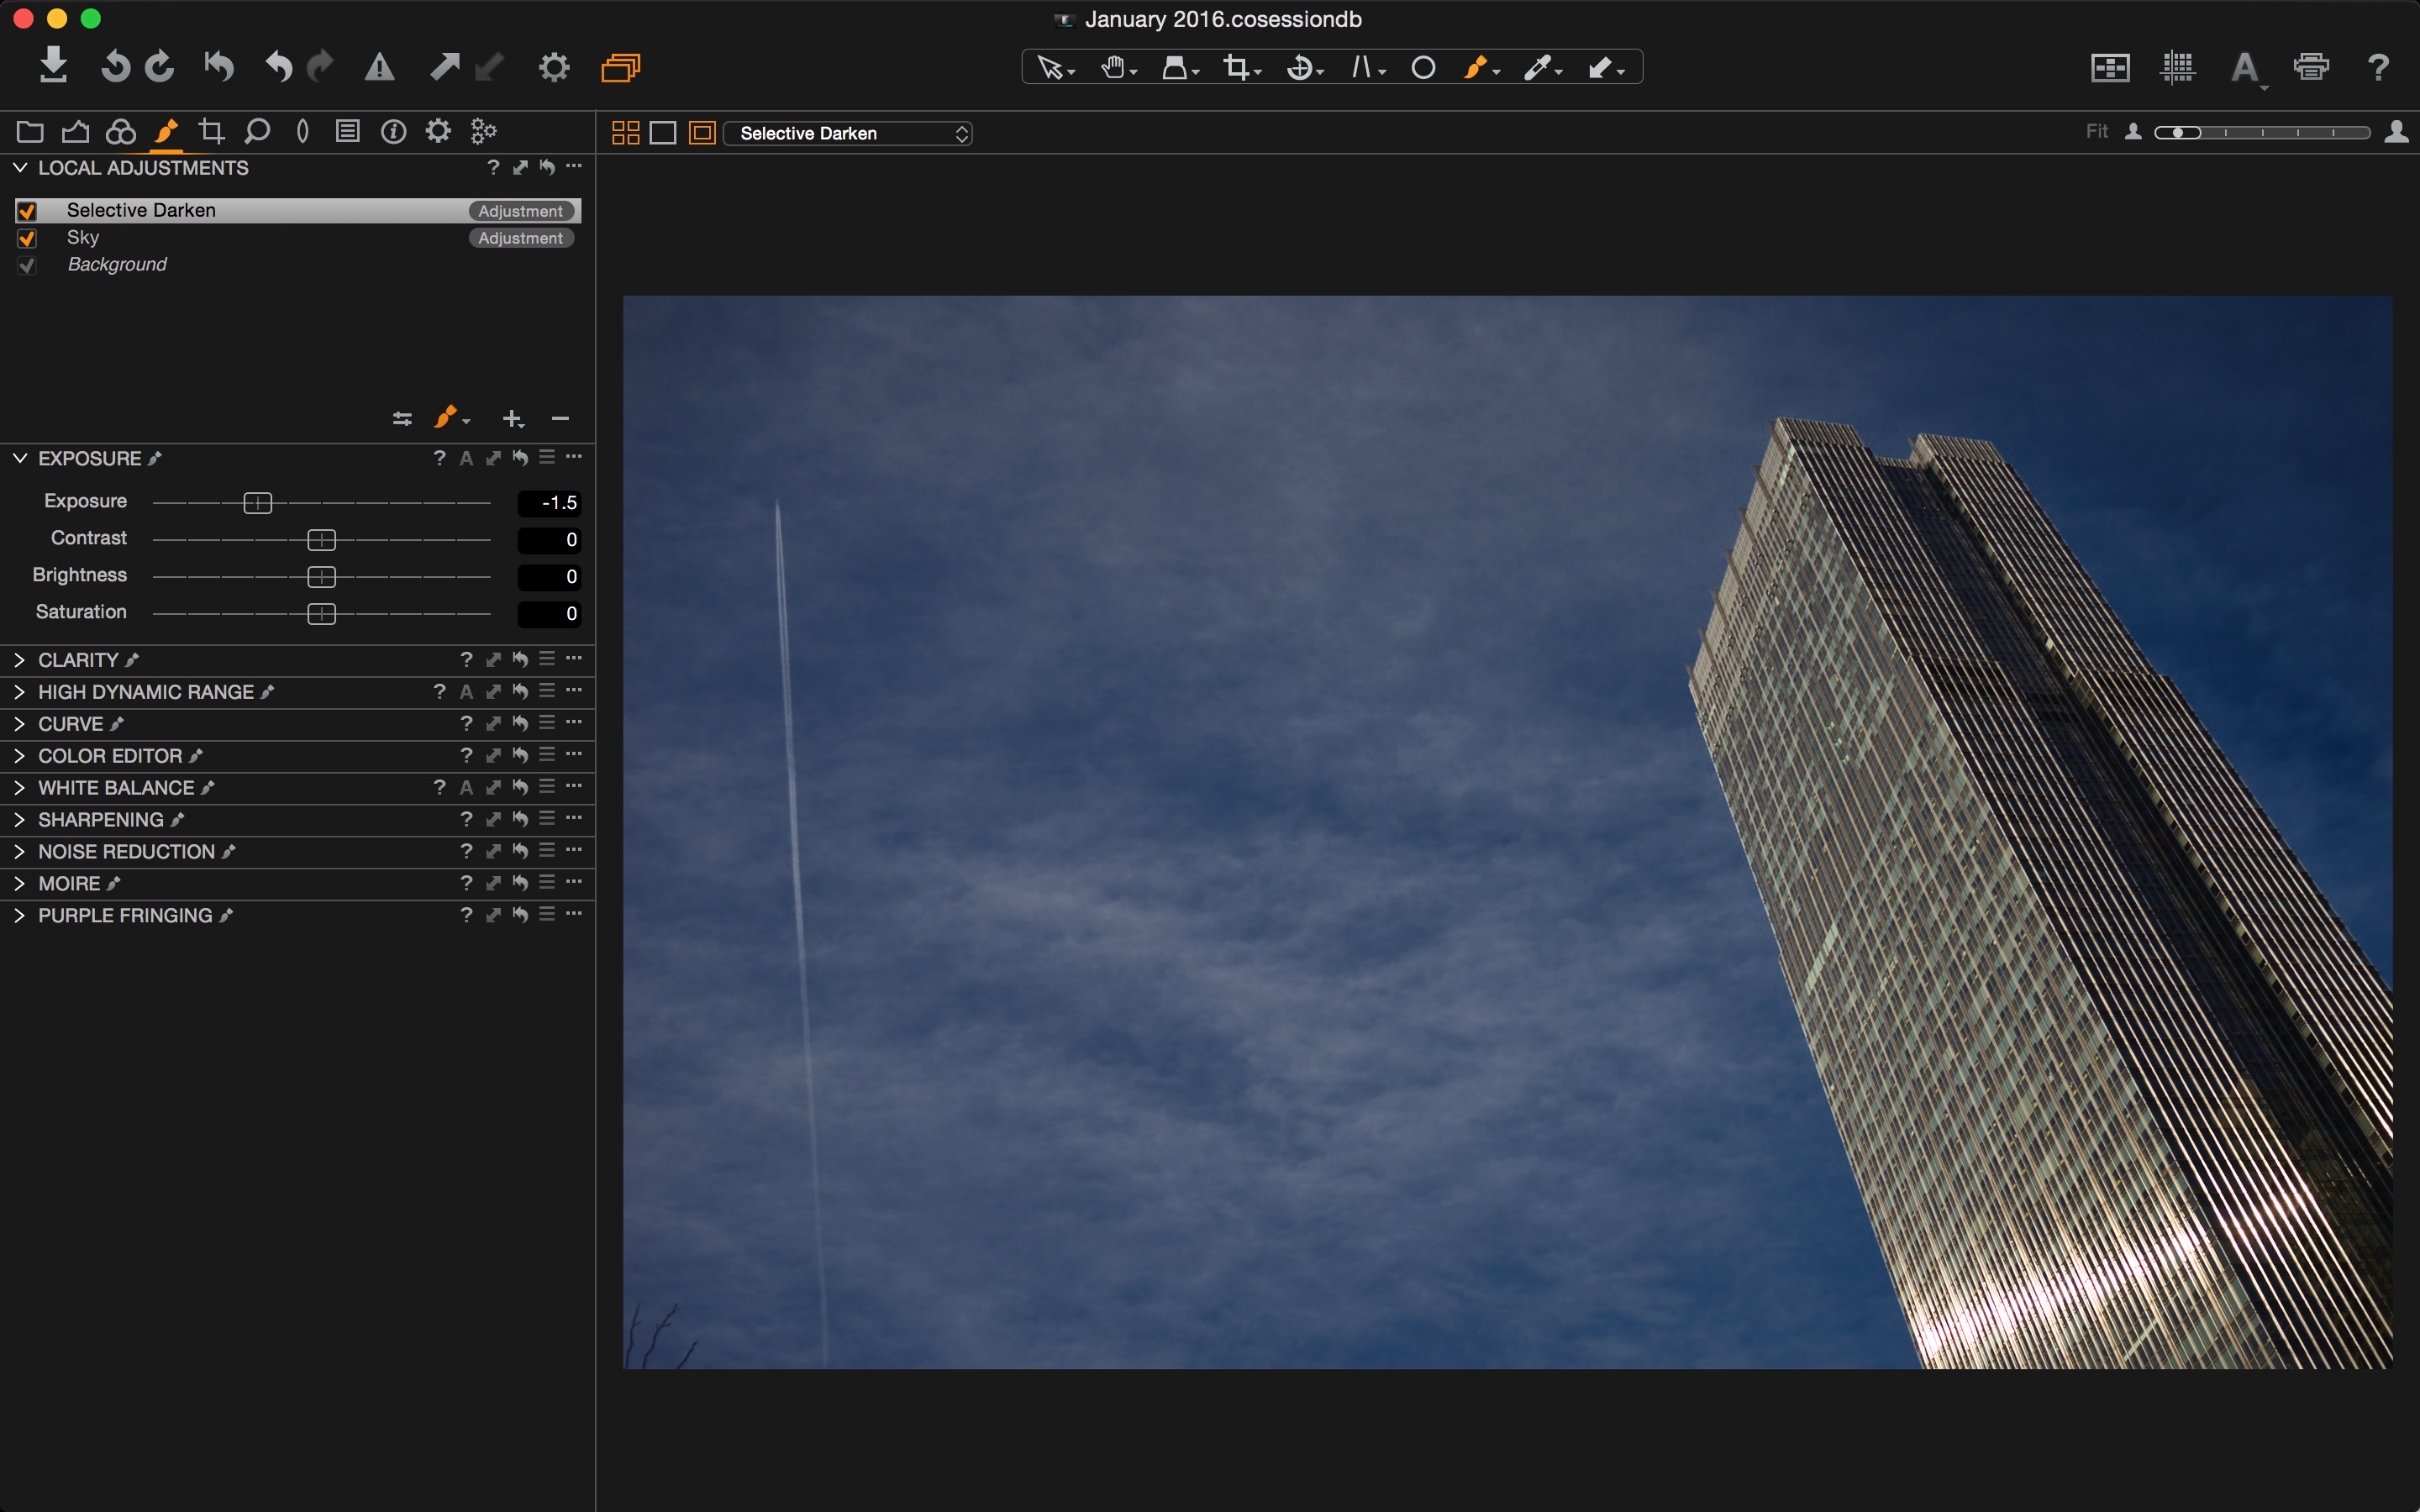
New Layers are created in the Local Adjustments tool by clicking the + icon
As you can see in the above image, I have also reduced the exposure by 1.5 stops. The image, of course, does not change as there is no Masking on that layer as yet – remember, changes on each layer only show on the masked areas.
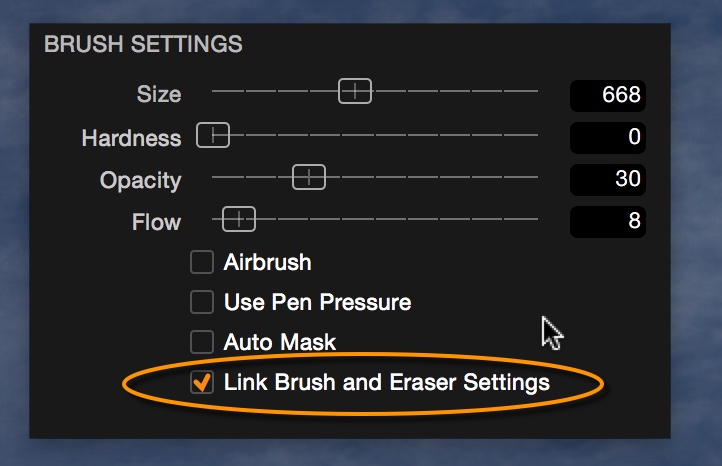
Next, I need to adjust my Brush Settings to allow a gradual and controlled build up my mask.
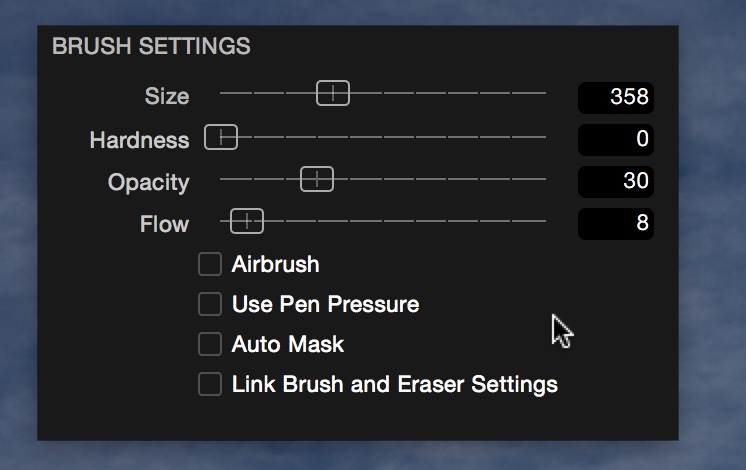
I choose a really low Flow (8 in this example) and also a low Opacity (30 in this example). You might be wondering why I don’t simply start with a less drastic Exposure correction, and this indeed could be a valid approach. But, it also gives me another level of adjustment to play with, as once I have applied the mask, I can increase or reduce its overall effect by playing with the Exposure slider.
With these settings, I can use my pen and tablet to ‘paint’ over the image. The more I brush in one particular area, the more the image darkens. I don’t have to lift my pen off at any point, I just brush away. Concentration in one area means the mask will build up gradually to my final desired look. Briefly brushing over a different area will be just a subtle effect.
Its important to add that I don’t have the mask showing when I’m drawing as I want to see the result on the image in real time.
Link Brush and Eraser Settings
If I feel like I have gone too far, I just press E on the keyboard to choose the eraser. Make sure the check box Link Brush and Eraser Settings is checked in the Brush Settings tool so that the Eraser and Brush share the same settings.
After masking, I settled on an Exposure value of -1.26 to reduce the effect a little.
You can see the before and after below:
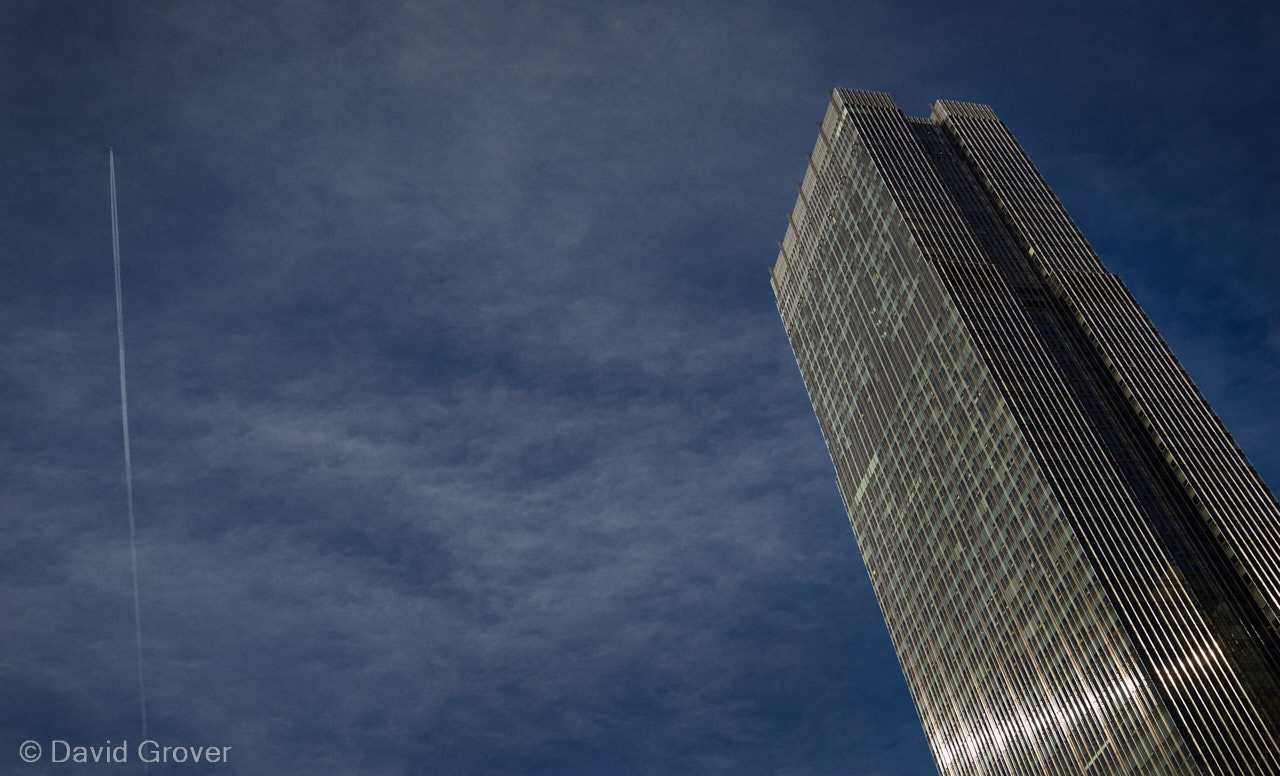
Oh, and to finish the image I also used a repair layer to get rid of the tree branches in the lower left hand corner.
Don’t forget, if you want to selectively lighten, the process is exactly the same, just use a positive Exposure correction.
The Airbrush checkbox adds an additional component: Time. The mask will build up simply by clicking and holding with the mouse (or pen). Higher flow rates will lead to the mask building up faster. I haven’t yet found a way to use the airbrush function in my own work. If you have, I would be interested to hear in the comments!
I hope you find this useful on your images. Dodging and Burning can be a fun way to add another dimension to your images and also save a step in Photoshop. Working on the RAW file gives a better result… as always.
All the best,
David Grover


Comprerei volontieri se fosse in lingua italiana
This description is really very difficult to understand for me. So I still do not exactly undersand the sense and the power of the flow funktion in demarcation to opacity. What exactly is the difference? What exactly happens?
Hey Kai,
Opacity controls the effect of the layer adjustment. Simple example – if we increased Exposure on an adjustment layer by + 1 stop, any masked area at maximum opacity would show that exposure adjustment as exactly that – + 1 stop. If the Opacity was at 50%, the exposure adjustment would only be + 0.5 stops.
Flow is a movement (of the pen or mouse) based setting. If you set Flow to 100 and moved your mouse then you will instantly mask to the currently set opacity. if you have a lower flow, then it will take more movements of the mouse to build up to the maximum. It simply helps to build up masks in a slow and controlled way.
David
Do what I did. Open an image and use different opacity and flow settings on the image to see how the brush affects it. It’s really quite educational. Then I read the tutorial and understood it completely.
Thanks for this blog, The flow control is now clearer understanding for me .
I consider that simple and powerfull control deserves a more detailed article or a webinar ( Flow + Air Brush )
Hello,
Concerning, flow, i agree It is very important to control it.
But my supposition would be that flow is linked to pen pressure (instead of linked to pen size)
I find much more interesting to get benefits of my 2048 levels of pressure on my wacom table to control flow (that have to be subtil) than use those pressure level to control size
Will eventually be a way to do it like this (like in PS)
Best regards
Frederic
Hi Frederic,
Yes, that could be an interesting option too. For me personally, I find keeping the Flow value low works well in pretty much all situations.
David
What is Pen Pressure?
What is Airbrush?