
Masking is a term that you may not think applies to Capture One Pro 7, but as you have seen in my previous blog posts it is certainly possible to selectively edit areas with Local Adjustments.
So indeed this is a kind of masking, but are there other ways we can selectively adjust images? Take a look at the image above. It has quite a prominent blue sky, but it didn’t look as rich as this in the unedited photo.
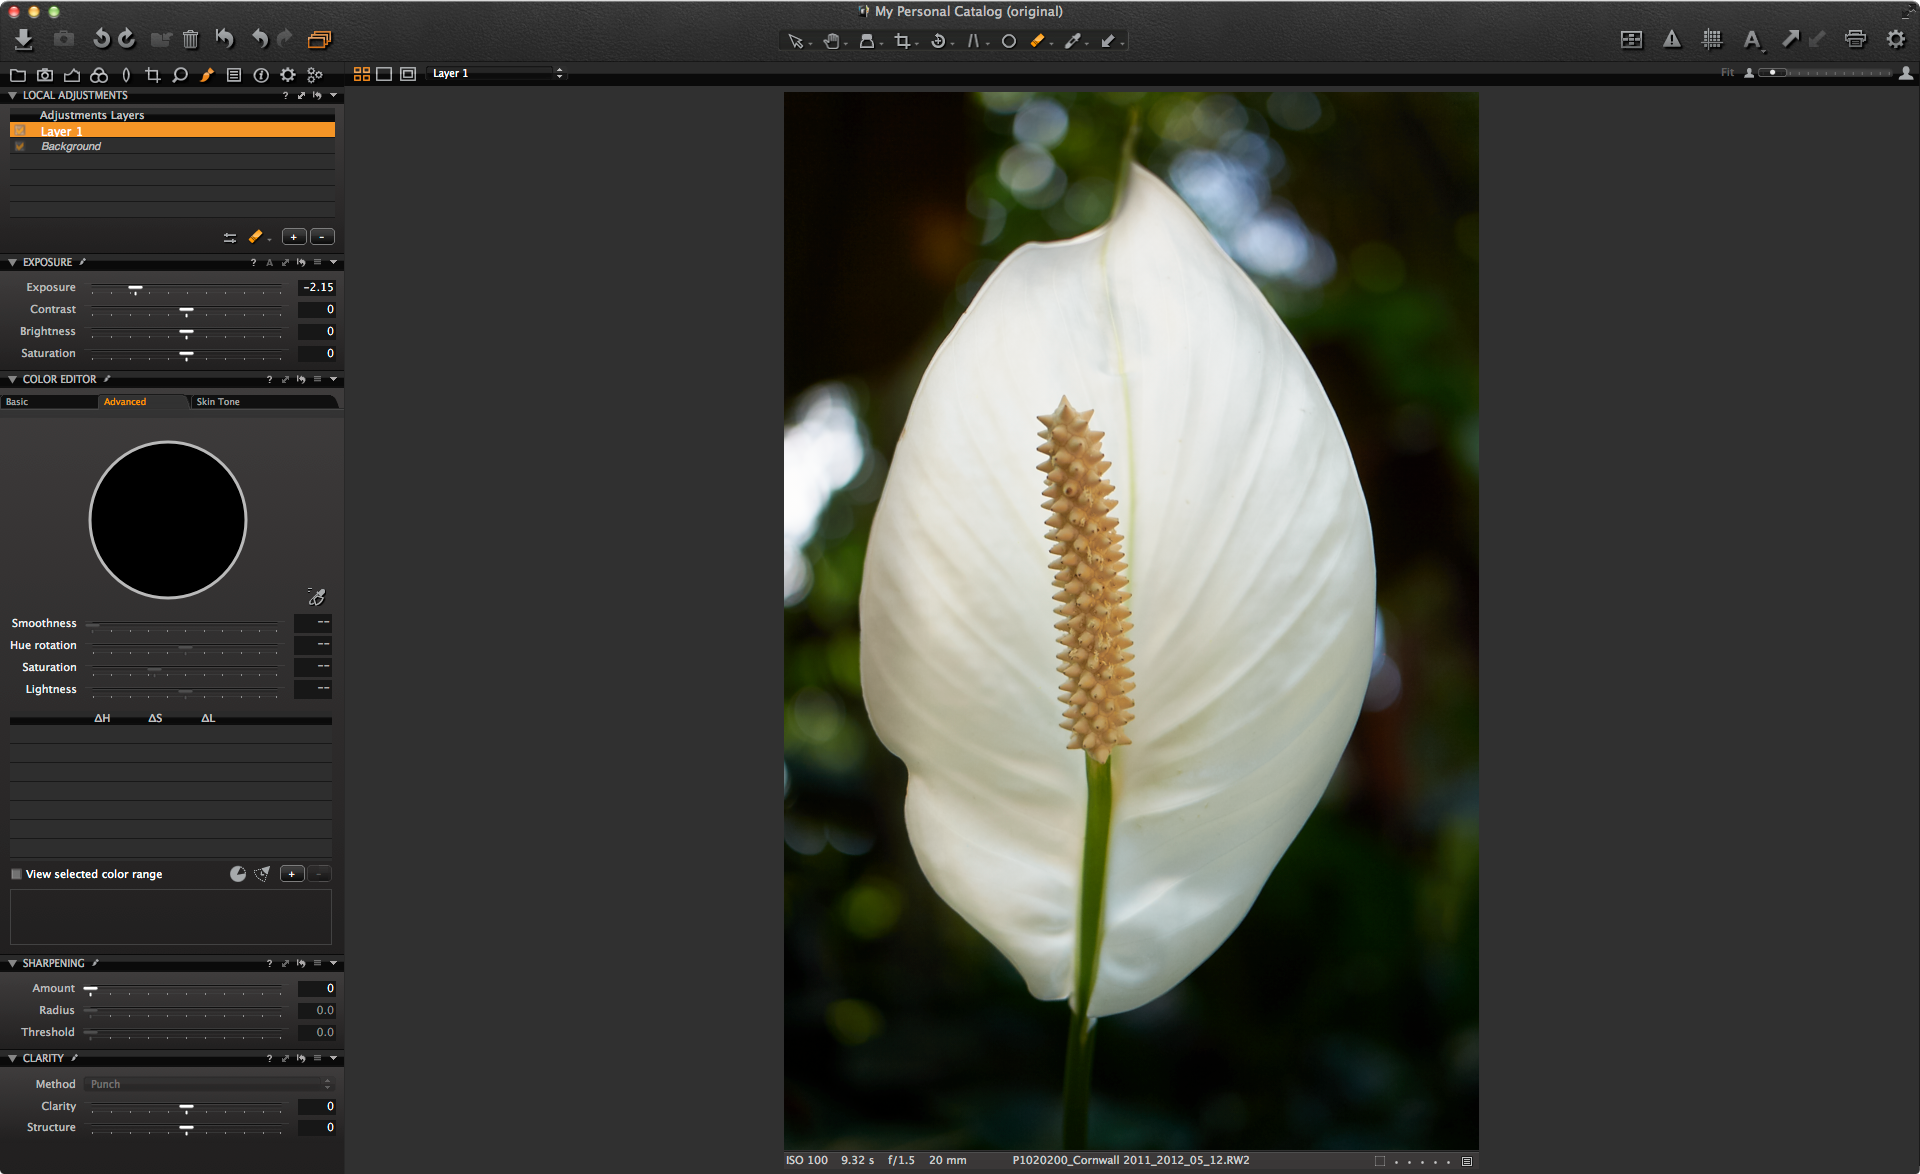
 All it took was a simple Color Editor adjustment and a change in the ‘Lightness’ slider to simply bring the tone down to something more pleasing. No need for any kind of Local Adjustment.
Often the Color Editor gets overlooked as a way to change the appearance of a color and not just the hue. Also in the above image the red flag was picked as well, to richen the red a little. Again, no need for any local adjustment. So think about if an area of your image needs adjusting, or if it can be dealt with using one or a few color edits as opposed to needing to draw a mask.
When to use Auto Masking?
During workshops and seminars I often see people instantly going to the Auto Mask feature and then spend more time than necessary trying to mask around complex objects, when all it could take is either a simple edit like above or a quick combination of a Local Adjustment Mask and a color edit. Normally for the last option the mask need only be ‘rough’ one, so it is extremely fast to do! We will look at that technique at the end.
However, the Auto Mask can certainly be a really useful feature and I do use it on occasion when the above-mentioned techniques don’t work.
How the Auto Mask works
The image below may well benefit from an Auto Mask, if I want to separate the background from the flower a little. Auto Mask works by detecting differences in color and contrast in an image file to find the edge of a subject, and this is a good example.
Here is the image with some basic corrections but I wouldn’t mind darkening the background a little. As the background is made of multiple tones it doesn’t work so well to use the Color Editor as in the above example.
 So instead I will use the Auto Mask function of the local adjustments brush. Normally, Local Adjustment masks are simply brushed on with varying size and opacity. If you want to know more about using Local adjustments then there are plenty on the blog you can read up on. To check them out, try searching for ‘Local Adjustments’ in the upper right corner on the blog.
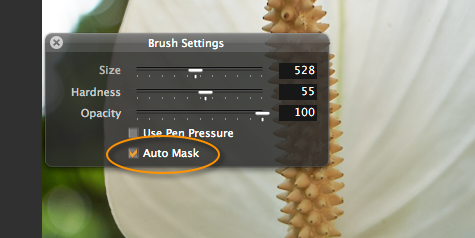
To activate the Auto Mask, right-click on the image with the Brush selected and check the Auto Mask box.
 The Brush icon now has three concentric circles with a smaller one in the centre. This centre circle is now the sample area. So during brushing the mask will stop, or find the edge, when the content inside the sample zone differs compared to the outermost circle.
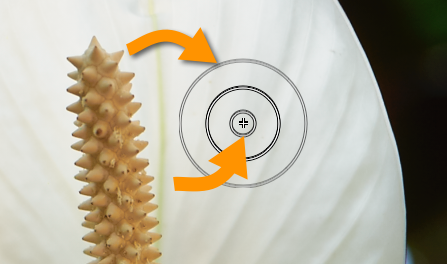
Now all I need to do is draw along the edge of the petal, keeping the sample zone on the petal itself and the outer circle on the background. If you have opted to see the mask as you draw, it will look like the edge has not been detected, but the calculation is actually made when you release the mouse or pen.
During masking:
 After releasing the mouse or pen:
 I continue around the edge until the mask looks like this:
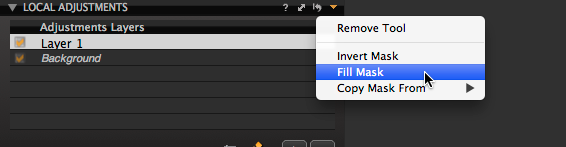
 To fill in the mask, I can use the Fill Mask command in the Local Adjustment Tool:
 Now the mask looks like this:
 There is a small error in the upper right-hand corner and in the bottom right, but it’s easy to clean that up with the erase brush.
 Finally, I can invert the mask and darken the background to my liking!
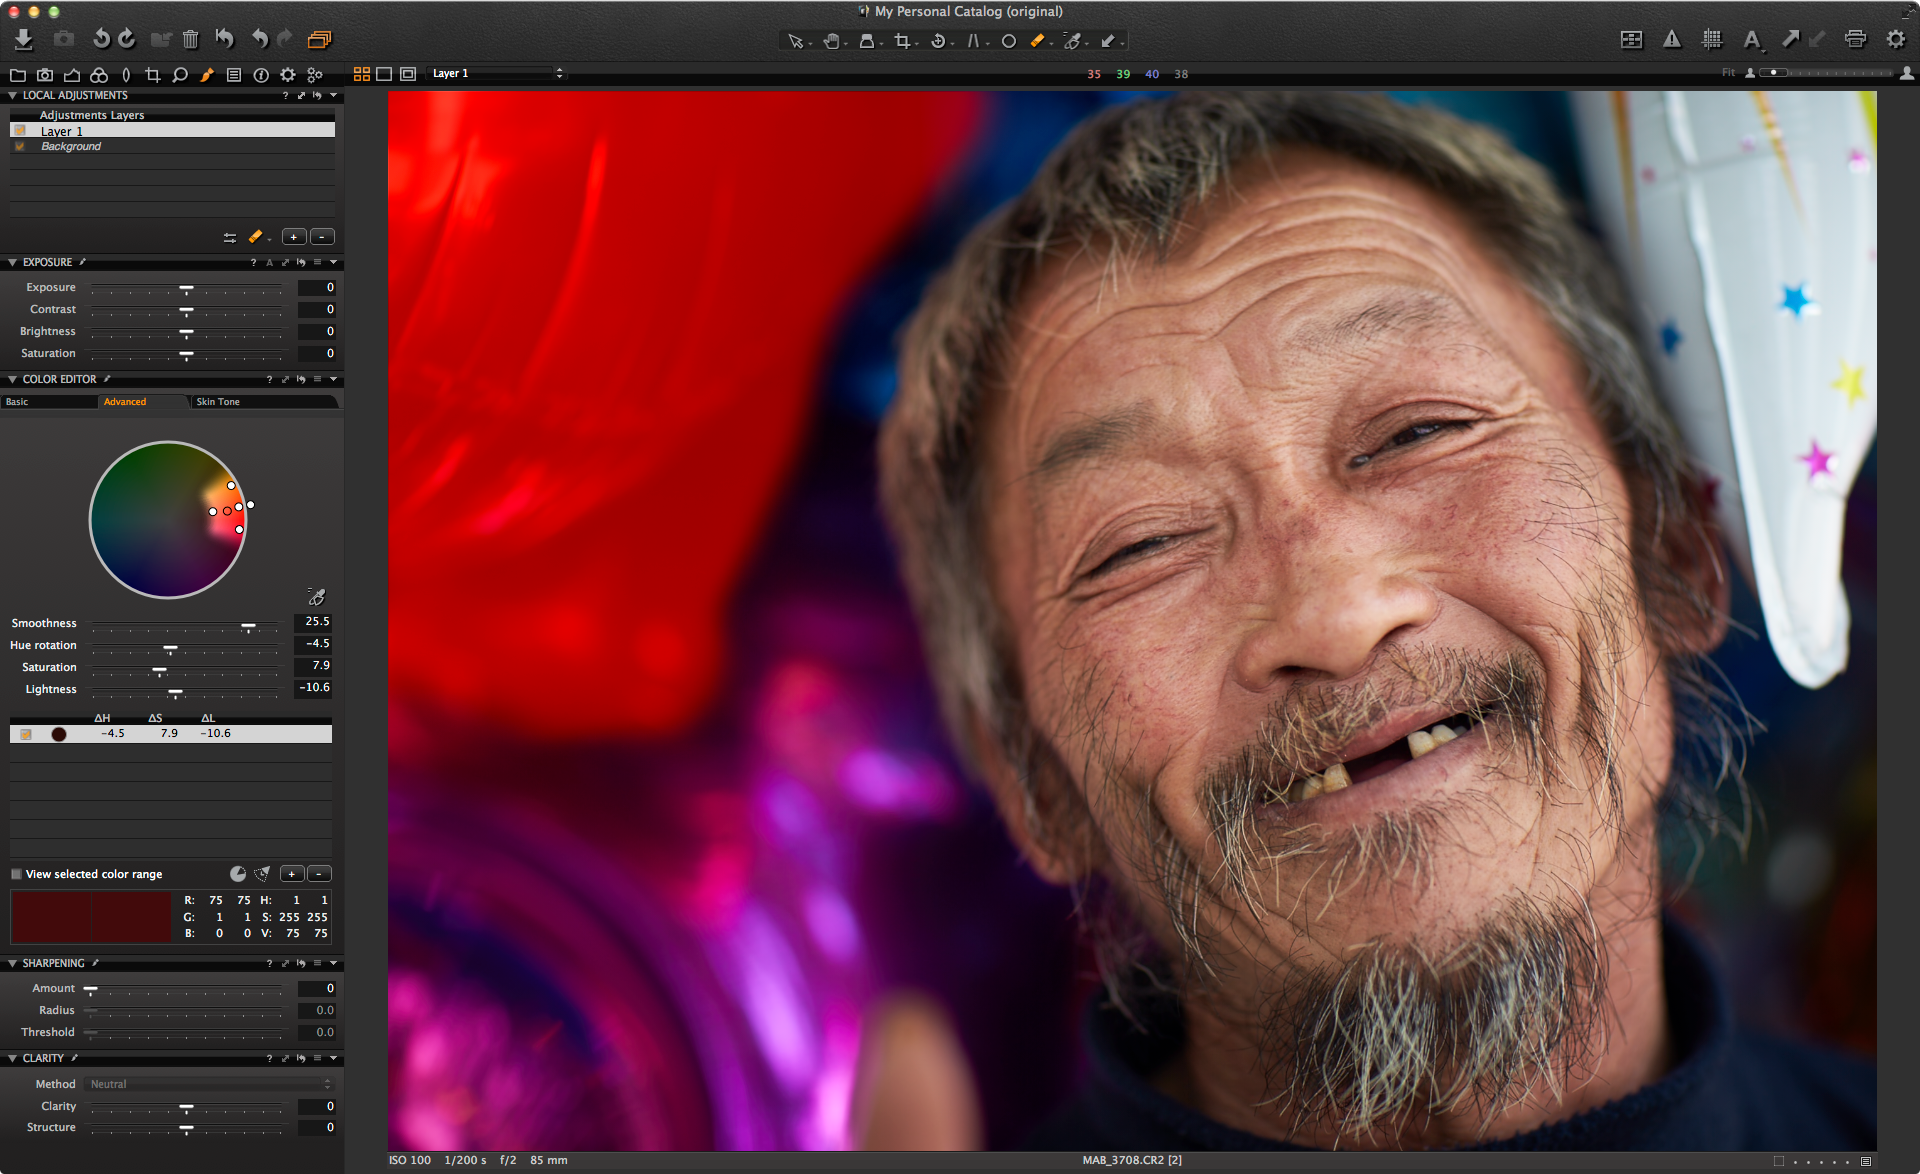
 Finally, a really useful technique is to use a Local Adjustment in combination with a color edit. I use this image below a lot, captured by my friend Malcom Bryan in Beijing, as it illustrates this point perfectly.
Here it is with some basic adjustments:
 What I want to do is edit the color of the red ballon a little in the background, but there is a problem! If I select it in the Color Editor and make an adjustment, it also effects the balloon seller’s skin tone. We can see this by turning on the View selected color range option in the Color Editor. This turns any part of the image, that will not be affected by the edit, to monochrome. I have adjusted the range and smoothness carefully to just include the balloon, but it still effects the skin tone as well!
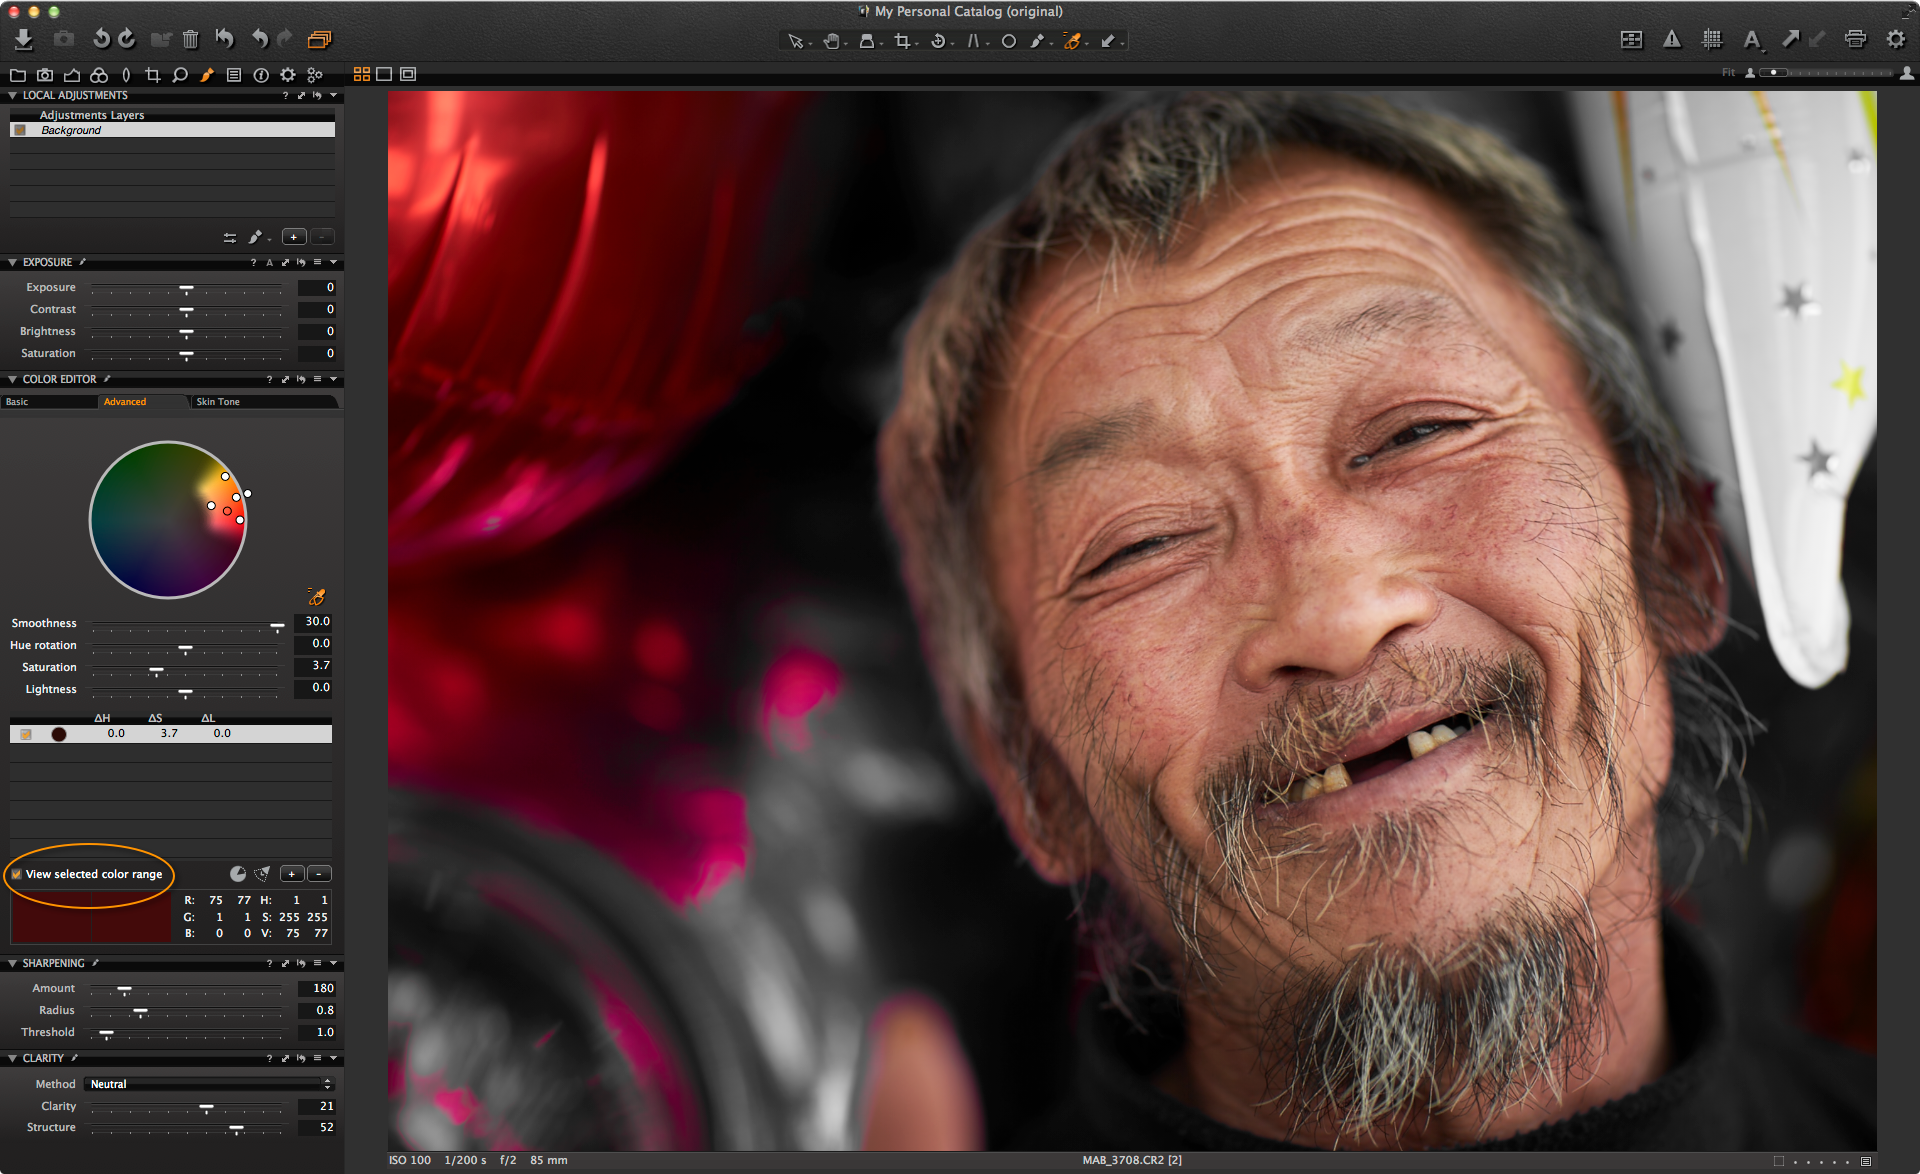 So by using a really rough Local Adjustment mask, I can select just the area in the top left-hand corner, select the red tone only and then the skin tone will be left unaffected.
So, that’s three different ways you can select areas for localized adjustments. All with different uses but all equally useful!
Best regards,
David


Dear David,
Are there any plans to include the auto mask functionality for Fuji XT-1 files?
Indeed, me too !
Thank you for the tips! They are very useful and a good reminder of how powerful the Color Editor is.
Do you have any idea when Auto Mask will be available for Fuji X-Trans files? I tried going through support but haven’t received a response after several weeks. I’d love to have this feature!
Thanks!
JerryR
This quick tutorials are very useful, I use lo al adjustments all the time and make my life much easier. C1 is an amazing piece of software. Can you talk in depth about color consitency between C1 and other software (i.e. Photoshop) and C1’s color space? Thank you so much.
Sorry to be repetitive, but can I also add a plea for auto mask to be available for Fuji X trans files.
Enjoy reading all the tips – thanks
The “Local Adjustments” do not work on a MAC with the latest version of Capture One Pro 7 (downloaded today). It’s totally buggy. Color Adjustments are always applied to the whole image. The before and after window shows no updates of adjustments made by the sliders.
Perhaps the Windows version works fine but the MAC Version is not what I expected. The bug is known for more than eight weeks. One other problem is the lack of color profile adjustments like Colorchecker Passport. Don’t get me wrong I would like to use the software but there are so many problems that makes it easier for me to use Lightroom and Photoshop instead of Capture One Pro 7.
OK. 🙂 Thanks for the comments re Fuji, noted!
It’s because of the x-trans sensor design creating a ‘problem’ for the algorithm but I understand your wishes to have that functionality.
Another +1 for the Fuji files here too 🙂
I was wondering why I got the “Auto mask can’t be used on this file” message last night. Now I know.
I’m not sure what problem Marcus is having. I made several local adjustments using the Colour Editor on an image last night (on my Mac) – worked perfectly. Maybe it’s been fixed since the comment here though. I’ve only just started using C1 last week.
i’m still having this bug today. maybe it depend on your fuji version if it’s not due to capture one .
Mark
could you give some information about your version ( os fuji and computer)
+1 for Fuji…
Would love to be able to use AutoMask.
Would love to be able to tether.
Auto mask consistently refuses to work: error message: “cannot be used with this image format”
I am using standard Tiff files, 16 bit. What’s the problem, please?
thanks
–s
Hi Stephen,
Auto masking is for RAW format only.
David
Just bought C1 v 8 🙂
Really disappointed I can’t use auto mask for my Fujfilm X-T1 files….
S
Hi Sean,
The auto masking relies on the bayer pattern to find the edges. Of course the Fuji X files don’t have this. Therefore this is why auto masking doesn’t work.
There are many others to ‘mask’ parts of an image. What are you trying to achieve?
David
I notice that quite a few people have asking for auto-masking to work with Fuji RAW files. The original response perhaps 10 months ago was yes, it’s coming. But now months later the response is that there are workarounds and the sensor creates problems for the algorythm.
Is it still planned to enable auto-masking for Fuji RAW files, or has been been found to be too difficult?
Really appreciate an update as I find the local adjustments using the madking tool to be awkward compared to Aperture’s brushes.
Perhaps there is also a mad king tool, but I meant masking tool. I think my computer has fallen for Game of Thrones.
Mad kings or not, I get your drift!
I am afraid we don’t comment on future releases of Capture One. We are aware of the desire for it, but its always the case of deciding what to implement first.
You can always log an official request by making a support case.
David
Version 9 and still no Automask for X-Trans sensor. When?
Yes, I would love too. But anyway you can already use the masking feature as it is at a very good level. There are several situations where the auto masking will not add more accuracy to your work. I moved from DxO Optics to C1 because of the quality of raw management for Fuji X series sensor. And I’m very satisfied – this is not paid by C1 🙂
Hi Tim,
Capture One’s Auto masking is based on the Bayer Mosaic, which you know is not present in the X-Trans sensors.
Therefore it is not possible to use this feature for those sensors.
David