Above El Chaltern and well before Monte Fitz Roy, deep in Patagonia, there’s a wonderful national park with some very photogenic walking tracks. Even better, you can hire some of the young mountaineers in the area who will carry your gear from camp to camp, just for a bit of training (and a small amount of cash).
We’d spent a couple of nights at a camp above El Chaltern, waiting and watching the weather as it crossed the ranges in the distance, and now we were walking ten kilometres across to the base of Cerro Torre and a second camp. This stream was at one of our rest stops, but a rest from walking inevitably saw us wandering around with our cameras, looking for things to photograph.
I loved this oddly shaped rock, seemingly a towering mountain on a micro scale, surrounded by a flooding stream. Well, perhaps my imagination was getting away with me, but I thought it looked interesting enough to pull out my camera.
There are two techniques used for capturing this image.
The first is the use of a tilt-shift lens, a Canon TS-E 24mm on an EOS 1Ds Mark II. Canon has since upgraded both. Generally speaking, a tilt-shift lens is used to reduce distortion. When photographing buildings, rather than pointing your lens up to include the top of the building (and creating unwanted converging vertical lines), you shift the lens upwards while keeping the camera back parallel to the building. The result is a technically correct perspective.
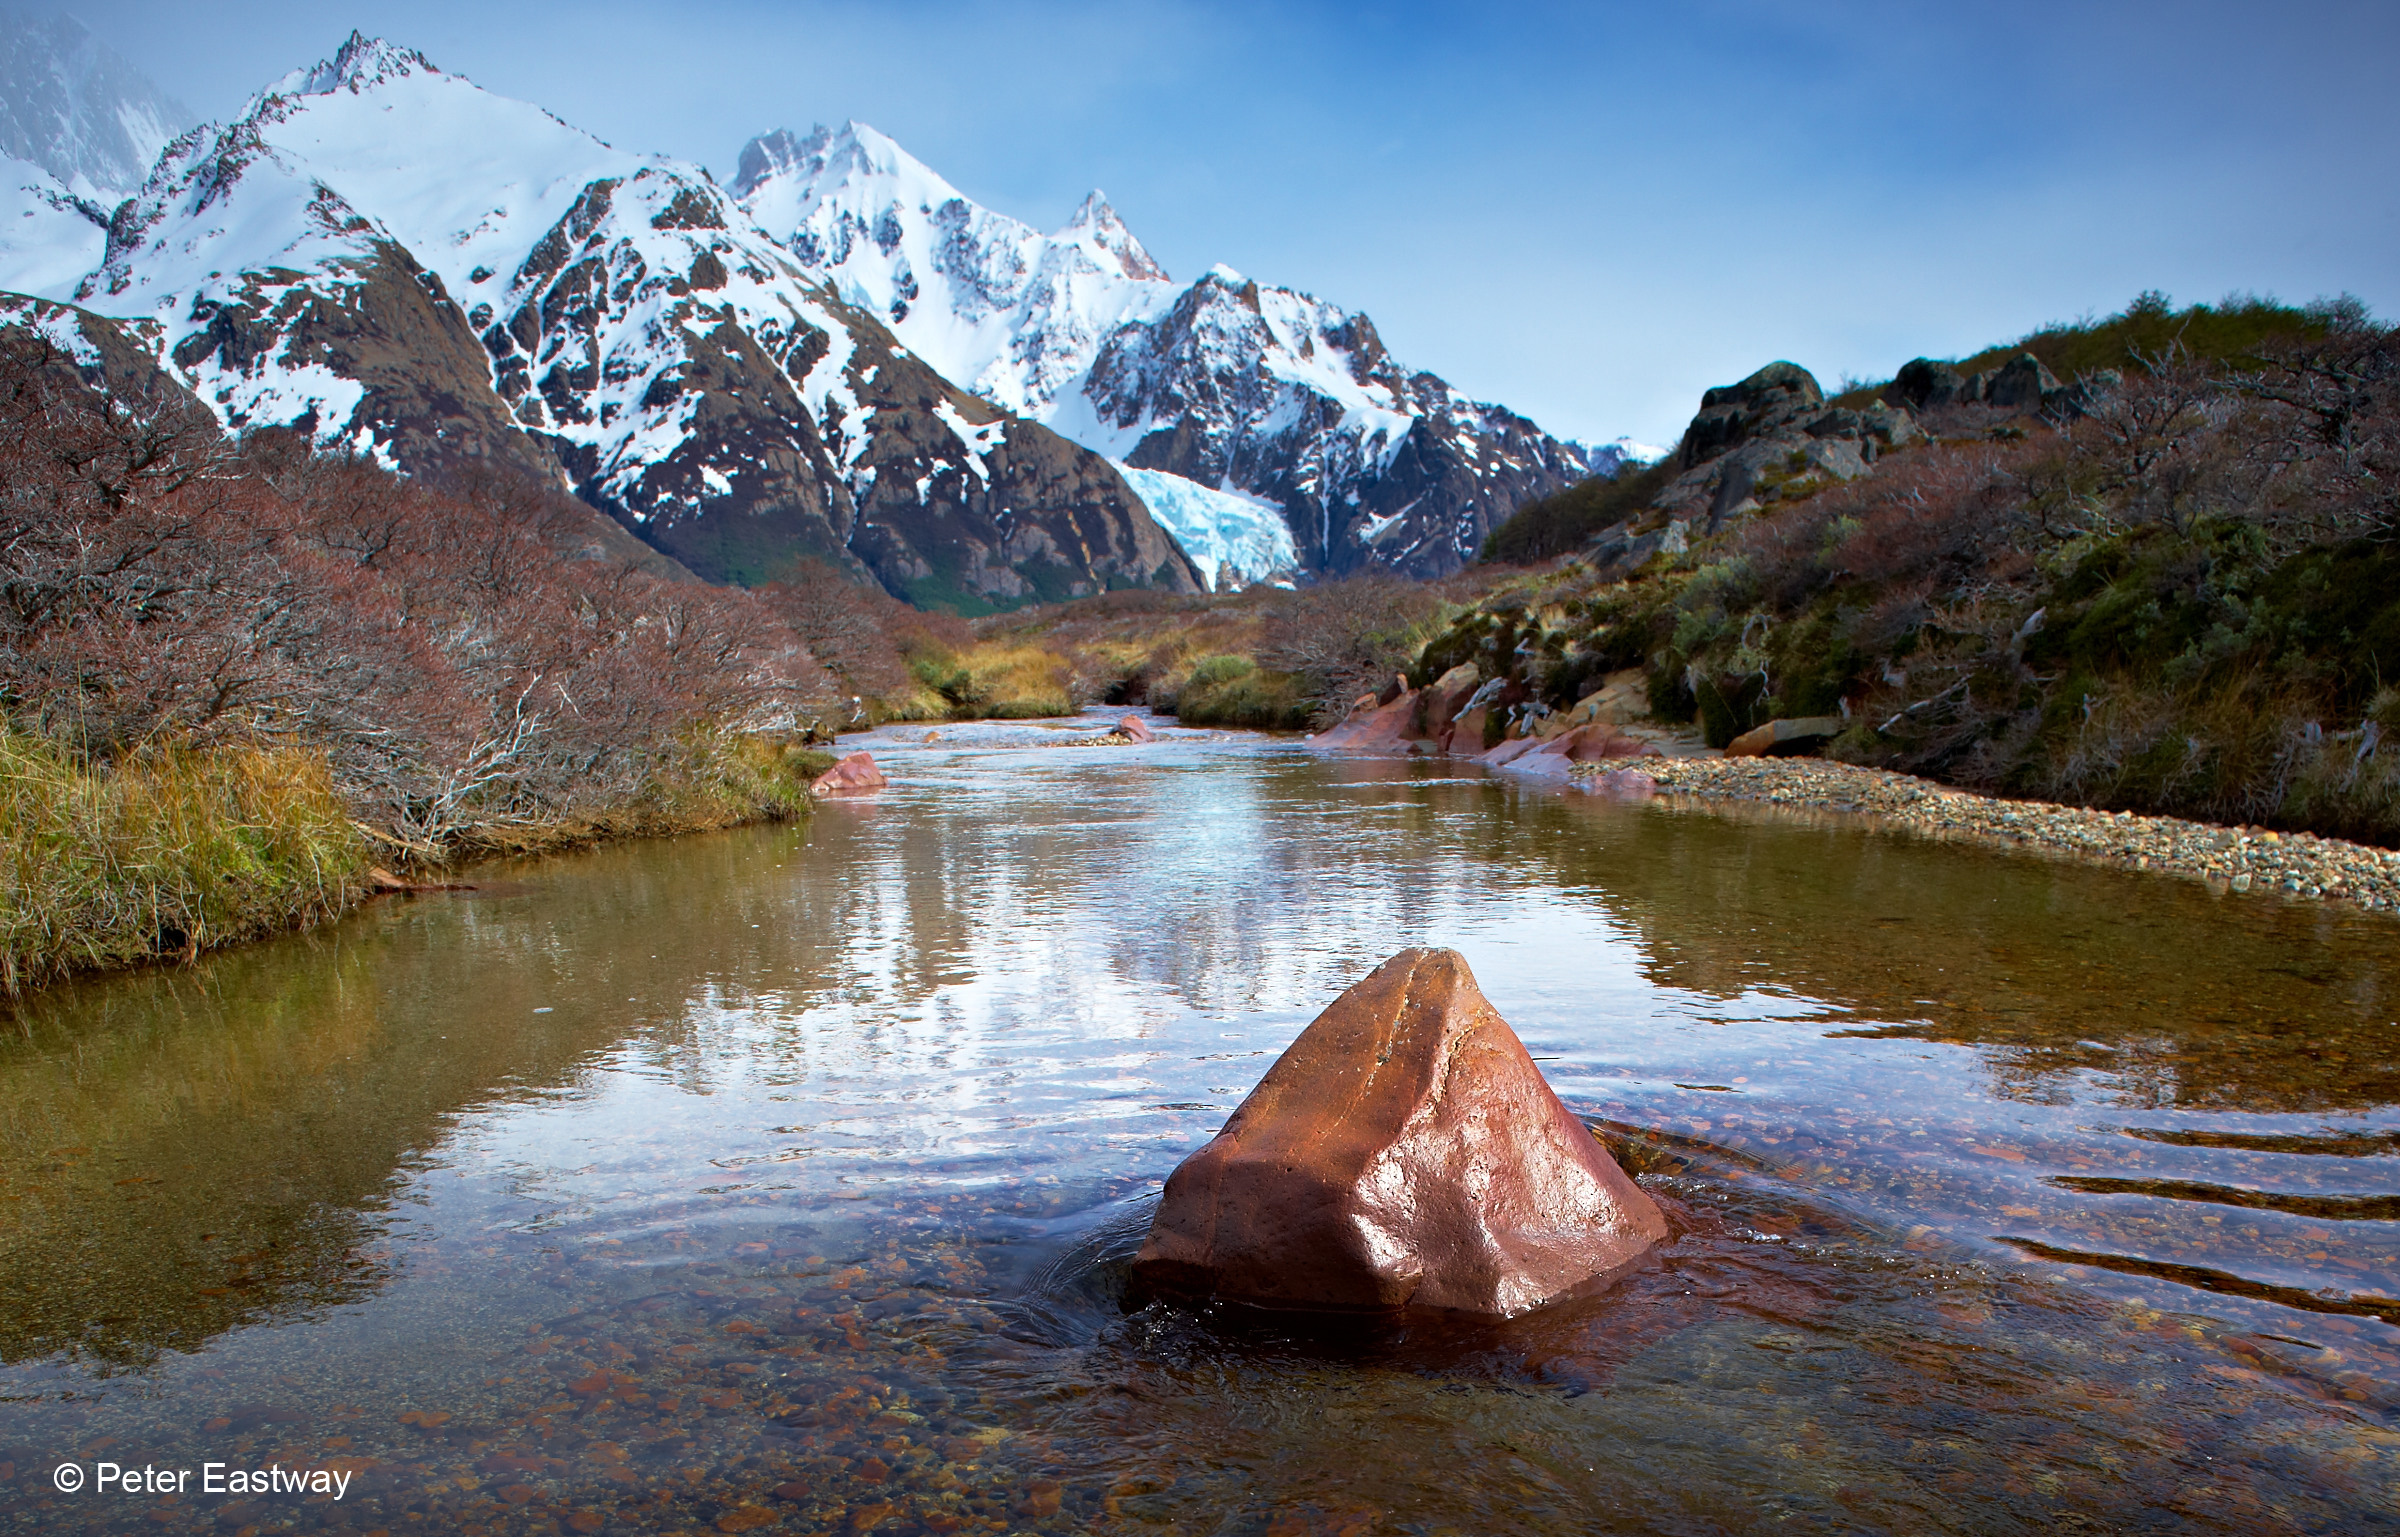
However, if you shift the lens and tilt the camera the opposite way, you can distort the edges of the image, effectively stretching the scene. This works well with the distant mountains, stretching them so they look a little higher than they actually appeared through a wide-angle lens.
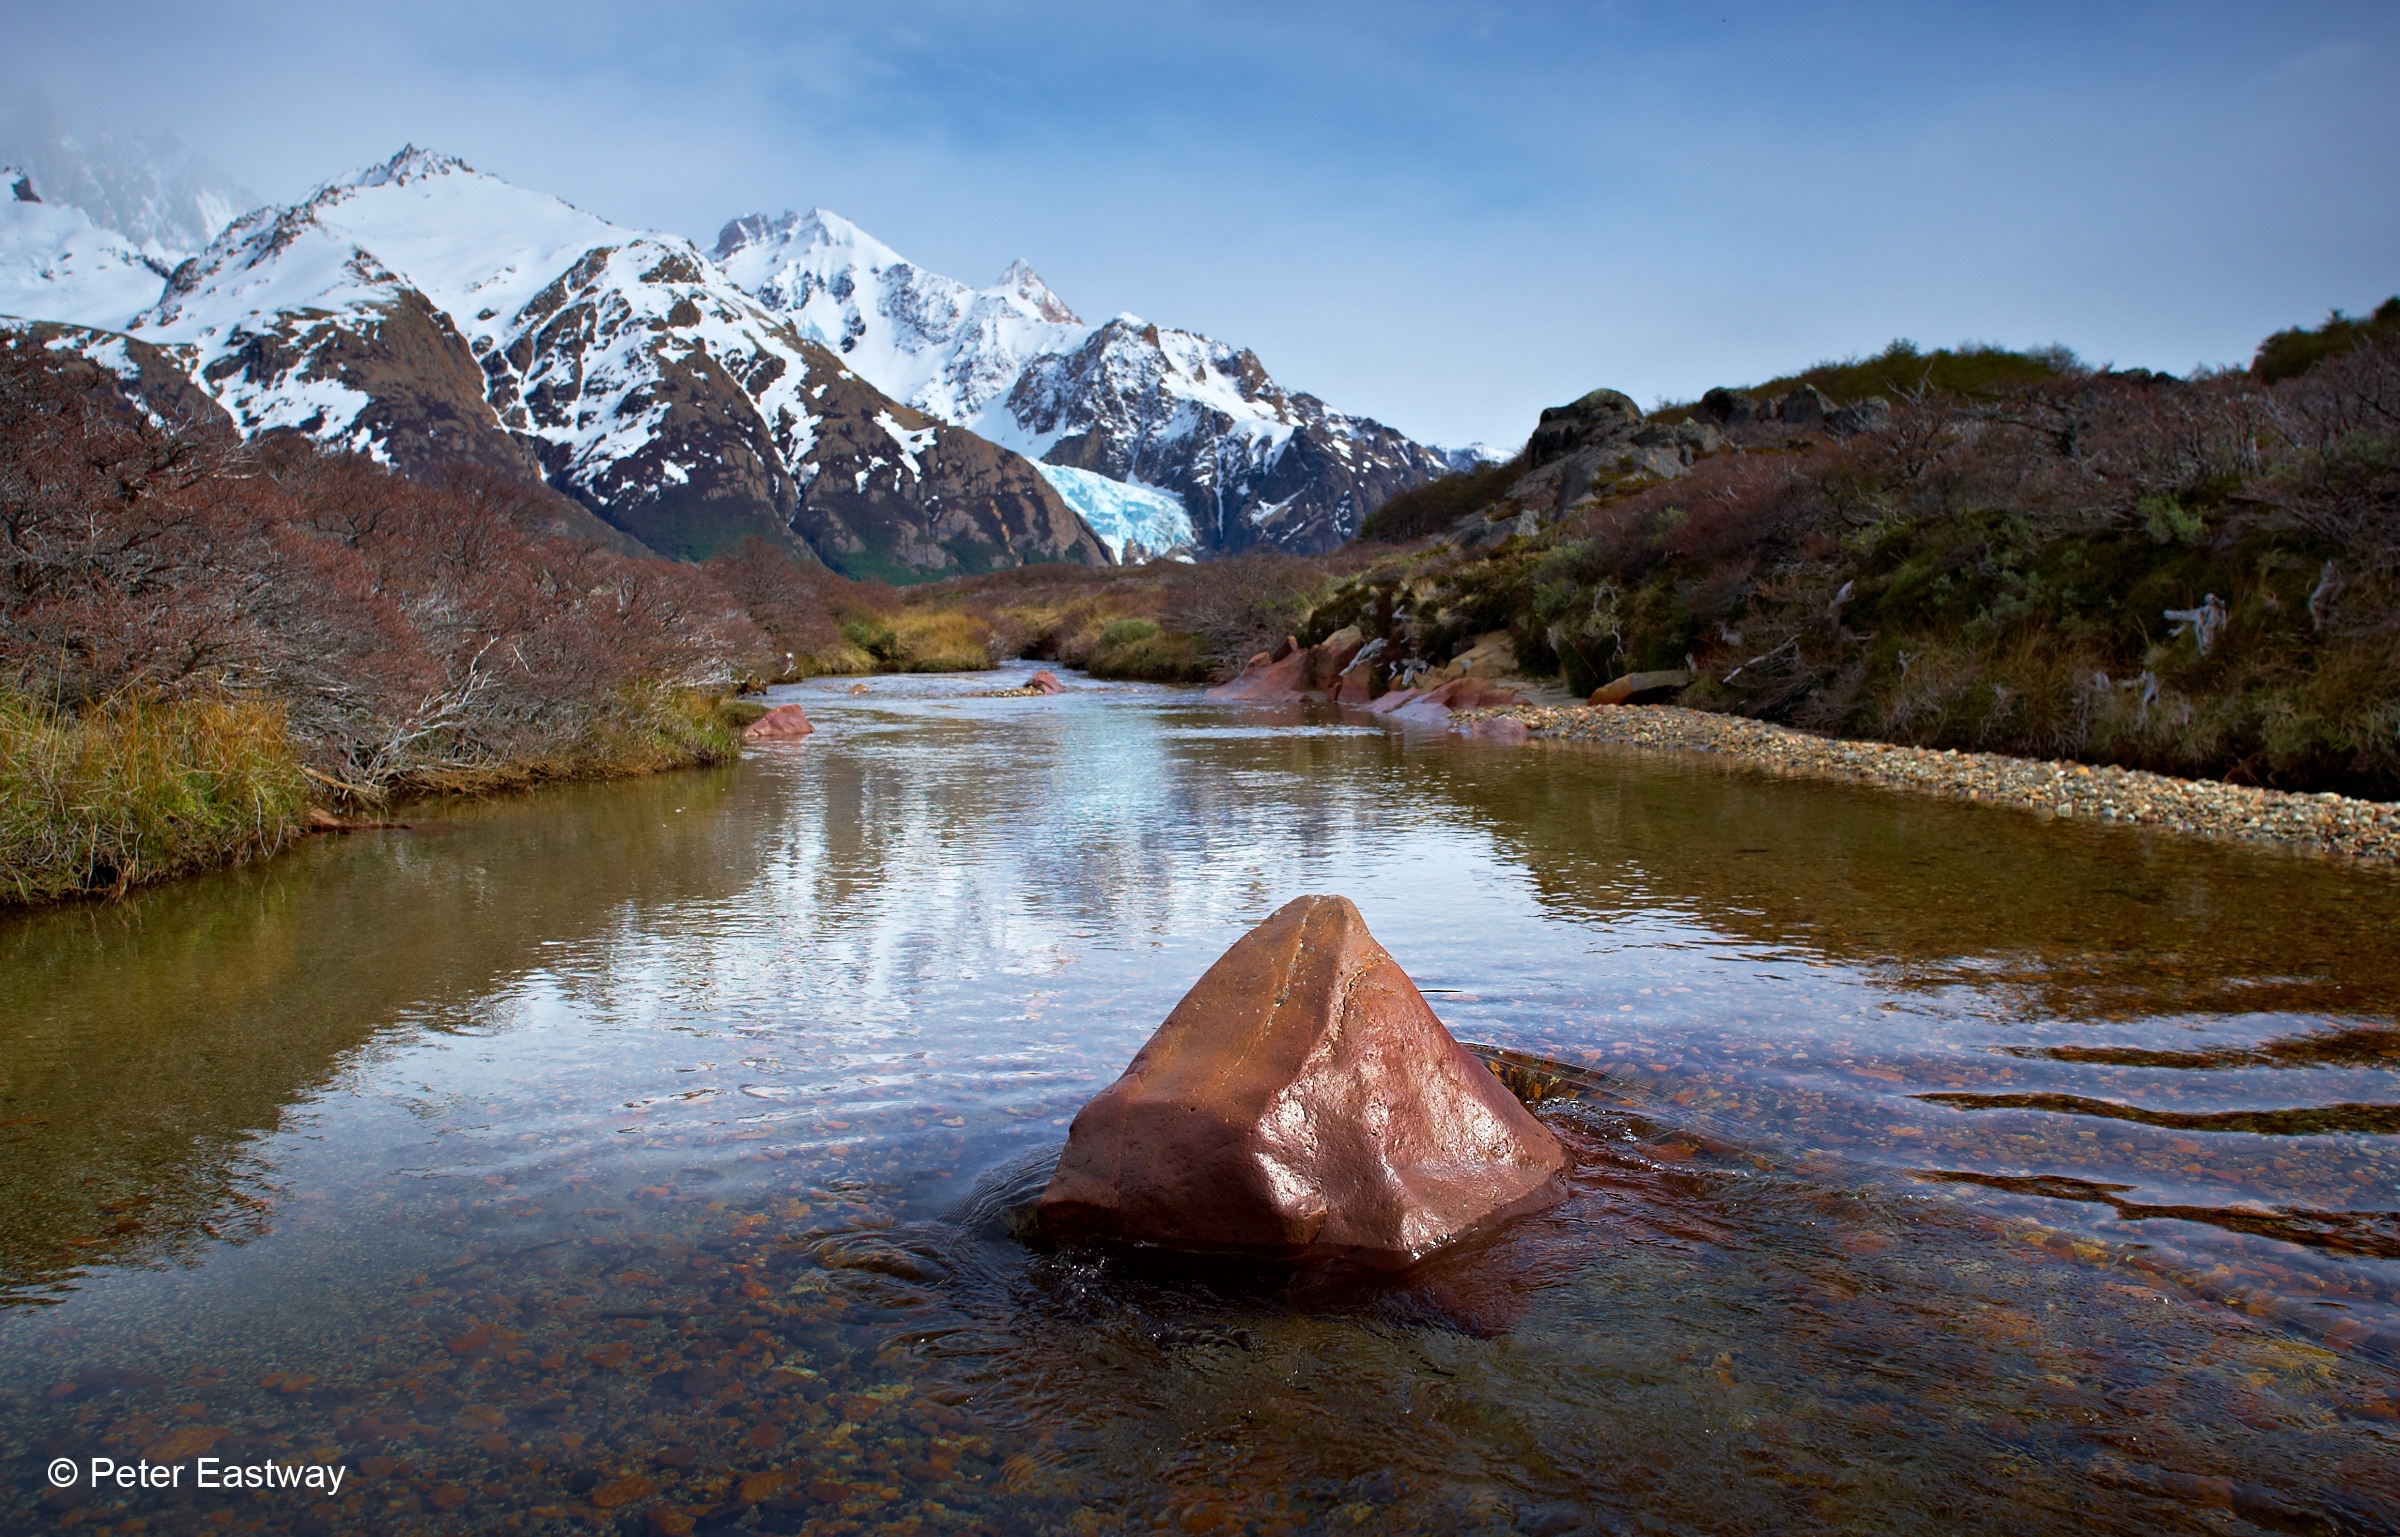
The photo below shows the straight photo without the lens shift. Note the height of the mountains in the background.
Compare this with the following image that includes a lens shift, and a re-framing of the image as well. The two compositions are very similar, but not identical, but the main difference is that the mountains loom larger and appear more impressive. I like this!
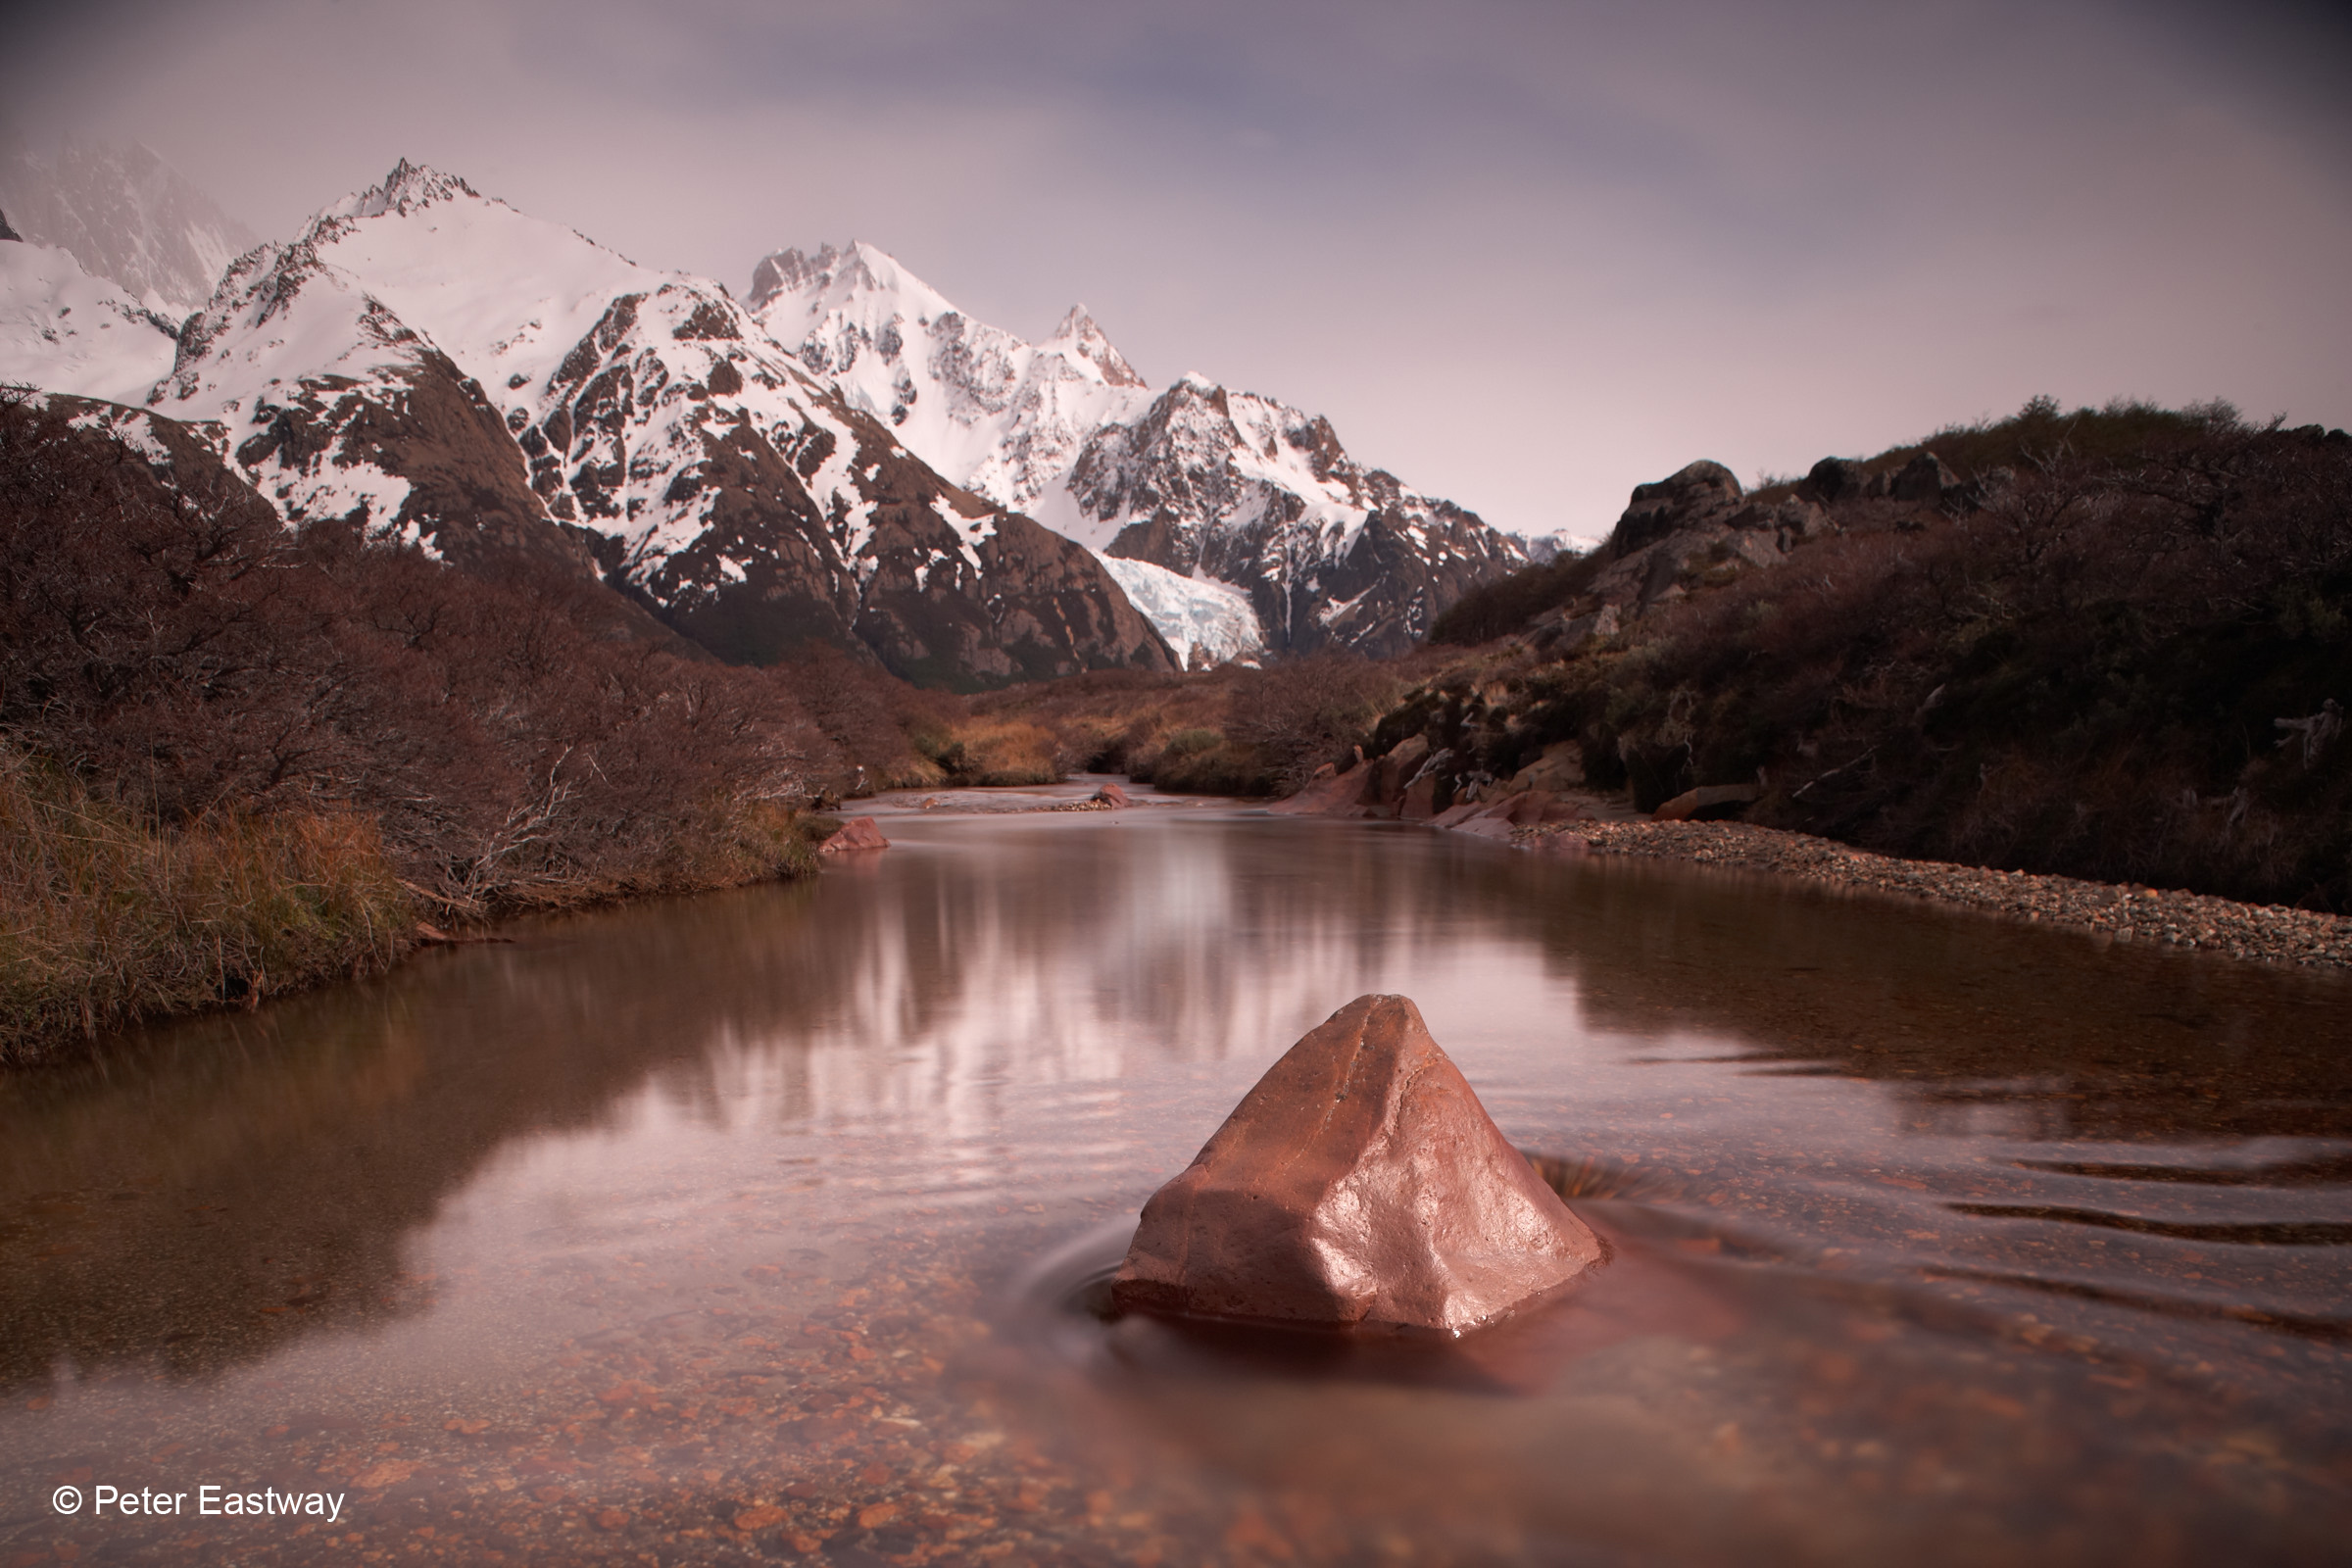
The second technique is the use of a neutral density filter. The ND filter allowed me to lengthen my shutter speed. This exposure is 60 seconds at f8 (it’s a 10x ND filter), during which time the water is recorded as a silvery smear and the clouds have also been beautifully blurred.
Compare the result with the same angle taken at a more conventional 1/250 second (see the previous photo). The clouds are more distinct and the water has much sharper reflections. In comparison, I like the ND filter effect because it takes the photographs one step away from reality.
In the days of film, we had to deal with reciprocity failure and colour shifts because the different layers in the film had different responses to light. I think some digital sensors are similarly affected with colour shifts at very long exposures and this shows up as a colour cast. This is the original exposure from the Canon EOS 1Ds Mark II before editing in Capture One.
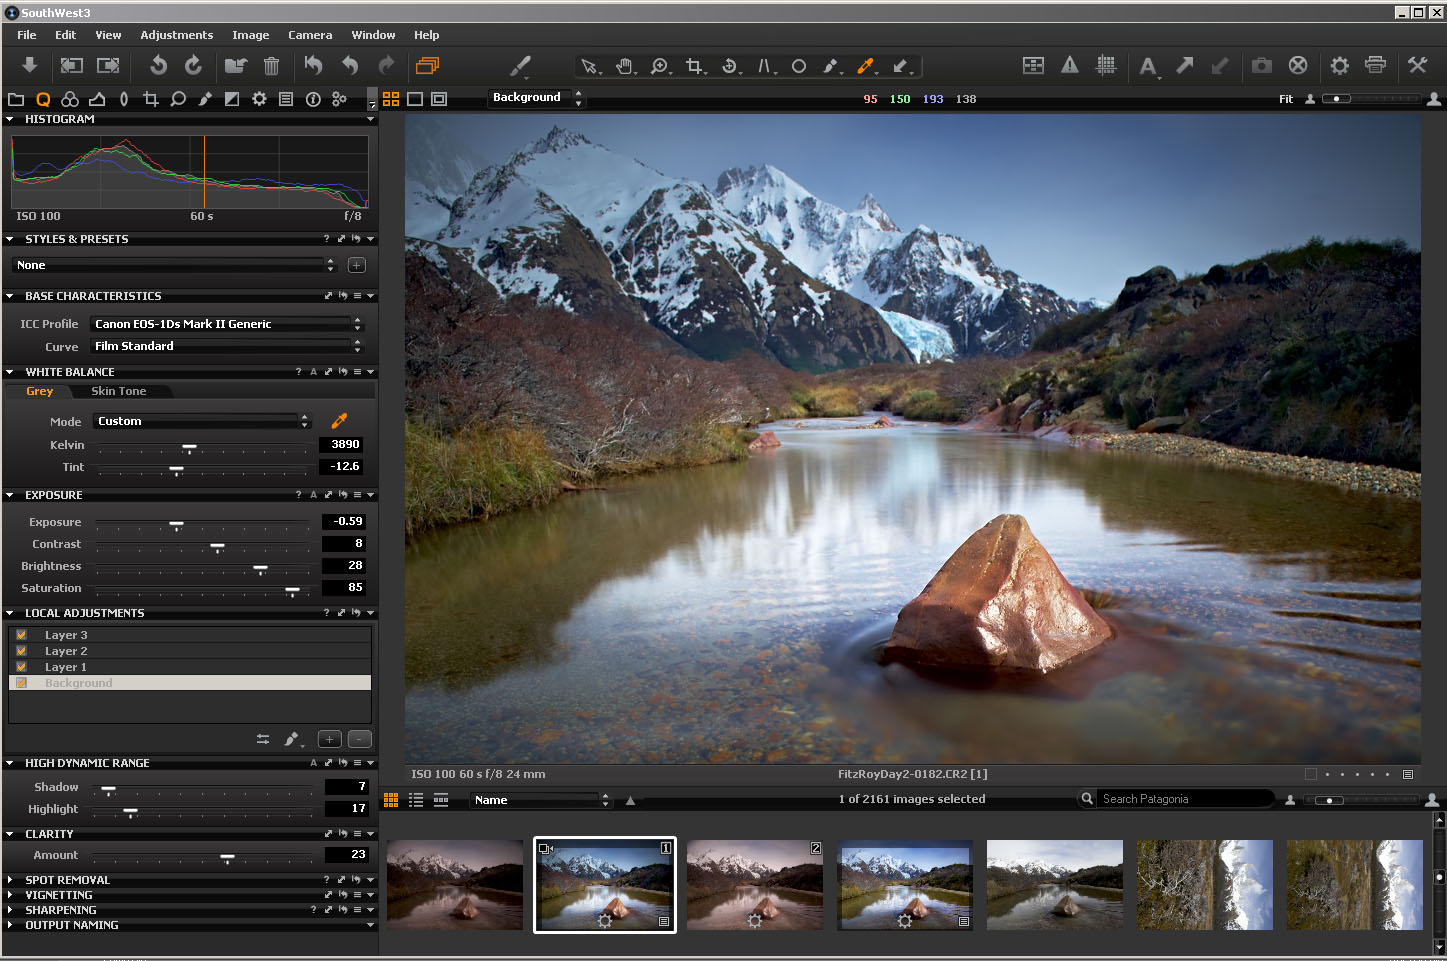
The magenta colour cast can be quite enchanting, but not for every photograph you take. Fortunately, it’s an easy matter to correct the colour balance – simply use the White Balance Picker in Capture One and the image’s natural colours immediately appear.
To process this image, I also had to make some strong adjustments to the Brightness and Saturation. I also added in three Local Adjustments, lightening up the middle ground and adding a little sharpening to the rock.
Peter Eastway
Peter Eastway’s passion is undoubtedly for landscape photography, but he is equally comfortable with portraiture, advertising and travel. He is currently an AIPP Grand Master of Photography, one of only a dozen in Australia and earned from a career spanning over 30 years.



Most of the things that the “Professor” told us or try to learn us is normal basic function of C1.
And the only thing that everybody is waiting for is, when will learn to set the ends of an histogram white the auto and decide where we want the blackpoint and the whitepoint, ex: 5 and 247.
And save this like a prefix!
J
10x neutral. 10 times 1/250 sec = 1/25 sec. Assuming the same f-value, why 60 seconds?
To my liking, you should have removed the colored edge appearing along the top of the trees to the right after the lens-trick.
Apart from this – a pleasant view and image, though I am a litte puzzled by the fact, that we still can see the stones on the bottom after a 60 sec exposure. I am aware of the waves around the rock being stationary, but still (?).
I refer to the second image from the top.
Or if your factor is an exponent, 2^10 will double 1/250 sec 10 times resulting in 4 seconds.. still not 60 seconds. What is your idea?
Hi Jensen
You’re quite right. I have two dark ND filters I use, a 10x and a 13x and I can never remember which filter fits which lens. Doing the maths, this must have been the 13x. That will still leave me short by 30 seconds (it should be 60), so I must have stopped down the lens further stop as well to get to 60 seconds. I usually take two or three long exposures, time permitting.
As for the stones still being visible, I guess this is the nature of the speed and depth of the water over the stones – it was quite clear to view and has remained that way, even with a long exposure. Throw an ND filter on yourself and you’ll soon get the hang of what happens with water.
Cheers Peter
To complicated