
Social Media sites often have very specific requirements for image upload, or at least the quality results can be much better if you adhere to their specific recommendations.
For example, Facebook has various dimensions for the Cover Photo, Profile Photo and Shared Image not to mention various other sizing for Highlighted, Milestone images and more! It is quite a minefield.
You need recipes
Luckily there are some good resources online to discover these sizes and incorporate them into a Capture One Pro 7 recipe so it is possible to export any image to fit perfectly with such requirements.
I have made a few examples based on Facebook, and one for Pinterest, which uses a slightly different way to display images compared to Facebook. Google+ has less restrictions on image sizing, which is why it is not included.
At the end of the blog you can also download these recipes for your own use on Mac or PC.
Creating and Using a Recipe
I will use the example of the Facebook Cover photo, which has the following image dimensions: 851 pixels wide by 315 pixels tall.
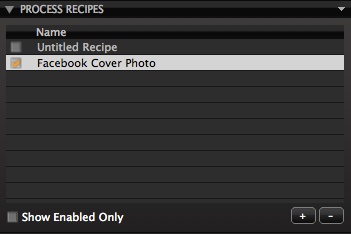
First of all, I’d like to define a Process Recipe, which restricts the output file to the pixel dimensions needed. If you haven’t used a Process Recipe before, first navigate to the Output tool tab. By default there is one Process Recipe called ‘Untitled Recipe’.

You can either modify that Recipe or create a new one by clicking on the ‘+’ icon in the bottom right of the Process Recipes Tool.
Make sure you name the Recipe so you can recognize it later. This Recipe will be for the Facebook Cover Photo, so I’ll name it accordingly.
 Next, I’ll set the parameters for this Recipe in the ‘Process Recipe’ Tool.
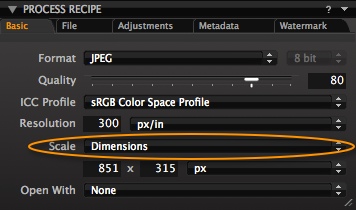 I have changed the format to JPEG, the ICC Profile to sRGB (best for web), and the scale to Dimensions, entering the pixel dimensions as described earlier. It’s really important that you set scale to ‘Dimensions’ as this will have an influence on how the Crop Tool works when cropping images to this format.
If you wish you can explore the other options in the Recipe by clicking through the additional tabs – File, Adjustments, Metadata and Watermark.
Now that I have my Process Recipe set, I can crop an image to this format. Before this step, make sure you have the Recipe highlighted in the Process Recipes Tool, as we will need to constrain to these dimensions when we crop.
Select the ‘Output’ option by clicking and holding onto the Cropping Cursor Tool. This option does just as described, it will constrain your Crop Aspect Ratio to match whatever is set in the currently highlighted recipe.
 Now I can crop an image I want to use for a Facebook cover Photo. You can see in the following short clip, that as soon as I begin to crop, the image is constrained to our Recipe pixel dimensions. This way you are guaranteed of the right dimensions when exporting.
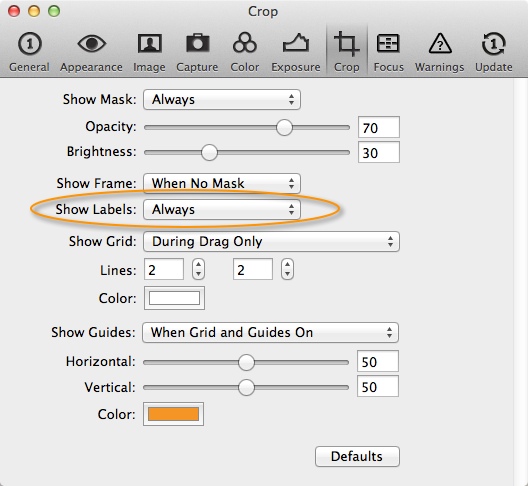
If you don’t see the pixel dimensions on your crop lines (Top and Left), you can turn this option on in the Capture One Preferences.
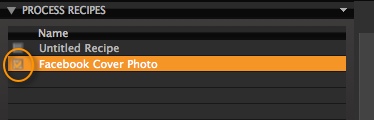
 To export the image, make sure the Recipe is selected by marking the check box.
 Before processing the image, make sure the ‘Ouput Location’ Tool is set correctly to the folder you want the resulting image to reside.
 If you are working in a Session – By default processed images will be sent to the Session Output folder.
If you are working in a Catalog – You may wish to set the output location by clicking on the ‘Store Files’ drop-down menu and choosing your preferred location.
To process the image, click on the ‘Process’ button in the ‘Process Summary’ Tool, or you can use the Keyboard Shortcut Cmd-D (Mac) / Ctrl-D (Win). This tool also shows a breakdown “Summary” of your currently highlighted Recipe.
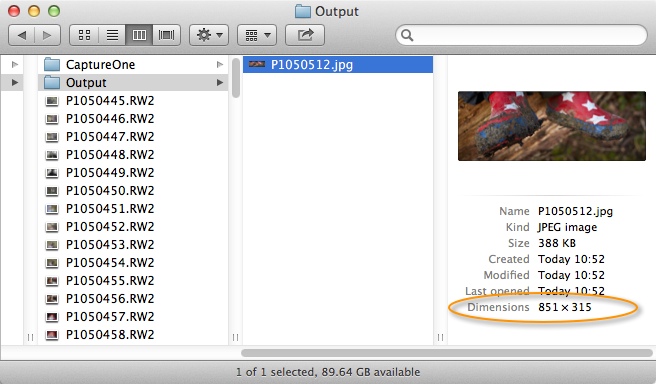
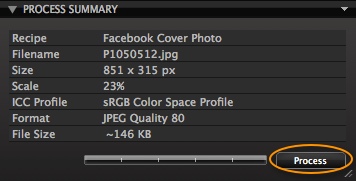 The processed image will fit just nicely for a Facebook cover photo.
Duplicating and Modifying a Recipe
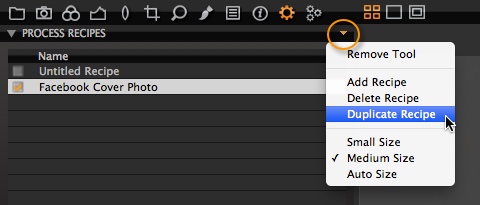
Now that the bare bones of the Recipe are set, it’s easy to duplicate it to work with other social media sizes. Click on the small triangle in the ‘Process Recipes’ Tool and choose ‘Duplicate Recipe’. The benefit of this step is that you will probably only need to change the Scale settings if you want to keep the same JPEG parameters.
 I will create one for a Facebook ‘Highlighted’ image, which is designed to span the whole Timeline and are therefore wider. The recommended upload size is 1200 wide x 717 pixels tall.
 It will be the same workflow as before: crop and process the image.
Here is a good opportunity to point out some smart behaviour of the cropping labels and ‘Process Summary’ Tool. As I have selected the new Recipe I have just made, the crop on the image, which was set when I had the cover photo Recipe selected, indicates that the height is incompatible with the Process Recipe, by displaying it in red.
 However, as soon as I go to adjust the crop, it will snap to the correct dimensions, as you can see in this second short clip…
Setting one Dimension Only
Pinterest is a good example where only one image dimension needs to be set for optimal upload. When a Pin is opened, the image will scale to 736 pixels wide and the necessary length for that particular image. Therefore it doesn’t make sense to upload anything larger to Pinterest. The same goes for Tumblr but the maximum width is 1280 pixels.
I’ll duplicate the last Process Recipe again but change the ‘Scale’ to Width and set this to 736 Pixels.
 Now when I change the crop, the width will always be output to 736 pixels and the height can be arbitrary. See an example in this final short clip…
This workflow of constraining crop sizes doesn’t need to only relate to social media, and could easily be adapted for many other disciplines where output sizes are crucial, or perhaps have been dictated to you by the client. It may save you a step in the workflow chain if you can output correctly from Capture One Pro 7 in the first place.
Remember, the crucial step is choosing ‘Output’ in the Crop Tool, to make sure you are automatically constraining to your Process Recipe output size.
Adding these Recipes to Capture One Pro 7
The three recipes shown here can be downloaded here.
On Mac:
To install them on a Mac, navigate to [USER]>Library>Application Support>Capture One>Recipes and copy the recipes into that folder. Restart Capture One Pro 7 and then they will be visible.
By default the Library folder is hidden on the Mac. The easiest way to reveal it is to hold down the Alt key and click on the GO menu in the finder.
On PC:
To install on a PC, navigate to C:>Users>[USER]>AppData>Local>Capture One>Recipes70 and copy the Recipes into that folder. Restart Capture One Pro 7 and then they will be visible.
By default the AppData folder is hidden on the PC.
Go to Control Panel > Appearance and Settings > Folder Options
Select the View Tab from the pop up menu and then Select ‘Show Hidden Files, Folders and Drives’.
Best regards,
David


Tanks David for this thorough tip! It filled out some gaps that I had.
I have a question maybe a bit off-topic but related.
Is there a way to have different sharpeninglevels for differnet output sizes connected to the different process recipes? I mean that different sizes will require a different sharpening. How is the program working on sharpening, will the sharpening be stronger relative to the size i.e. a low res jpg compared to a high res jpg?
If not possible at the momnent maybe something for the wish-list, that specific sharpening can be applyed for each process recipes.
Hi Martin,
That’s a good question.
Let me do some research and report back.
David
Do you have conclusion?
Thank you for this post that can save a lot of time !
It would be great if a C1 recipe could include an additional sharpening parameter that usually depend on the output dimension.
BRILLIANT TIP! This really just saved me so much time, David!
My pleasure Matt!
Just a tip on format. I did some tests myself and found PNG to be the better format for Facebook. Reason being the image is the only compressed once (by Facebook) rather than them compressing an already compress image (jpeg).
I found the uploads are sharper with less chance of banding or noise being emphasised.
Hi Calvin,
Interesting – thanks!
You could of course output directly from Capture One as a PNG as well.
David
Where can I find the folder with recipes?
I have MacBook Pro and I can not find it on my HD.
I use Capture One Pro 7.2.1
I have made several other recipes for different purposes, but would like to take yours for social media.
Best regads Ebbe
Hi Ebbe,
The instructions to locate the folder are at the end of the blog post!
David
I have noticed one limitation in the software that would make a nice addition. Instagram has a size limitation and a file size limitation. Capture One doesn’t have the option of limiting the file size which is rather frustrating, I have to use Photoshop for Instagram.