
In last week’s tip, Peter Eastway mentioned that he often uses the Aspect slider in the Keystone Tool to adjust the appearance of the image.
“Although I’m sure the developers in Copenhagen didn’t design the Keystone Tool for me, it’s amazing how often I use the Aspect slider to either squish things together or stretch them out.”
Therefore I decided to elaborate on Peter’s technique in case you can find a place for it in your workflow.
The Aspect slider is found in the Keystone Tool.
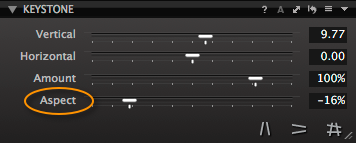 The traditional use of the Aspect slider is to alter the effect of any perspective adjustment to make it look more natural to the eye. Sometimes the ‘perfect’ correction isn’t the best one visually. This is why by default, if you use the Keystone correction tools, the Amount slider is set to 80% as opposed to 100%.
The Aspect slider has no automatic values applied, so it’s up to you to dial in the look you want to achieve. In a lot of cases of the normal use of the Keystone Tool, the Aspect slider can be left alone, but it’s often worth experimenting with it, in case it can help the image.
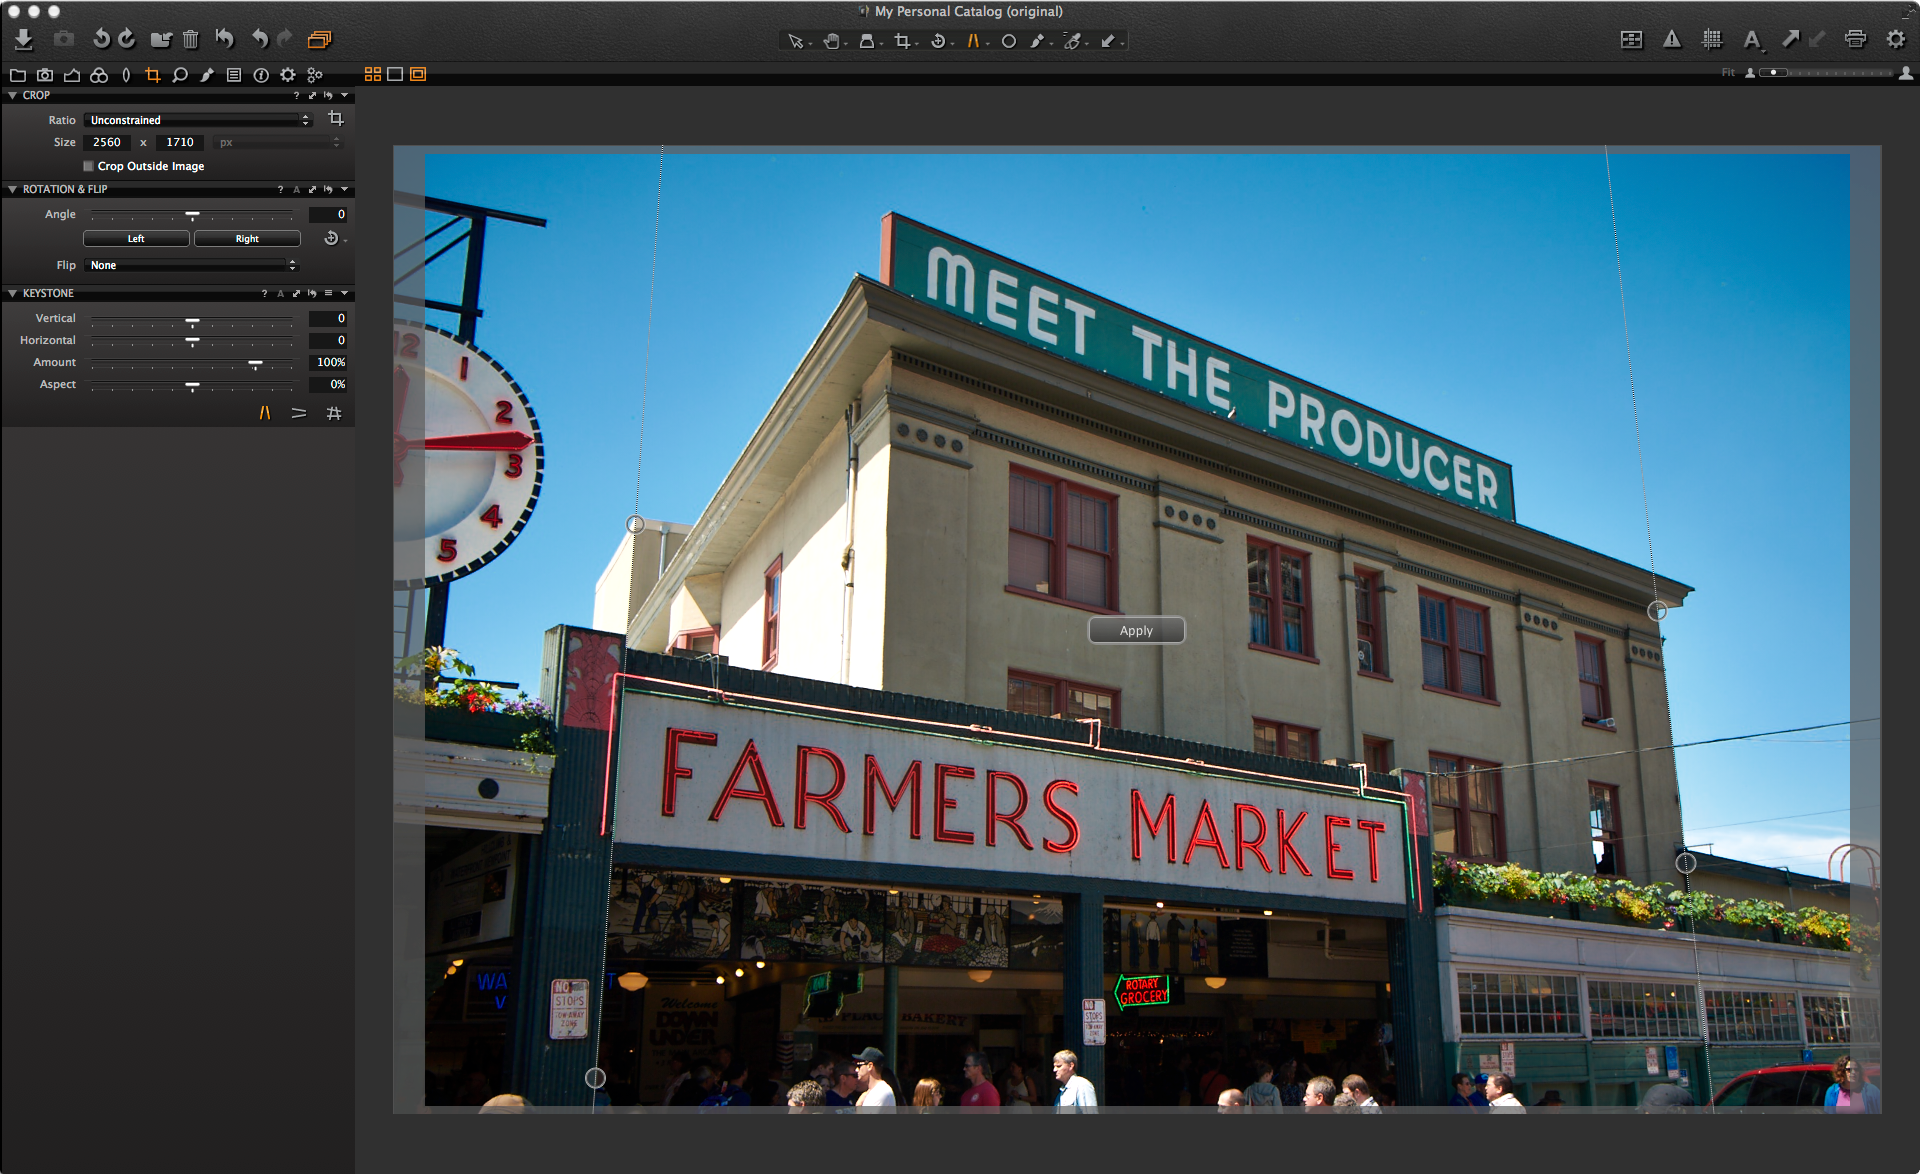 For example here, if we correct the perspective of this image using the Keystone Tool.
We can reduce the aspect value a little to make the building a little taller. Notice that the Amount slider has defaulted to an 80% correction. This still removes most of the ‘falling down building’ syndrome but looks more natural.
 With some images, the perspective is too extreme to make a visually pleasing correction, but this doesn’t mean we can’t still make use of the Aspect slider.
The lead image without any corrections looks like this.
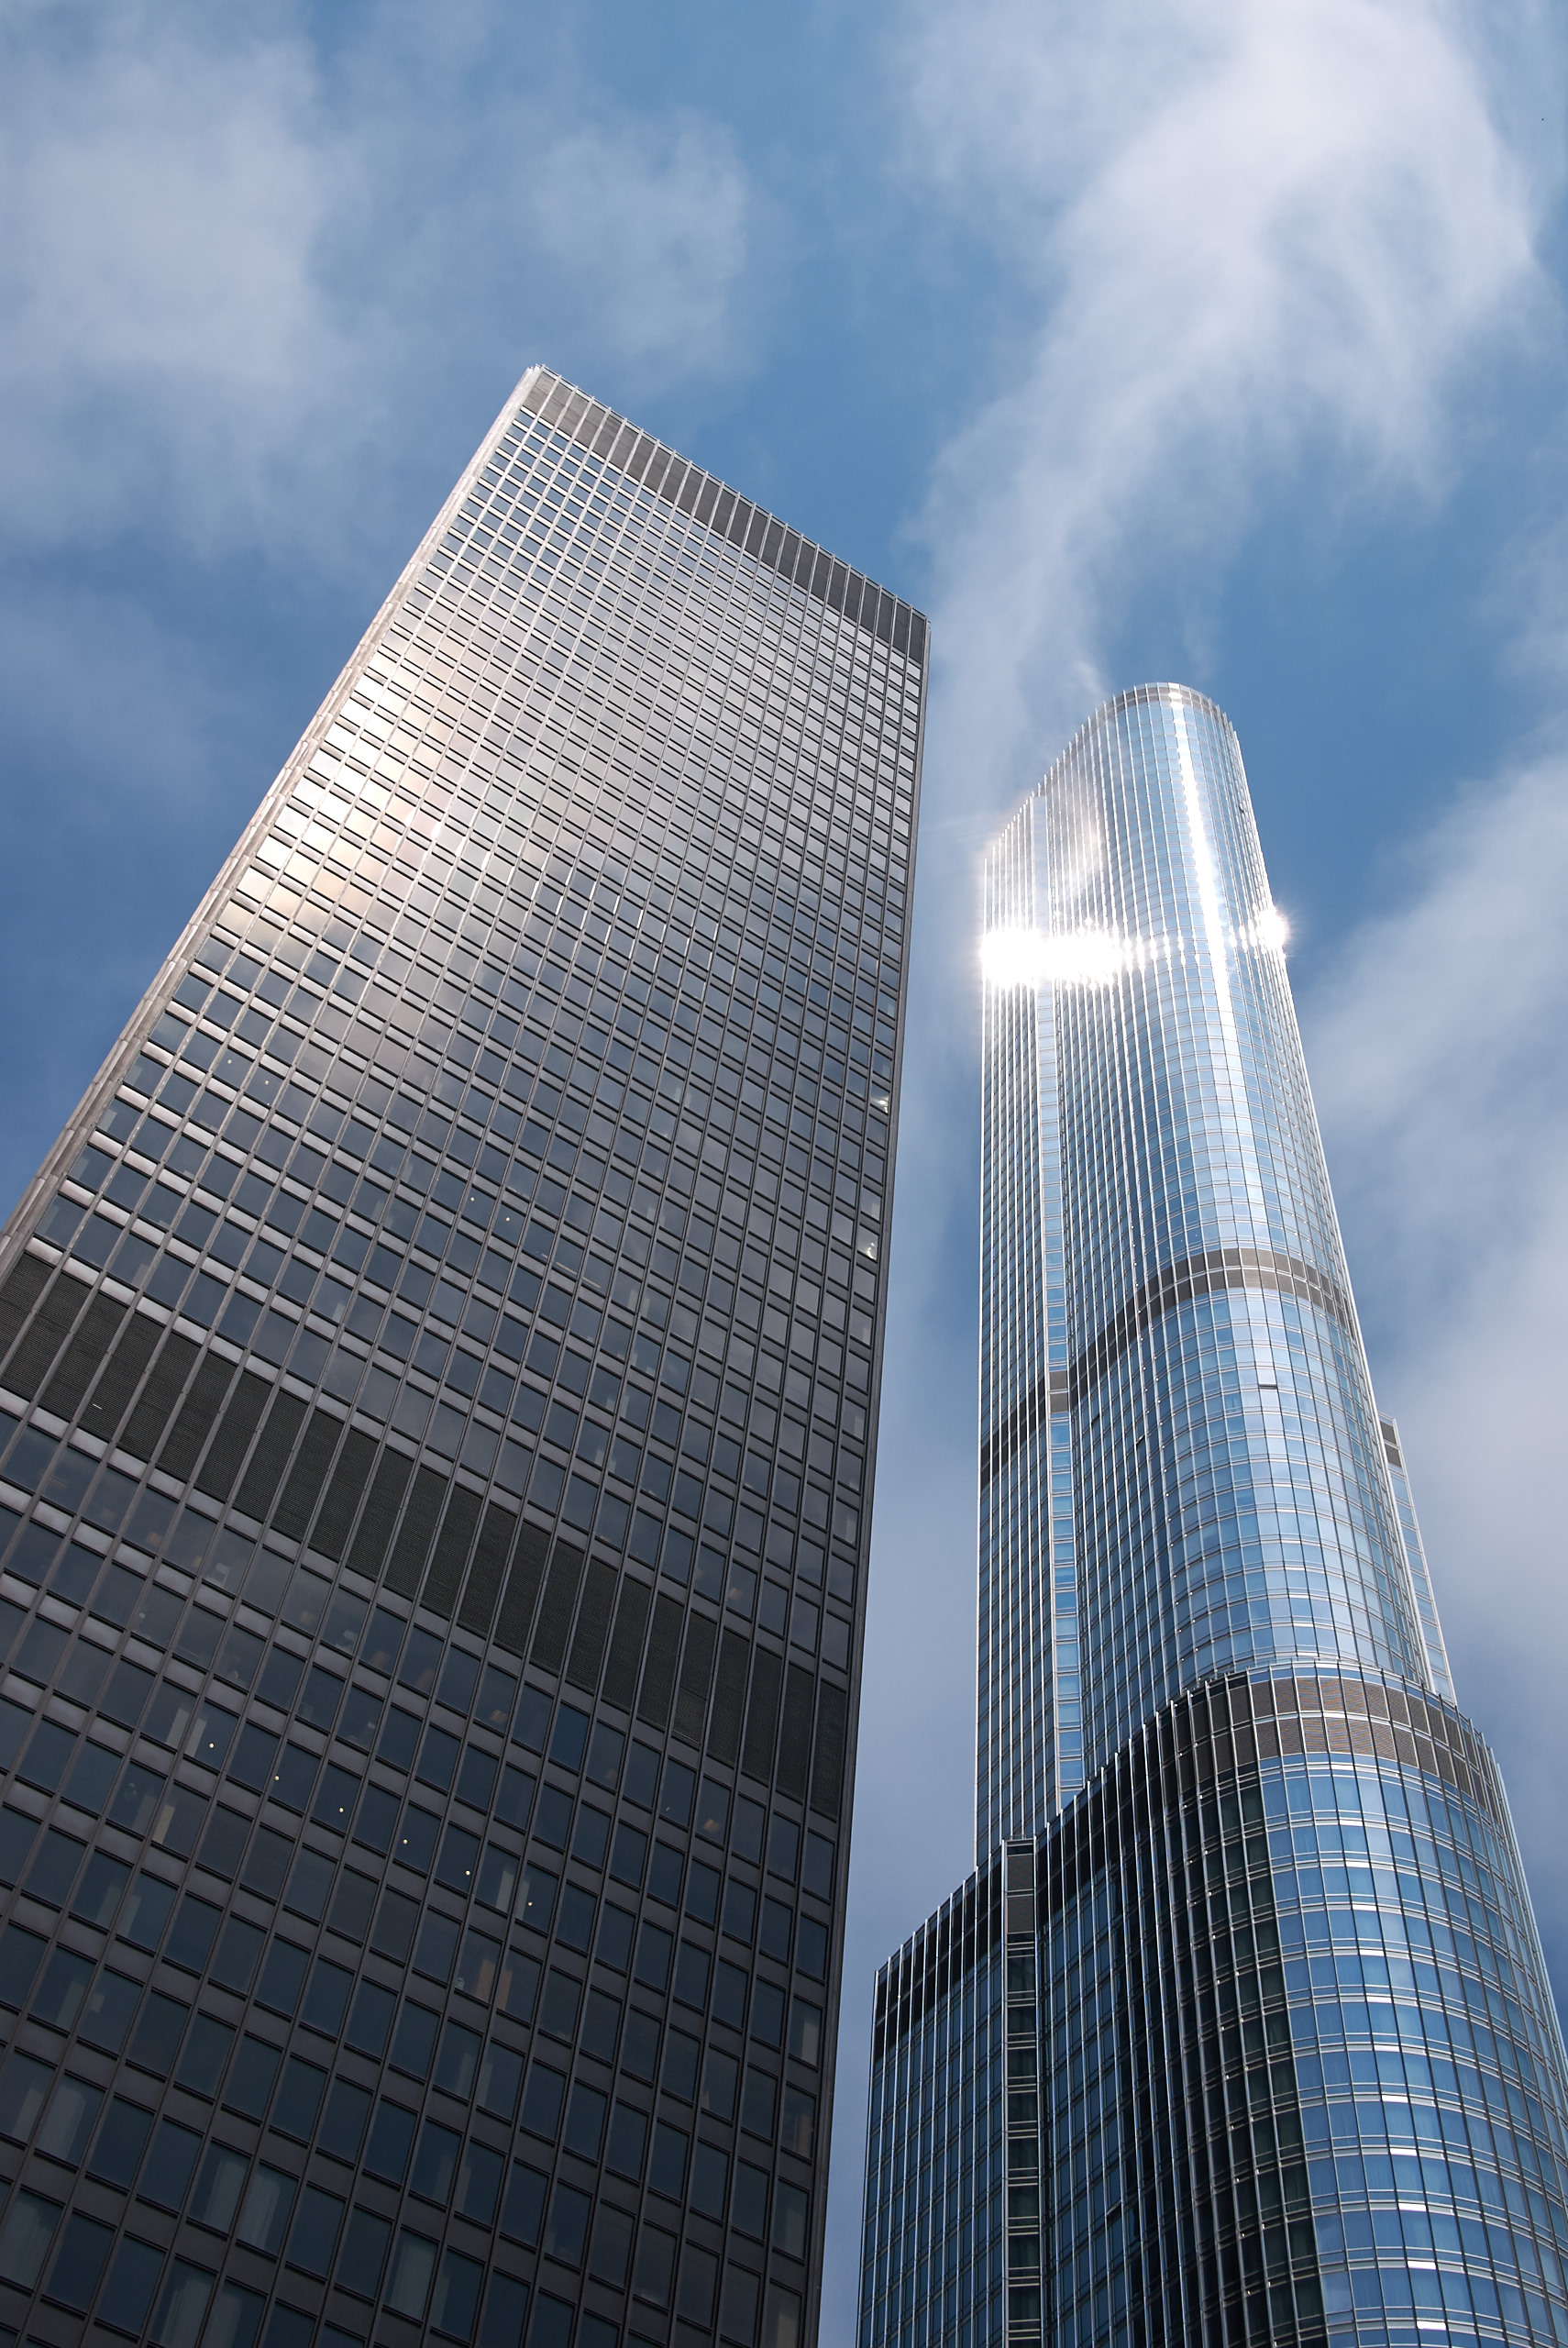 As there are a couple of lofty towers in Chicago’s skyline, it makes sense to try and convey that a bit more… even though it is cheating somewhat! The image could also do with some help in the way of contrast and probably some Local Adjustments.
If we start to drag the Aspect slider we can gradually stretch the buildings making them look taller. You can see the difference between the original and the same image with a -18% Aspect adjustment.
 You may find that the crop needs adjusting after the Aspect slider has been moved.
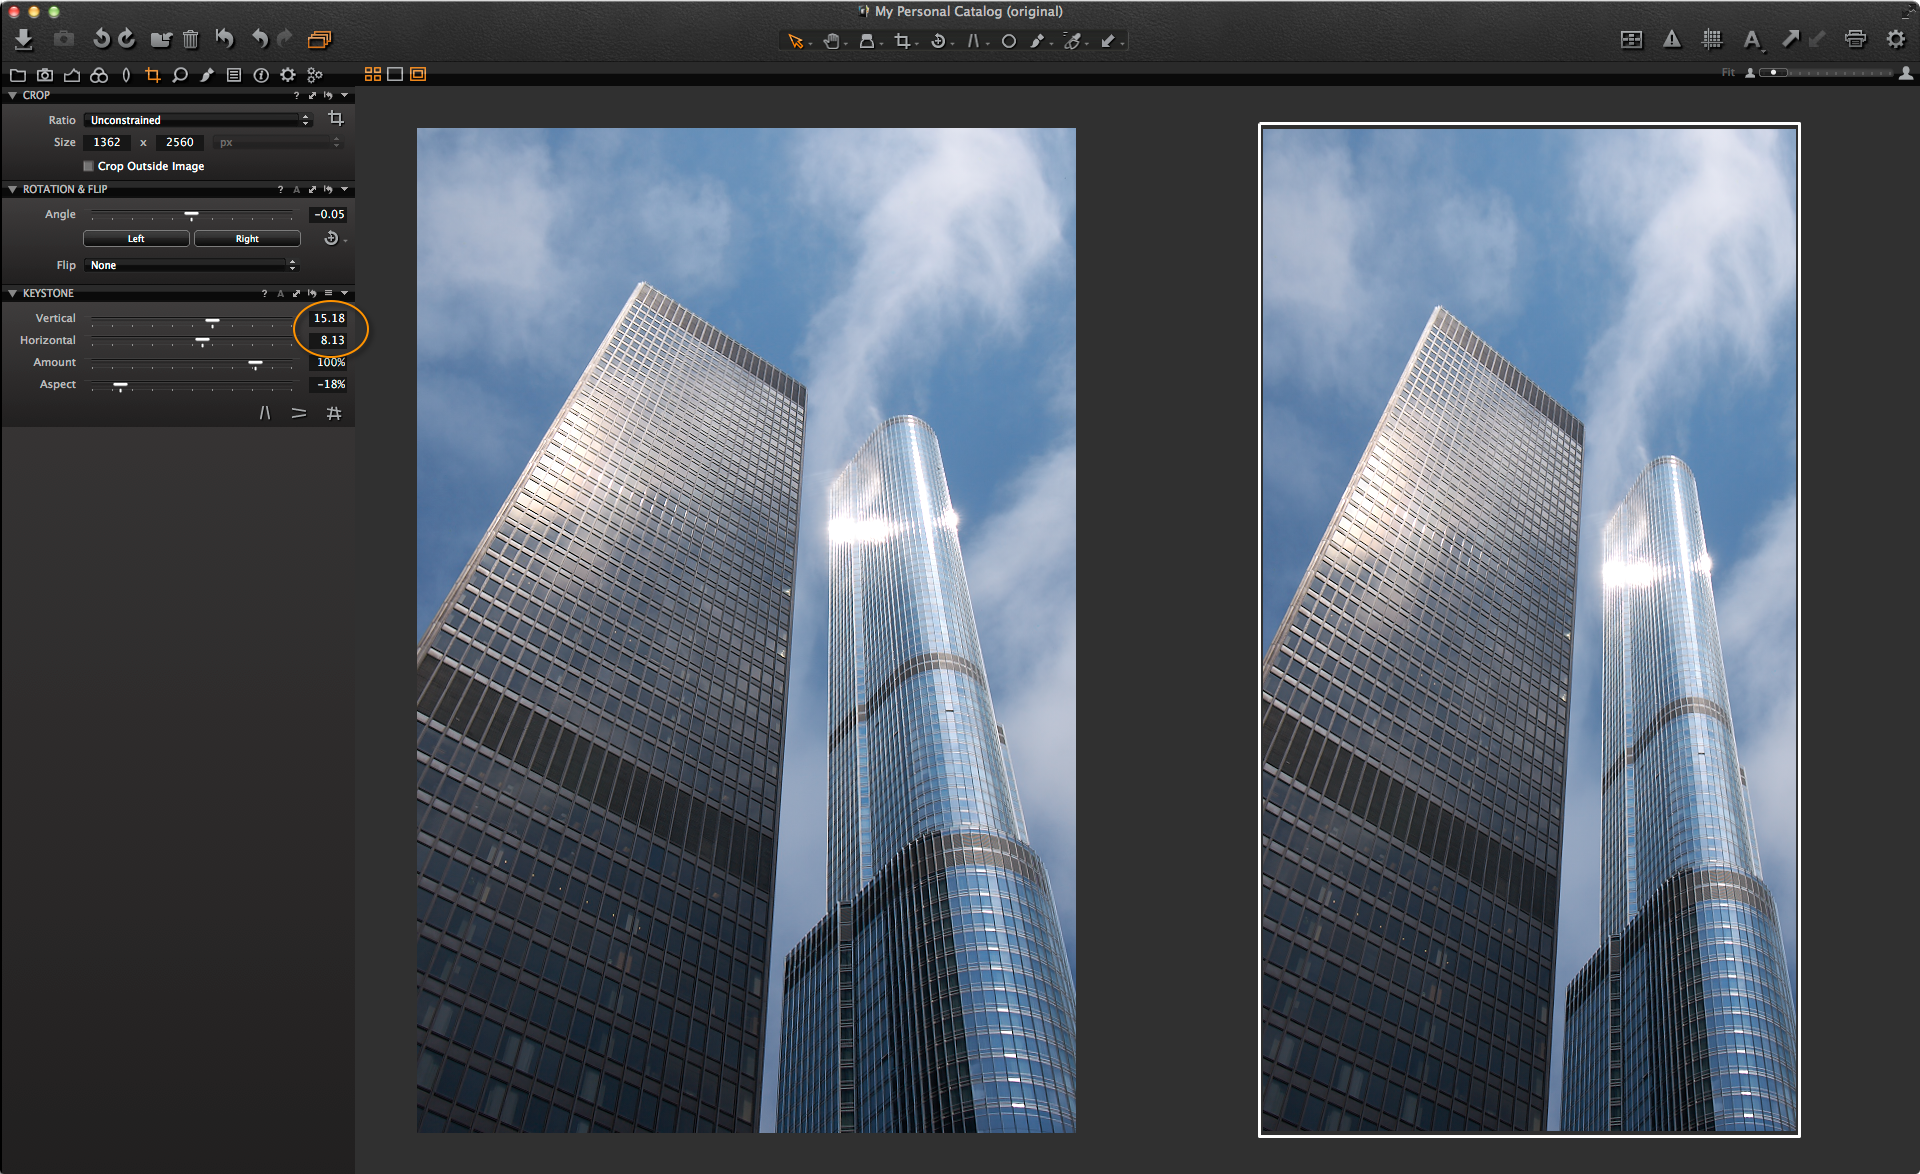 I have also played with the Vertical and Horizontal sliders to change the look a little as well.
Now that the building shape is a bit more dramatic I can complete it with some image adjustment.
The contrast is really flat, probably from a lot of flare from the sun off the glazed surface. The Levels look ok with a nice even Histogram, but the mid tones could definitely use some help by pulling the mid tone slider towards the highlights.
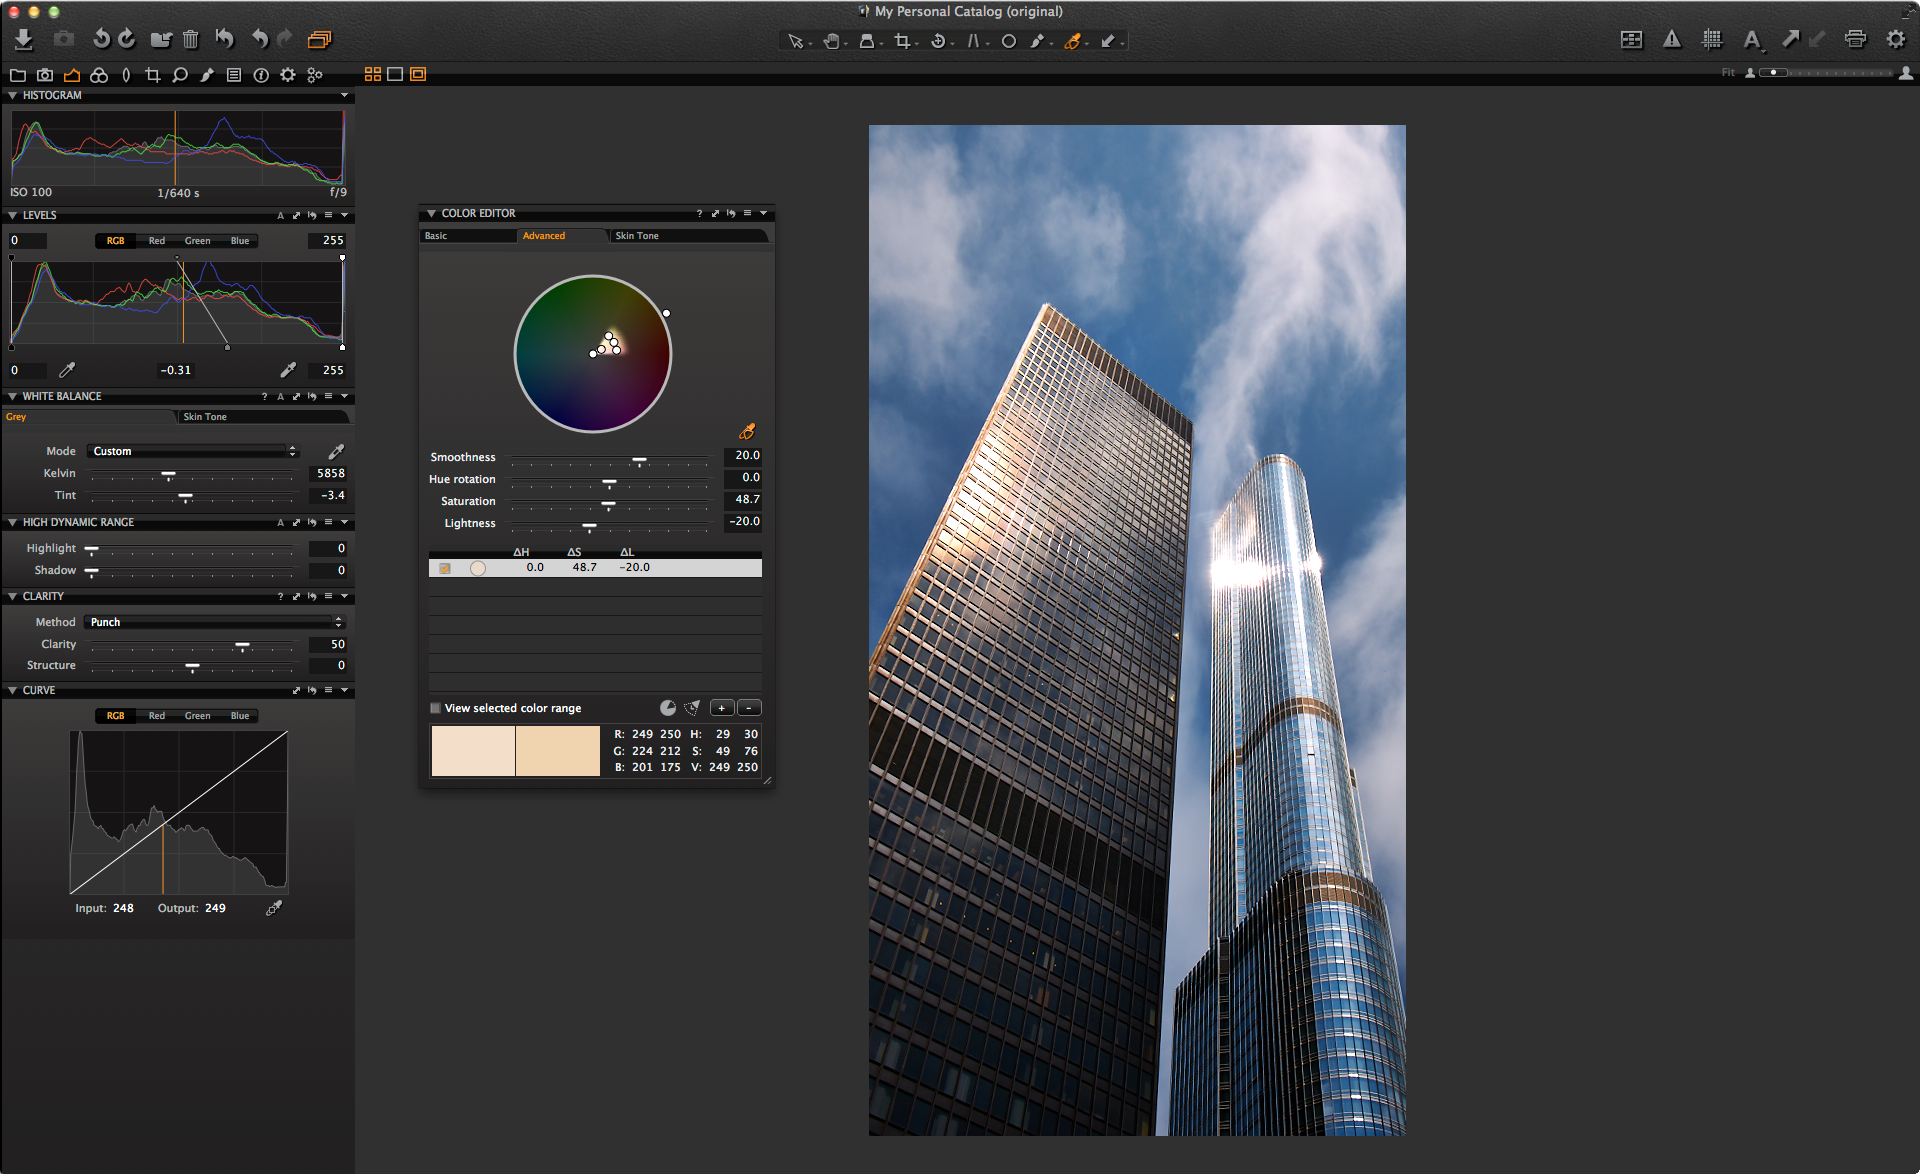
A positive Clarity adjustment will also help with the haziness of the image. Remember, set to ‘Punch’ the saturation will be increased as well, which is perfect for the blue sky. The final thing that needs to be done is to warm the white balance so the sun is more obvious on the side of the building.
 To bring out the warmer sun even more, I can use a pick on the Advanced Colour Editor to darken that tone and increase saturation.
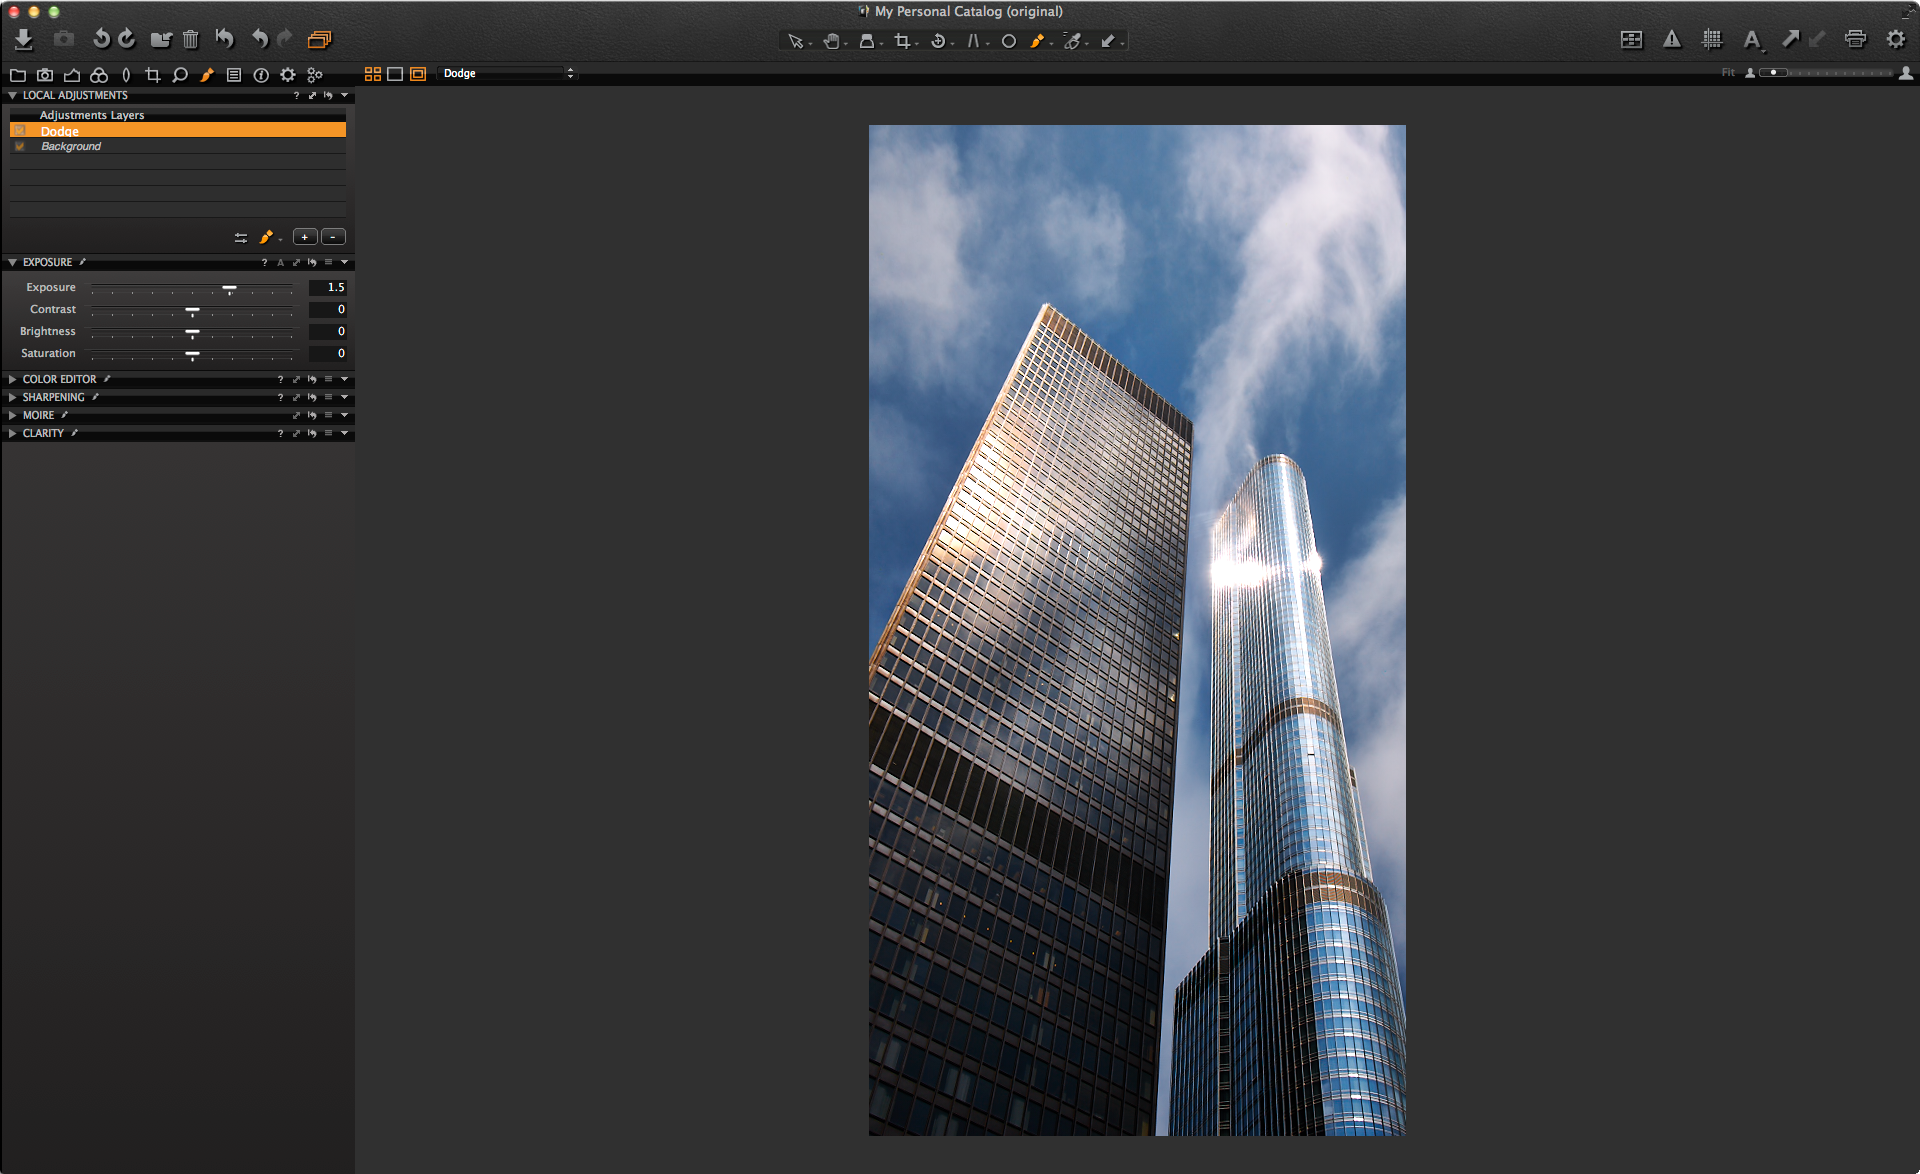
 As a final step, to get a bit more variation in light in the building, I will create a Local Adjustment layer, which I can use to ‘dodge’ selected areas of the image.
Before brushing onto the image, I’ll call the new layer ‘Dodge’ and right away increase the exposure for that layer by 1.5 stops. The brush Opacity should be nice and low so the effect can be built up and remain subtle.
 A few brushes and I can improve on the lighting on the windows.
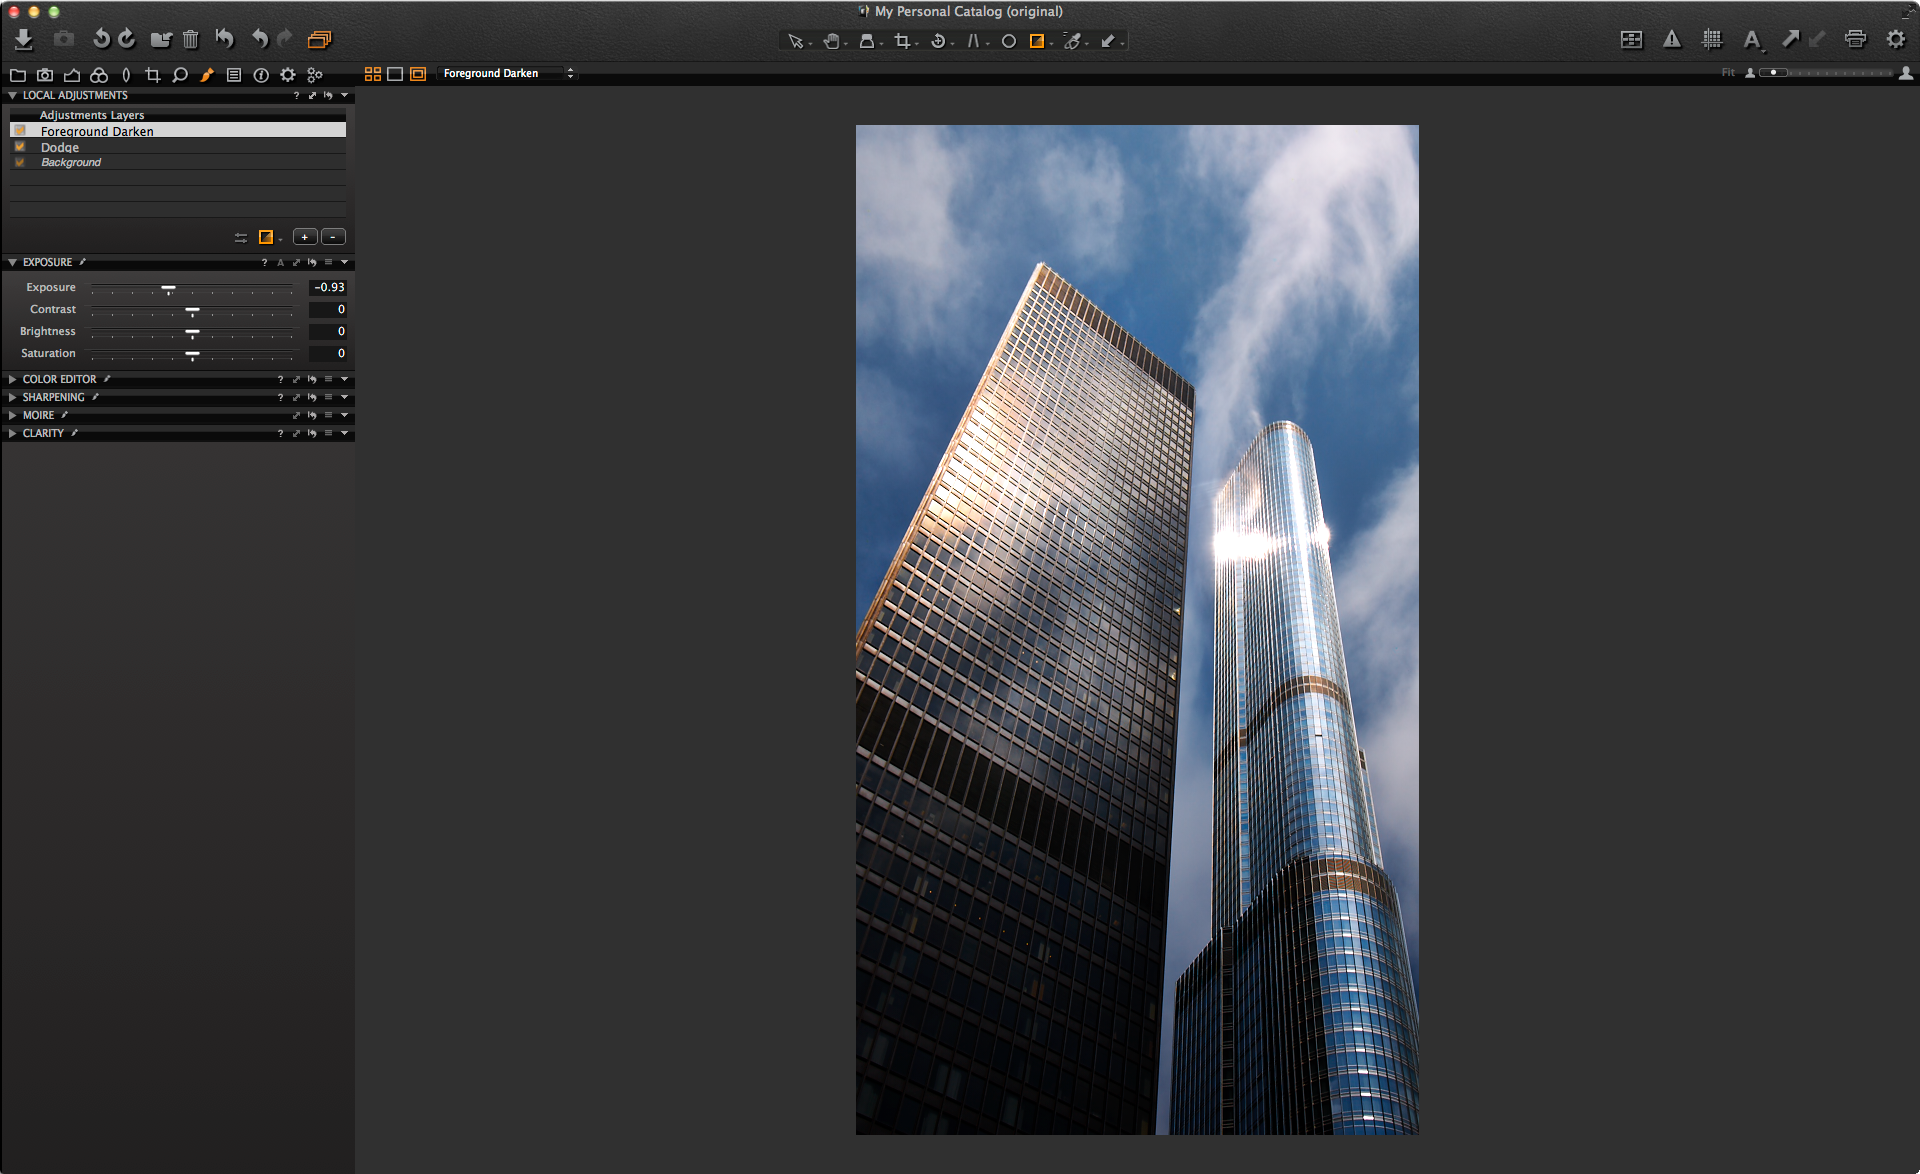
 I think that’s it, except for a small adjustment on the crop and a Local Adjustment gradient mask to darken the foreground a little.
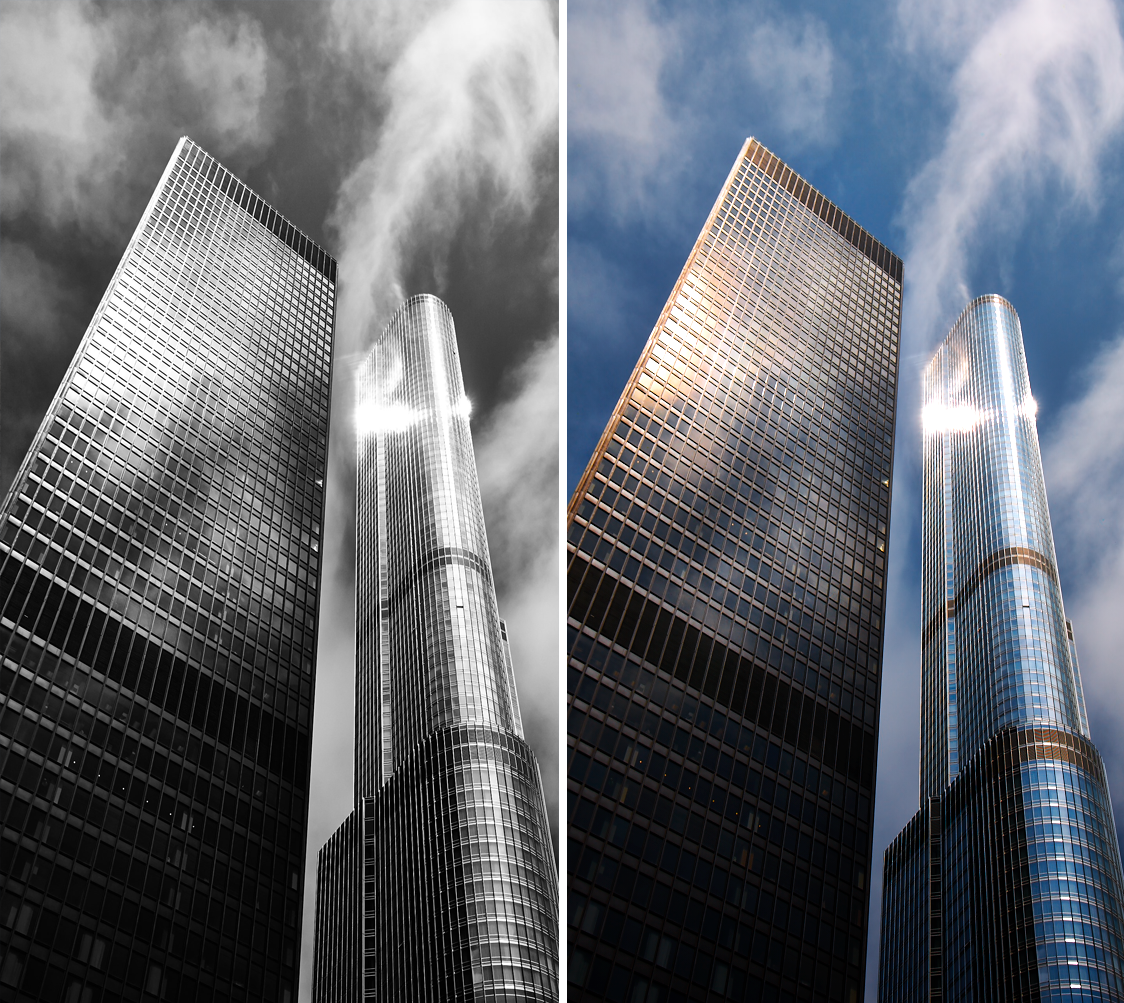
 Here is the final result against the original.
 It would be interesting to know if you have found another use for the Aspect slider? Or if it has benefited your images?
Oh… and here is a Black and White… now to stop playing!
Best regards,
David


That’s great, I never used that slider. I’m going to try it, just yesterday I was struggling to correct the verticals without correcting them “too much”…
I’ve certainly corrected vertical, often in shots of fitted kitchens but have overlooked the aspect option. Interesting will explore this more.
Thanks David!
Hi David,
Your photos of these beautiful buildings I have changed themselves.
It bothered me these white spots in the right building.
I have cropped the photo and made more dynamich.
In this picture I deliberately end the buildings left out.
This will make the picture more interesting, the viewer must now use his own imagination.
Hi Christy,
Thanks for your interpretation!
David
It is a powerful tool but in these instances why not select a suitable lens rather than damage pixels?
We are photographers not software gurus are we not.
Have to agree with the comments about the blown section in the RH building it is off putting.
Well in this instance on this particular camera I only had the one lens to choose from.
Also it was a hurried walk around Chicago before catching a flight, so sometimes we take what we can get!
I quite liked the blown section and enhanced it a little more… so, just shows there is no agreeing on photographic content. 🙂
Love using this “Beast of a Program.”
Word of advice to people, it is in bad form to take someone’s image, hack it with an uncomfortable crop and suggest it is better. Since I am on the subject of suggestions, suggesting to use a suitable lens is not only unrealistic to many who do not have disposable income to have an arsenal of tilt shift lenses and more importantly, having a tilt shift lens would of made the whole reason for this tip about keystoning and the aspect slider, moot.
Thank you David. I always enjoy and appreciate your lessons.
Cheers
Thanks Christian!
Hi David,
I am writing here because I could not find any other contact point for Phase One/Capture One marketing. I have posted on my blog a writeup of my moving from LightRoom to Capture One and wanted to share it with you guys. Great work, and congrats! And sorry for the OT.
http://www.dearsusan.net/2014/07/02/242-showdown-1-lightroom-vs-capture-one/
Cheers
Philippe
Hey Phillipe,
Thanks for the tip on your article!
David
after you make the adjustment how do you save what you have corrected and transfer it to a different place say disk top . i have being making corrections on my capture one pro 7 but i can’t fined a thing that says save the changes i made ??
I assume you mean to export to a finished format like tiff or jpeg?
File>Export>Variants or run a process recipe!