
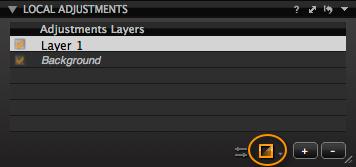
In the past I have written a great deal about Local Adjustments on this blog, and for good reason!
I believe Local Adjustments are a powerful way to explore creativity in Capture One Pro 7, but more importantly it can save you time by avoiding this step in Photoshop.
Equally a layered file size in Photoshop can run into many gigabytes, whereas in Capture One Pro 7 we have the beauty of working on the RAW file that will not balloon in size as we add layers.
Add a new dimension to your creativity
In this blog post I will talk about varying the Opacity in your local adjustments, which can add a whole new dimension to your creative application and also make the job of applying a local adjustment much easier!
It is especially useful to use a lower opacity when erasing parts of a mask, which is a really nice way of shaping the result of the adjustments on a mask.
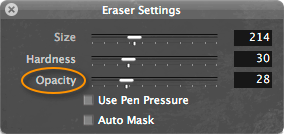
First of all, to vary the opacity of your mask, adjust the slider in the cursor settings dialog box, which can be found in the Local Adjustments Tool, circled in orange. You can also access it whilst right-clicking on the image with any of the mask tools selected.
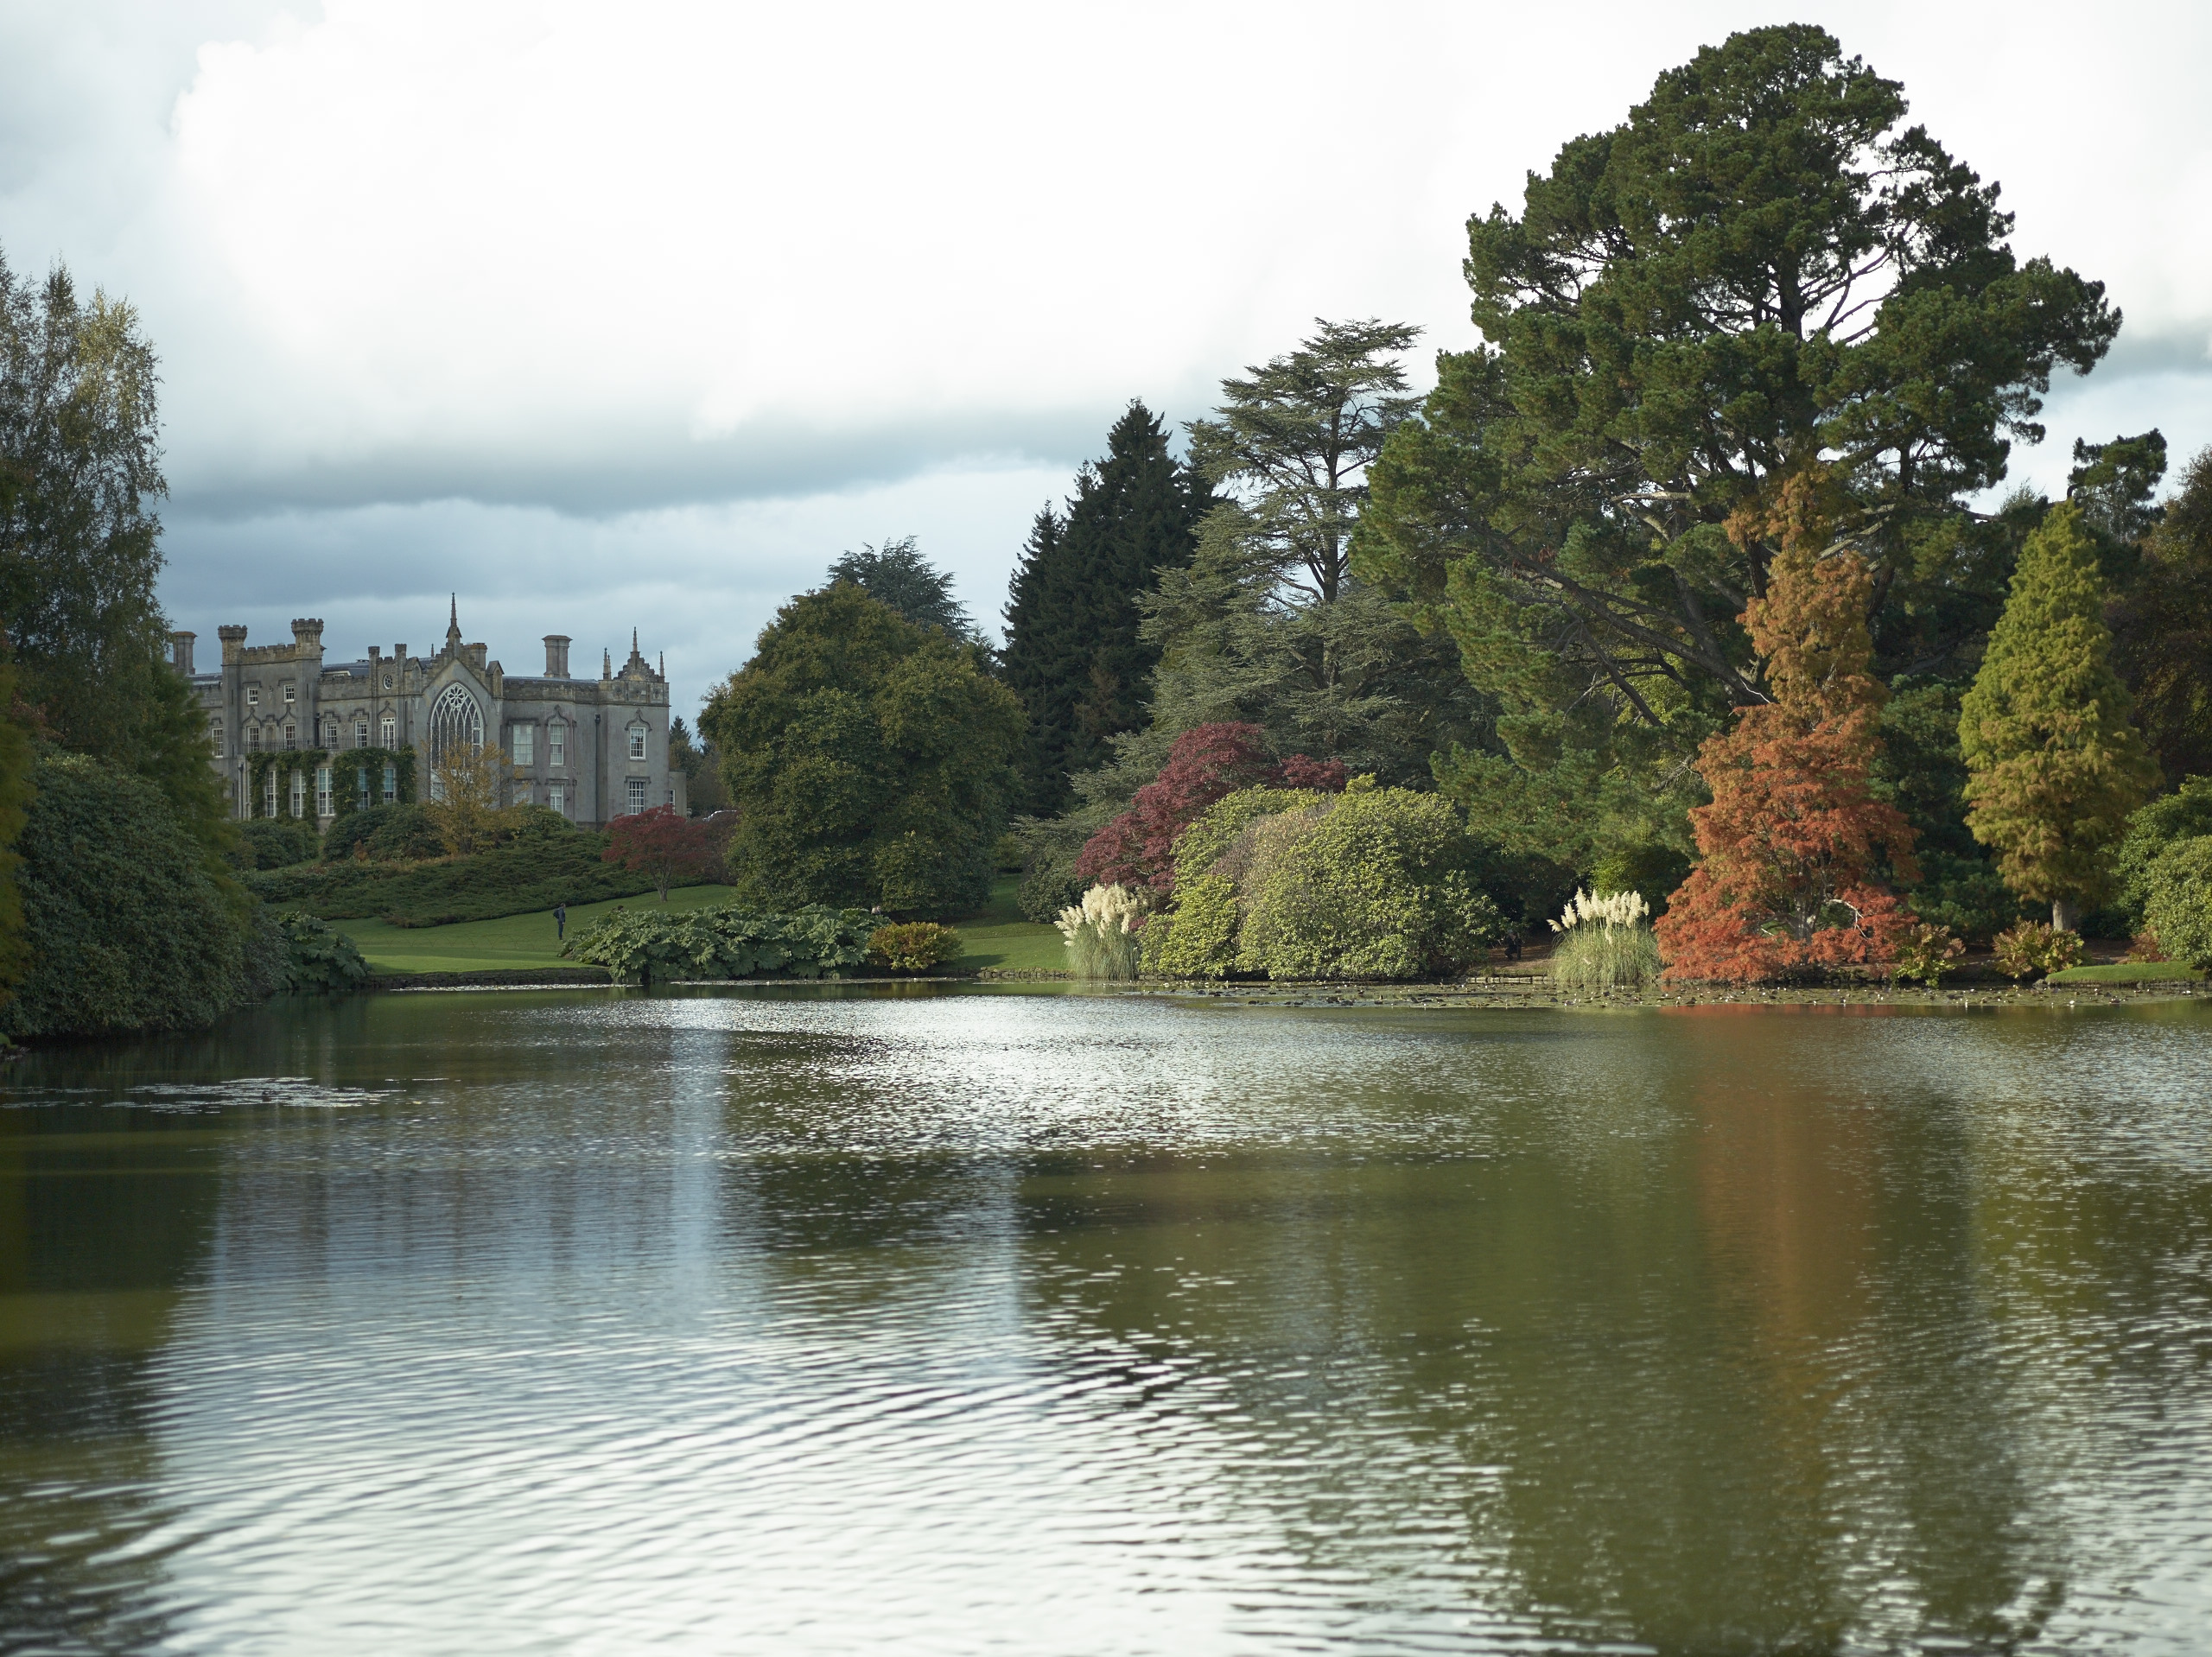
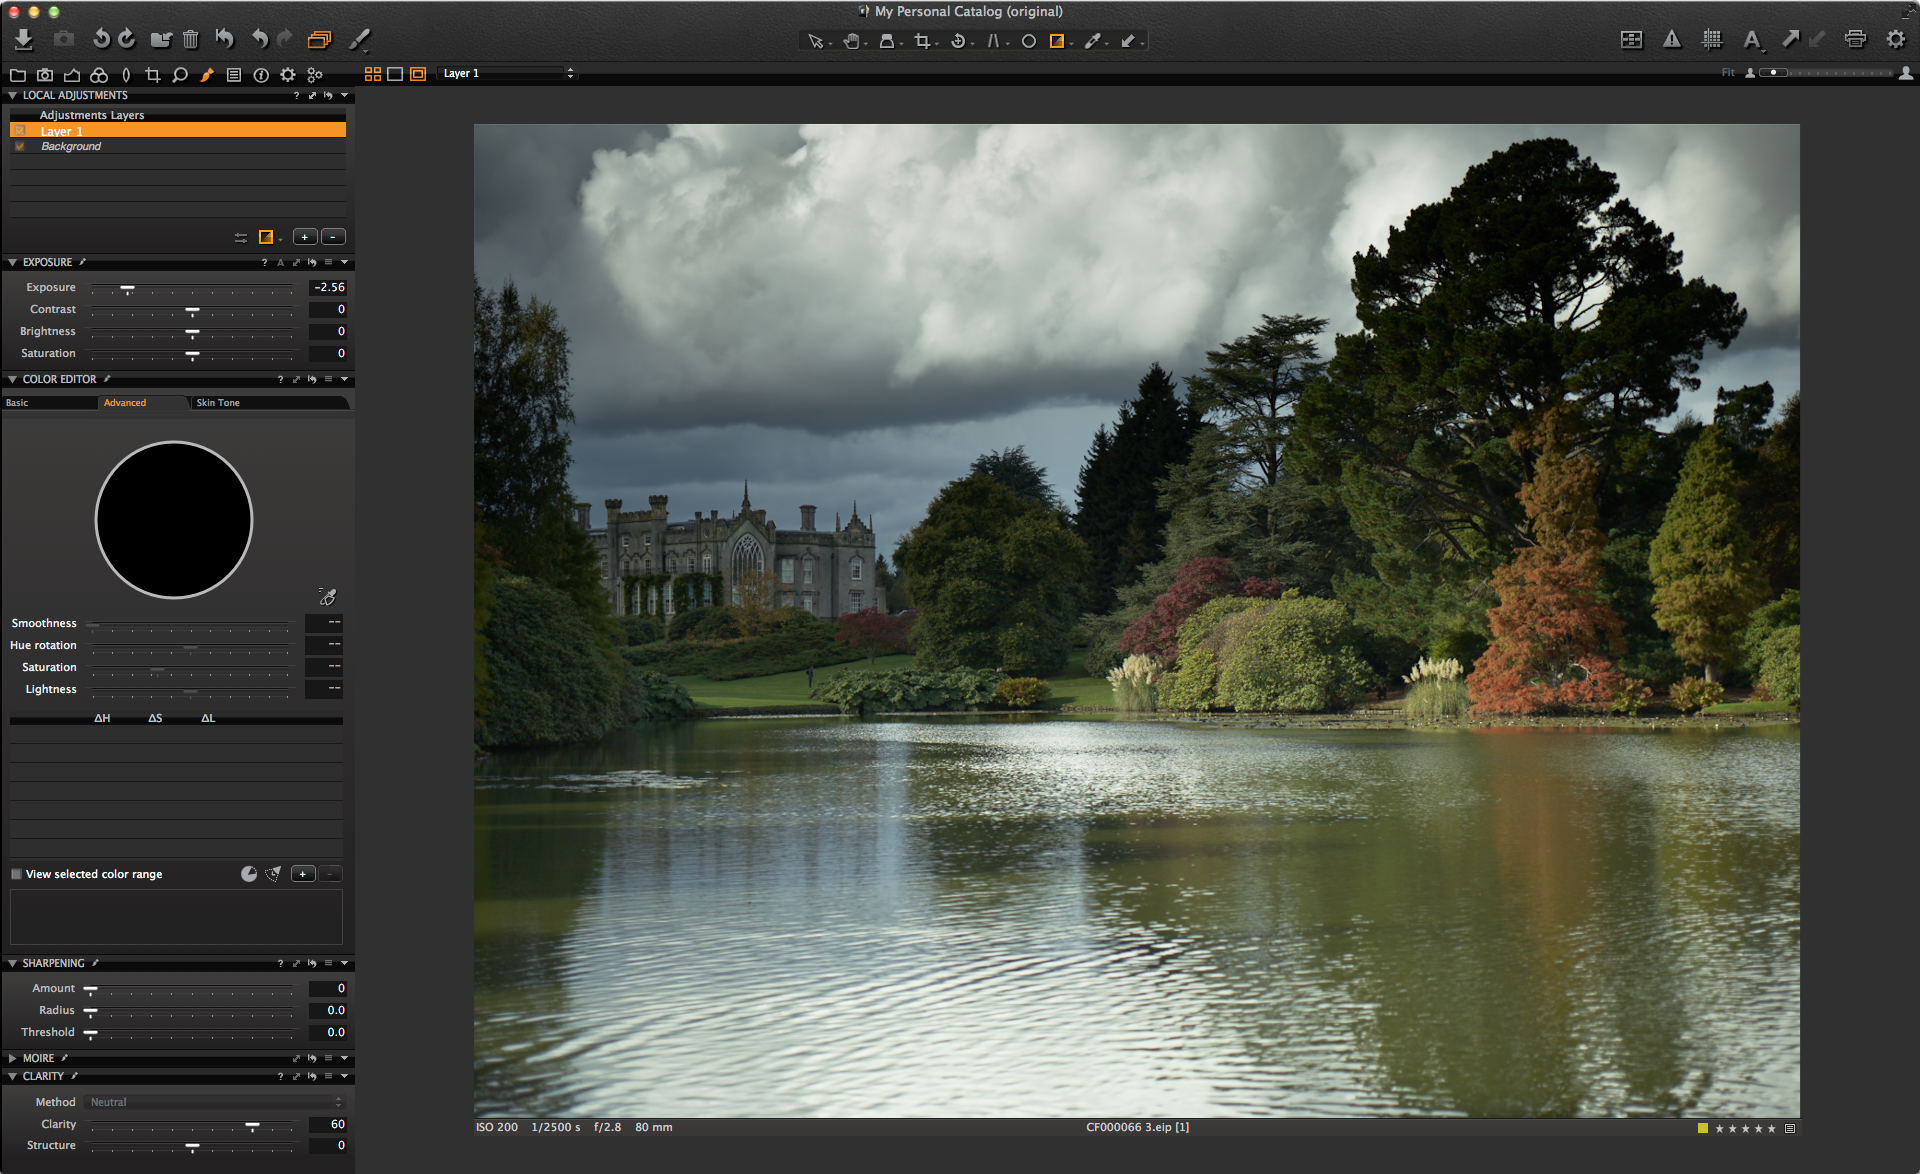
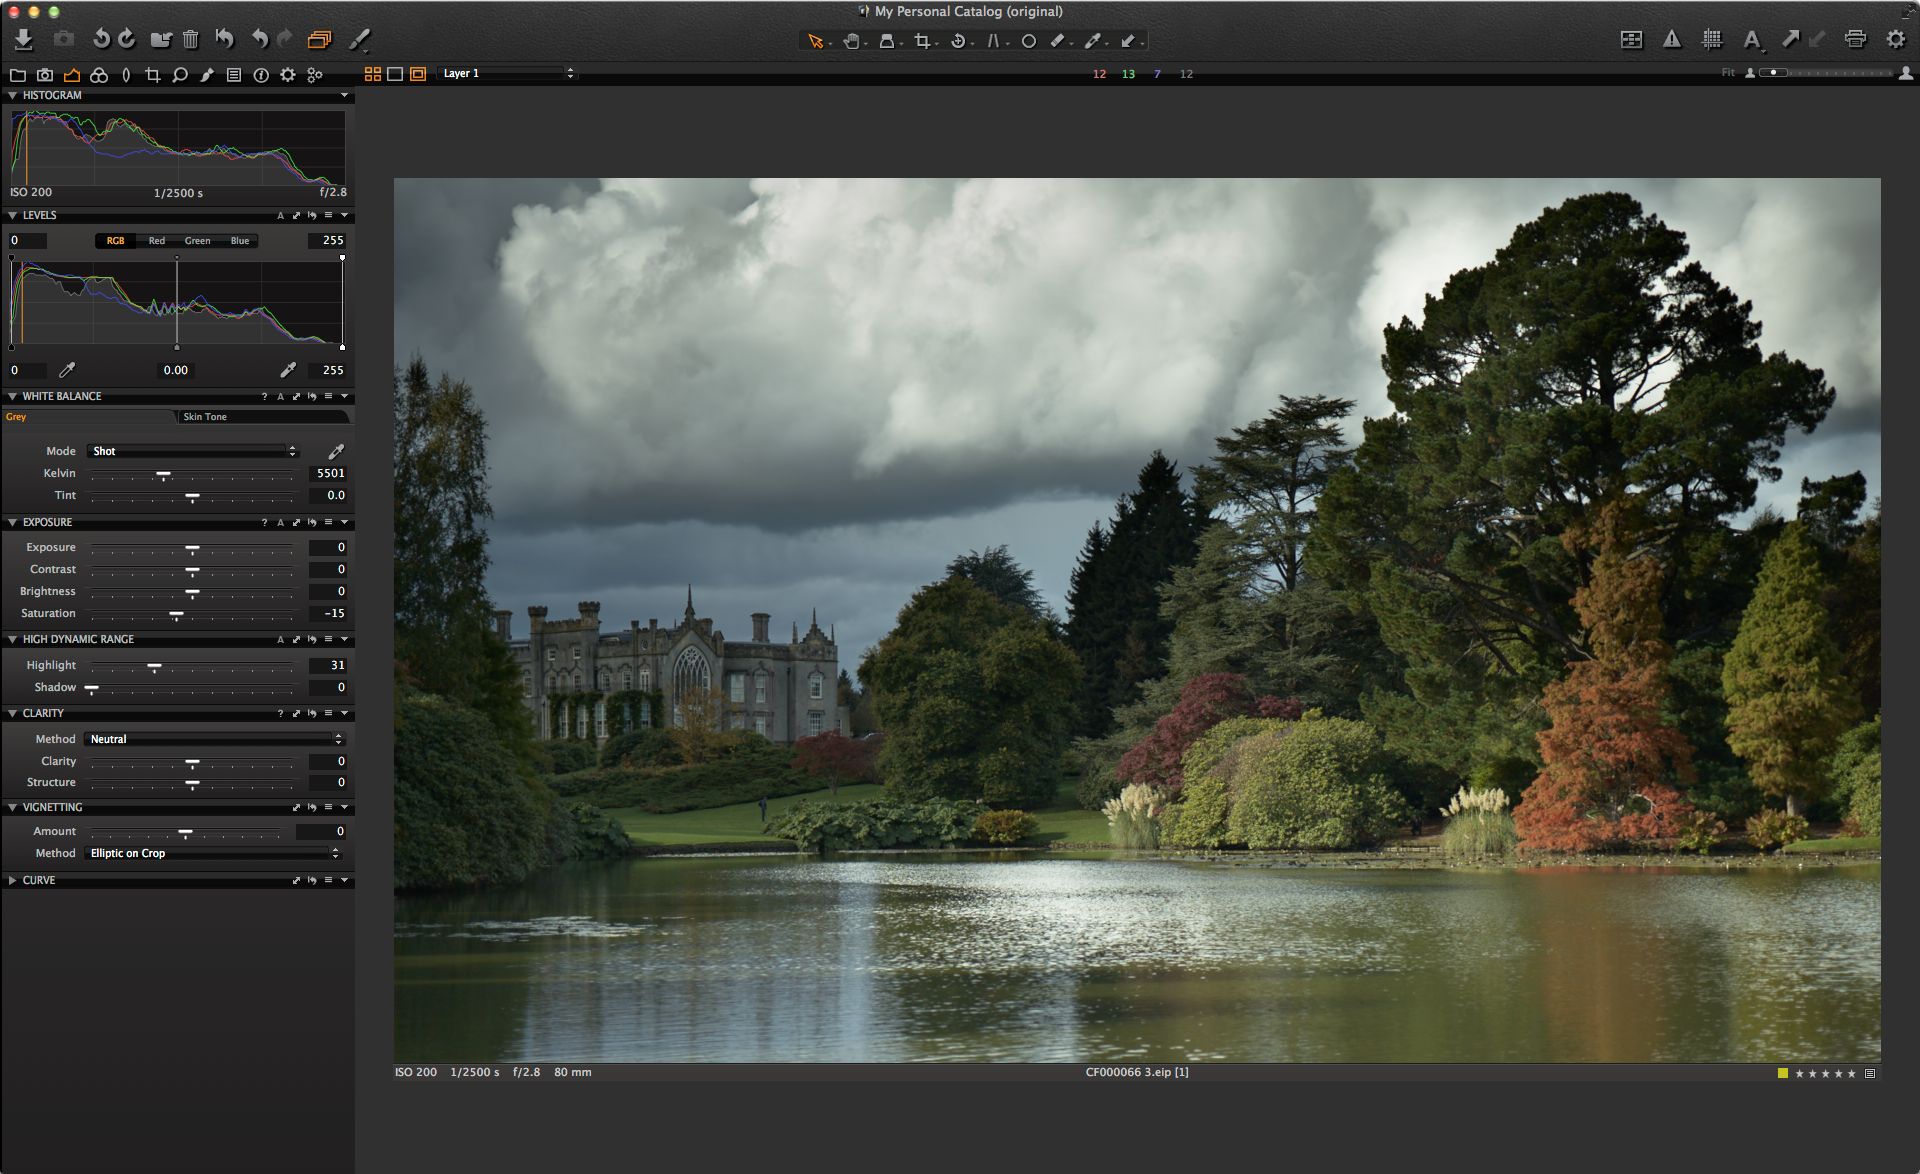
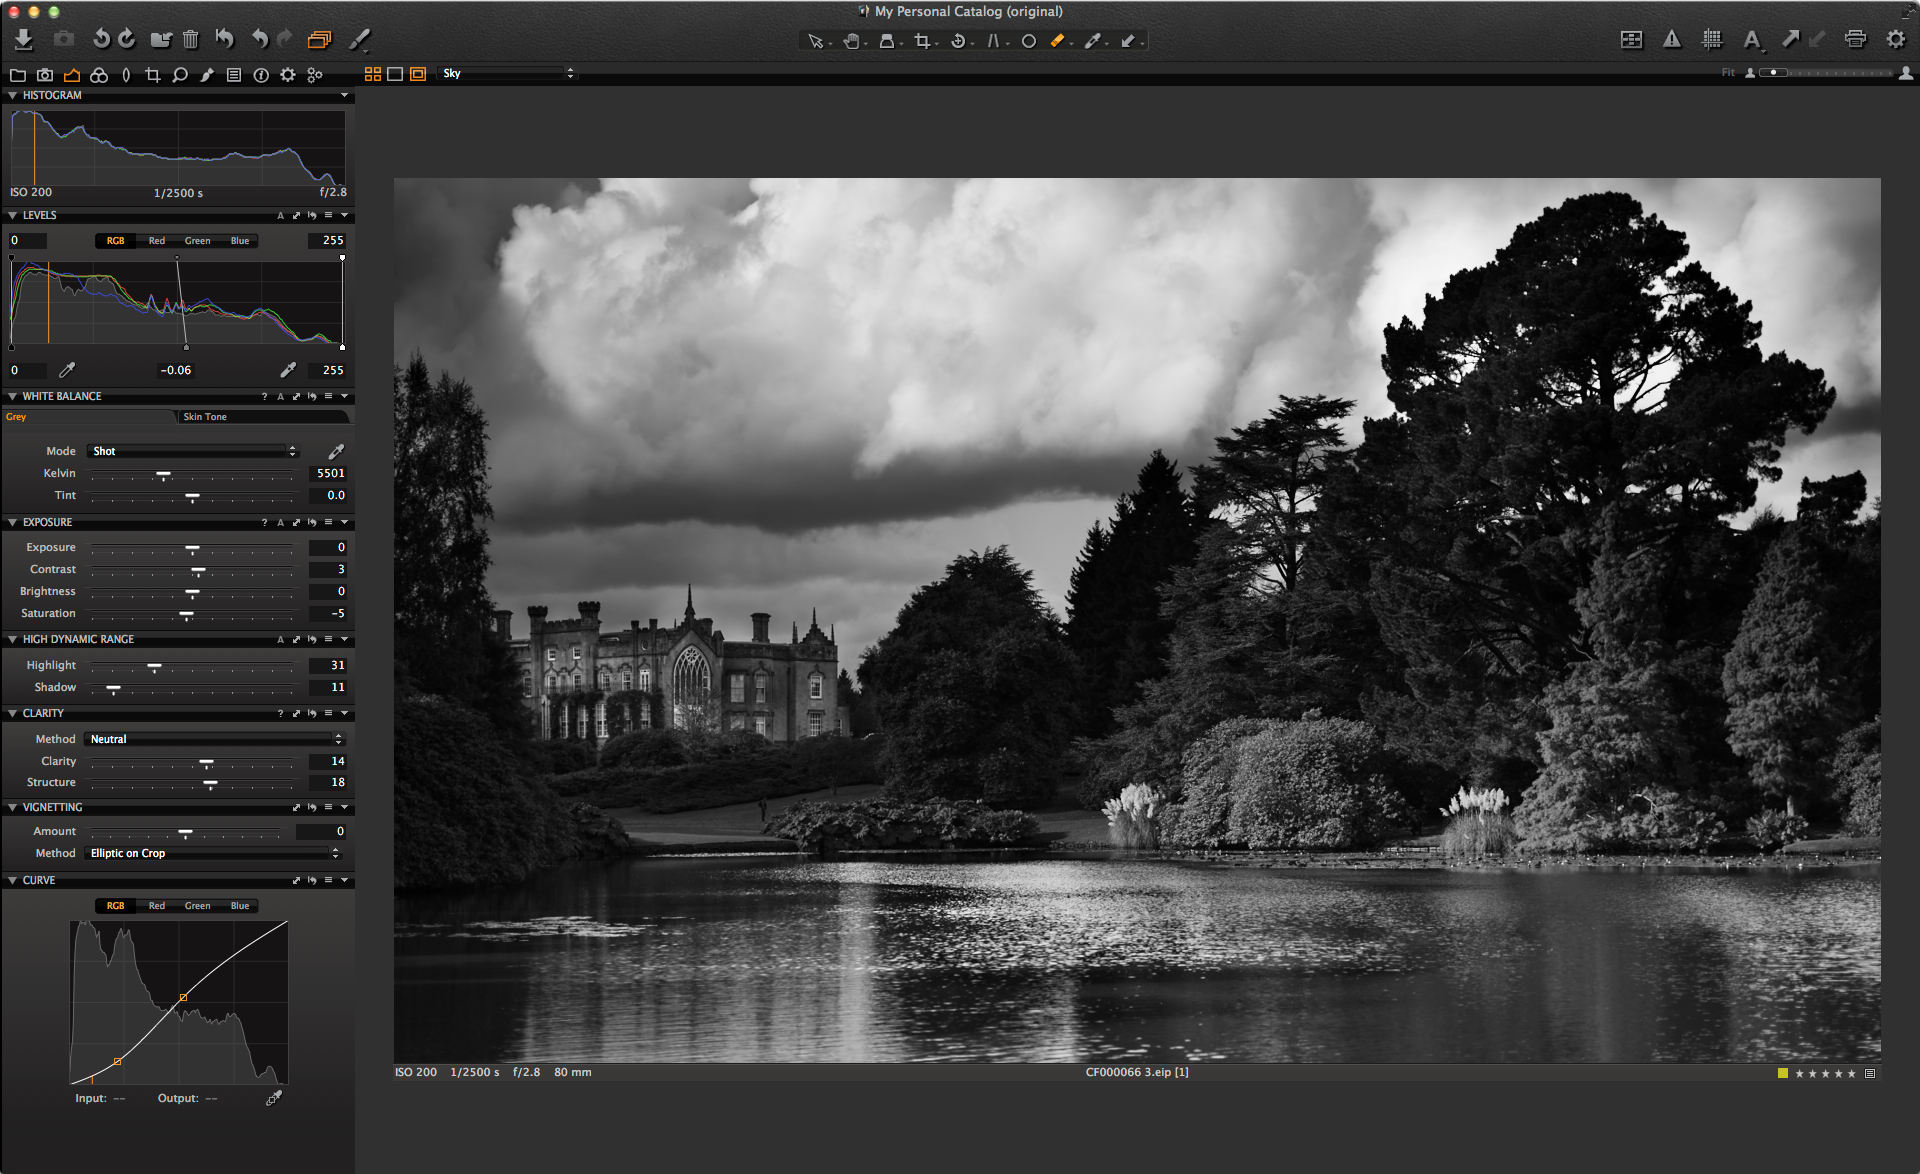
 I am going to work on this image, which is definitely going to benefit from a number of local adjustments to even out exposure and get some more detail and drama back in the sky. Here it is with no adjustments.
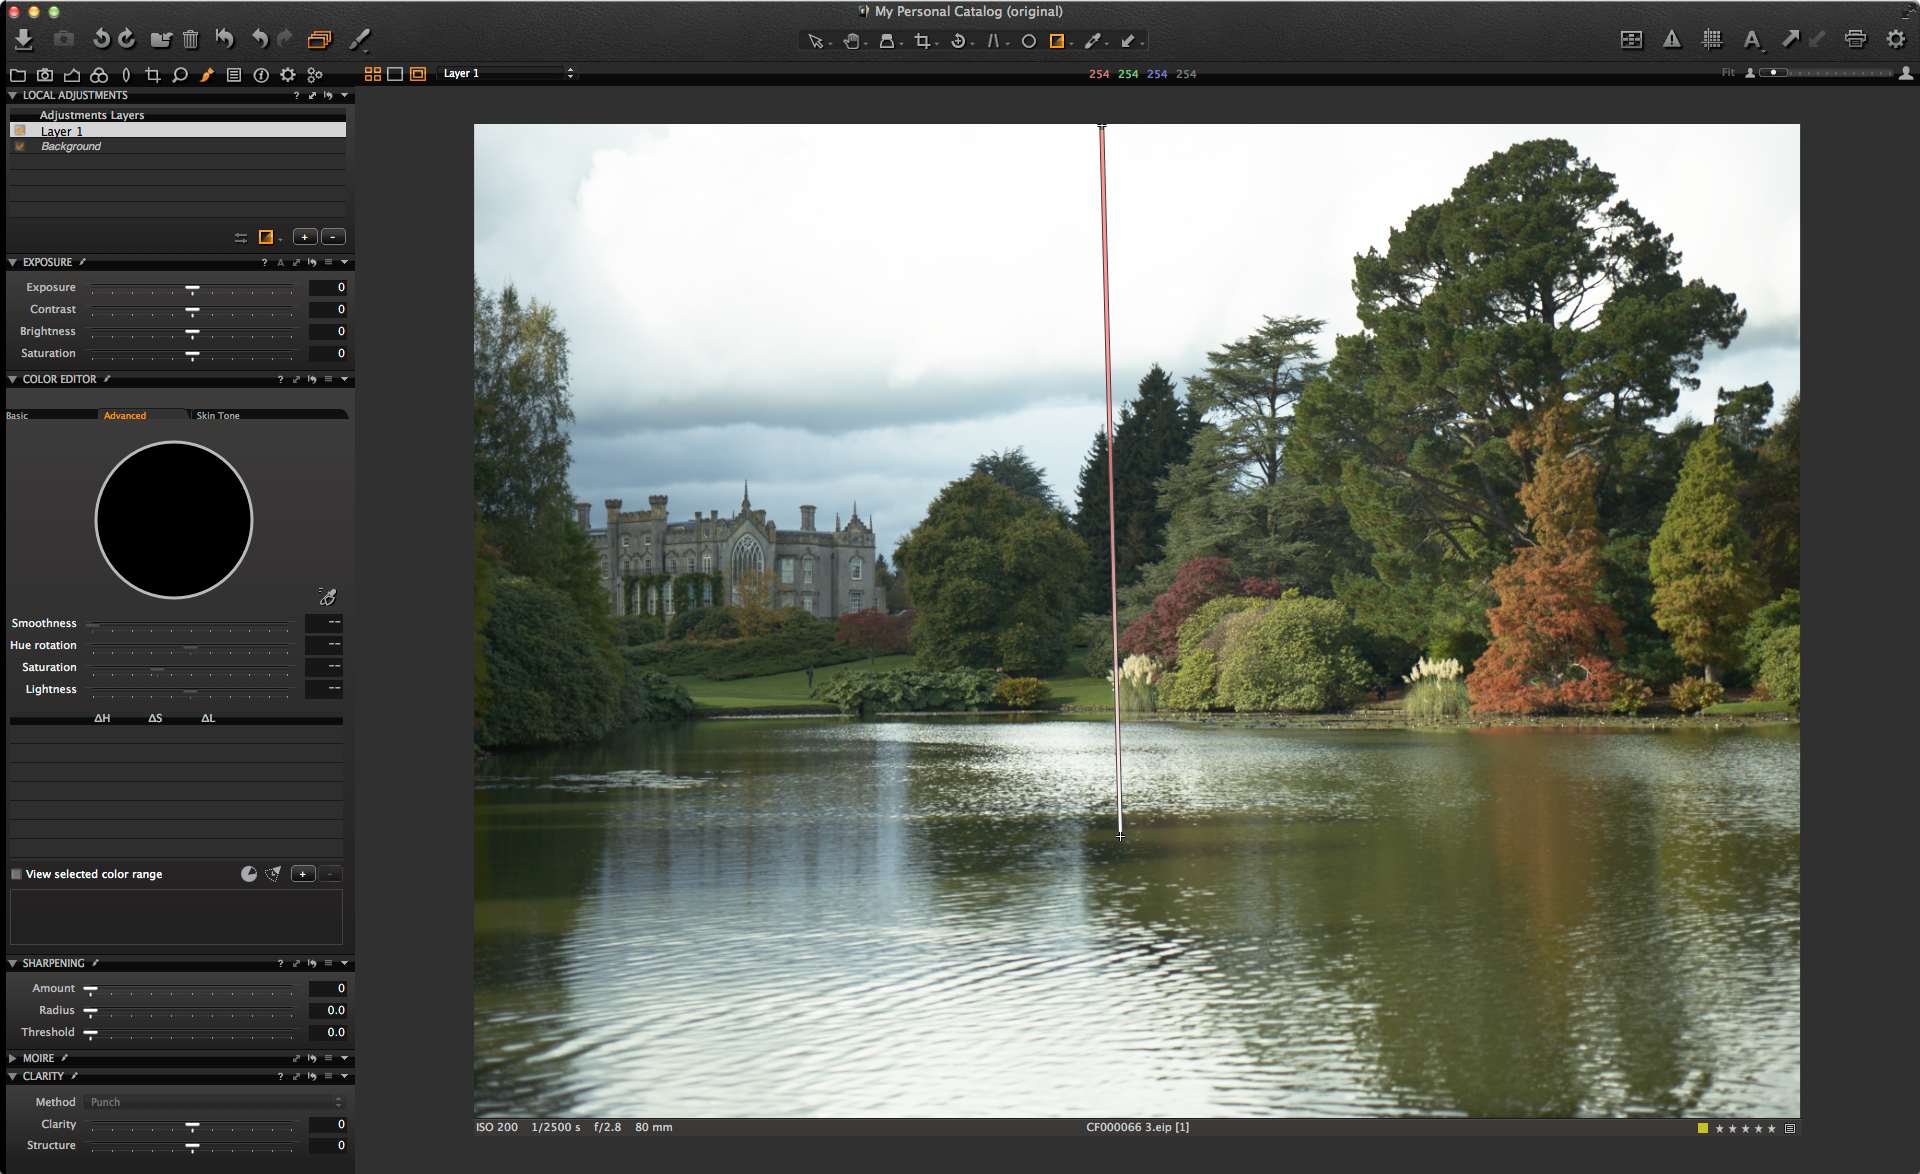
To begin with, I will use a Gradient Mask so I can lower the exposure in the sky. The Gradient Mask Tool is selected with this icon in the Local Adjustments Tool.
 Then click and drag on the image to define the start and end of the mask. Where you start drawing the mask will be at its strongest, where you finish the mask will be at zero.
So I will end up with a mask looking something like this (Press ‘m’ on the keyboard to show your mask).

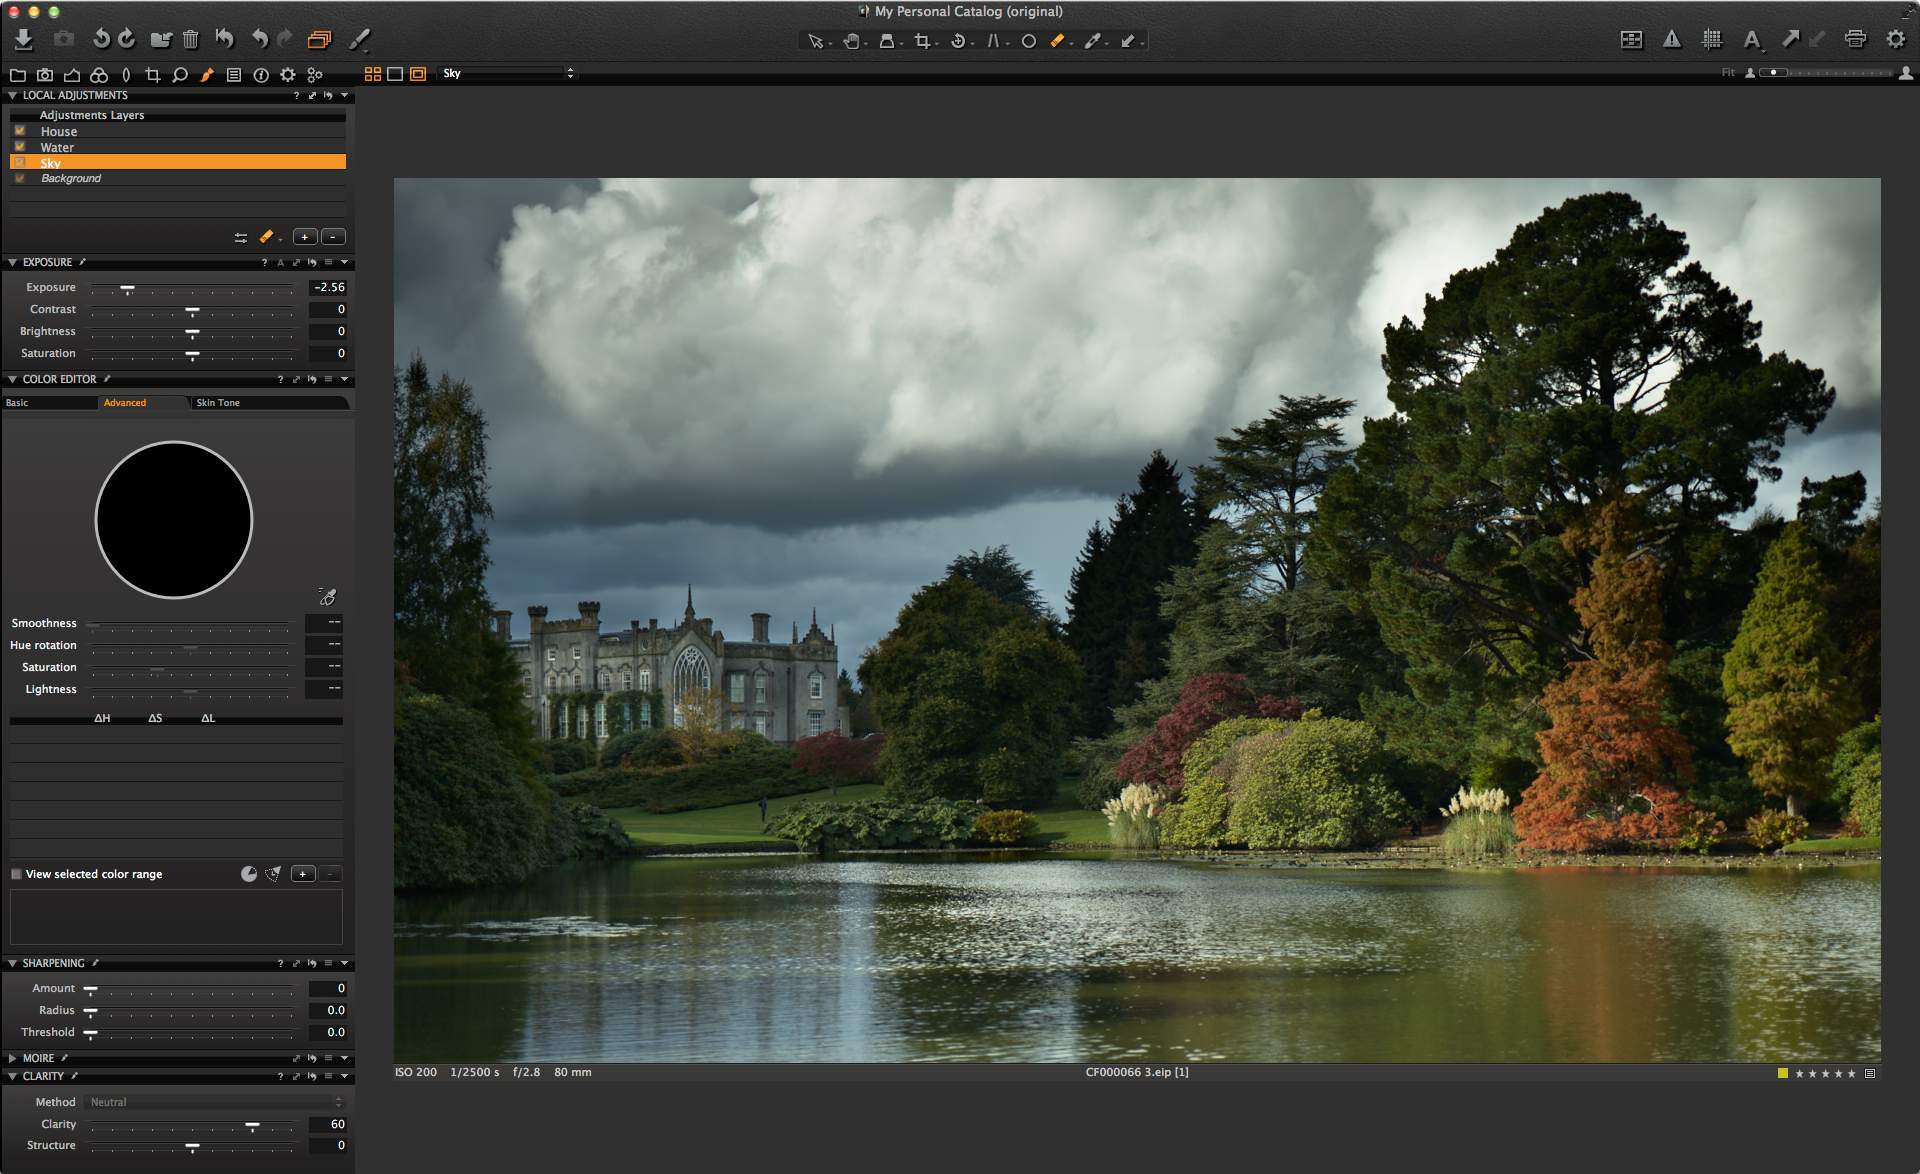
The mask is shown in red. Now I can lower the exposure and boost the clarity to get some more drama back in the sky.
Much better! But now the issue I have is that the tops of the trees are too dark on the top right of the image. If I try to erase with a 100% opacity eraser, then it looks very ugly and obvious, like this:
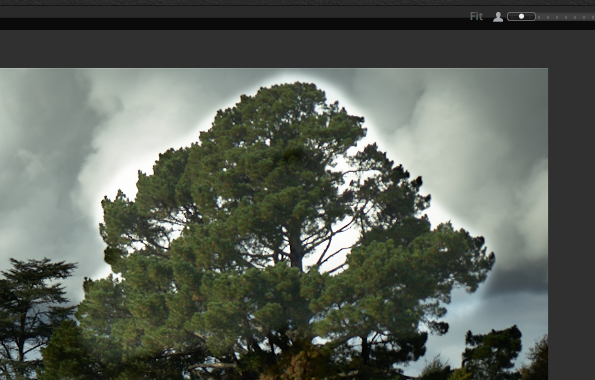
No amount of careful and precise brushing can really improve on this and it becomes frustrating going back and forth trying to repair it! So the solution is to drop the opacity of the Eraser Brush right down and gradually work away at the area to bring it back to the desired exposure.
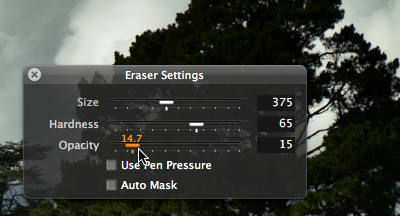
I have chosen the Eraser by simply hitting ‘e’ on the keyboard and then right-clicking on the image and lowering the opacity to 15%.
 Now I can use the brush in multiple strokes to gradually erase the mask in steps. I feel this is much more of a gentle process like dodging and burning in the darkroom was… but with a bit more predictability!
I can also open up any other areas of the clouds if I feel like it. If I go to far, I simply choose the Draw Mask at an equally low opacity and add a little more back in. With a few minutes work I am happy with the result, and it is much more natural. I also lightened the trees on the left too. 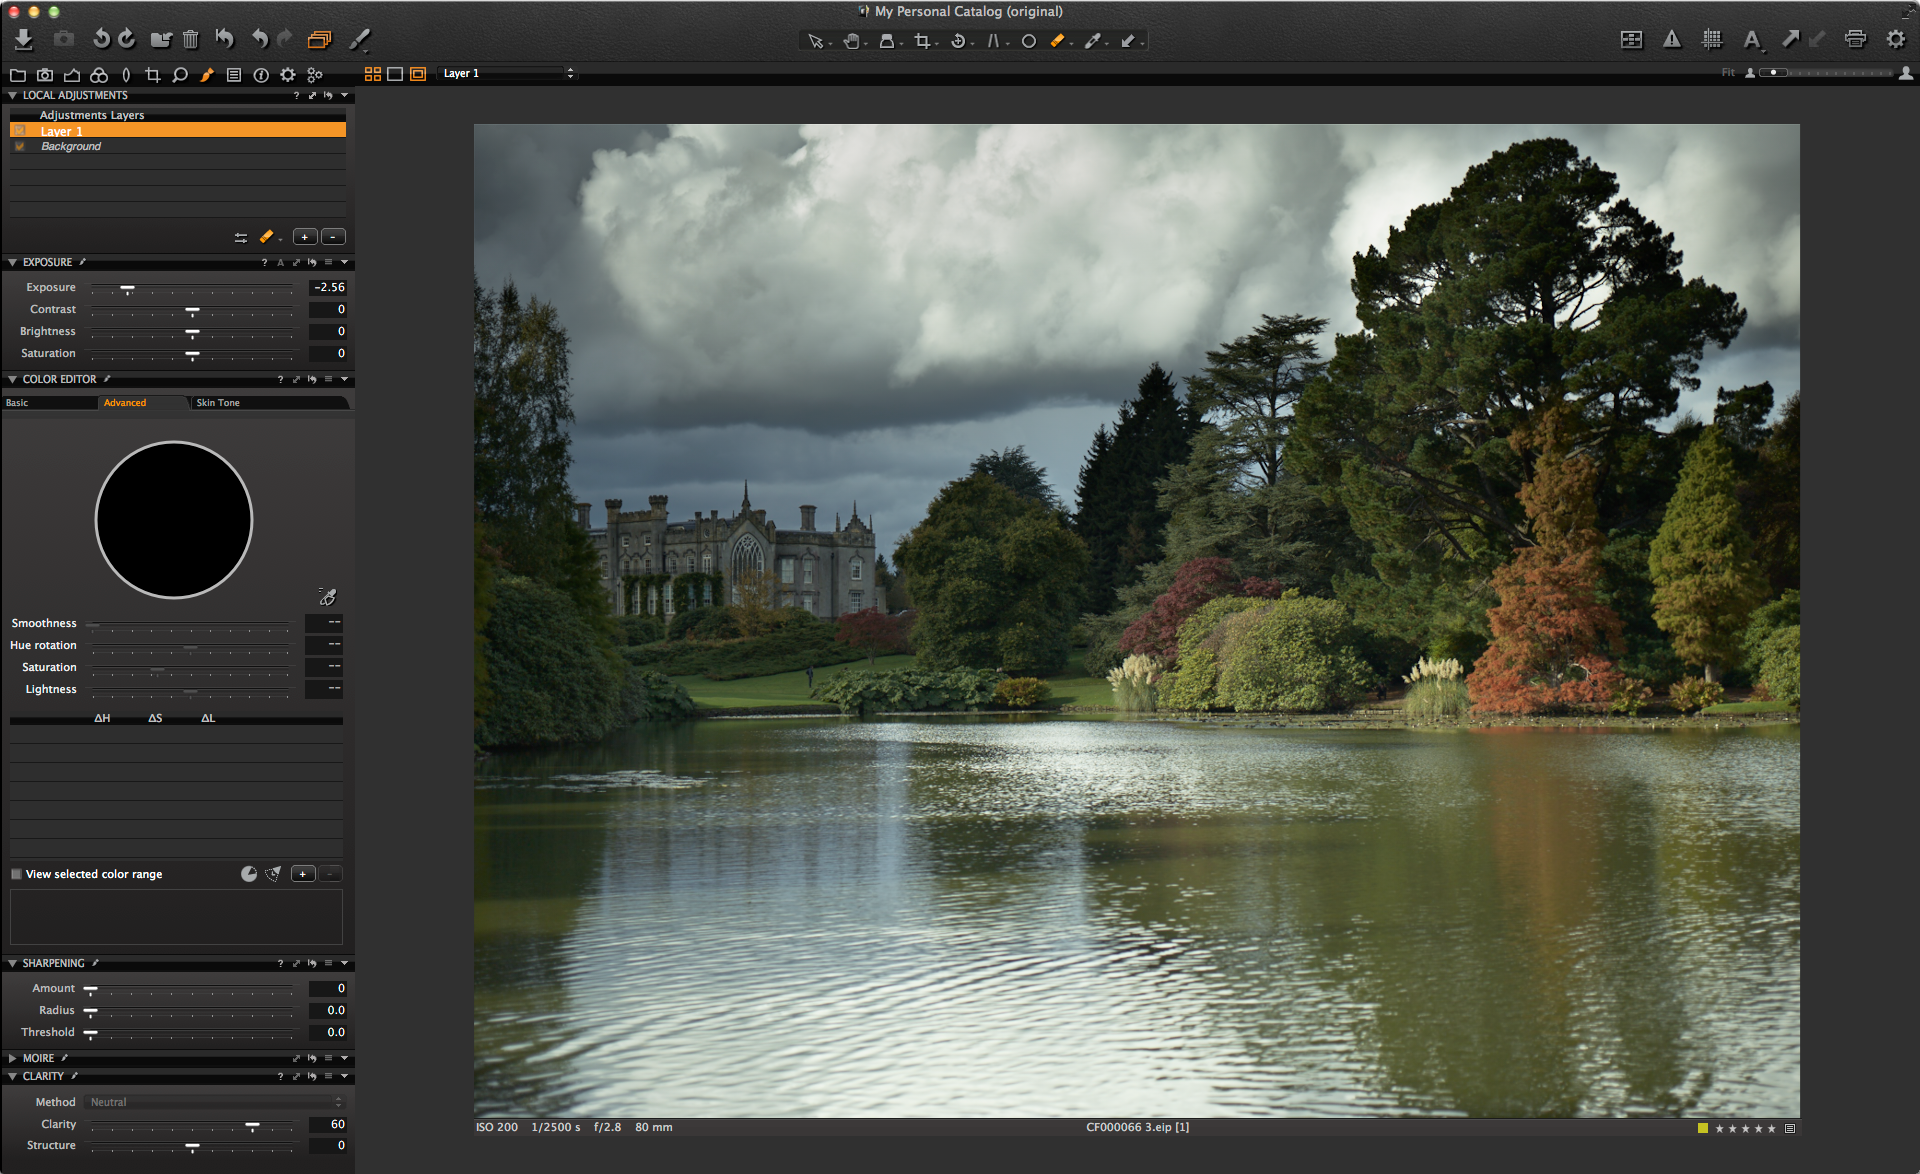
Now, I think I should fix the crop to something I like and think about next steps, for example reducing the exposure on the water highlights a little. Here is the final crop:
Now, what about if you would like to mask a whole area to begin with at a lower opacity? Let’s take the area of the water in the foreground, which is a little too bright and distracting. I will take quite a small brush, again at a lower opacity and simply outline the area, and then use the ‘Fill Mask’ option in the drop down menu in the Local Adjustments Tool.
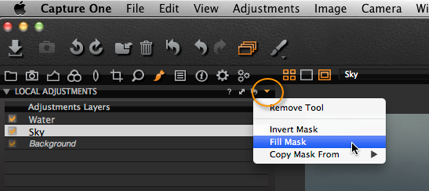 I will then get the area masked all over at the lower opacity. If you try and fill it in by simply brushing with the mouse or tablet pen, you will not get a perfectly even mask to start with. By lowering the exposure and adjusting the mask as necessary I can get the effect I want and maintain the natural look as before.
Finally, I will boost the exposure on the house a little by adding a further layer. I will draw a very rough mask again at a lower opacity and adjust as needed by using the erase and draw mask brushes back and forth. 
Also, by using this method, especially in conjunction with an exposure adjustment means you are adding an additional way to vary this adjustment. So, the more you brush over the same area again and again (in this case) will increase exposure and gradually decrease exposure if using the erase brush. With the house, I have intentionally brightened the left side of the building a little more compared to the right, just by brushing over a few more times.
Secondly, this method of using a mask gives you ‘more bites of the cherry’ to get the look you need.
To finalize the image, I will add a bit more Neutral clarity to the Background layer and increase contrast slightly.
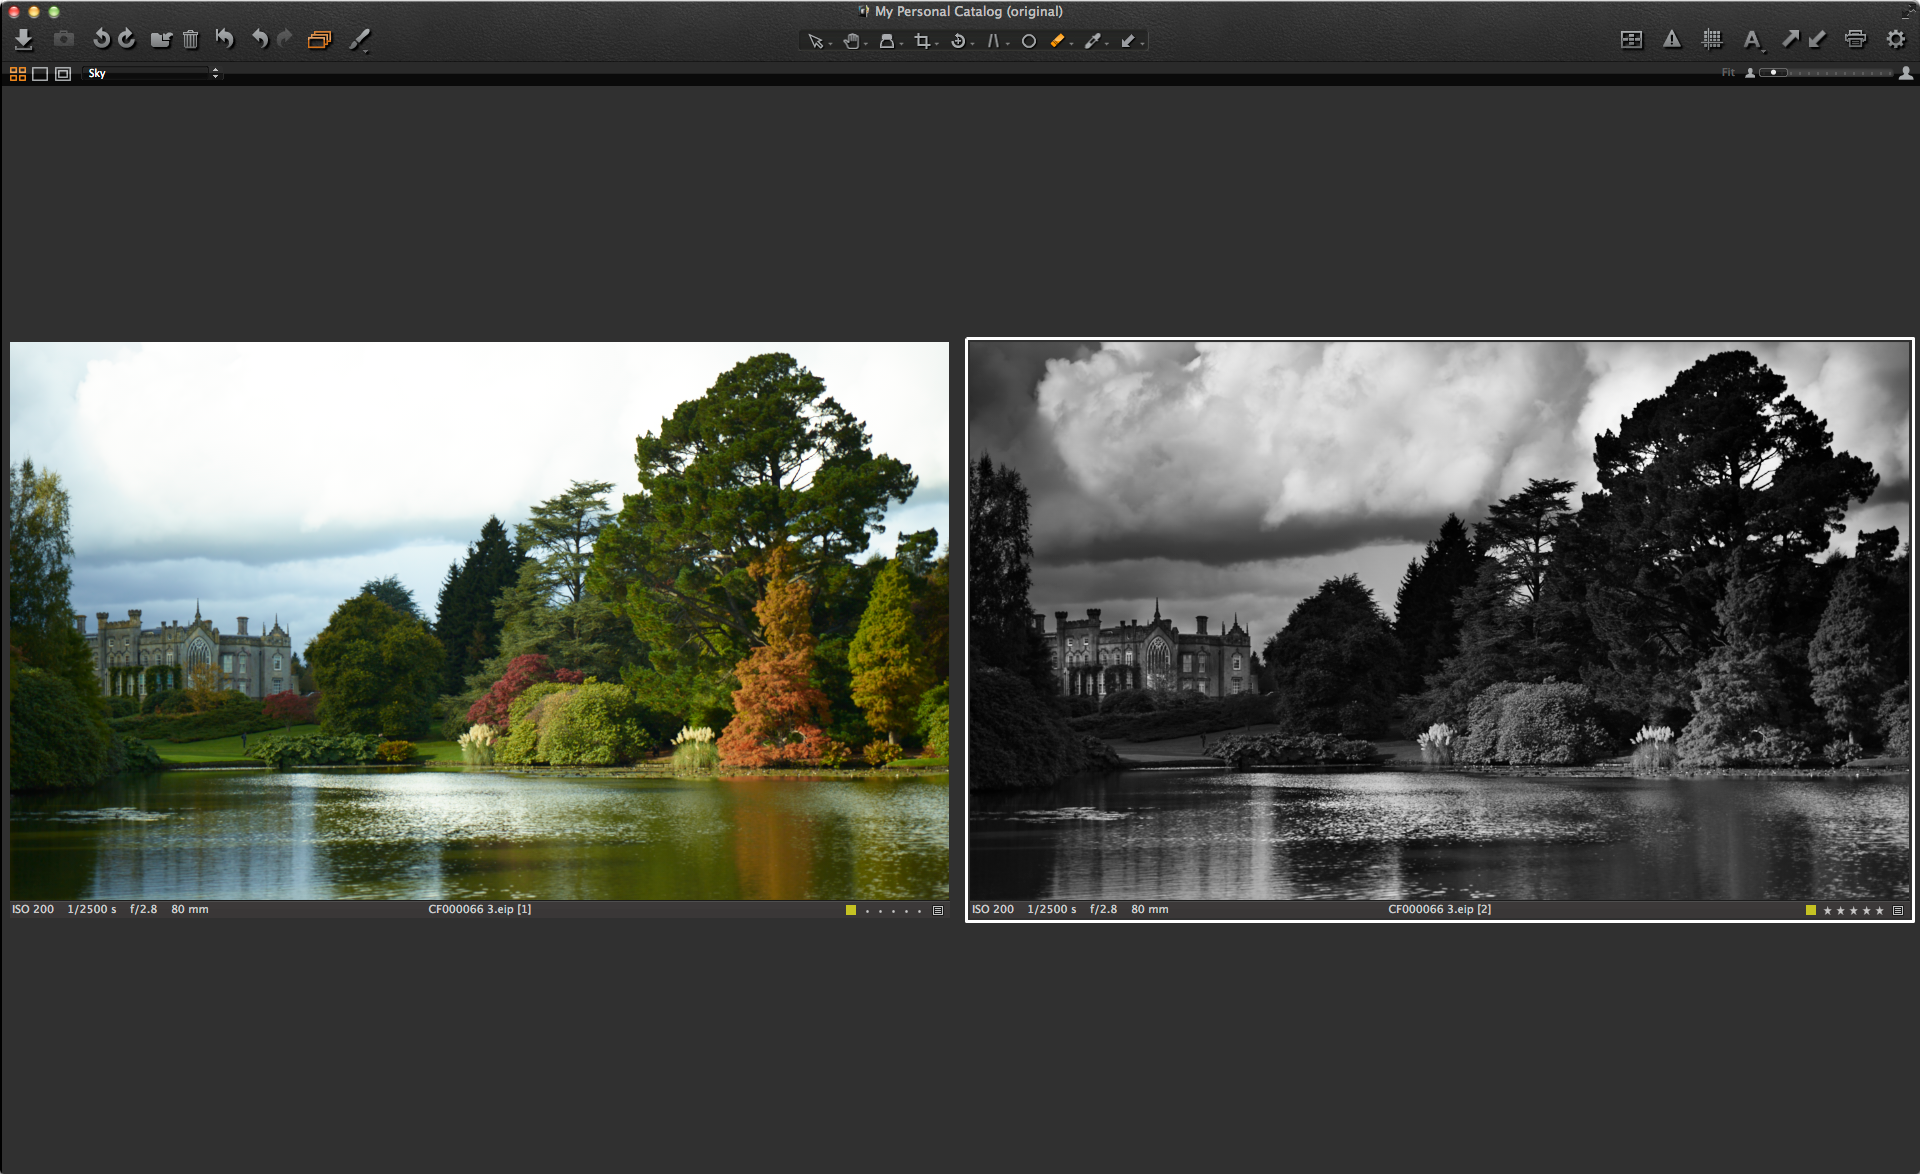
I think this may work nicely as a Black and White so I will use one of my presets as another example on a cloned variant.
In summary, by lowering the opacity we can have much more control over our local adjustments and deliver a more natural result. By working on the RAW file we maintain as much quality as possible and avoid the need to work on a large Photoshop file.
But the most important point is that it is a lot of fun!
Here is the original image with the final result:
Best regards,
David Grover


Thank you for pointing this out in such a clear way. Too many of us do these adjustments in the “I do that in Photoshop” – style. As you mentioned, performing those steps in COP7 has many advantages …
Yes agreed. Of course you can do more complex layer techniques in Photoshop but for a great deal of us, the possibilities in Capture One are often more than enough!
Nice job. The B&W looks great. I can’t wait to try this on some of my images.
Enjoy Neal!
For fading/blending edges of masks, I sometimes use a really large and soft brush at 100%.
To help describe: the center of the brush, bound by the first circle applies all of whatever opacity is selected, 95% or whatever. The second, outer ring bounds an area of transition from full application adjacent to the inner ring to none.
To blend the edge of a mask, I might move the large brush around the edges without touching the mask with the inner full application circle. The edge of the mask is gently erased using only the area of transition.
The strength of erasure can be varied by size of the brush/hardness, how close I position the inner circle, and number of passes.
For a swift transition, a large brush with more hardness. For a gentle fade like the Gradient Mask, a very large and soft brush. Huge brush. Sometimes ridiculously so for a smooth transition.
Not exactly the same technique as using the opacity slider but, maybe, some related…
It would be interesting to have the contents of the blog translated into French, Portuguese or Spanish readership would rather broader.
Thanks David, this is a useful technique to know. I do hope though that a next version of C1 includes an actual layer opacity control.
By the way, is a C1 v8 long overdue?
Hi Mark,
I agree that would be useful!
David
Nice job, you are also blessed for having such beautiful backgrounds.
Hi Samuel,
It would be nice to have that view from one’s living room, eh? 😉
This is the location..
http://en.wikipedia.org/wiki/Sheffield_Park_Garden
Designed by one of England’s most prolific landscape designers.
David
Excellent and powerfull, it works. Thanks for the detailed comment.
Should be intergrated in the next versions of the help files (on line and downloadable PDF file), for example in the paragraph on brush size and hardness.
I must confess that in the context of the settings dialogue I understand Opacity as referring to the opacity of the mask, not the intensity of the effect.
Reto
Hi Reto,
Thanks for your comments!
David
Hi David,
very nice feature, I can really use this for my work!
I tried to do a local adjustment with HDR, but it didn´t work out. I added the HDR tool to the “Local Adjustment Tool Box”, after adding a mask, I could for example change the clarity to the masked area, but changing the HDR slider changed the whole image.
What did I do wrong?
Thanx for your help!
K
Hey Kai,
Currently Local HDR is not possible in Capture One. The tools that work are by default in the Local Adjustments tool tab.
David
I understand, so maybe in the future, that would be cool!
Thanks for sharing this.
I must say that I really enjoy the local adjustments, at least often.
But, it is all about the edges.
For many tasks the possibilities offered indeed are sufficient, and you don’t have to go to Photoshop, but, this having said, I find myself considerable amounts of time drawing and erasing and re-drawing and correcting the masks over and over.
I use masking with or without automask and all other varieties (as Tan68 said “The strength of erasure can be varied by size of the brush/hardness, how close I position the inner circle, and number of passes.”); but this also means that you _have_ to do a lot, if you need precise results.
It’s all about the edges.
Once you think you are happy with the mask you might have another idea and want change the exposure, hue, clarity or noise reduction afterwards ( I am glad that I can do so), but often you’ll then find the some processing artefacts (better: undesired effects) at or around the edges, e.g. tree/sky, rock/sky, flower/background etc.
Automask often fails to separate correctly, around the edges you have either too much or too less of opacity, or you are too close or too far away from the edges.
If you enhance the masking features in future versions than Capture One local adjustments really can be a “killer-app” for Photoshop, but (in my humble opinion) masking needs to be more powerful and time-efficient.
One suggestion was already mentioned above (changing the opacity of a layer, after the layer mask is drawn), but I think you’ll have a similar effect if you just increase or decrease the local adjustment, e.g. exposure or whatever you want to adjust.
Suggestion 1:
I think a much more powerful function would be if you could change the opacity at the edges of a mask – gradually, after the mask is drawn; in other words, soften the mask edges (similar to photoshop).
Another useful function: widen or narrow down the mask by n pixels, n being a user’s choice.
Suggestion 2:
Don’t know if this should be a layer property, or a one-time action, so that you can erase this effect (re-draw) afterwards where the effect is not desired, e.g. at the edges of the image.
I would be thankful if you would enhance the options for the edges, but don’t get me wrong, I am very pleased with what is possible today already.
All the best
Marc