When speaking with photographers, it’s apparent that Capture One has become quite wellknown amongst portrait, beauty, and fashion photographers. However, it is not so much the case in the wedding industry.
Shooting both portraits and weddings, I started using Capture One for tethered shooting in the studio. Soon I realized the RAW files I developed with it looked much more pleasing to my taste. It only took a couple of weeks before I switched my whole RAW processing workflow over to Capture One. If I could get my portrait clients to look better with a simple software change, why shouldn’t I do the same for my wedding clients?
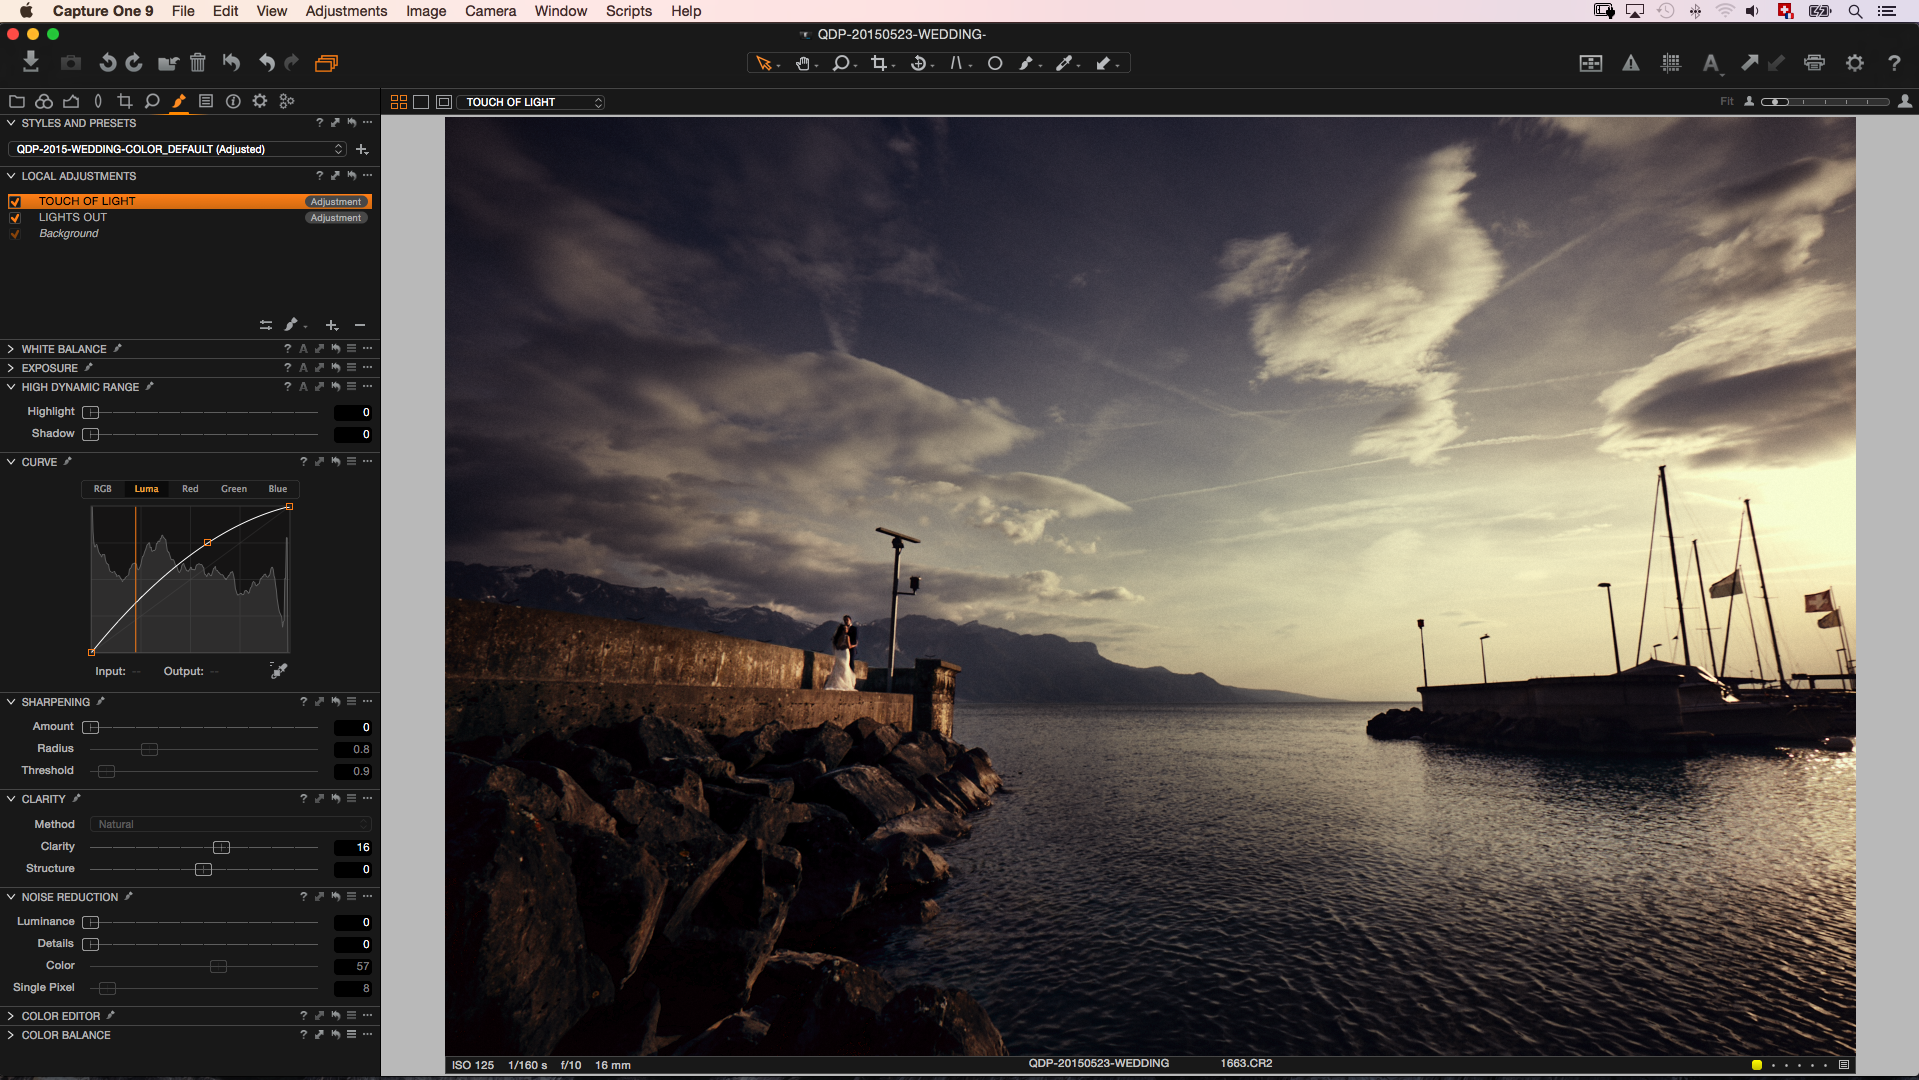
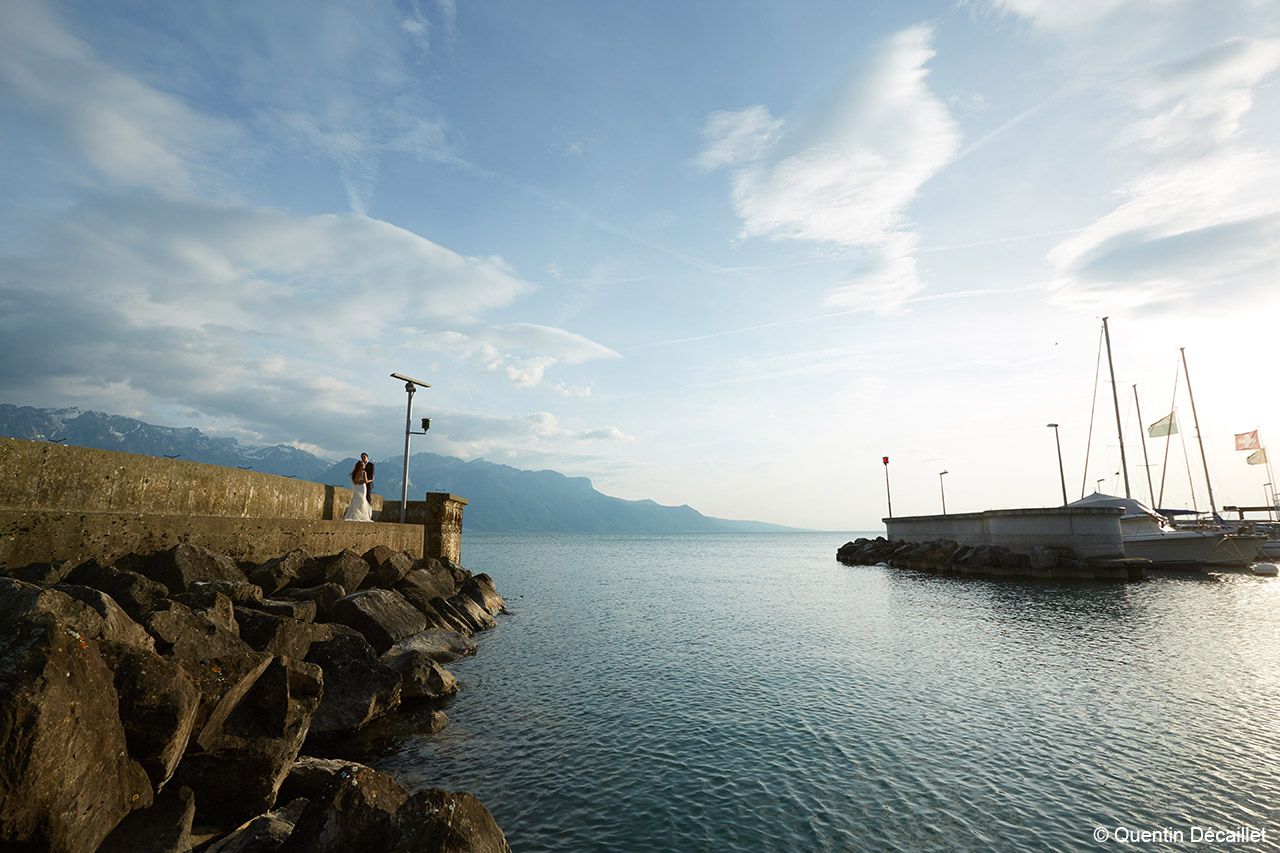 Hero shot before before adjustments made in Capture One Pro 9
Download free 30-day trial here
Step 1: Culling
Any good wedding retouching workflow requires a quick way to cull images. Everyone knows how painful it is to select the keepers.
My picture selection is split into two parts. The first is done using Photo Mechanics. Because it displays the JPEG file embedded in the Raw file, it is great to go quickly through the files of the day. In Photo Mechanics, I do not lose much time. It takes me about 20-30 minutes to go through the whole wedding. I get my number of pictures down to about 500-700 pictures.
My goal here is to keep anything that looks remotely deliverable. I do not zoom to see if the images are sharp; I do not mind under or over exposed shots. Think of this step like preparing all the ingredients on the table before cooking, taking only what is really necessary to work.
Once this is done, I trash anything that is not flagged as a keeper and import the rest into a new Capture One session. Starting with fewer pictures, also allows Capture One to work faster because it will have to generate fewer previews and manage fewer files.
When the images are imported in my Capture One session, I’ll make sure to switch my workspace to my wedding custom workspace.
Step 2: Sharpness check
The first thing I then do in Capture One is checking which images are sharp, which ones are not, way under or over exposed and delete those that are not usable for any of these reasons.
Step 3: Focus check
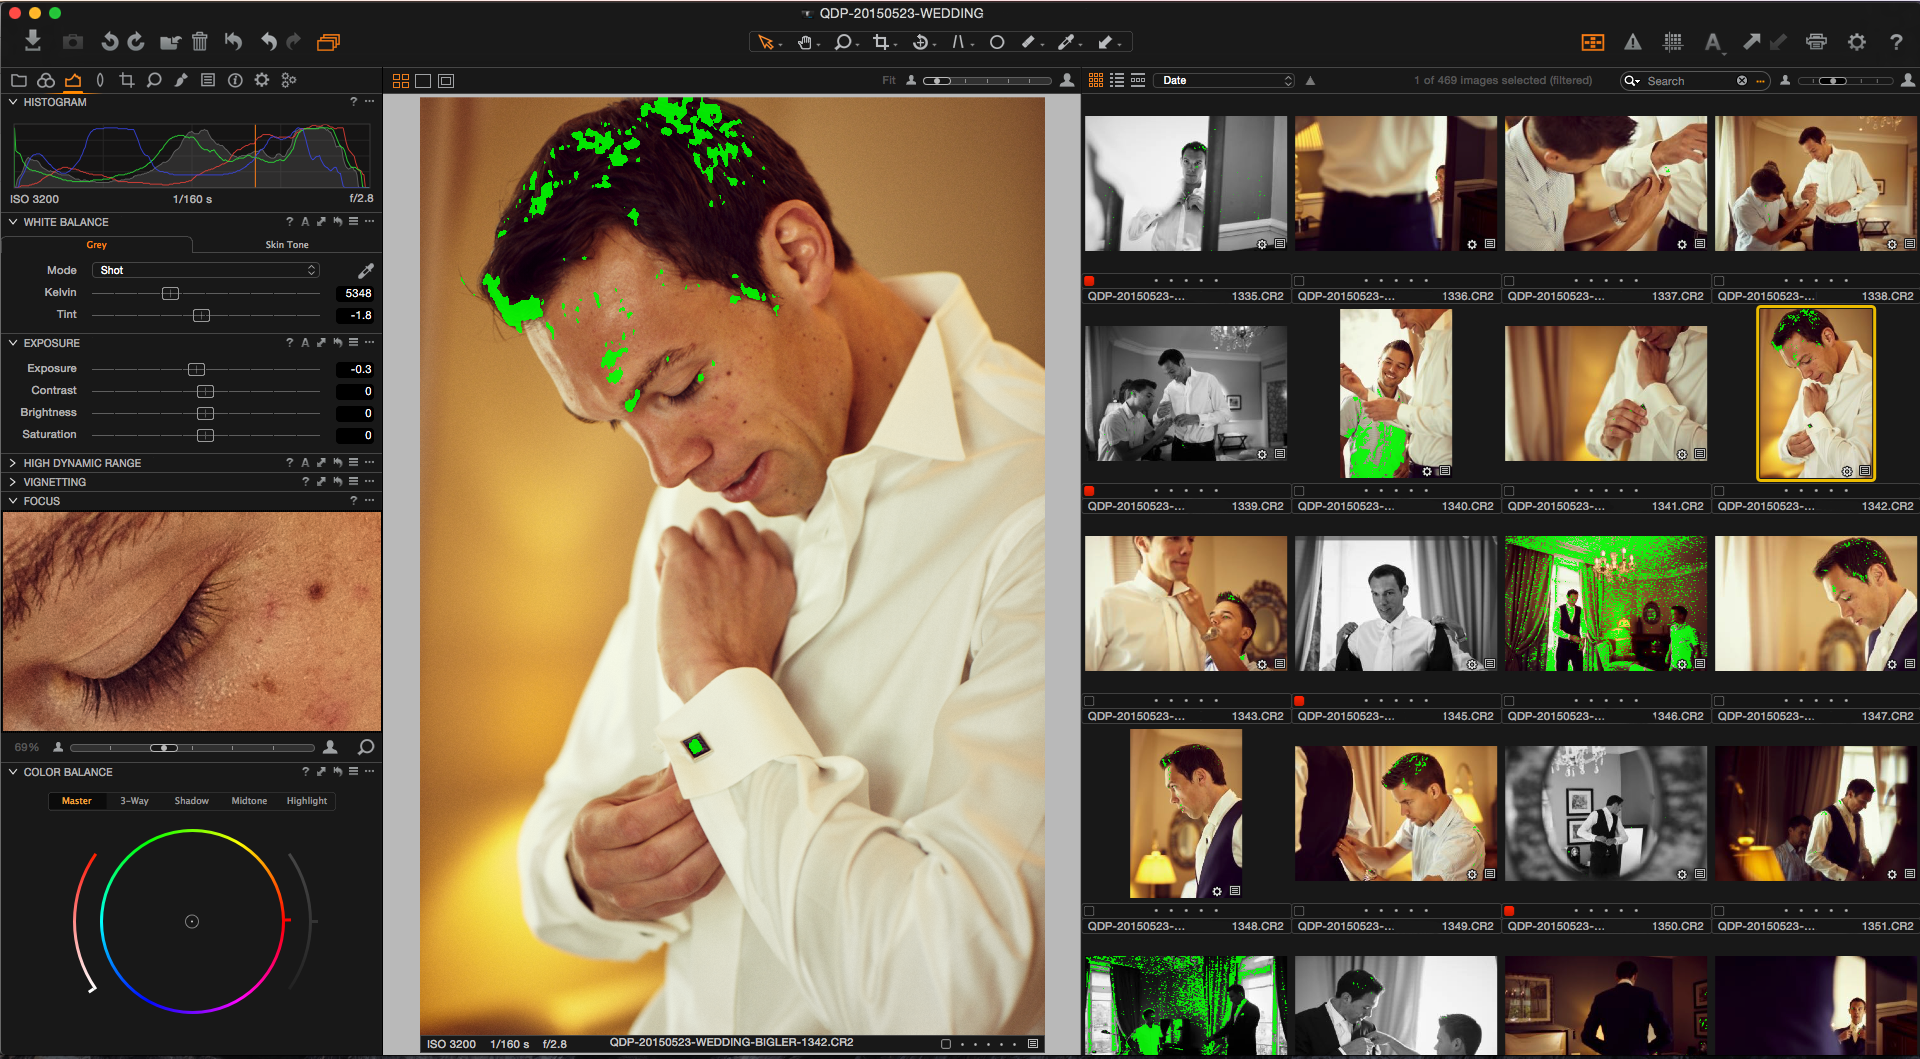
The Focus Mask tool is useful to review quickly the images and see which are in focus and which aren’t. In my previous Lightroom workflow, I had to zoom in the picture, wait for the preview to load and check if it was sharp or not. No need for that anymore.
In Capture One Pro 9, I simply activate the Focus Mask and use the focus point picker if a closer look is required. With my custom workspace, I can even check an image in full size while still having the remaining images displayed in grid style, and not in tiny thumbnails. This also helps me going through my pictures faster, because I don’t need to switch from one view or module to another.
Step 4: Exposure correction
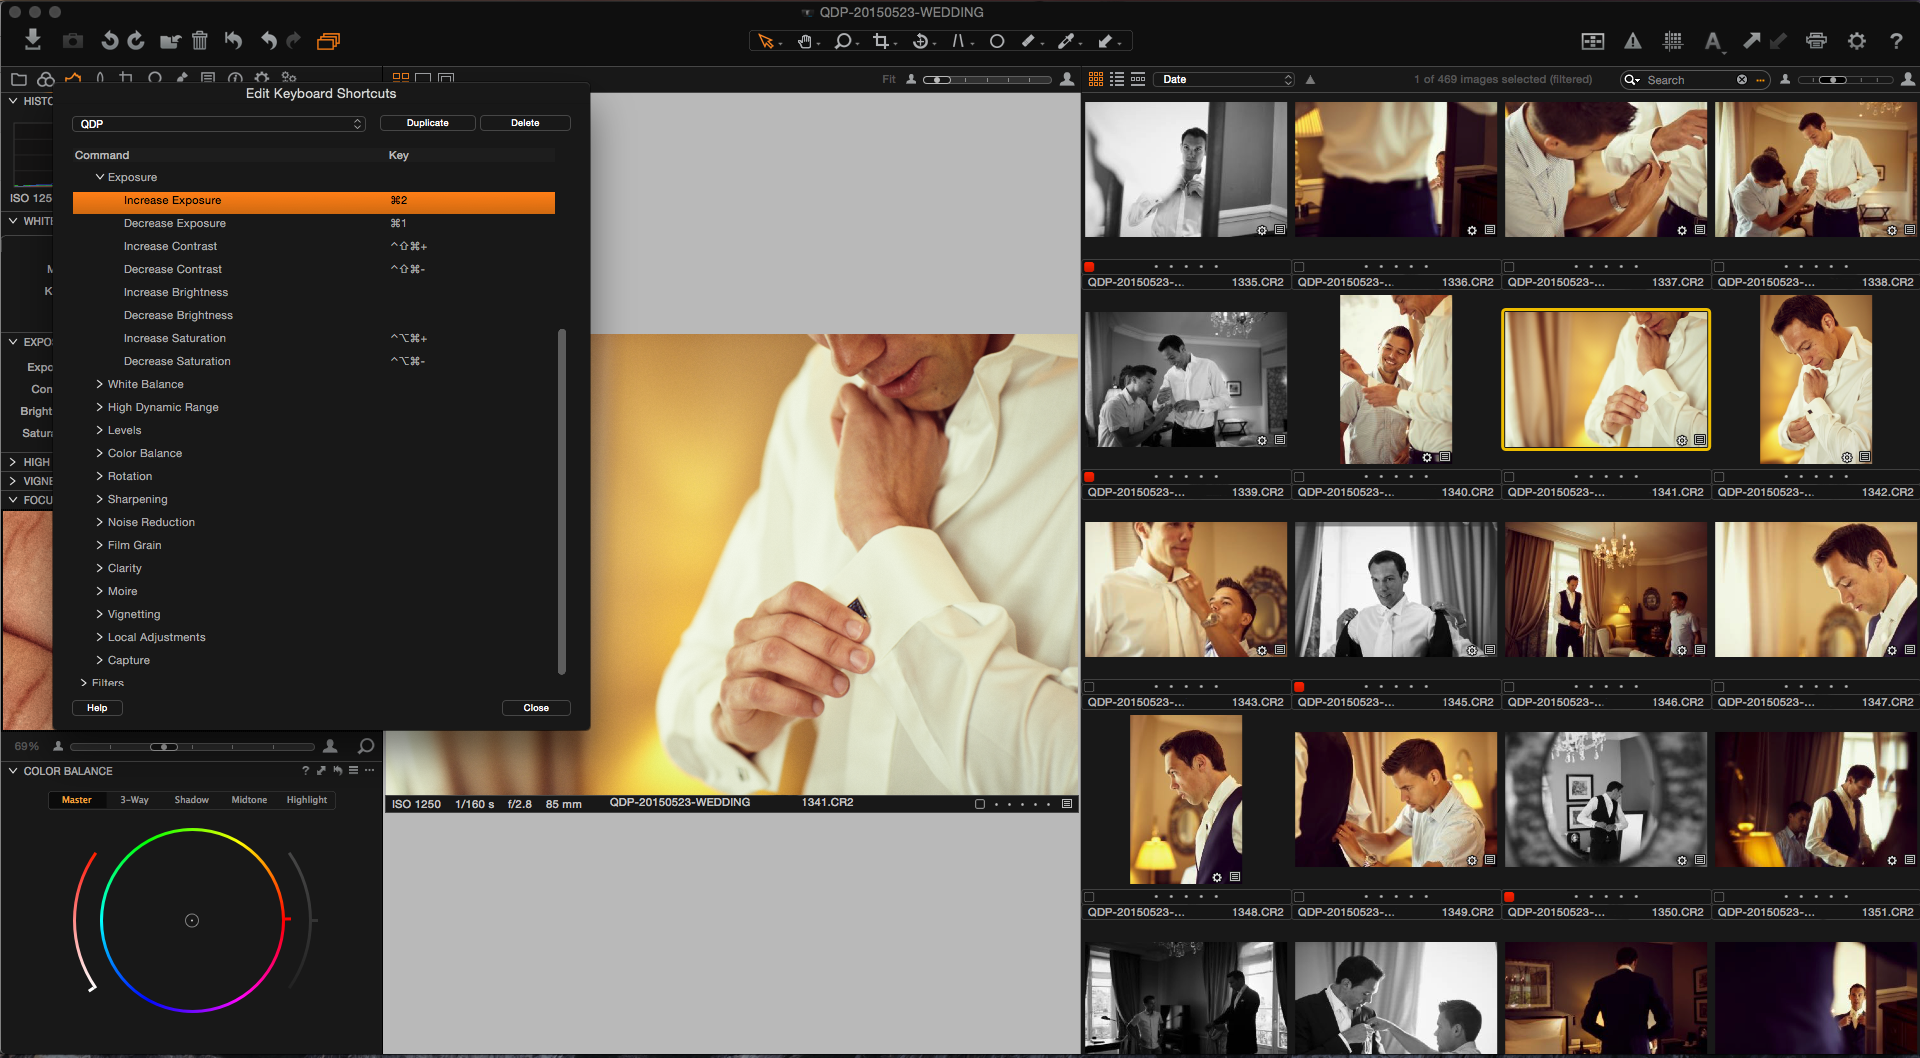
While checking the focus I usually also correct the exposure when it is needed. Thanks to Capture One’s customizable shortcuts, I can increase or decrease the exposure by 1/10th of a stop using cmd+1 or cmd+2. So whenever I click on an image, I can quickly adjust the exposure without the need to play around with the slider. The less the mouse is used, the faster we work! Any geek will confirm that. Being able to customize shortcuts was a game-changer for me in that regard. Check out this video tutorial for customizing your shortcuts.
Step 5: White Balance According to Skin Tone
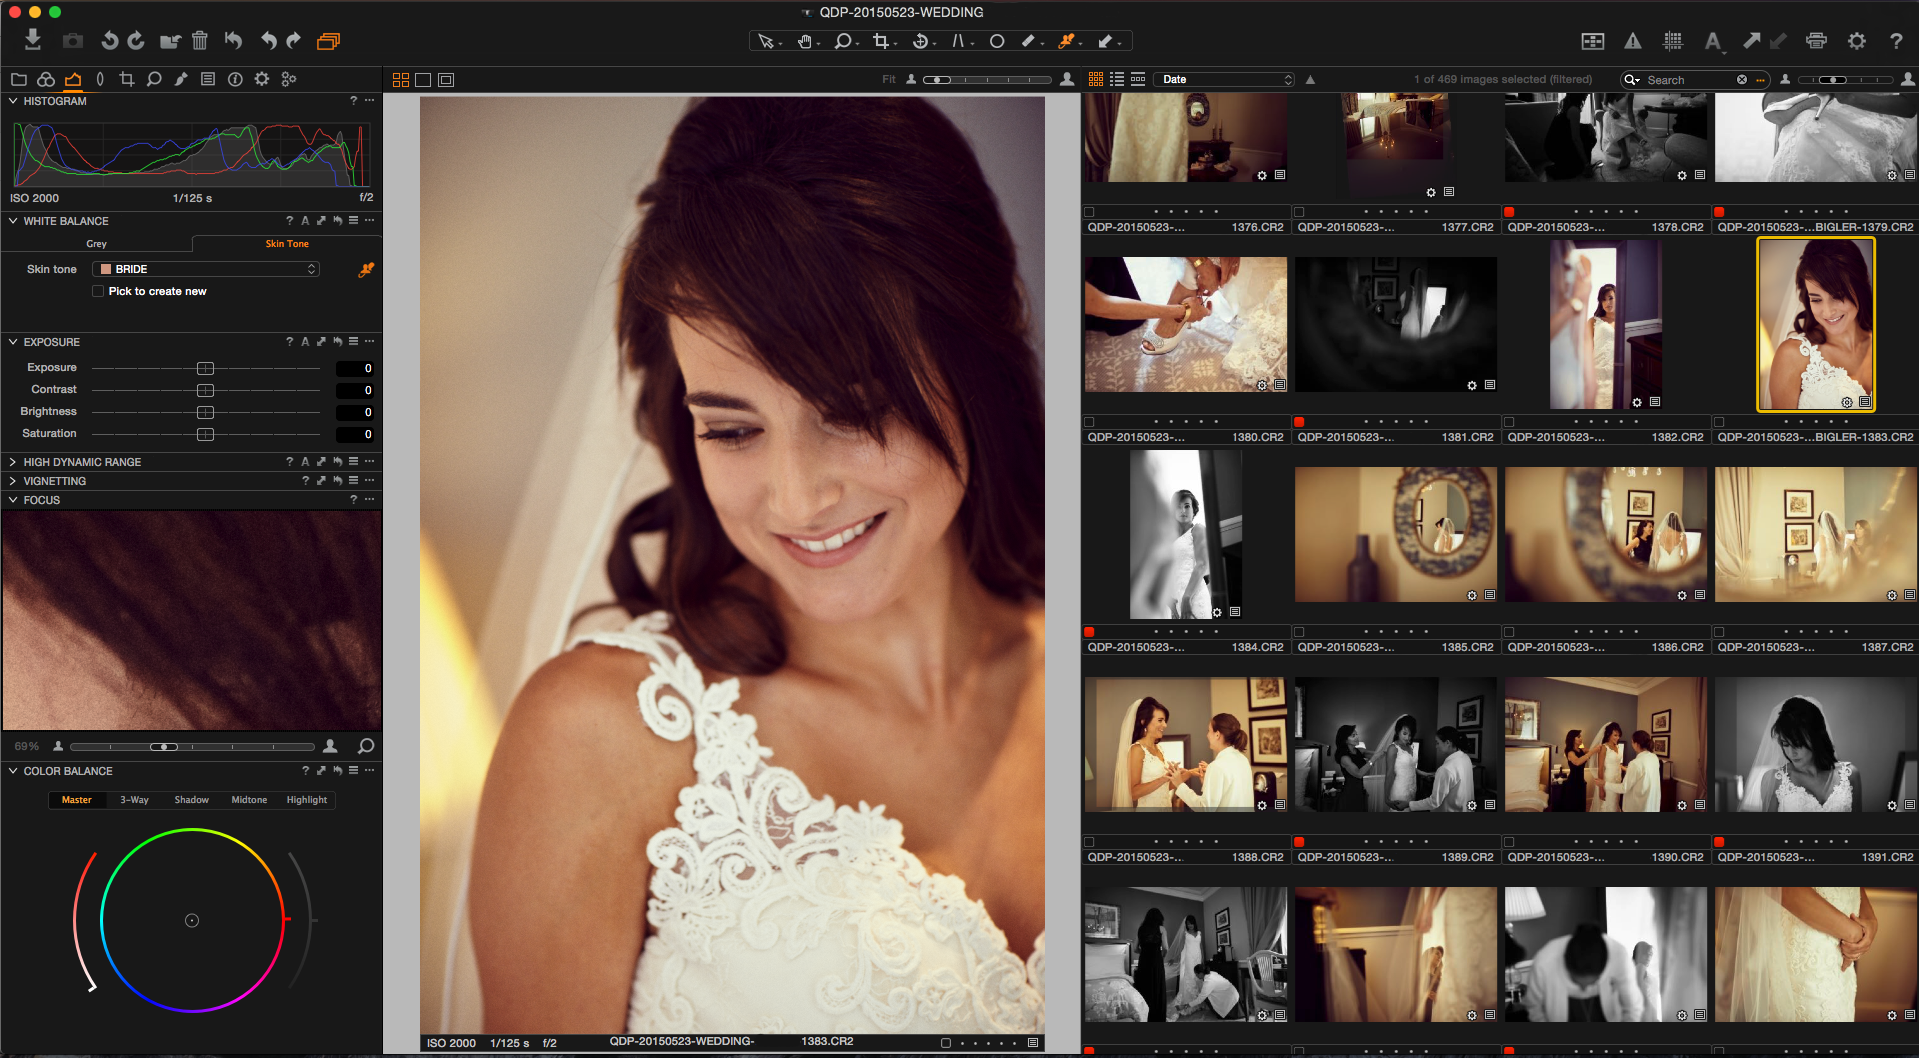
Now that I am left with only the pictures I like and that are usable, I start color correcting them. The first thing I do is correcting the white balance. Capture One Pro 9 has the perfect tool for wedding photographers: a white balance picker that will work based on skin tones.
Why is it so great? Well, the reason is quite simple. Your bride is most likely looking gorgeous in the morning after her makeup is done. However, after she stayed under bright sunlight for a couple of hours (ceremony, couple pictures, formal photos, cocktail, etc.), chances are her face turned slightly red, or at least is more saturated because she tanned. Once the reception starts, the alcohol will probably not help with the redness.
However, the bride probably does not care about this. She wants to look great on her pictures. Because in her head she was beautiful on that day!
Setting the white balance according to her dress would leave her face red. Setting it according to her skin tone to get the same tone across all images would correct that problem. Now, you are probably going to tell me that then her dress will not be white anymore. But is it easier to desaturate her dress to get pure white or to correct redness on her face?
So what I do is I set the white balance on one picture where I judge her skin tone to be good, and then apply it to the remaining images. Usually, a picture right before entering the church or just after makeup was done will do the trick. Avoid a picture that was shot with too high of an ISO as the colors are usually not at their best. Also a close-up shot is better suited to create the white balance preset as it will be easier to pick the desired color.
To apply the settings to the rest of the pictures, I usually correct the white balance for one picture of every moment of the day, and then copy/paste these settings to the other images that were taken at the same location and moment. Sometimes, before copy/pasting the development settings, I’ll also use the Color Balance tool if there’s a strong color cast that cannot be fixed with the White Balance tool. This is especially useful for reception shots.
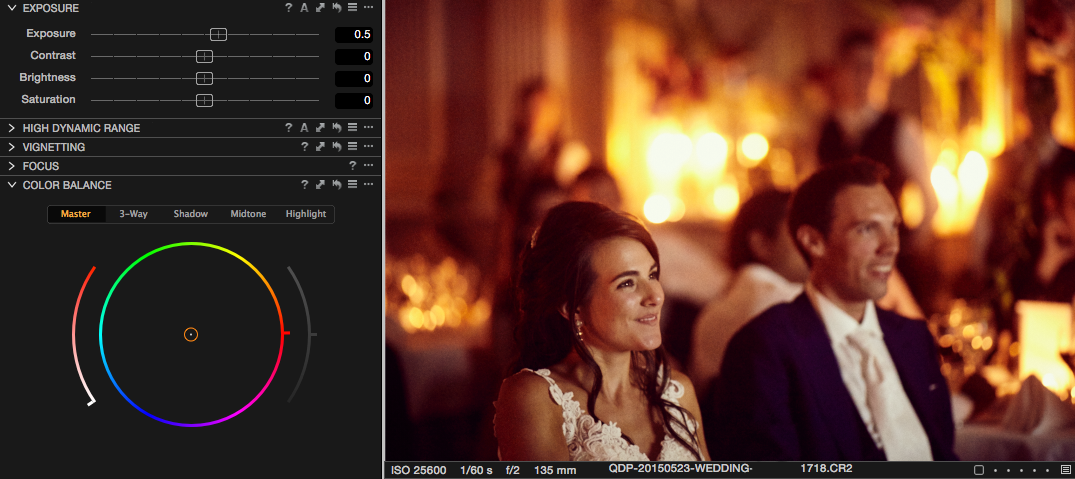 Image before Color Balance correction in Capture One Pro 9
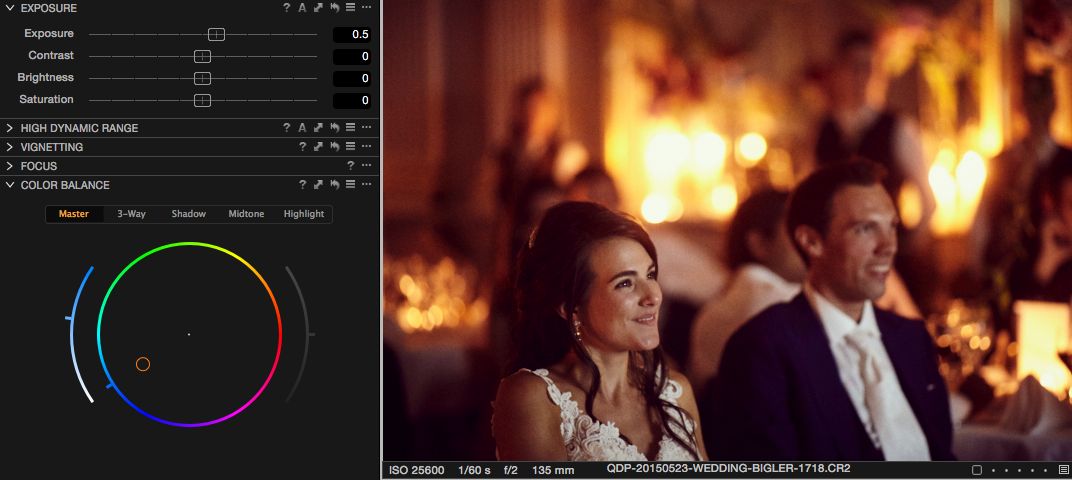 Image after Color Balance correction in Capture One Pro 9
If one picture is too much work to color correct, I usually flag it in red. Every red flagged image in my wedding workflow is a picture that will be converted to black and white using a preset.
Step 6: Presets
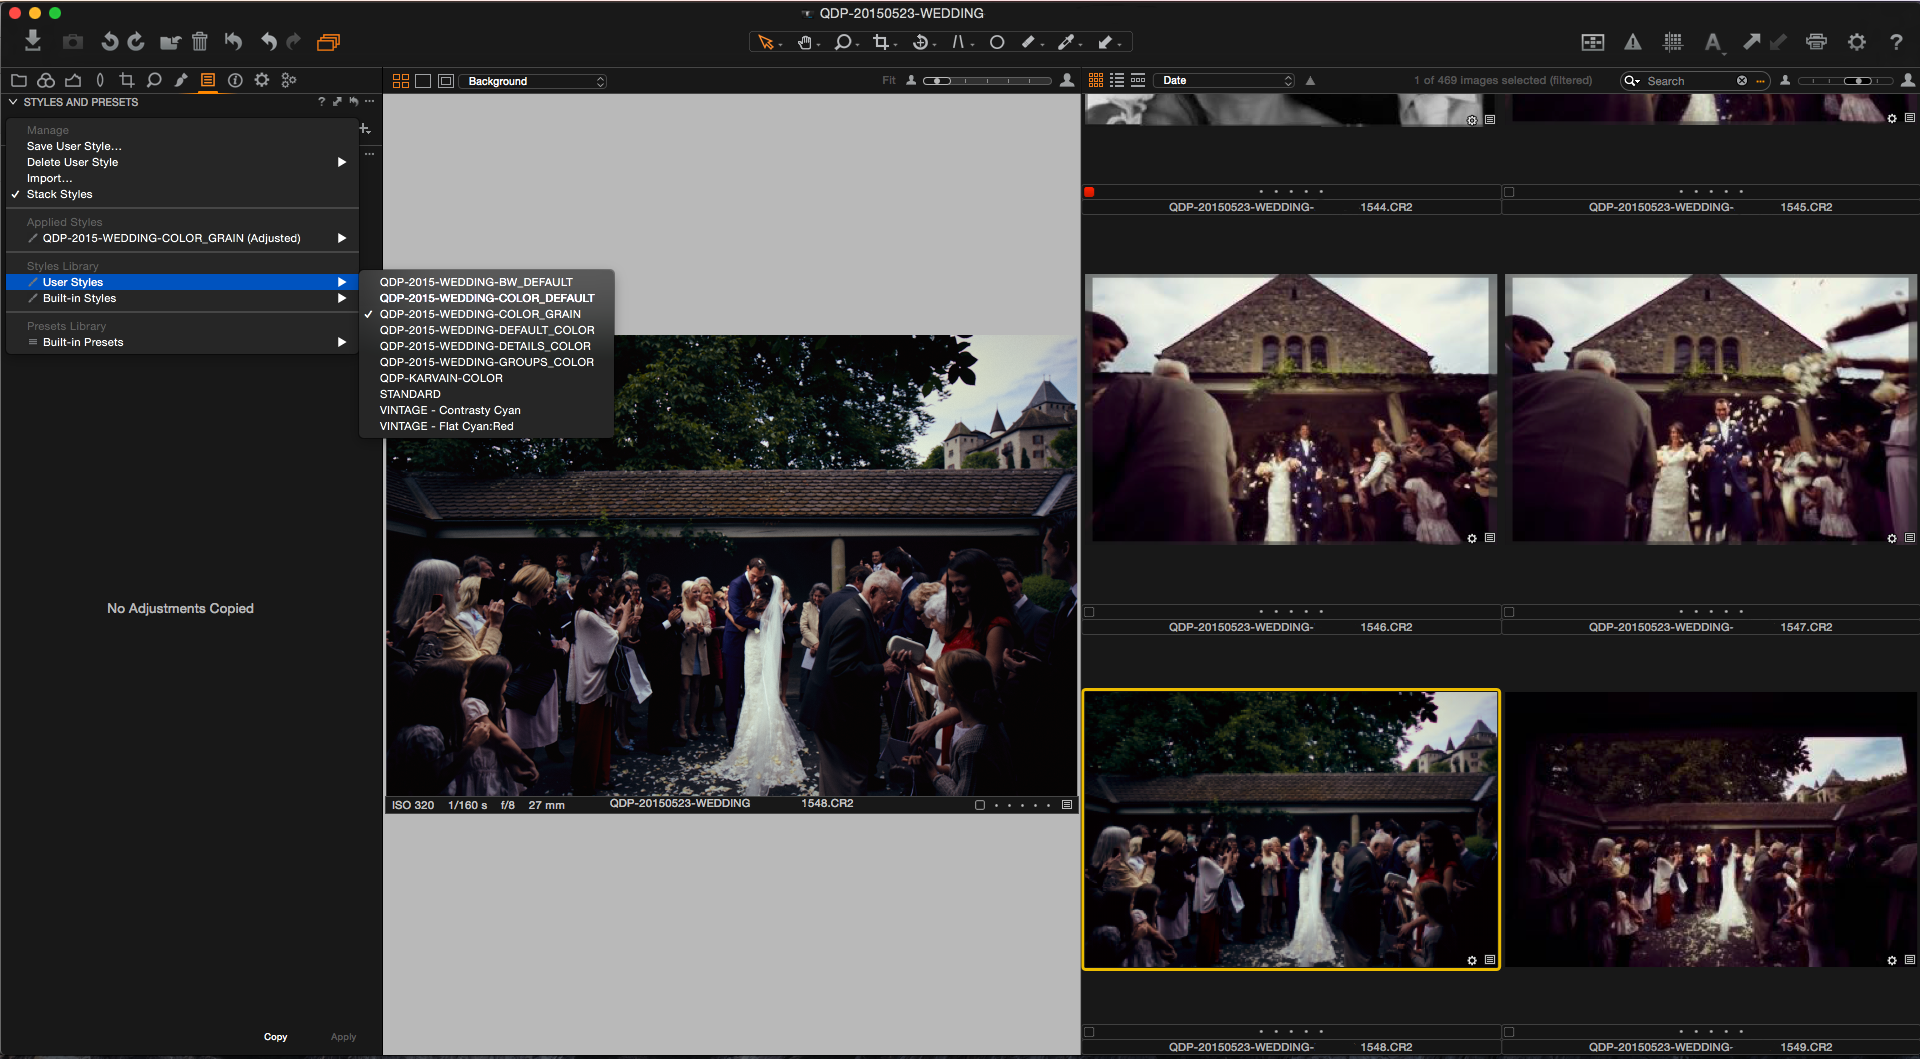
At this point, my pictures should be either color corrected or flagged for black and white conversion. However, in either case, exposure and sharpness are on point, and I have files that could be printed. Before exporting my files as JPEGs, I apply my personal presets to give it my “touch”. Note that my presets do not alter the exposure. Otherwise, the previously done work would be made useless.
I use two presets: one for color, one for black and white. Nothing crazy, just simple color toning, change of clarity and contrast, add some grain, cleaning noise and that is about it.
My wedding retouching stays quite basic for digital files delivered to my clients. Only the pictures going into the album will be more refined. For the album, once the couple has validated the design, I will go over each of the selected pictures and redevelop them individually to get the best out of them. Much like I’d do for a portrait session. This would include local adjustment, cloning and healing, making skin tones uniform or perspective correction.
Step 7: Exporting files with Process Recipes
Before I export my developed raw files, I go through all the pictures in grid mode once again, with the images displayed as big as possible. I always want to make sure there isn’t any inconsistency. Then I export them in three different formats: full resolution files for archive purpose, 12×8″ for client delivery, and 900px on the long side at 72 dpi for the web.
What changed in my workflow coming from Lightroom, is the speed at which I work. With Capture One Pro 9 , I feel like I can work the way I want to and thus faster. Having the possibility of customizing both the workspace and the shortcuts, was liberating. Also, with Capture One Pro 9 I can work using a combination of the grid mode and the full-size view on one screen without having to wonder in which module I am and what is achievable using this module.
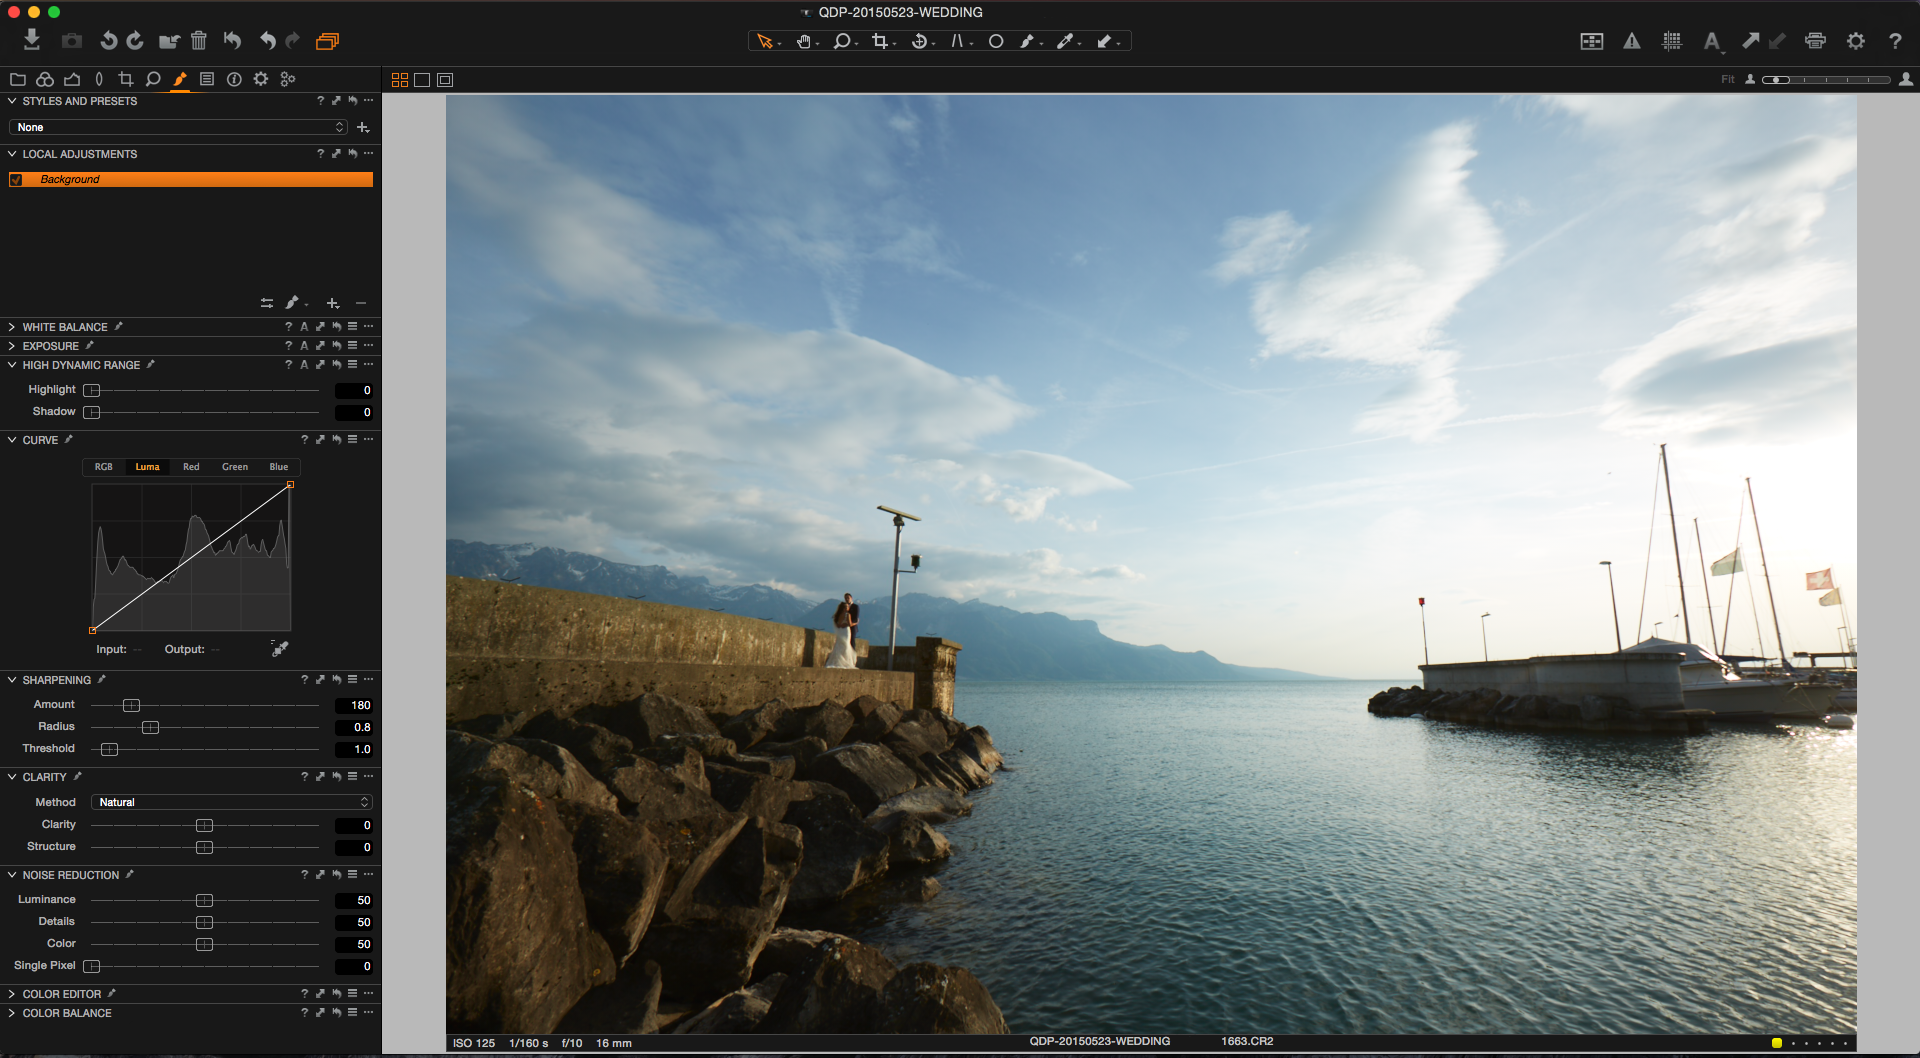
Finally, with the Local Adjustments options offered by Capture One Pro 9, there is less need for Photoshop. Dodging and burning can be done directly on the Raw file in Capture One, custom vignette as well using the new Luma Curve tool and the Local Adjustment brush. I am looking forward to next year’s season to take full advantage of the new features of Capture One 9!
If you want to learn more about using Capture One Pro 9, be sure to subscribe to the weekly webinars.
Download free 30-day trial here
Best regards,
Quentin Décaillet
Quentin Décaillet
Quentin Décaillet is a product and beauty photographer based in Switzerland. His endless curiosity and hunger for learning new things have led Quentin to create a unique paradoxical visual style. Bold, contrasty, and vivid, his imagery is a combination of his deep passion for art and technology. When Quentin is not working on a project, you’ll most likely find him trying new techniques to push his art further.





Good Tips, thank you!
I am also a wedding and portrait photographer and I just switched to C1Pro; could not be happier
Hi Michael! I’m sure you won’t regret your choice. I personally couldn’t go back to my Lightroom workflow. The degree of customization of Capture One as well as the result I get with minimal work out of it is far superior.
J’aime beaucoup le côté sombre apporté
il donne un aspect magique
ModiJobi
Merci Pier. Sur la dernière image il s’agit d’un traitement réalisé avec Capture One 9 et un burn de toute l’image à l’aide d’une courbe luma sauf du couple. La possibilité de régler le flow et l’opacité, ainsi que d’utiliser la pression du pen de ma tablette wacom me permettent d’être vraiment précis dans le travail des masques d’ajustments locaux 🙂
Great article…Good Job!
With regards to C1 producing slower previews in comparison to Photo Mechanic. Have you tried reducing the size of your proxy files(i.e your previews displayed) by changing the settings in the C1 preference menu…?
If you follow the path C1>Preference>Image and under Cache: Preview image size (px) and you lower its value to that of your monitors resolution…I am sure you’ll find it will generate quicker previews.
Give it a try.
Hi Jean-Pierre! Thanks for the tip. I actually already use this setting when retouching as I often times alternate between a 15″ MBP and a 27″ external screen depending on where I work. For culling a wedding I still Photo Mechanic to be faster as it loads the embedded JPG and not a preview of the processed raw. Perhaps if editing on a workstation Capture One is fast enough. But on my MacBook Pro there is a difference between the two software 🙂 I prefer using each software for what it does best: Photo Mechanic for a quick first selection, Capture One for the final selection and raw processing as well as light retouching, and Photoshop for fine retouching.
Thanks Quentin!
Useful tips as I just started with wedding photography and still spending way too much time in dealing with the huge amount of images after a full wedding day.
Just wondering, have you ever used the “Match total Exposure” command in LR in order to adopt a bunch of images taken under the same lighting conditions? If Yes, is that something that you miss in COP or is there a way of achieving a similar result without such a command?
Cheers, Frank.
Hey Frank,
Never used it. I think I made the switch to Capture One before it was available or I never found out about it. Such a feature doesn’t exist within Capture One, but if the changes are minor, you can make adjustments very quickly using custom shortcuts for exposure. For example, I have set two buttons on my mouse for that, this way, I can quickly click on the picture I want to adjust and then adjust its exposure with two other buttons without having to use my keyboard. Very handy! I went over it in a recent Webinar that you can find here: https://youtu.be/tEheKiYlPfM?t=17m34s (this link should get you started right at the time I speak about adjusting exposure quickly).
j’ai acheté capture one 8
j’ai perdu la clée d’activation pouvey-vous me la renvoyer
merci
Bonjour assemat, la clé est normalement retrouvable dans votre compte utilisateur en vous connectant à cette adresse: https://www.phaseone.com/en/GlobalMenu/LoginPage.aspx?rurl=%2fen%2fSupportMain%2fContactSupport.aspx&burl=%2fen%2fSupportMain.aspx
Autrement, n’hésitez pas à contacter le support via votre compte (même lien que ci-dessus) pour plus d’aidre 🙂
Muy bien, ¡excelente trabajo!
I just got the new styles pack. I wonder which ones that you are liking the most?