Learn how combining masks unlocks more flexible editing in Capture One with almost infinite possibilities.
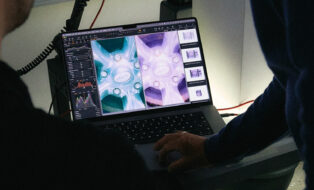
It’s finally here. The possibility of combining masks while keeping the flexibility of editing them individually. It was one of the highest-rated feature requests, and with the recent additions of many types of AI masks, it made sense to implement now, more than ever.
You can combine masks by adding, subtracting, or intersecting them. Intersect will make a mask in the overlapping area between the masks.
If you’re thinking to yourself, “cool, but I’m not sure I need it for my editing,” you’re in the right place. I will try to show some different examples that might spark not only interest in this feature but also inspire the creative possibilities it has unlocked.
So, what does it unlock exactly?
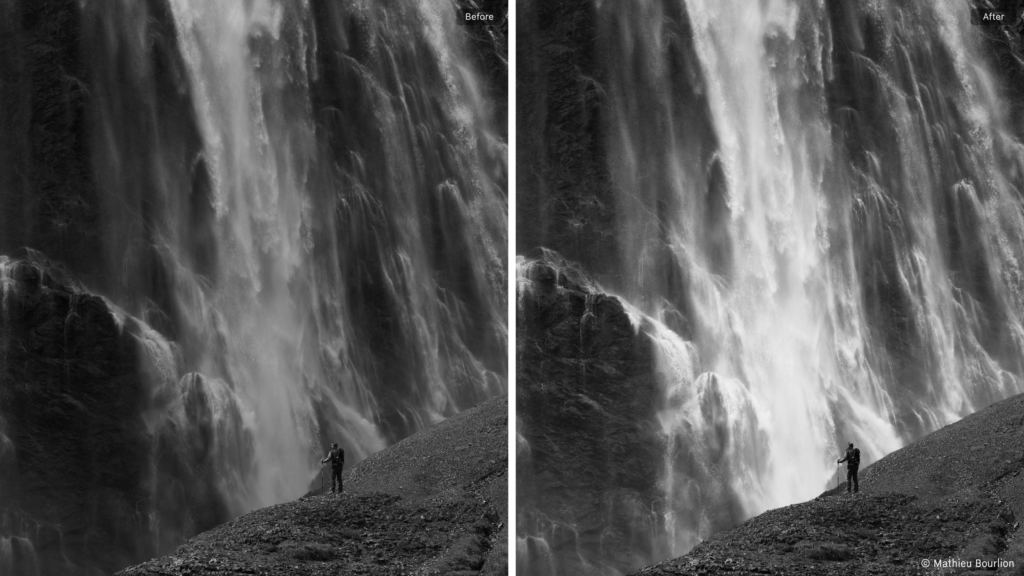
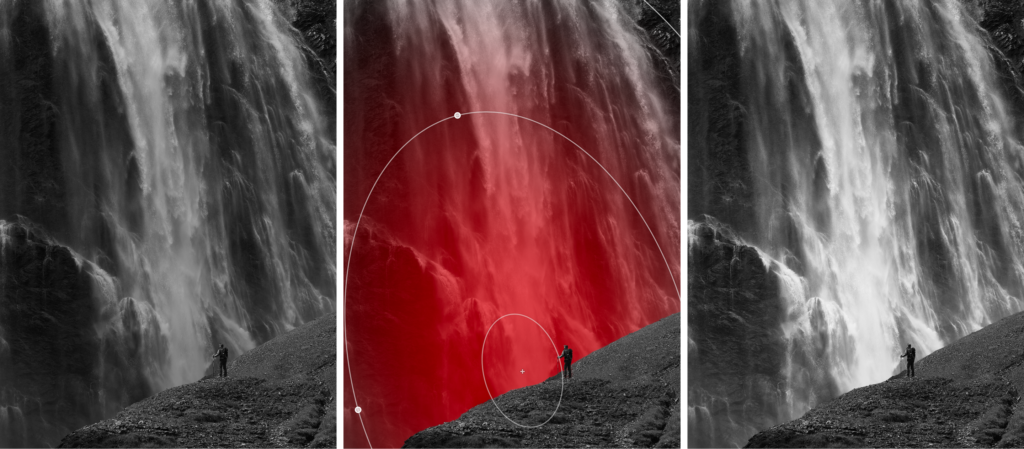
Imagine you have this image of a person in front of a waterfall, and you would like to lighten the waterfall to separate it from the foreground. You could brush it, create a Gradient, use AI Select, or many other options. However, they wouldn’t be as flexible as combining two masks.
What would you do instead?
First, create a Radial Gradient in approximately the position and size you want. You can always adjust it afterwards.
Once you have your first mask, click the new ‘Combine Masks’ button. Here you have three options for the type of combination. Add, Subtract, and Intersect. For this example, I used Subtract, as I want to subtract the foreground. For the type of mask, I used AI Select to manually select the foreground and person.
Pro tip: Masks created with AI Select will be more detailed if you zoom in before you click on the image.
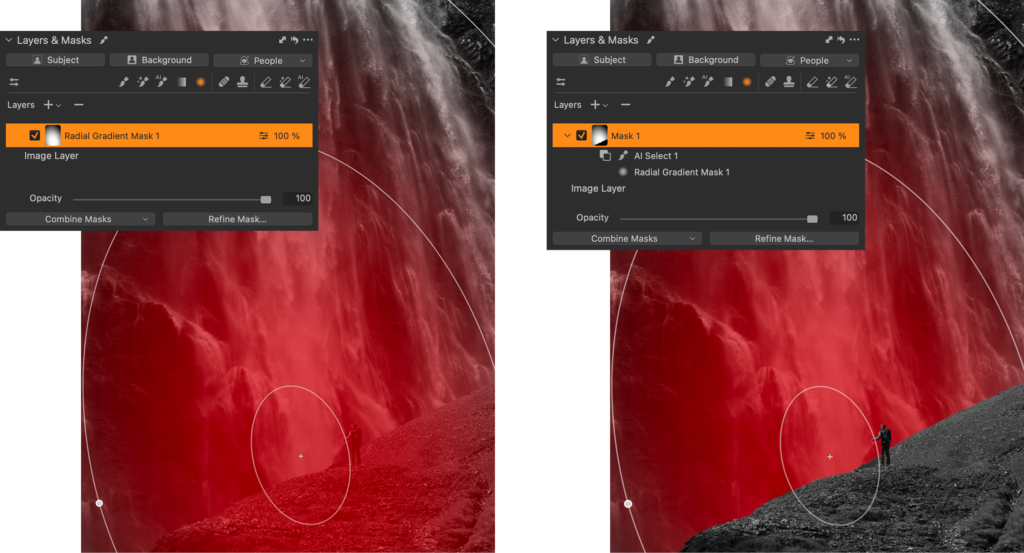
The result will look like this in the Layers tool. You still have the two individual masks; the Radial Gradient and the foreground masked with AI Select. They are now nested under the new combined mask, Mask 1. You can edit each of the individual masks by selecting them and using masking tools.
Now you can freely move or resize the Radial Gradient behind the foreground, getting exactly the look you’re going for. By applying some brightness, levels, and clarity, the waterfall truly stands out.
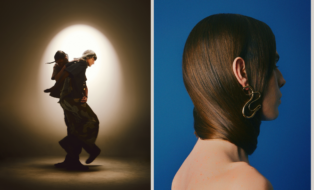
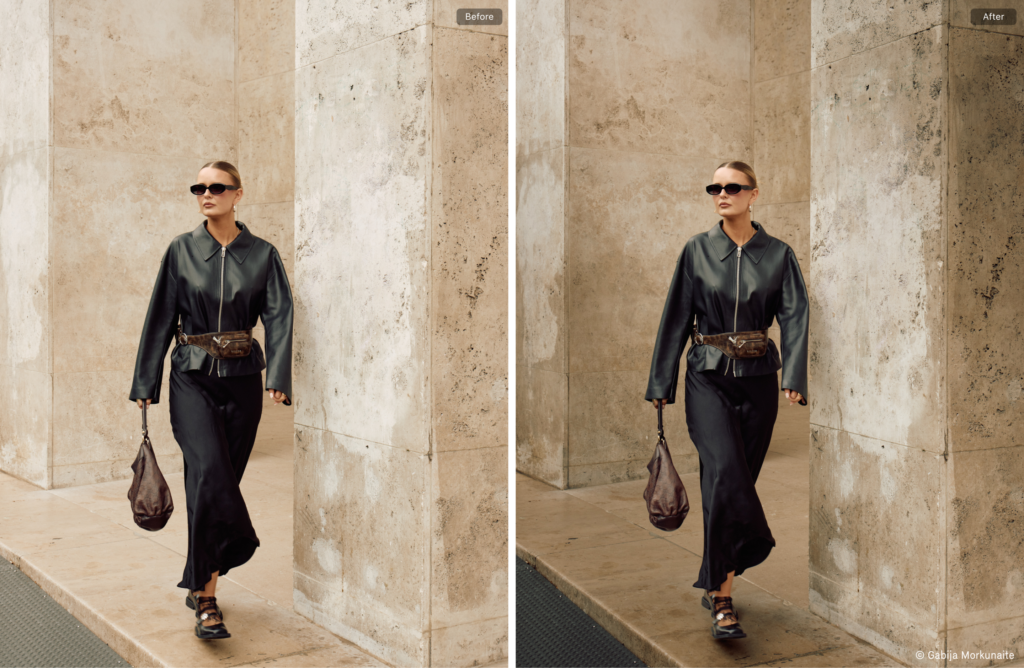
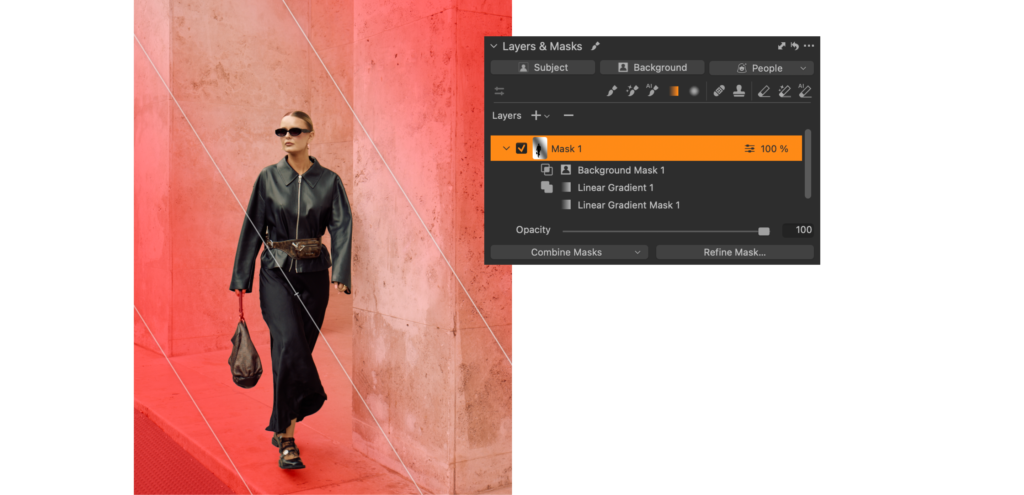
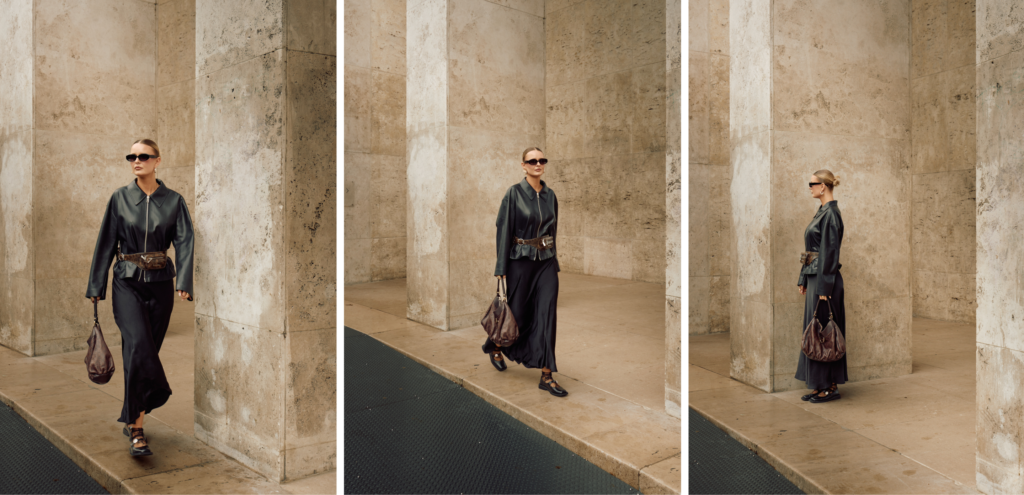
Gradient on the background
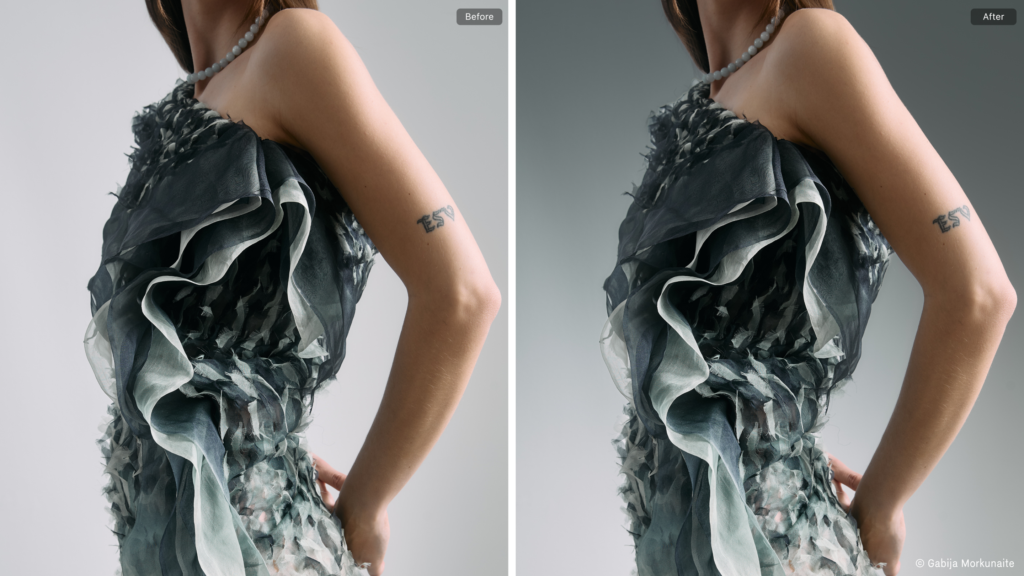
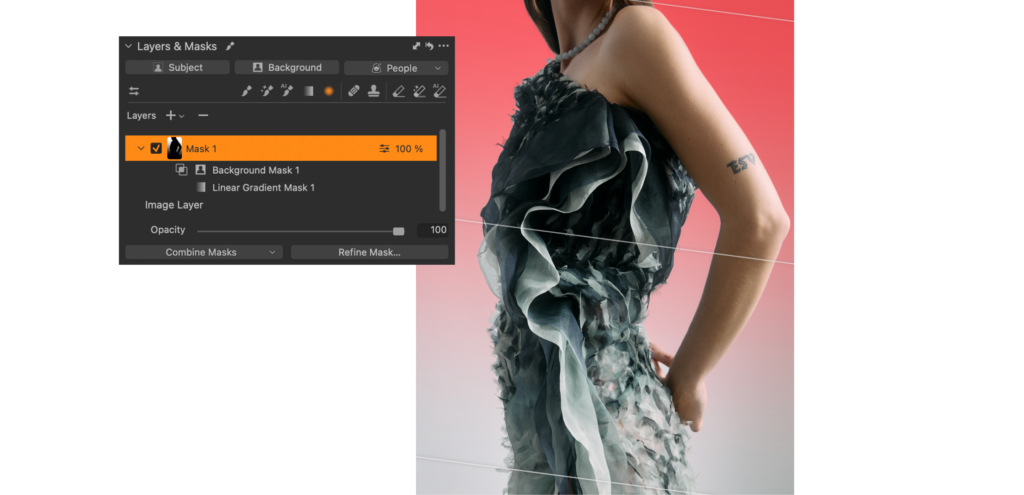
Adding a gradient to the background on this image makes the model stand out more.
This one is slightly simpler. First, you add a Linear Gradient. Then you have two options to achieve the same; you can either Intersect with the Background or Subtract the Subject. Both will give the same result, allowing you to freely move the Gradient around behind the subject to achieve the look you want.
Directional light
On this image, you can create an interesting contrast on the background, drawing attention to the center of the image.
This one is a bit more complicated as it consists of three masks. First, you add a Linear Gradient from one corner. Then you use Add in the Combine Masks menu to add a second Linear Gradient from the other corner. As the final step, you Intersect with the Background to make sure the mask does not overlap with the subject.
What’s brilliant about masks in Capture One is that you can copy them across other images, and their dynamic properties remain. Copying the Layers to other images gives you the same dramatic lighting change in a few seconds and lets you control the combined masks flexibly on each image.
Including the reflection
Adding contrast to this image by playing with the light is much easier with a combined mask. To make sure the edit looks natural, the reflection needs to be included.
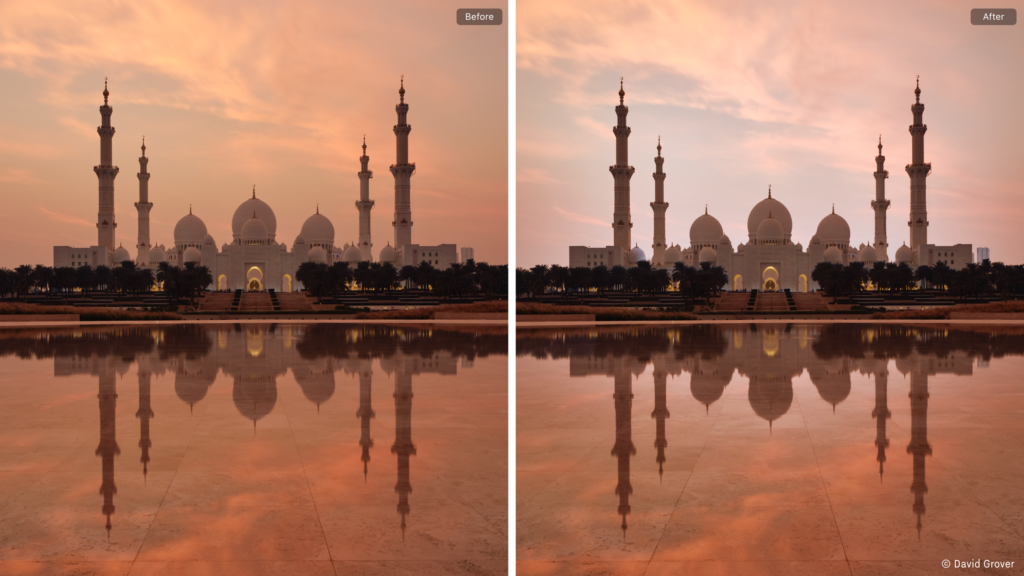
You might have guessed the steps to take by now. To achieve this, you first create a Radial Gradient. Since the beautiful mosque and reflection are a little complex, the regular Subject Mask doesn’t quite catch it all, so you need to Subtract using AI Select and manually select the mosque and trees, also in the reflection.
When everything is selected with AI Select, you should end up with a flexible Radial Gradient you can move around behind the mosque, also including the reflection. Here, it’s also shown as a greyscale mask (Option/Alt + M) to easily visualize the mask.
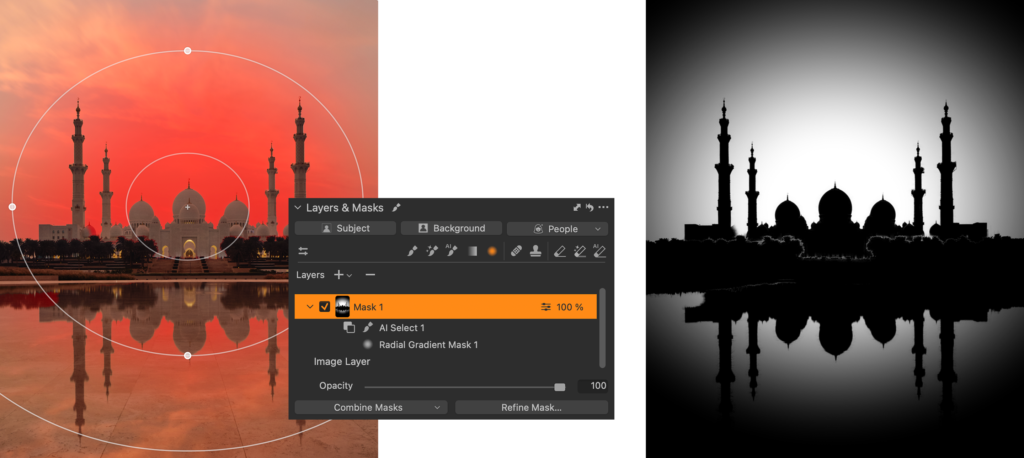
Adjusting light, contrast, white balance, and clarity creates a nice separation between the mosque and the background.
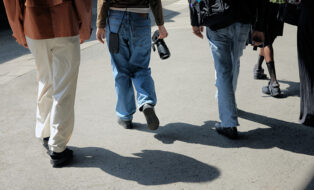
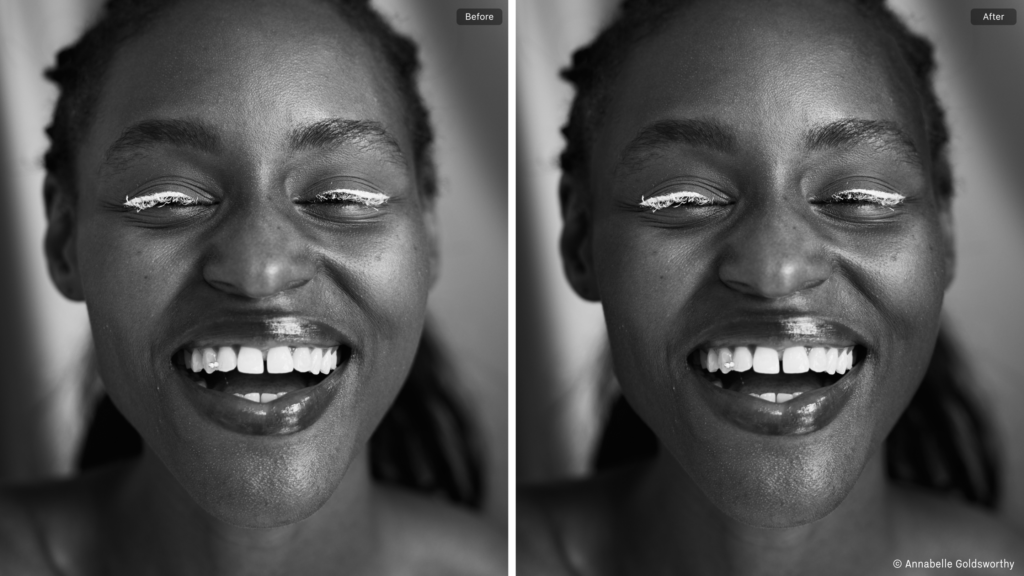
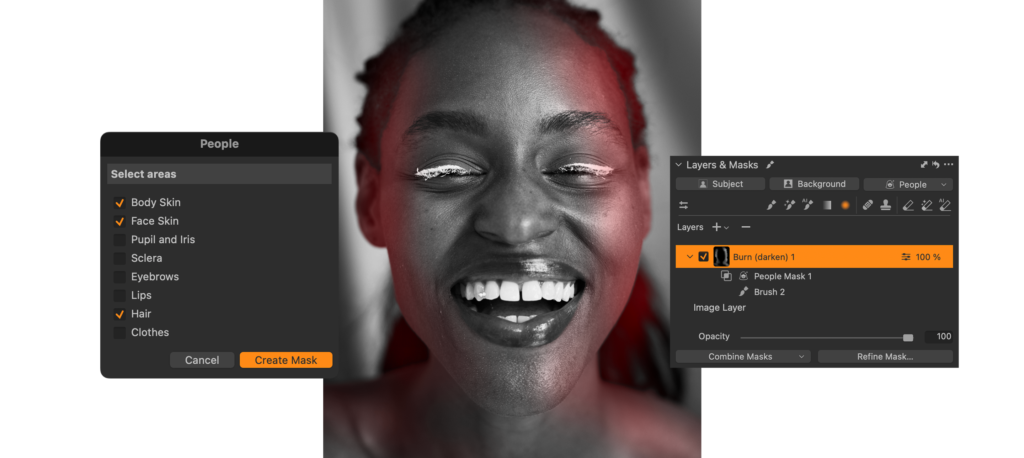
Restricting a manual brush
Did you know that Capture One has built-in Dodge and Burn brushes? They are part of the Style Brushes. For this image, it’s easy to gently darken the edge of the face of the model to enhance the depth without affecting the background.
First, you select the ‘Burn (darken)’ Style Brush and make a brush stroke on the edge of the face of the model. This automatically creates a new Layer. Now you intersect this mask with the ‘People’ mask option. Here you select ‘Face Skin’, ‘Body Skin’ and ‘Hair’. Now your mask is restricted to only the skin and hair of the model, and you can brush around the edge without affecting background.
What about Luma Range?
You might have noticed that the Combine Masks button has replaced the Luma Range button. This is because a Luma Range applied to a Layer is already a combined mask. You need to get used to a slightly different workflow. To get the result you’re used to from older versions, you need to use ‘Intersect’ when combining with a Luma Range.
Now you just have Add and Subtract as well in case your mask needs something different.
Remember that you can always add custom shortcuts for each available operation. Just open the Shortcut Manager (Edit > Keyboard Shortcuts > Edit Keyboard Shortcuts…) and search for, for example, ‘luma’, for example.
What about the 16 Layer limit?
Capture One currently limits you to 16 Layers per image. You don’t need to worry about Combined Masks taking up too many slots, because no matter how many masks you combine, the final mask only counts as one Layer.
Almost infinite possibilities
After these options were implemented in Capture One, I’ve discovered masking options that I wouldn’t have thought of before. It makes me think about editing and improving my images in a new way, and it’s difficult to imagine advanced editing in Capture One without it.
I hope these examples give you some inspiration for what you can achieve and how to start playing with combining masks.
New to Capture One? Try for free for 7 days.
Alexander Flemming
Alexander works as a Senior Product Manager at Capture One. Previous experience as a Test Engineer along with 15 years of photography have provided Alexander with a broad understanding of the many technical advantages of Capture One Pro.